


How To Build a Deck

Hey everyone! I am excited to bring this project to you all. I am a carpenter by trade and I love showing people my craft and how they can do it themselves with a bit of patience.
I have linked my youtube video showing you my full process along with a few other really cool features I added but they are a bit more tricky.
First thing you need to do is lay out your footings. I am using 2x8 boards so my footings should be laid out no further then 6 feet apart.
To level your footings, you can dig out some of the land and add gravel for drainage.

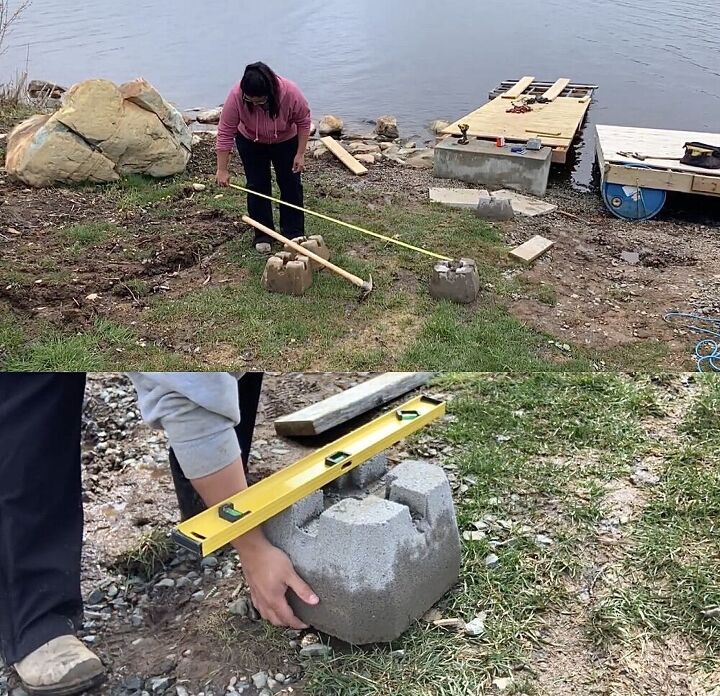
1- Choose a corner footing and cut your 4x4 or 6x6 post at your desired deck height.
2- Put a 2x8 on TOP of that post and your level. You will need two people for this step. One to hold the board and one to take the measurement below.
3- The bottom right step is the measurement of your new post ONCE the other person says its level. THAT measurement is your new post height and your board should sit level.
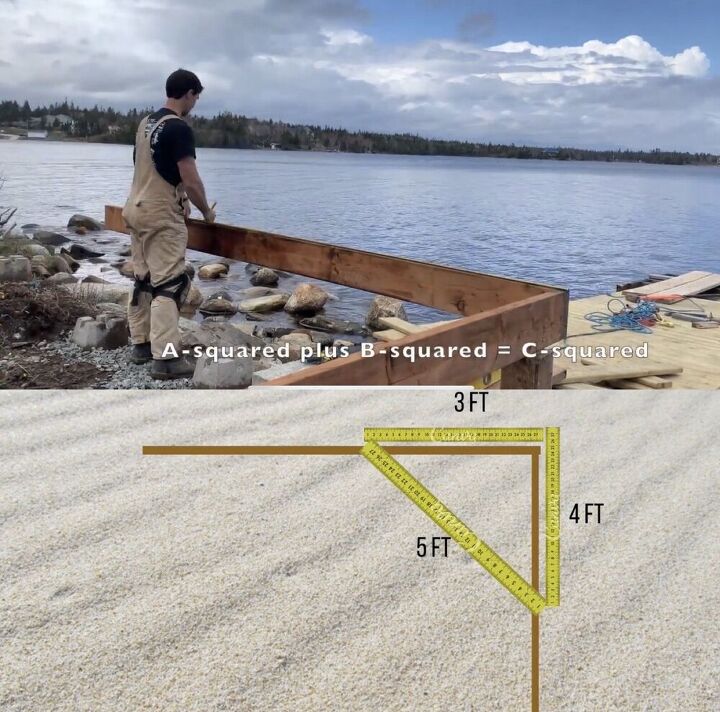
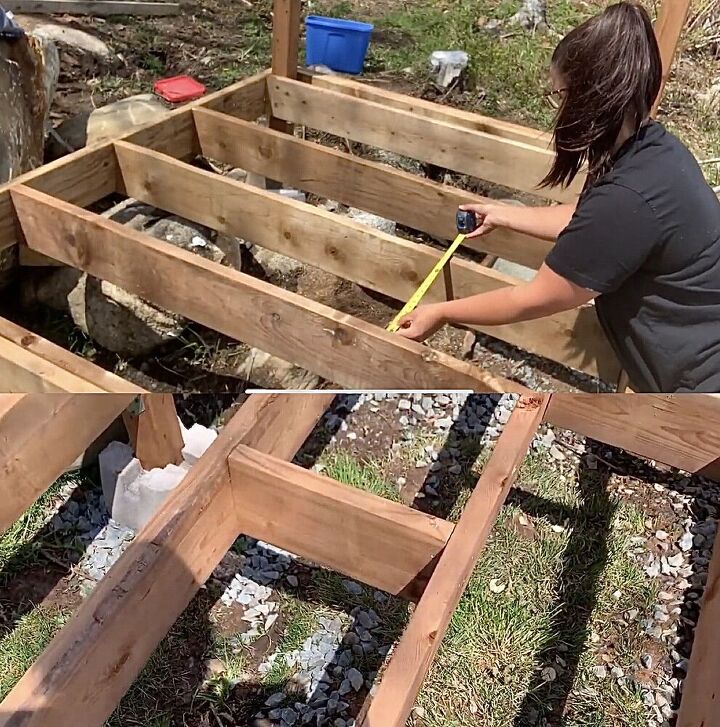
A lot of people focus on making sure your deck is level and yes it should be but another key point you need to ensure is that your deck is square.
If you use the 3-4-5 method its actually quite easy. From the corner of your two deck boards measure down 3 feet on one side and 4 feet on another. When you measure across those two points should be 5 feet. Move the board that doesn't have posts on it yet so that it measure 5 ft across.
A squared plus B squared equals C squared.
Finish off the first step of setting your boards and posts until your deck boarder is complete.
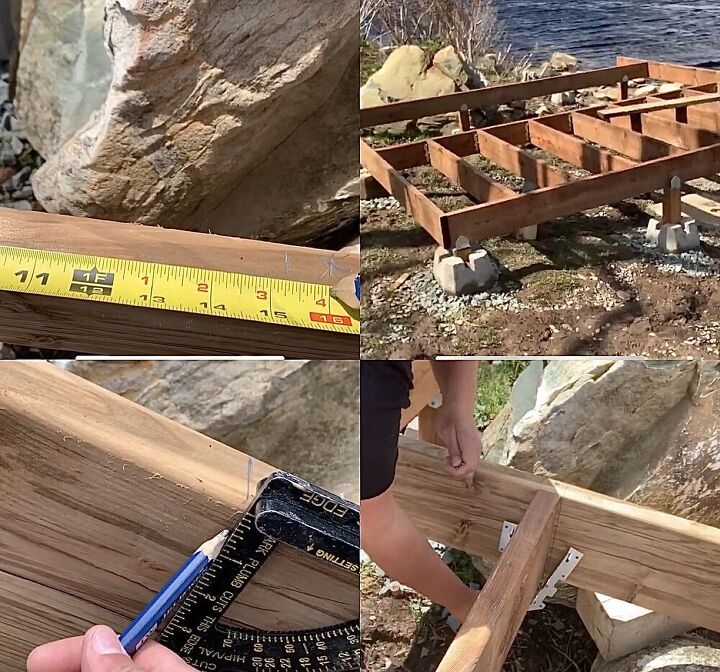
Once your deck perimeter is done you will add your joists.
Joists are the boards that run across your frame and are essentially the skeleton of the deck.
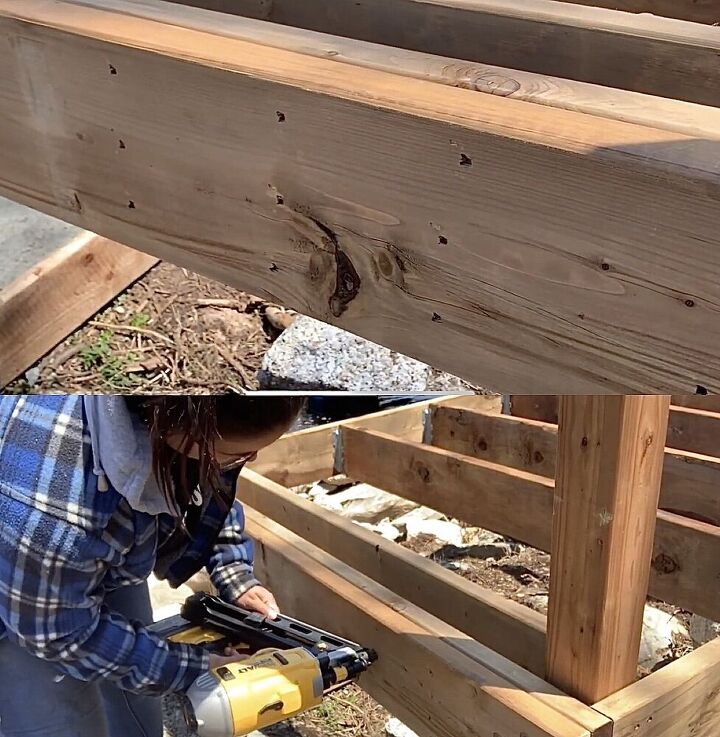
They get laid out at 16 inches on center.
If you have ever wondered why your tape measure has red numbers every 16 inches, that is for framing.
Mark an X on your boards 16,32,48 and so on. Before removing your tape measure, mark 3/4 of an inch BACK (from each x) and that is the mark you will line up your 2x8 to because the 16 inches is the center and your boards are 1.5 inches thick
The video link is above if you are more visual and I show you step by step how this is done.
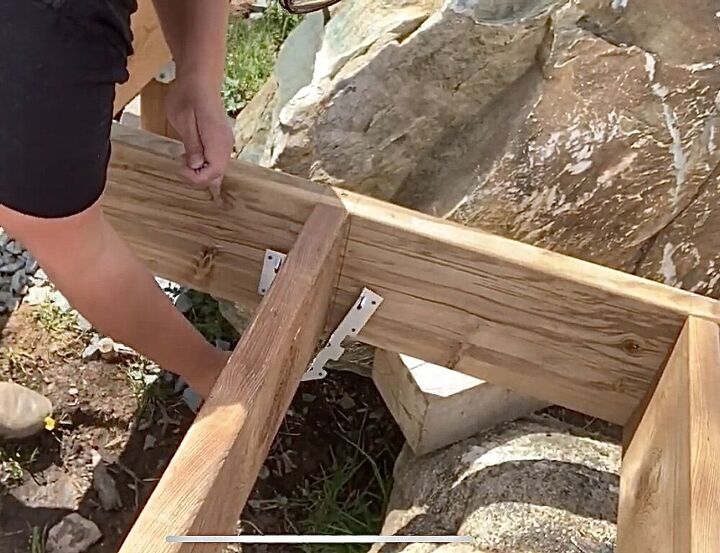
Once all of your joists are screwed in place, you will attach joist hangers with the proper joist nails. This helps the boards hold strength and stay straight.
When all of your joists are on you can add blocking. This just means pieces cut at the width of between joists and added for extra strength.
The perimeter boards are referred to as your rim boards. Once all of your joists are on but before you add the floor you will need to double your rim boards. This adds strength and stability to your frame.
To do this you will measure and cut your 2x8 to length and nail it on in a pattern of 3 nails every 6 inches
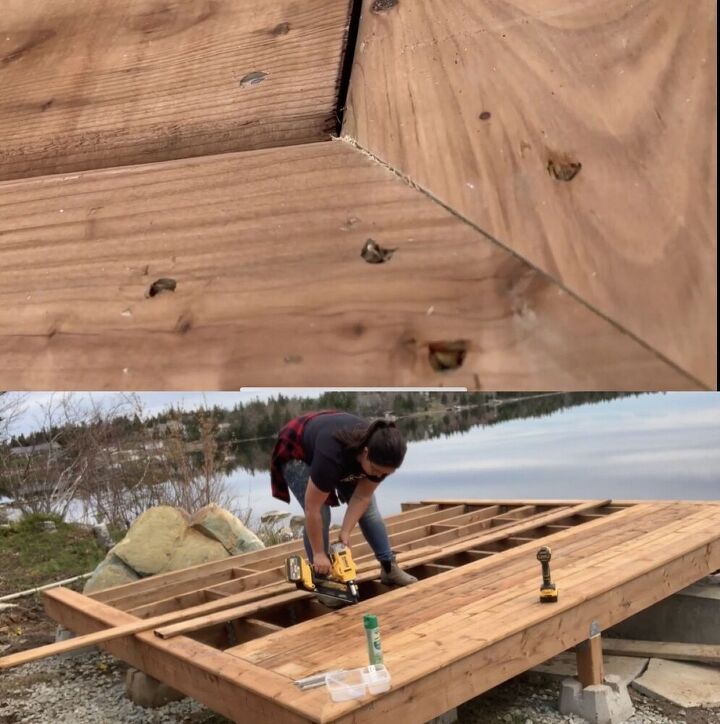
Once your frame is complete you can add your decking on top!
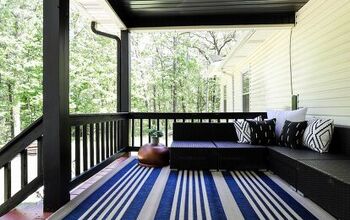
You can lay out the boards straight or you can do what I did and thats adding a picture frame boarder. That means cutting some deck boards on 45 degrees at the corners and then put your deck boards inside.
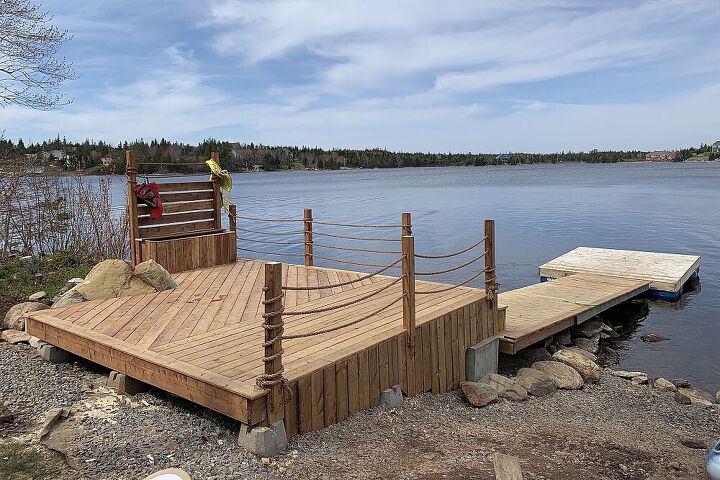
Woohoo! You are done! I hope these steps help you in your deck building and you can grow your design off of this tutorial.
My youtube video is linked above with a full how to visual of each step and down below I linked my DIY nautical rope railing that I added to the deck. Hope you like it!


Frequently asked questions
Have a question about this project?
How many of you would try to tackle your own deck? Maybe even just refacing the floor boards and railings and giving your current deck a facelift?
how do you compensate for soggy ground?
That is very nice! Did the color change due to weather?