


Outdoor Wooden Ring Toss

Summertime lawn games are one of the best parts of summer. Sunshine, hanging out with friends, and passing the time by tossing things back and forth. What's not to love?!

Tools needed for this project:
- Mitre saw or skill saw
- Wood glue
- Brad nailer
- Power drill
- 1" spade bit
- Heavy duty scissors
- Painter's tape
- Paint or gel stain
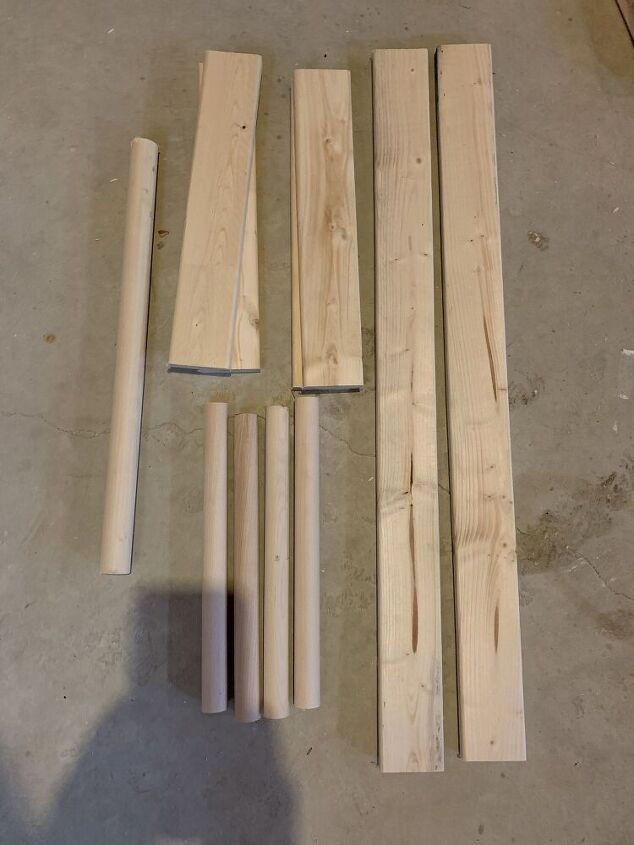
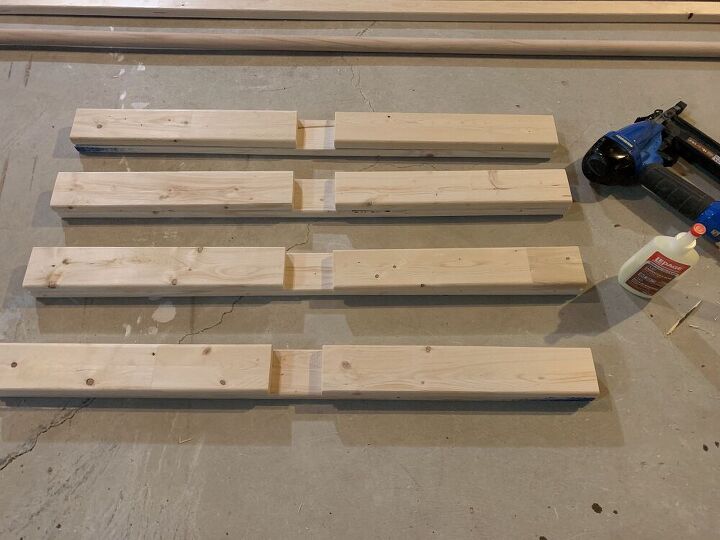
To make 2 ring toss stands, you will need:
- 1"x3"x8' lumber x 3 (cut 4 pieces @ 30", cut 8 pieces @ 13.75")
- 1"x6' dowels x 2 (cut 8 pieces @ 12", cut 2 pieces @ 18")
*Note: This photo shows the wood cut for just 1 ring toss stand.
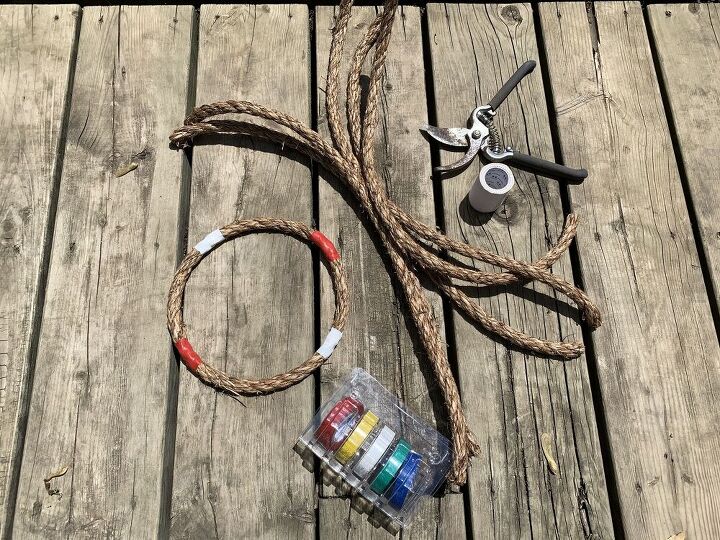
To make 6 rings, you will need:
- 1/2" manila twist rope x 9' (cut 6 pieces @ 18")
- Colourful electrical tape
- Duct tape (or in my case, medical tape, since I couldn't find the duct tape)
Make a circle with each piece of rope and use duct tape to hold the ends together. Decorate however you'd like, making 3 of each colour combination.
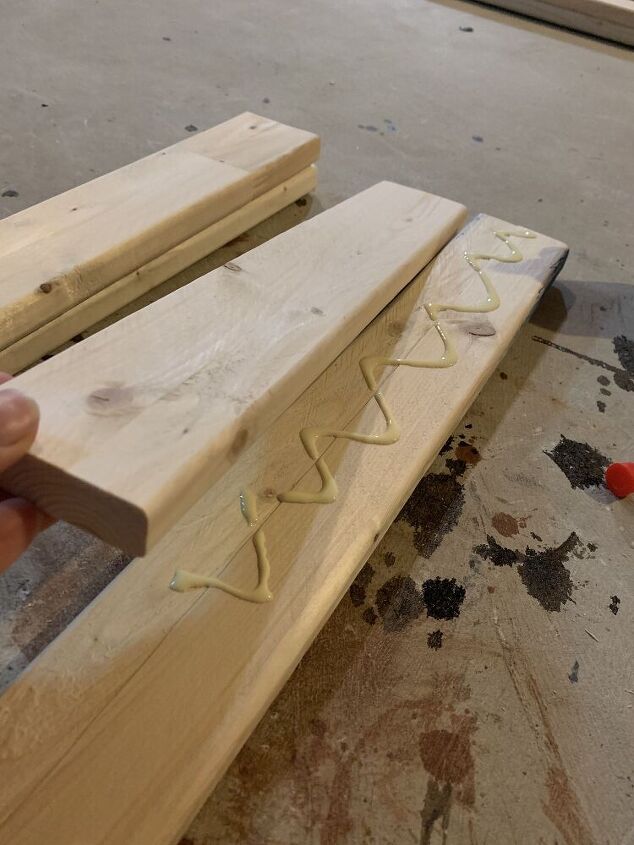
Each leg of the stand is going to be 2 boards thick and have a gap in the middle for the other leg to sit/interlock in.
Lie your 30" board down and place 2 of the 13.75" boards on top with the ends lining up with the bottom board's ends. There will be a 2.5" gap in the middle.
I used wood glue, then brad nails to hold the boards together.
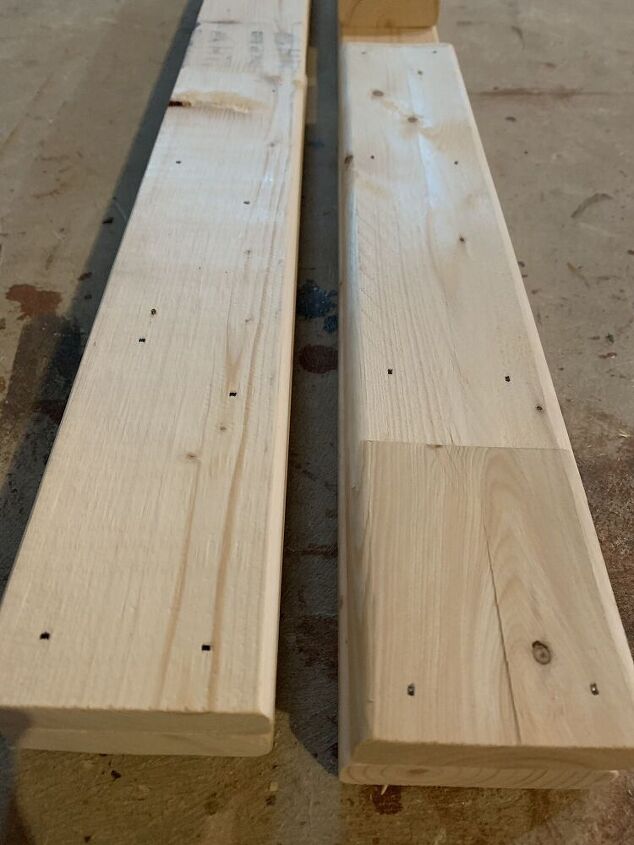
This is what your legs will look like when completed. The top legs will be flipped over and interlock with the bottom legs.
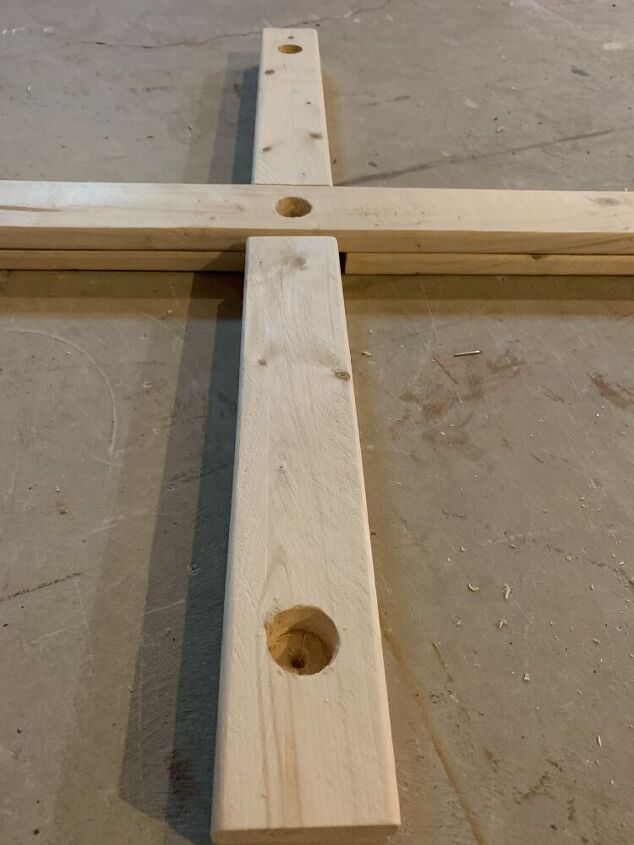
Drill the holes using your 1" spade bit. There will be a hole on each end of the legs and 1 hole in the middle of the top board. I made these about 1" deep.
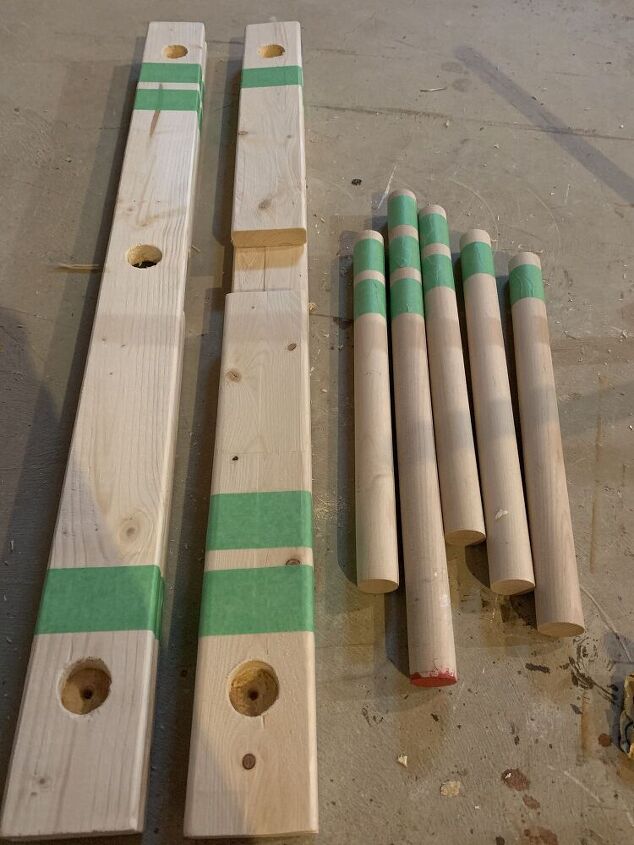
I made a pattern on my pieces to indicate the points for each pole. 2 of the 12" poles are worth 1 point (1 stripe), 2 of the 12" poles are worth 2 points (2 stripes), and the 18" pole is worth 3 points (3 stripes). I also taped of the ends of the legs to coordinate with the poles that will go in them.
Use either a gel stain or paint with the painter's tape. A regular stain will bleed under the tape and will not leave a clean stripe. You can also use the colourful electric tape to create patterns as well.
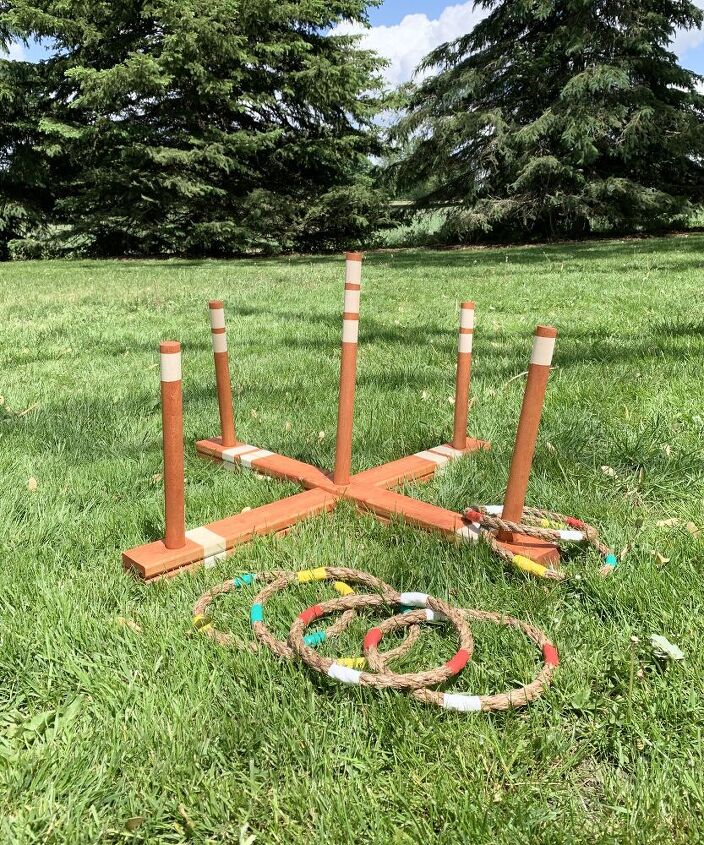
I'm not sure what the real points are for ring toss, but we decided on using 1, 2, and 3 points for the poles and the first team to 21 points wins!
.
.
.
For more ideas and ongoing projects, follow along on Instagram and Facebook!
Insta: @farmhouse.ongunnshill
Facebook: Lauren Ann Design
~Lauren 
Resources for this project:
See all materials


Comments
Join the conversation
-
I just cleaned up and organized my scrap wood stash and I have everything I need to make this. Thanks so much for sharing this idea!
-
Will have to have hubby make this for the grandkids.


Frequently asked questions
Have a question about this project?
What size are your rings? I don’t see anything telling you how you made those and the diameter.