


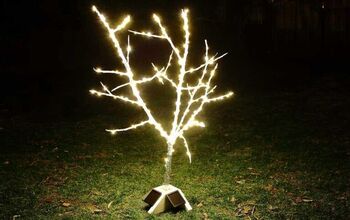
LED String Globe Lighting
Want to know how to add square footage to your home for less than $.55 per square foot? Okay, it's temporary but who can resist globe lights?

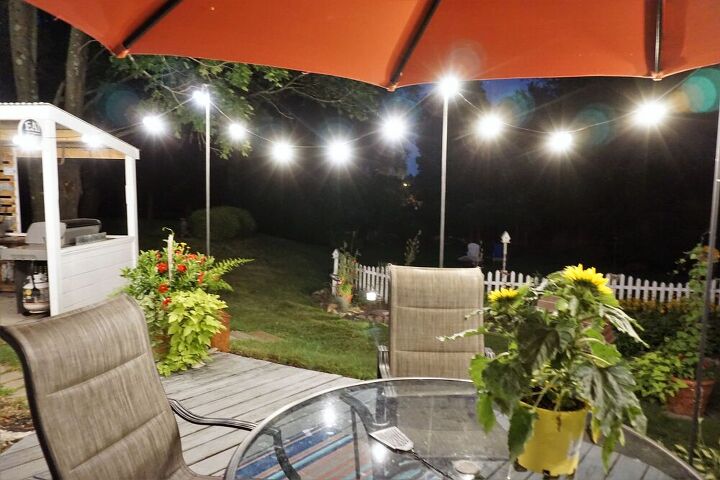
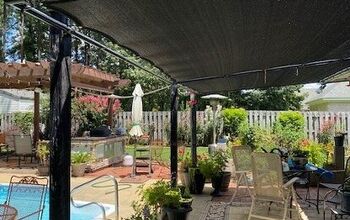
This is our back deck. It sits on the stone and due to the size and shape we didn't want to do anything that would take up space on the deck. Plus, at some point will be doing this over so pouring cement was not an option right now. Also, we don't want anything that will obstruct the view during the day.

At our local home improvement store we purchased black, threaded, gas plumbing pipe-4 pieces.

We picked up 4 flanges. These got a couple coats of Rustoleum black paint. They will rust so unless you like that look do not skip this step. (We had the paint from another project.) We also had S-hooks but they are not expensive. Also, we had some calking we used to fill in the top of the flange so that water wouldn't get down inside the pipe. It is not a necessary step if you don't live in areas that freeze.
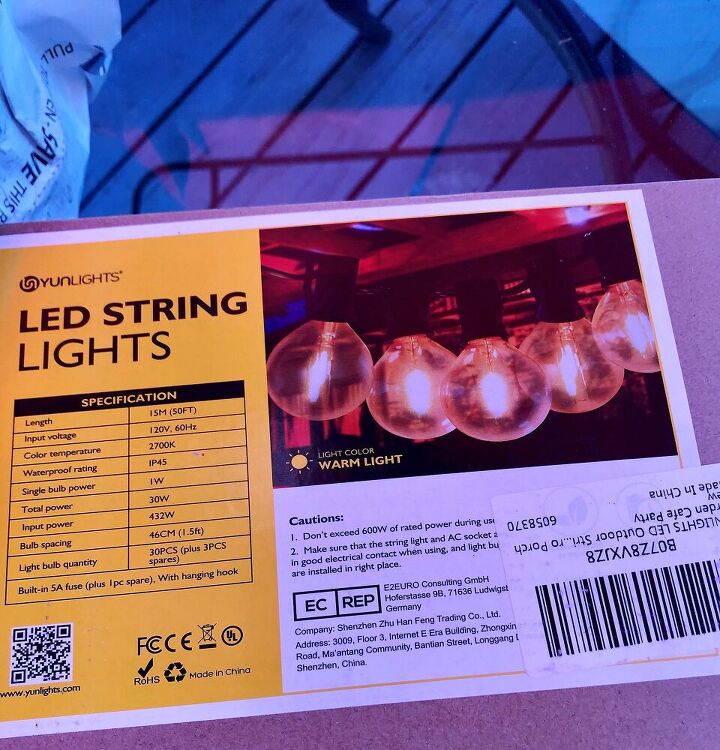
String lights ordered online were delivered in about 24 hours from ordering.
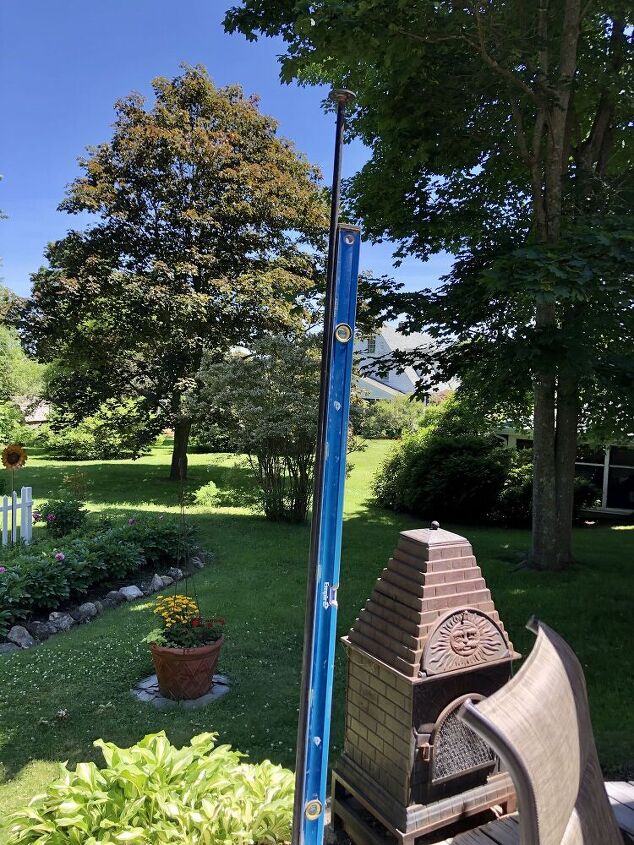
Based on our deck area we positioned the poles around the perimeter. The poles are about 10 feet long. They were pounded them into the ground leaving 8 feet exposed. We did use a level to make sure they were straight and plumb. They are already black and required no paint.
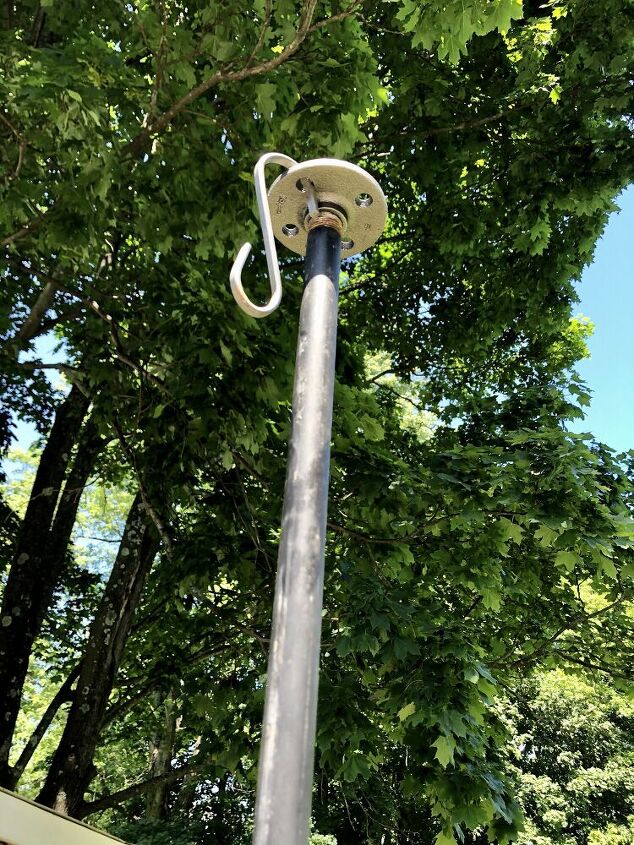
This was simply a matter of screwing them on top and slipping the s-hook on. At this point we had not painted them and had to go back later to do it right.

With that our new outdoor room was complete. Yes, it is seasonal but we love it and it does exactly what we had hoped it would. The deck is 16x16'. The cost of the materials: $141= $.55 per square foot. If you have to buy the s-hooks, caulking, zip ties and paint it will cost a little more-maybe $20 more.
Resources for this project:
See all materials


Comments
Join the conversation
-
I constructed a sun screen canopy for my patio off our porch. I used 3 4x4s set in 5 gallon galvanized buckets which were then placed in large planters and covered in soil for flowers. The frame was built using black fence rails (for chain link fences) and corners and connectors of galvanized metal painted black. I divided this into two frames but you can do singles of any size for your patio. I anchored one long side to the porch eave and the other to the 3 posts. I then placed 2 10x10 sun-blocking mesh material in between the frame using sun-resistant zip ties. Just pick the size of the mesh and build your frame to suit. The fencing is strong and does not droop. The mesh is tight and the wind doesn't bother it and the poles won't move unless I move them. Attached is a picture of what they look like.
-
What a great idea and of course, always helps to have partner around, which I recently lost. All things aside, your yard is beautiful like in Better Homes and Gardens! And the light are striking. You did good work! 😊


Frequently asked questions
Have a question about this project?
Looks great! I’m wondering how you “pounded them into the ground leaving 8 feet exposed”? If you have a magic tip for skipping post hole digging please share your magic. In my mind I’m on top of a 10 ft ladder with a hammer in my hand but that seems like wishful thinking.
I assume that you live in a mild climate??
Do take them down forrain, high einddd, high heat or snow??
Looks fabulous!!
What were the zip ties used for? I see them mentioned in materials but not used in instructions? Maybe just to secure lights to S hook??