


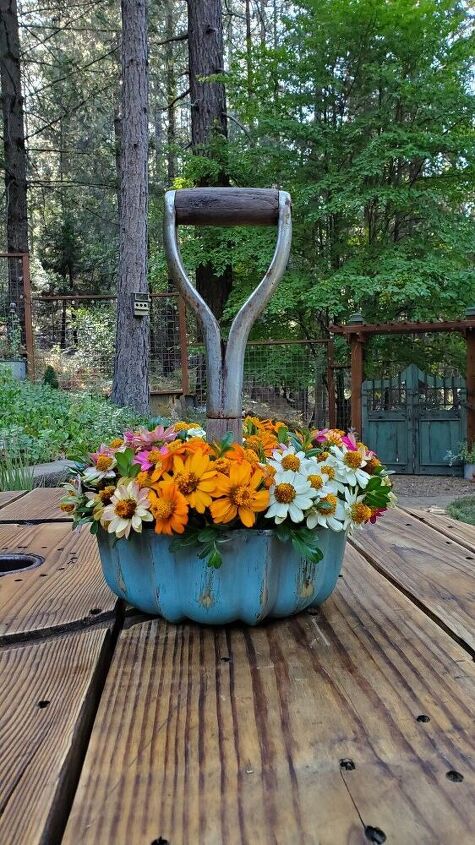
Upcycled Caddy With SUGRU

I'm excited to bring you another SUGRU project! SUGRU is one of my favorite DIY "ingredients". I have done so many things with it, from making wreaths to fixing mirror frames, light fixtures, and even repairing my porch railing!

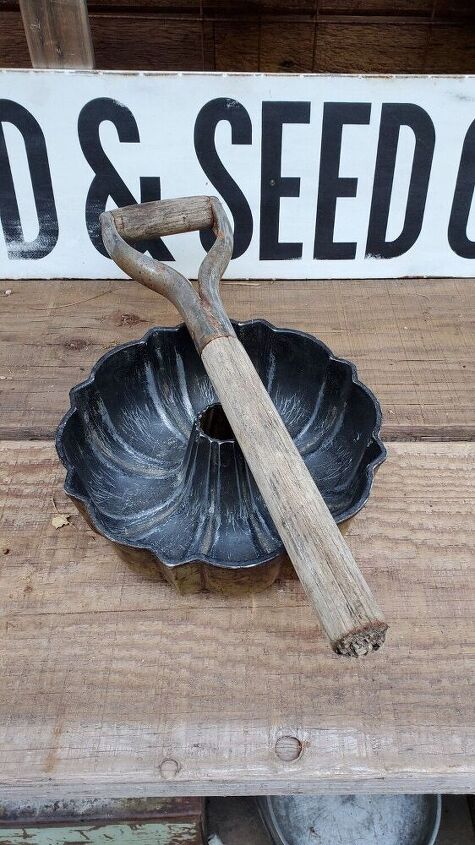
You'll need an old bundt cake pan and garden tool handle (cut to the length you want).
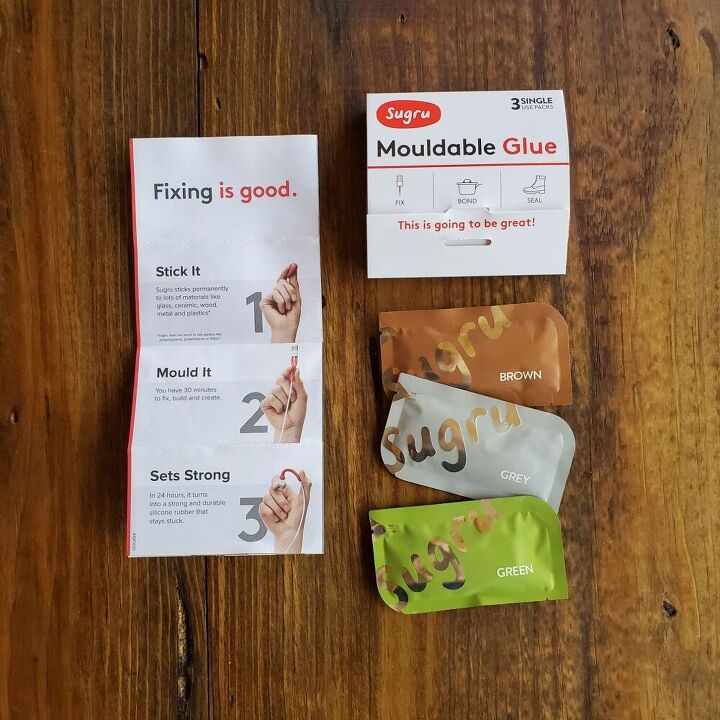
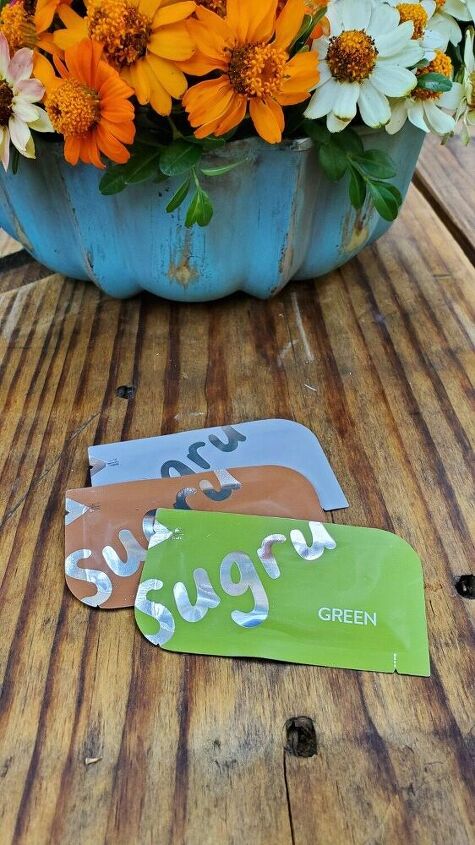
You'll also need SUGRU, in a color of your choice! I opted to use the natural brown. SUGRU comes in many colors, and depending on the color of paint you use for your pan, you may want to choose a SUGRU color to match.
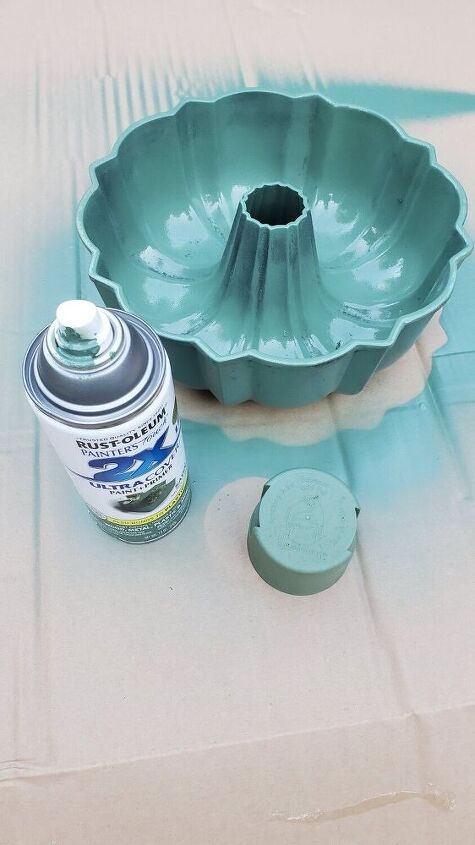
If you'd like to paint your pan to have a vintage look, I suggest using a few different colors. I started with some green spray paint that I had on had. Alternatively, you could skip the painting all together. If the inside of my pan had been in better condition, I would have only painted the outside, so that I could use this caddy for serving food, too.
My next layer of paint was blue chalk paint. I brushed it on messily, to go with my rustic look.

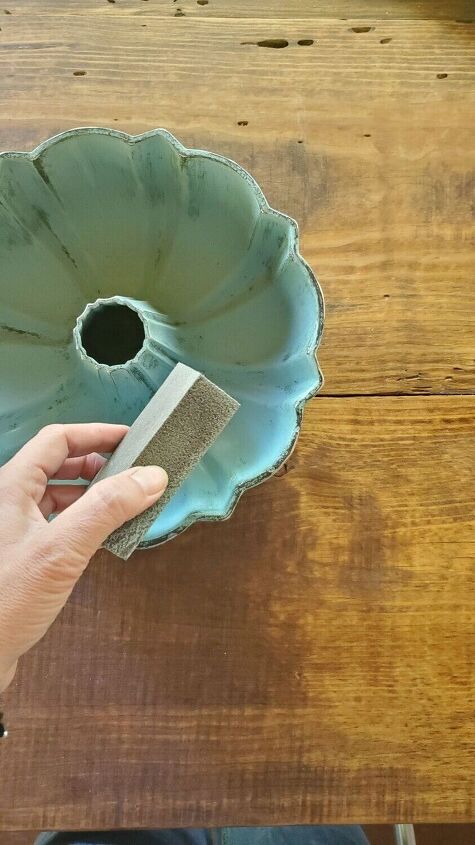
I like a rustic, distressed look, so I lightly sanded the edges of my pan with a sanding pad.
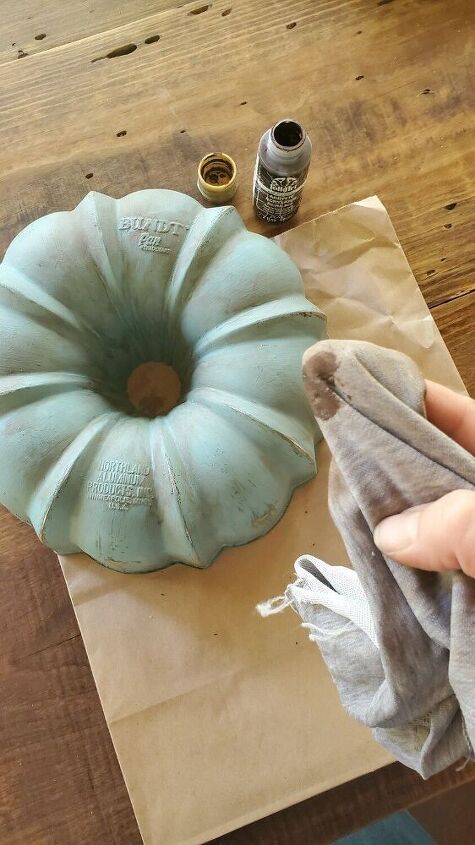
If you have chalk paint antiquing wax, you could use that here. I was out, so I just got a damp rag, dipped it into some brown paint, and lightly rubbed it onto the pan.
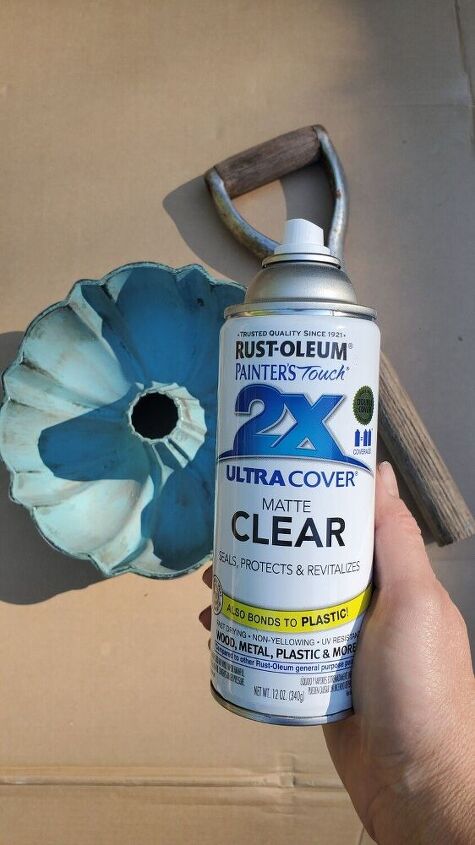
I gave everything a coat of clear sealer.
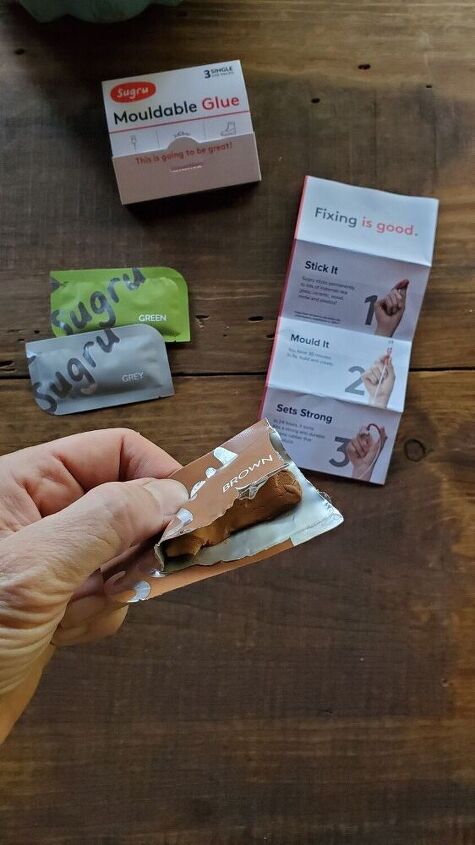
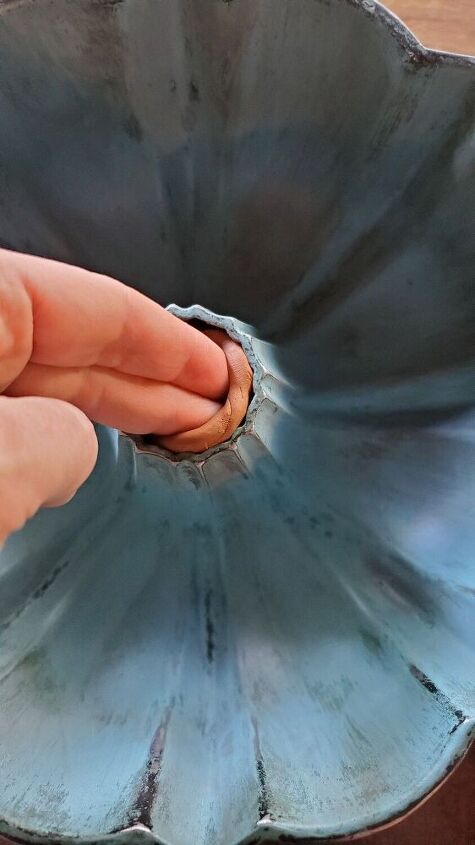
SUGRU is a moldable glue. It is very flexible and easy to use, and feels like putty or clay. For this project, I used a few packets of brown.
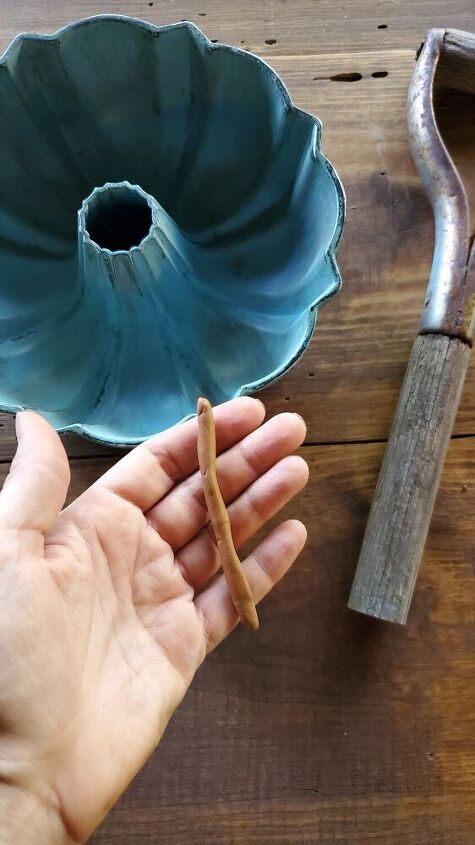
I rolled my SUGRU into a "snake" (just like I used to do with Pay-Doh when I was a kid!).
Next, I placed the "snake" inside the hole of the pan, pressing it into the pan to hold it in place.
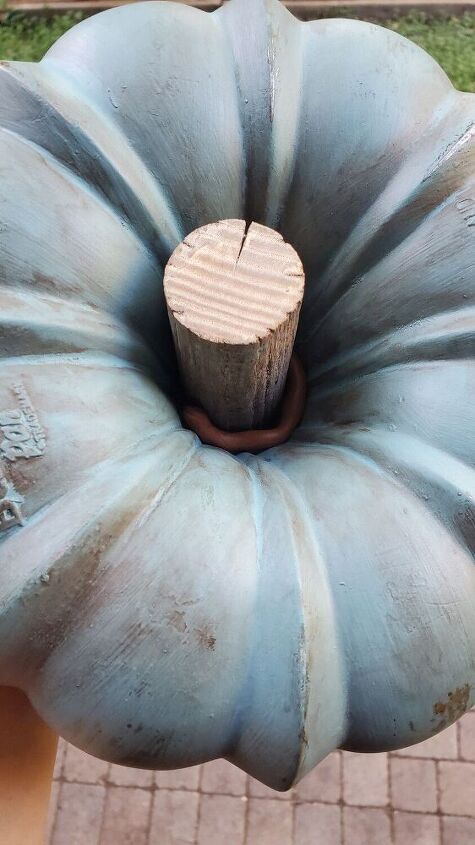
I pushed the handle through the pan. Here is what it looked like on the back side.
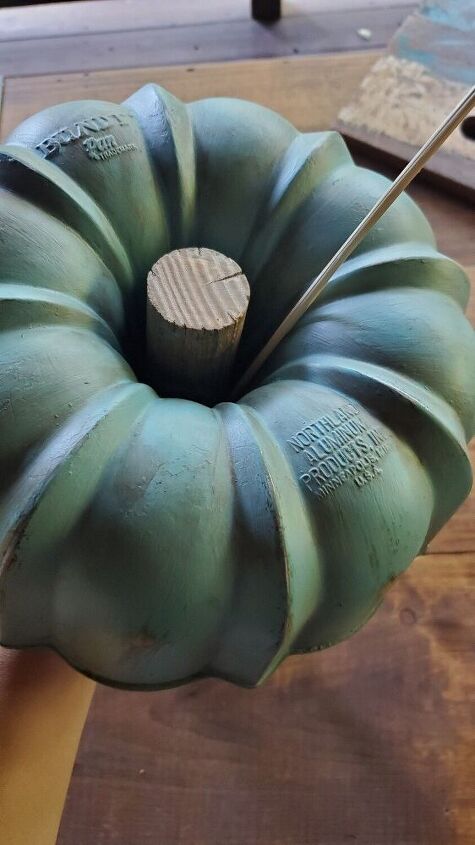
I wanted to make sure that the SUGRU was nice and tight against both the pan and the handle, so I used a wooden skewer to push it firmly into place. You could also use a butter knife for this step.

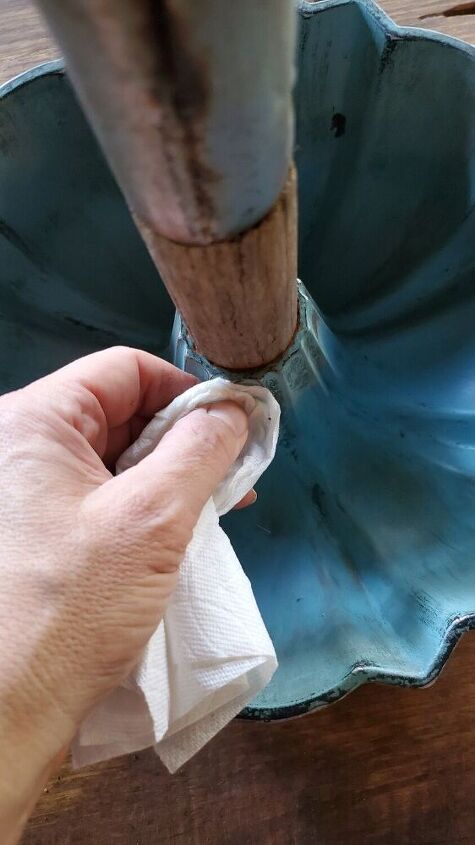
Some of the SUGRU may squish back up through the top. No worries - it is easy to clean up!

Just scrape it off with a knife or your fingernail, and wipe with a damp rag to smooth it out.
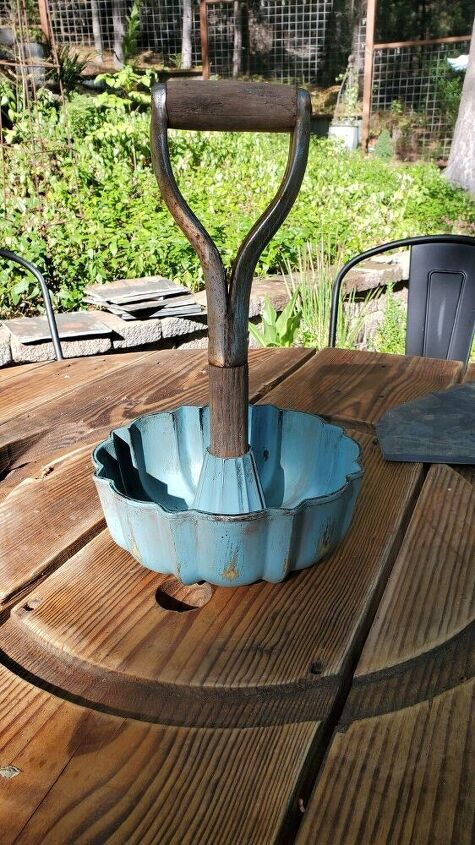
This was the hardest part, because I was so excited about how cute this caddy looked, and I wanted to use it right away. However, you need to let the SUGRU dry for 24 hours. Before I stepped away, I double checked that my handle was sitting nice and straight. Once the SUGRU dries, it is very strong, and you won't be able to make alterations.
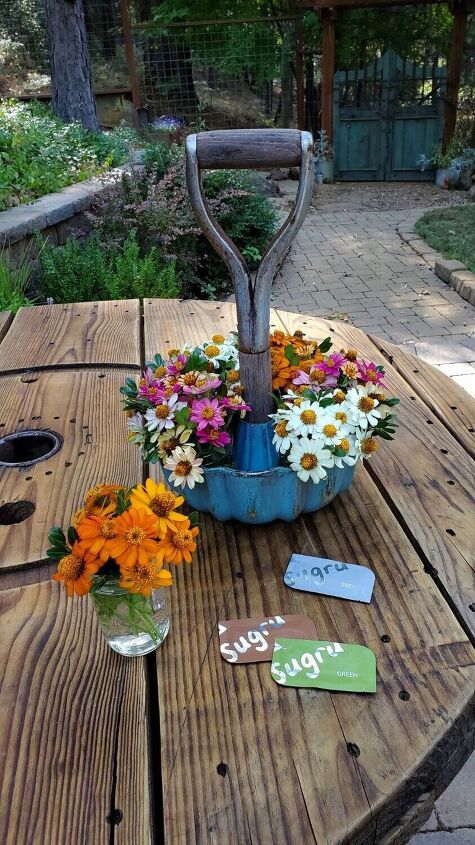
I decided to fill my caddy with little jars of water and Zinnias for the time being. But I also look forward to using it in my studio, to hold craft supplies! I think it would look great filled with succulents, too. If you don't have to paint the inside of your pan, you could also fill it with yummy treats!
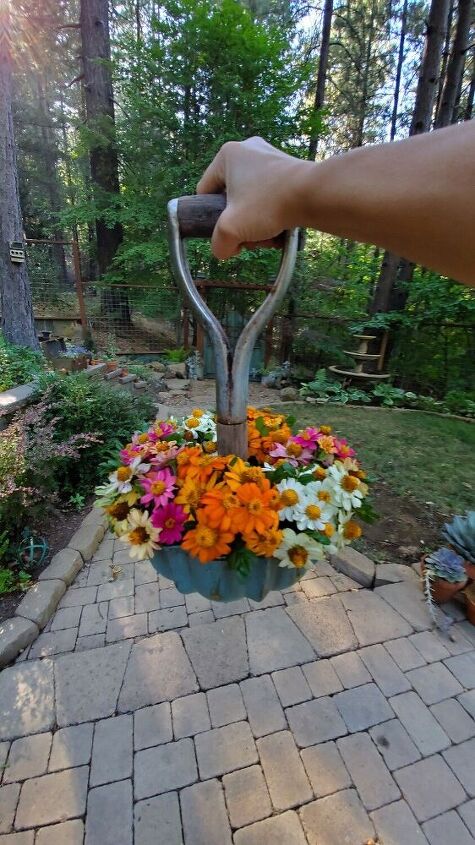
Look at how strong it is! The jars filled with water are actually quite heavy, but the SUGRU is holding the handle in place so nicely!
I still have some SUGRU left over... stay tuned for my next project! 
Thanks so much for reading through this tutorial. If you make a caddy, please share a photo. I would love to see it! Also, don't forget to follow me here on Hometalk, and also on my Instagram and Facebook pages. I love to post DIY projects that I think you will love, too. And if you do like this tutorial, please share -- I really appreciate it!
For more brilliant project ideas sign up to the Sugru newsletter here and get a 10% discount when you buy any Sugru - enjoy!
Have fun making awesome stuff,
XO Jamey
Resources for this project:
See all materials


Comments
Join the conversation
-
Very, very cute!!
-
Nice directions for a creative idea


Frequently asked questions
Have a question about this project?
What a cute idea!!! Hopefully the photo I copied of yours is showing because I have an idea; with the bundt pan turned over and the tool handle coming through, I thought of a pumpkin that can or cannot be painted orange:)
Love it going to try it
Nice idea. Should there be drain holes?