


Dollar Store Canvas Print Revamp- The Grand Finale

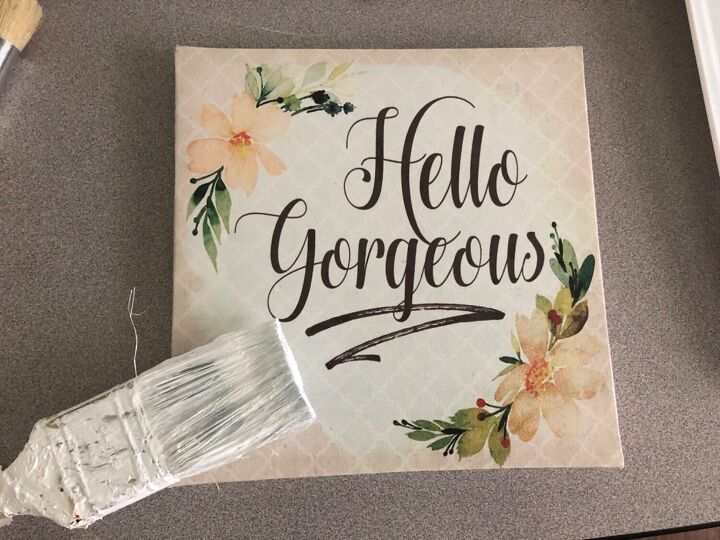
I am making baby steps in my progress towards decorating the laundry room. If you recall from a previous post my current decor consists of 3 small items that I DIY’d. While these items illuminate an otherwise drab space, the rest of the room is strictly utilitarian and really needs some work! I gotta step up my game!!! Well imagine my surprise when I found 2 more dollar store canvases in my She-Shed stash! While I was planning initially to do 2 different projects with the frames, my first attempt at this print came out so well that I decided to make a second one... and here we are with the gran finale of my Dollar Store Canvas Print Revamp “series” (ooh.. doesn’t calling it a series make it seem so... chic?!). 😆
While there may be someone in the world that has done this before, I came up with the idea for the design after I saw someone make a brick pattern on a wall with joint compound and tape- how clever! Their final project looked fantastic! So taking that concept I got to work. The final look somewhat reminds me of the decorative tin ceiling tiles. You know the ones they used to put in homes “back in the day”?! You can put as much or as little detail as you want. I want to try this on a few other surface to see how it will come out!! Well... Without any further adieu, here is how I did it.
*Optional Step*
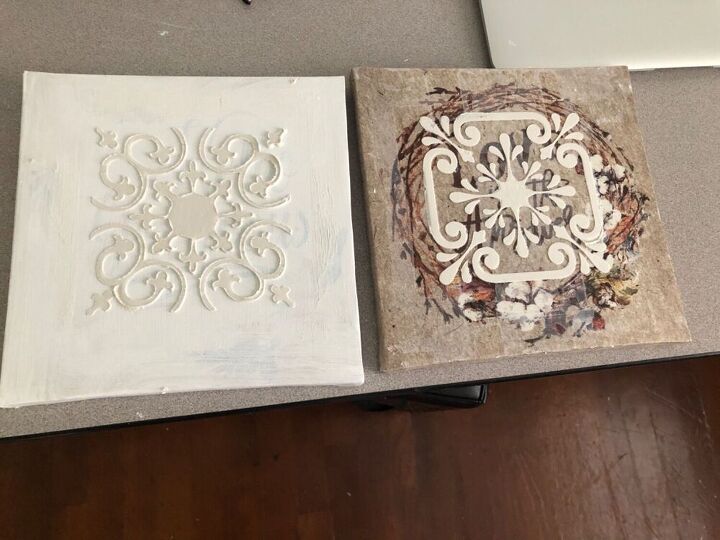
I decided to first coat my canvas with paint in order to “prime” the surface, as I wasn’t sure how well the joint compound would stick. On my second one I didn’t do this and the joint compound stuck just fine so it really wasn’t necessary. I suppose the only real benefit to doing this step is that you wouldn’t have to do as many coats of paint to cover the print and risk losing the details of the stencil once it has been applied.
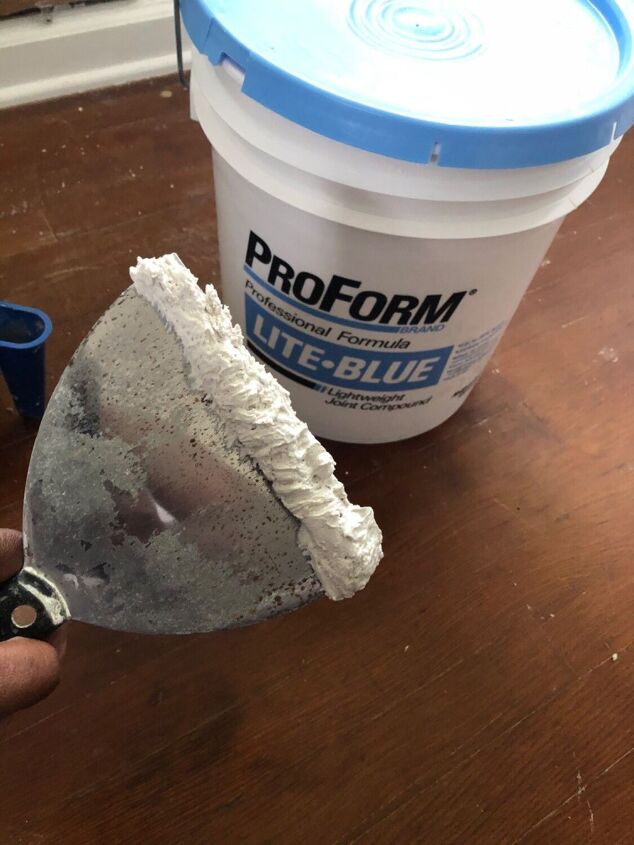
You will need joint compound, a putty knife, and a stencil to create the design. ****Note: If you have one near you, you can pick up a small cup of joint compound from the Dollar Tree. It is generally located in their “Tool” section.****
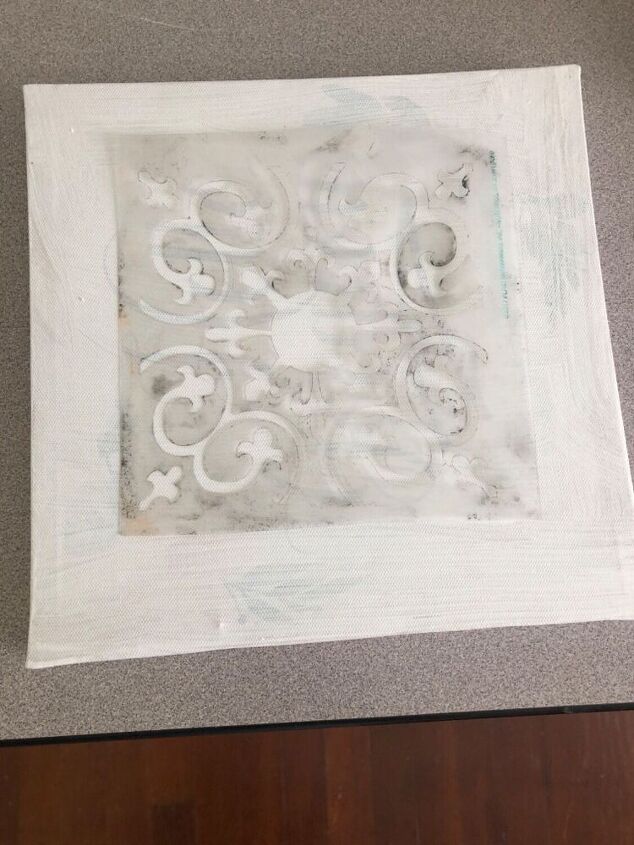
Once the canvas was dry I placed my stencil in the desired location.
Once you have the stencil situated on the canvas, simply apply the joint compound to the stencil with a putty knife!
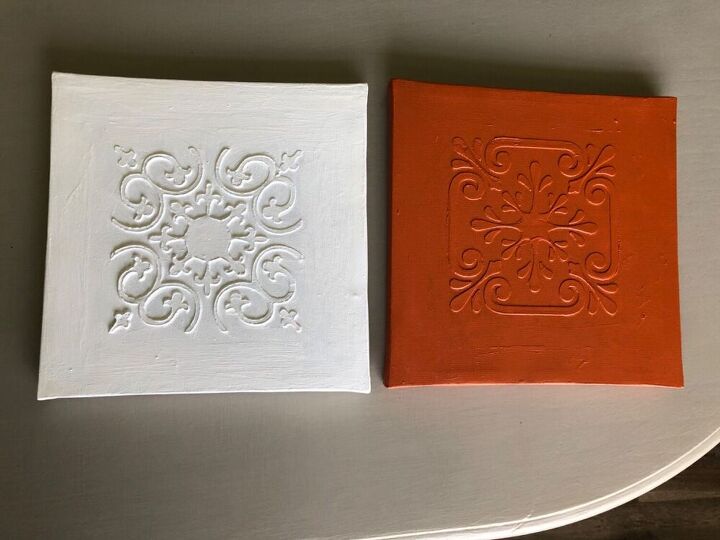
Here are the frames once the joint compound was applied.
The next step is to apply paint. For some reason I thought this yellow was a lot more subdued... This yellow was so bright that I was sure it would glow in the dark!!! I later repainted it a crisp white. Still debating but I think I may add this one to my newly renovated bathroom. The other I painted a burnt orange to match my laundry room decor!
Now if this “look” tickles your fancy you can stop here... but I think by now you all know that I am EXTRA.. and needed to... kick it up a notch! *In walks scrap boards from kitchen shelving that I recently took down...*. Ooohh this is gonna be good.
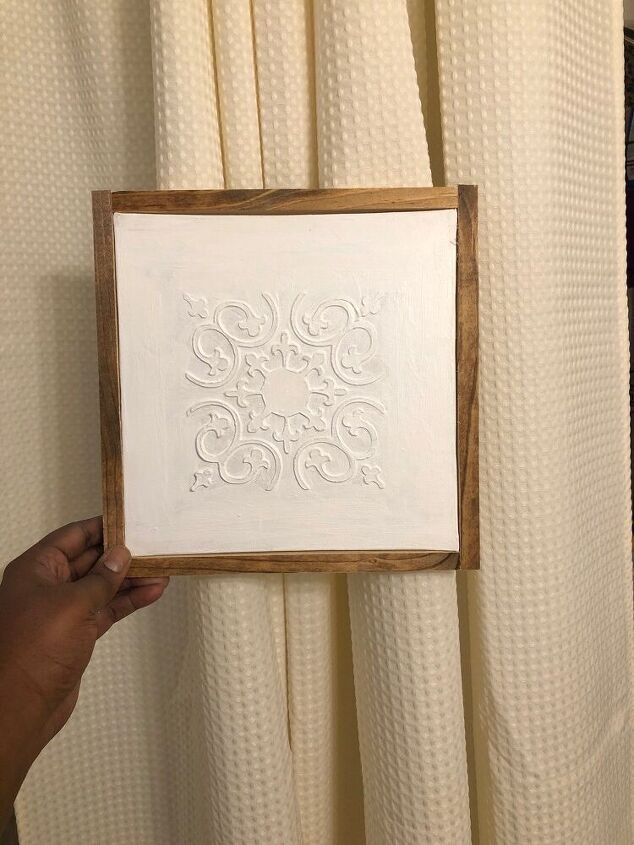
After adding a frame.... DONE!

I believe that adding this to my current gallery wall (mmhmm yes a gallery wall...that’s what we are gonna call it... you know... as if I planned it that way....😬😬...just go with it!) will add a hint of a classic-look to the space!
Resources for this project:
See all materials


Comments
Join the conversation
-
Very pretty
-
Oh My!!! I just Love this!!! I can see pure white background and put paint pearl white on details, or another pearlescent paint. Even flat white for background and a high gloss, same color only the details paint with glossy paint, the difference is subtle, but nice!


Frequently asked questions
Have a question about this project?
Shot gun kitchen, dinning room, and living room. How do I break up dinning room from living room without losing open concept?
Hello. How heavy is the finished project
Looks great. The only thing that I would add, is a little rub and buff (gold or copper) just to enhance the raised design.