


Rustic Jewelry Organizer
Raise your hand if your jewelry is just stuffed inside a drawer or jewelry box somewhere. *Raises hand* If this is you, too, never fear – I can help you get it organized and looking gorgeous with this DIY rustic jewelry organizer tutorial.
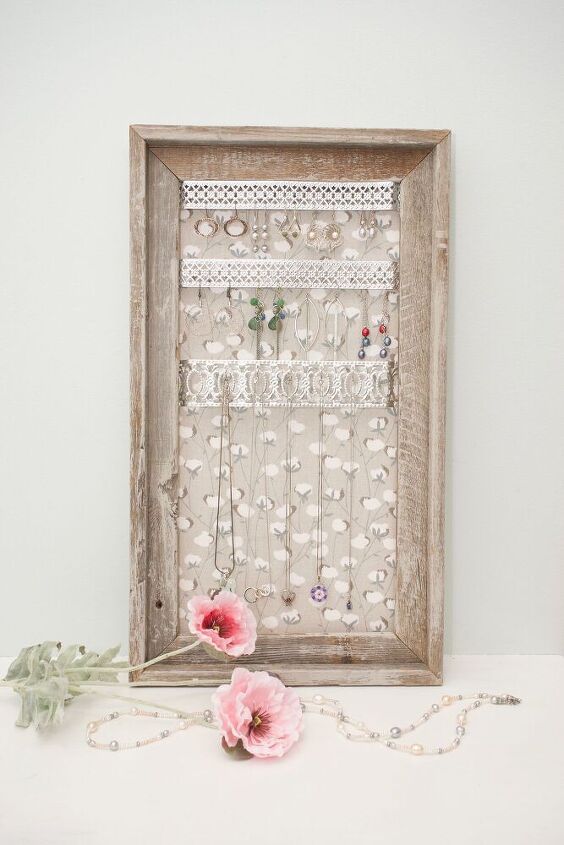
I have a pretty large jewelry chest in my bedroom, which my mom bought for me years ago. It is great for storing jewelry, but I wanted something that would make some of my favorite pieces more accessible and organized. I tend to have certain pieces that are my go-to’s when it comes to jewelry. They are the items that get worn the most frequently. So, I wanted to make sure they were easy to get to.This organizer was actually really easy to make, and I think it turned out great. I put it together in just one day, and it was just what I was needing!
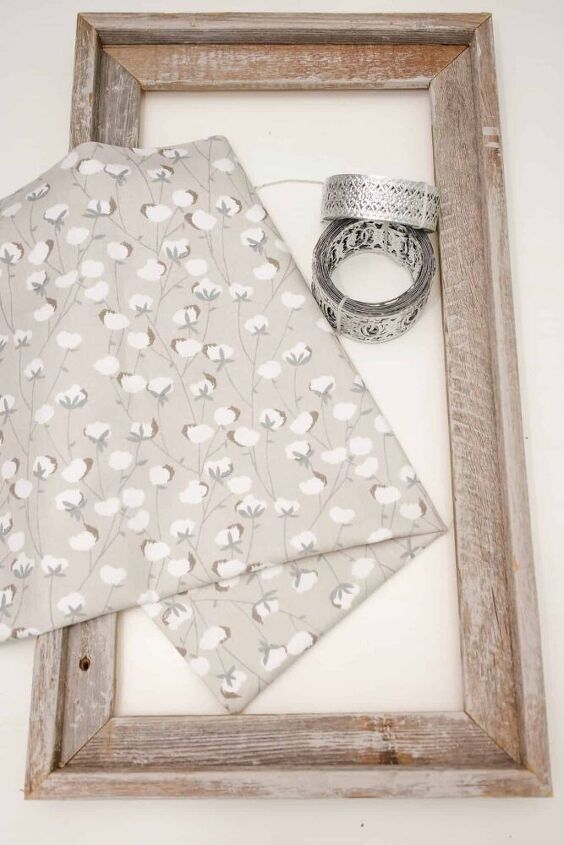
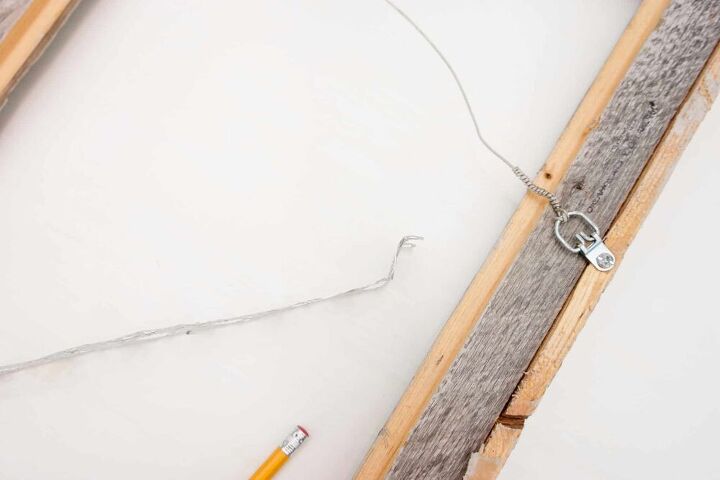
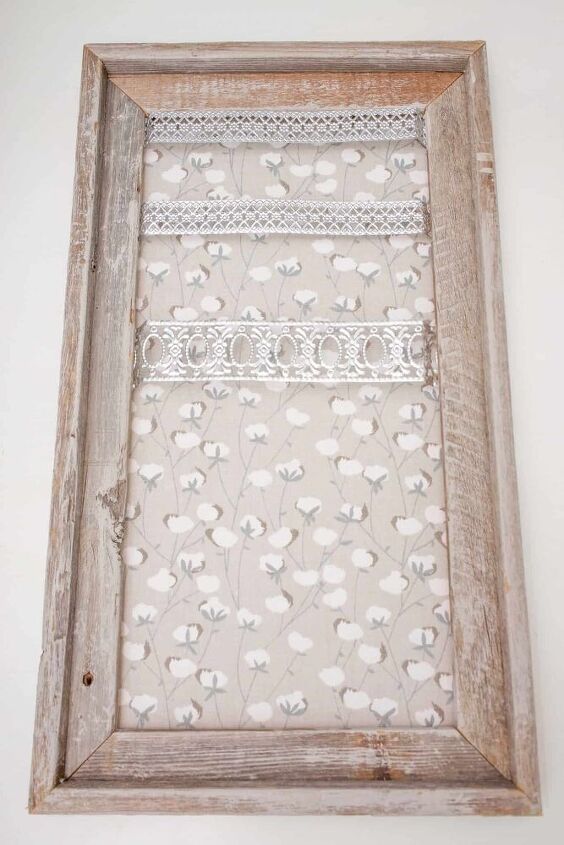
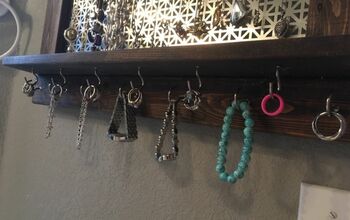
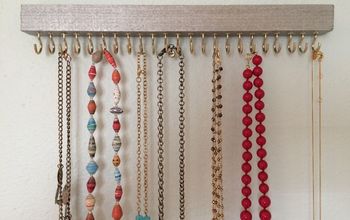
The first thing I did was gather the supplies I needed. I ordered the mini S-hooks and the metal ribbon off of Amazon (which I think is super cool, and I can’t wait to find another use for it). I picked out some fabric that I liked at Michael’s, and I found an open frame that I thought was the perfect size at a local antique mall. (I think the frame was handmade because it was a pretty odd size. The opening of the frame was approximately 9.5″ wide by 19.5″ tall. I was looking for something tall and narrow, though, so I knew it would work.) All of the other supplies I already had on hand. (I had a piece of thin hardboard that we had not used when we put in our closet system a couple of years ago. It ended up being perfect to use as the backing to the frame. If you have a frame that has a back to it already, that should work fine – just ditch the glass in the front.)
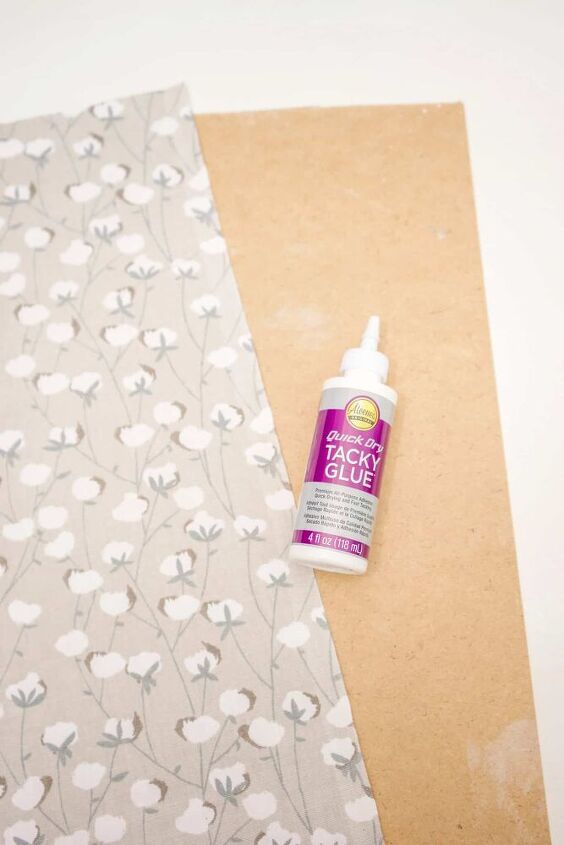
First, I measured the back of my frame (width and height), and I cut my hardboard to the appropriate size. (I measured from just inside the very outer piece of the frame. You will need the backing to be larger than the visible opening, because it will be nailed into the backside of the frame. I hope that makes sense….)The next step involves covering the hardboard in fabric, which will make the whole piece ever so slightly larger. So, you want to keep this in mind when cutting the backing.
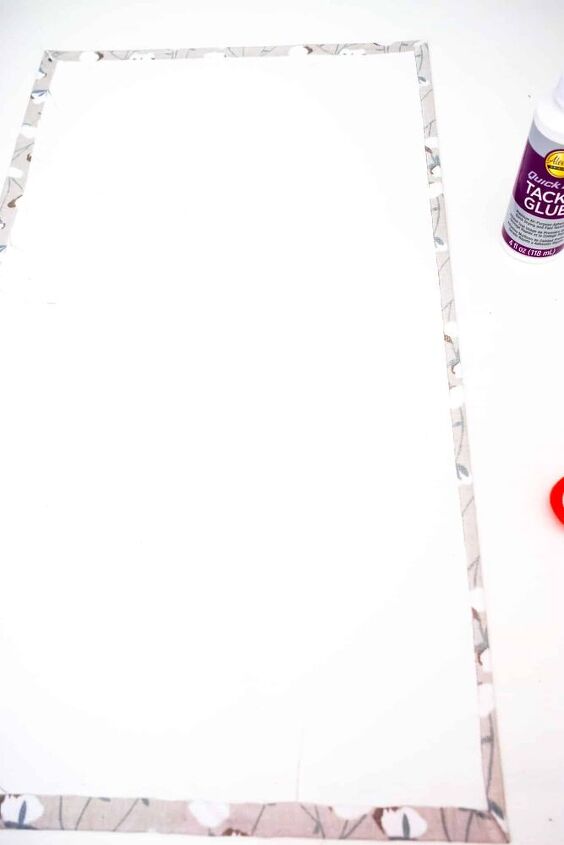
Then, I cut my piece of fabric. I cut it about one inch larger all the way around than the backing. Once these two pieces were cut, I ran some glue along the outer edge of the backing. Then, I centered my backing on the piece of fabric and glued it down. I simply ran my hands over the fabric to smooth it out as much as possible.
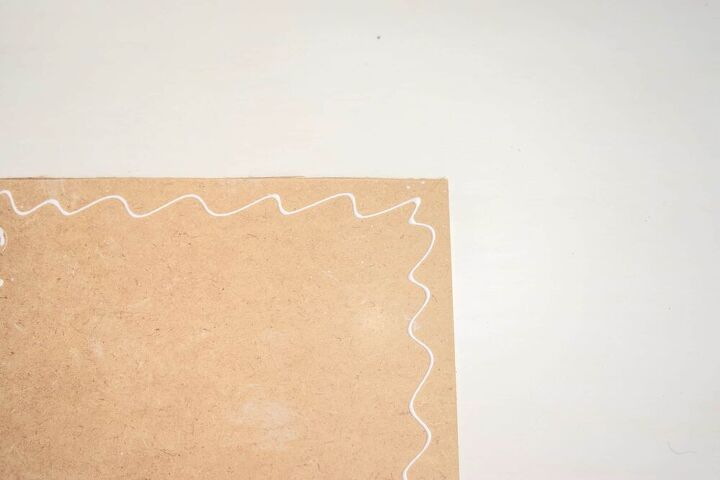
When that was mostly dry, I put a strip of glue along the excess fabric and folded it over the backing. (I did have to snip the corners a bit to get them to lay down mostly flat.)
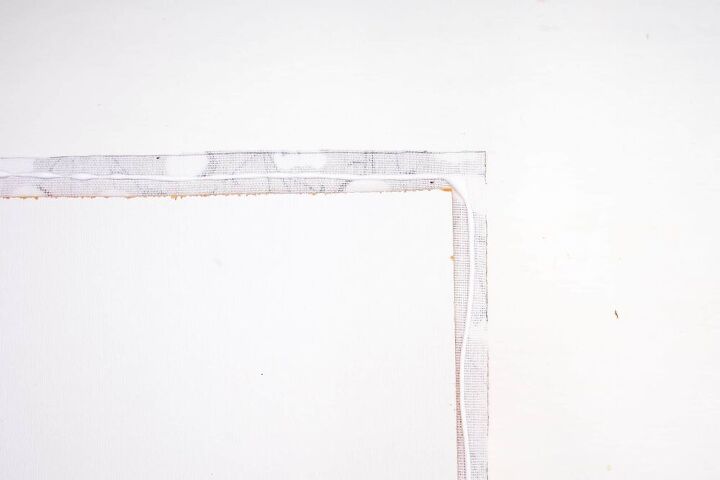
While that was drying, I started working on the metal ribbon. Once again, I measured the inside of the frame, and I cut my ribbon slightly longer than my measurement. I knew that I would need to bend the metal ribbon outward a bit, so that it didn’t lay flush against the backing. Therefore, I needed it to be a bit longer than the opening.This is how I bent each piece. I wanted the ribbon to pop outward a bit, away from the backing.
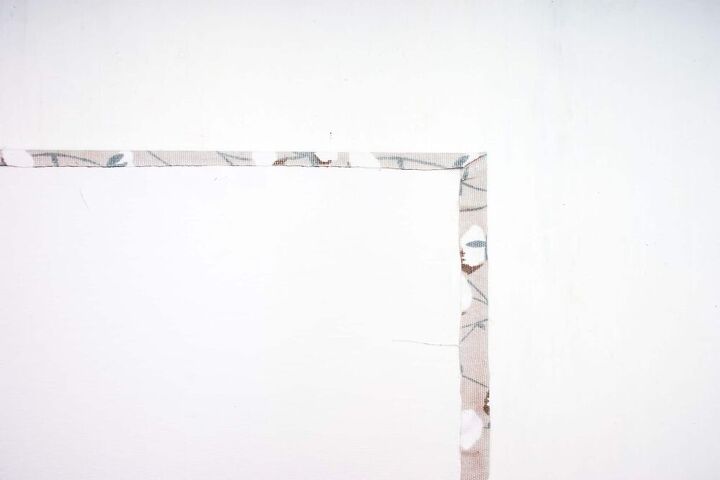
Then, I marked the inside of the frame where I wanted each piece of metal ribbon to go. I actually pulled out a couple of pair of earrings, as well as a necklace to help me figure out where each of these pieces needed to go.
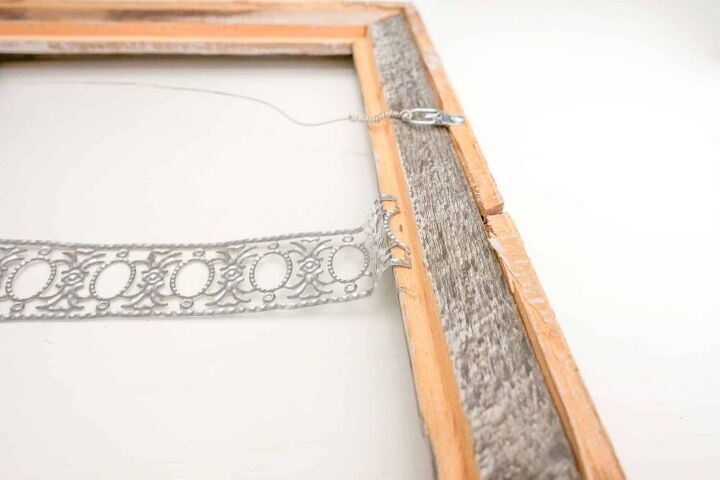
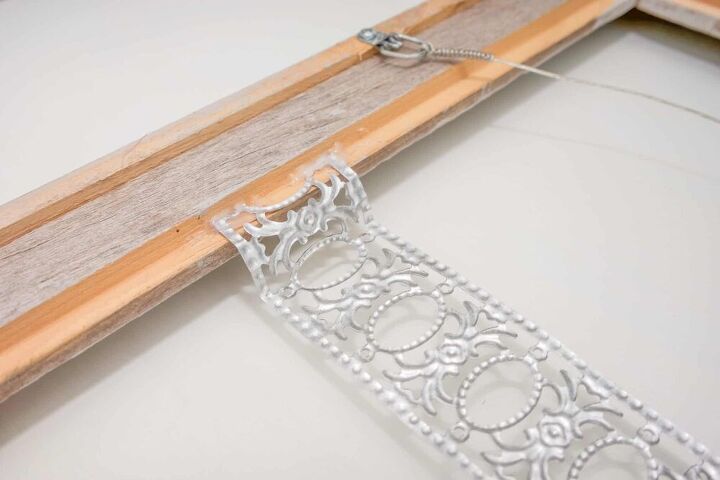
Once that was marked, I attached the metal ribbons to the inside of the frame with hot glue.
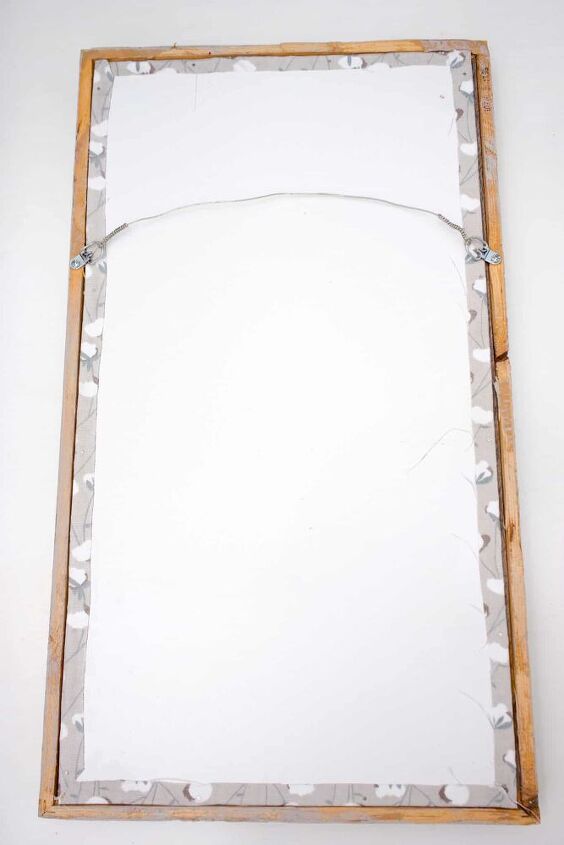
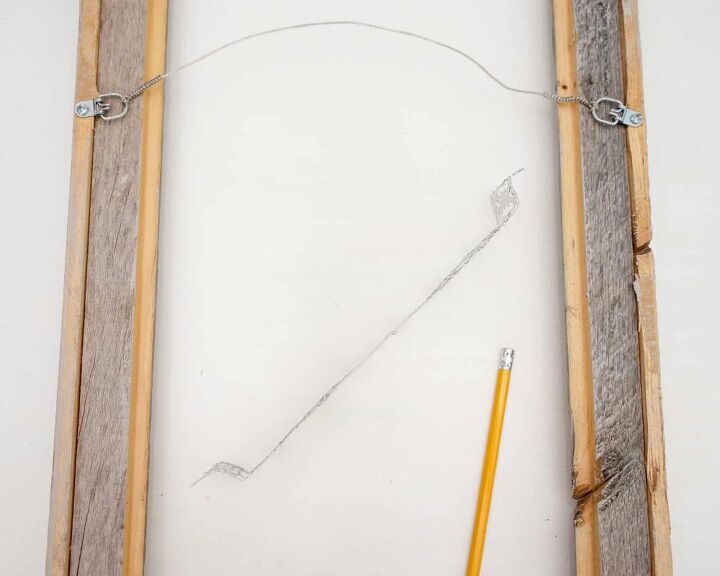
Then, when the glue on the backing had dried, I slid the backing into place. Using 1/2″ finishing nails, I nailed the backing to the frame all the way around.
And that was it!
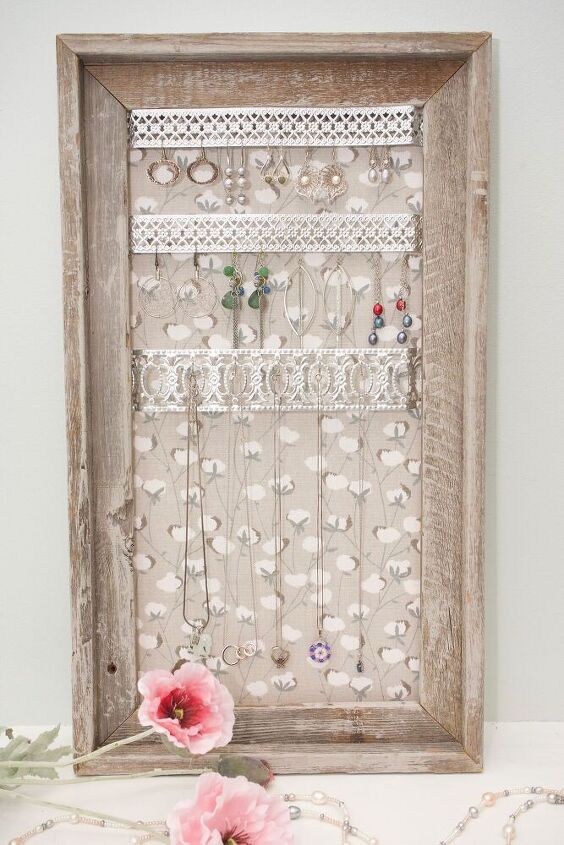
The only thing left was to load it up with jewelry. I hung the earrings directly onto the metal ribbon. For the necklaces, though, I used mini S-hooks. I knew I would never have the patience to hook and unhook the necklace from the metal ribbon every single time. With the mini S-hooks, I can just lift the necklace off of the hook, and attach it on the go.I am loving the way this rustic jewelry organizer turned out, and I had the perfect spot in my closet for it. So, it’s all right at my fingertips.
Resources for this project:
See all materials


Comments
Join the conversation
-
great idea, thanks for sharing
-
What a great way to display some jewelry that often just sits in a drawer!


Frequently asked questions
Have a question about this project?
Very pretty.
You see this kind of jewelry holder, but I have mostly post type earrings... any good ideas for those (I use an ice cube tray in a drawer)?
@Kipley. That is exactly my question! What do you do with the studs? Are the holes in the metal tape small/large enough to just poke them through?
The other idea I had was to layer strips of screen on top of the fabric (maybe under the metal tape? Or instead of the tape?) IDK. I’ve been puzzling over this for years!
And bracelets?
Thanks! Any comments will be appreciated!
I'm curious why you used such a busy patterned fabric and not a solid color. I can't see the jewelry pieces in the busy-ness of the fabric.