


Pottery Barn Inspired DIY Christmas Snowflake
When I saw Pottery Barn's Christmas wall decor, I was captivated by their snowflake wall art made of driftwood. I instantly wondered if I could replicate the look and I knew exactly who I’d give it to once finished (my mom!). I had to create a video to show some of the techniques described below – sometimes it’s easier to show than explain. If you like the video, please give it a thumbs up and let me know what you think in the comments! You can also subscribe to my channel for a new decorating/DIY video each week.
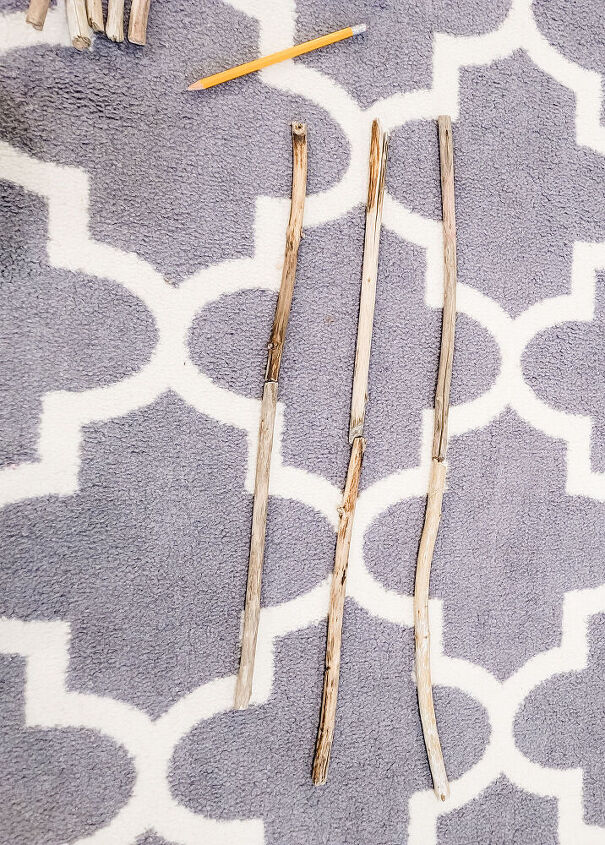
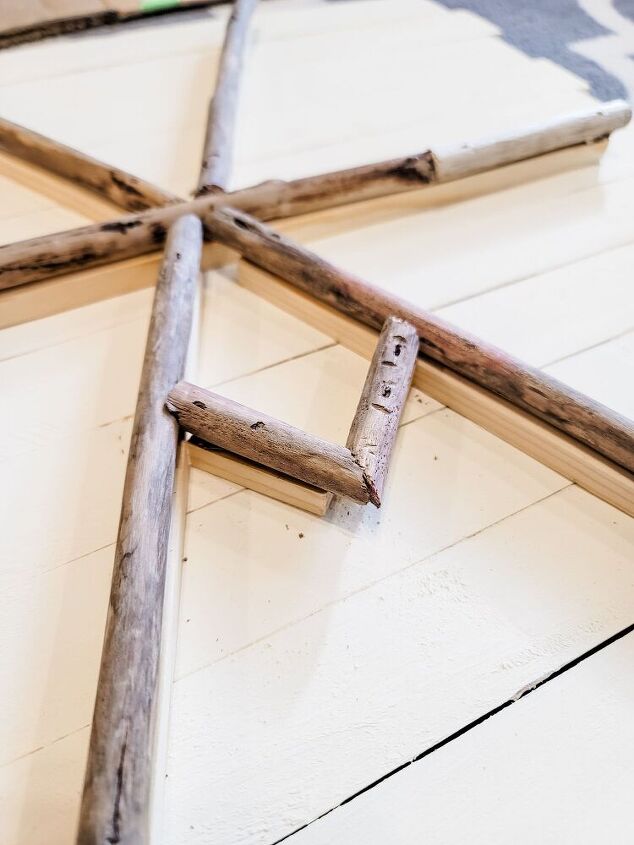
Gather driftwood of similar thickness. Find the longest pieces to make up the three main points.
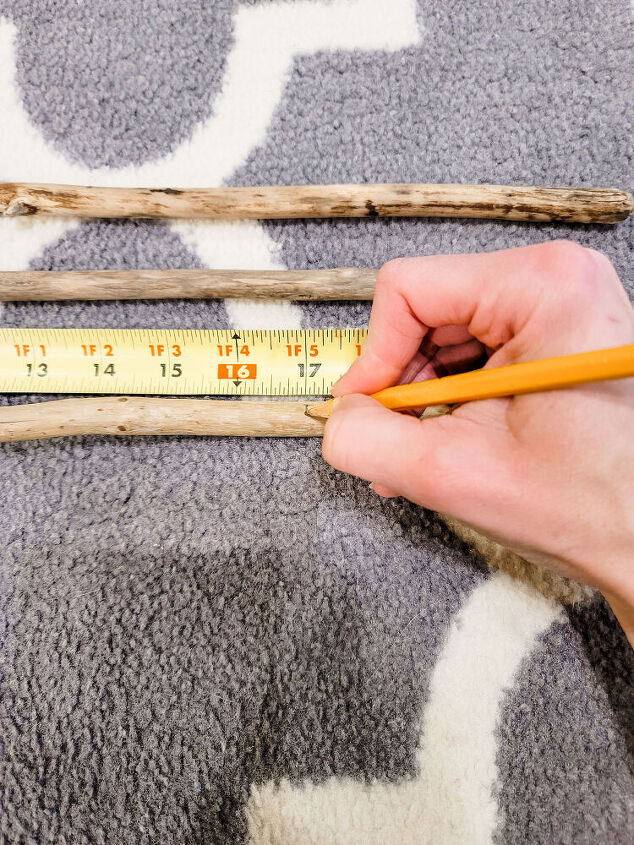
I found that I could create 17 inch points for the snowflake. Measure, mark, and cut.
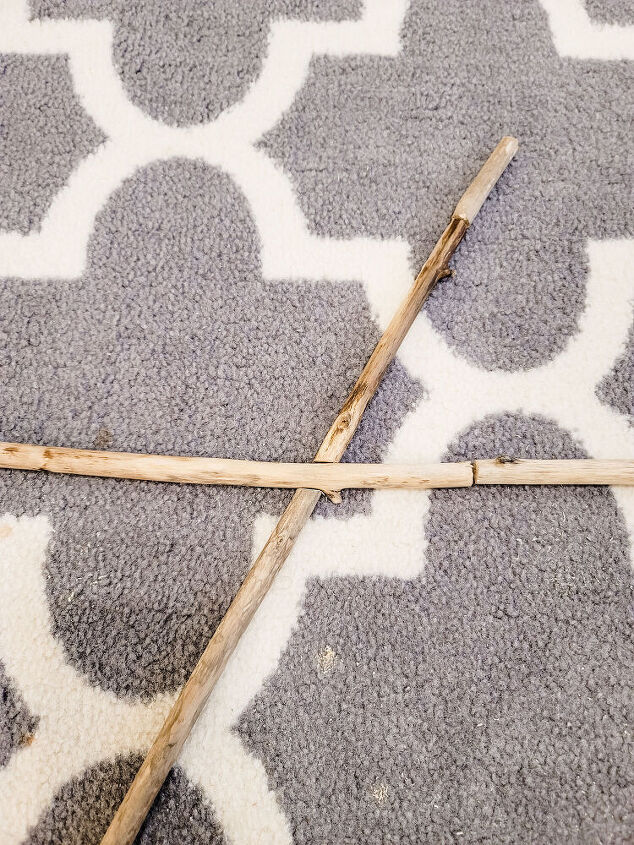
Begin to line up the three main points of the snowflake. Make sure the lengths are the same even if you have to use a few pieces of driftwood to do so.
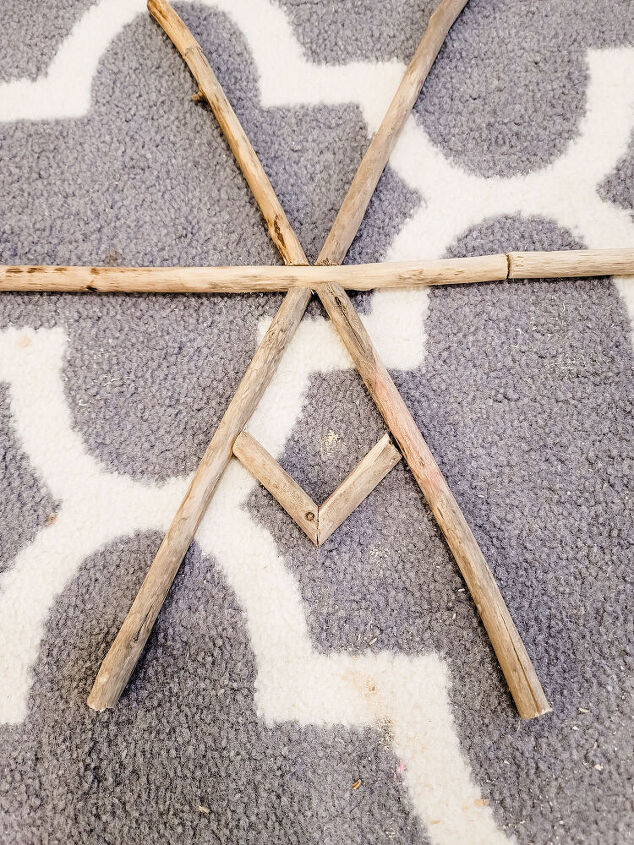
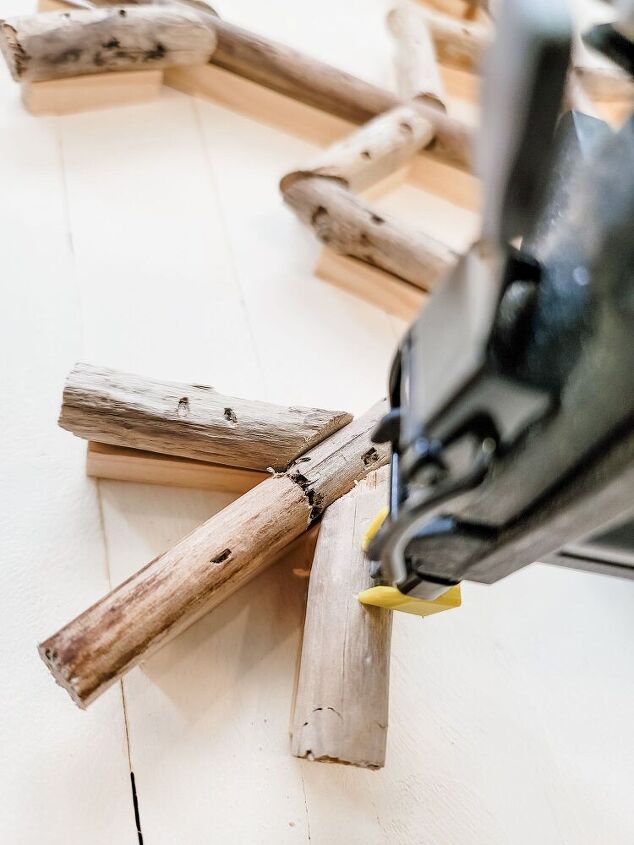
Cut one end of the inner points at 22.5 degrees, and the intersecting end at 45 degrees. My driftwood pieces are about 2 inches long.

I used this mitre box to help me line up the correct angles. Be sure to wear a glove - after over 70 cuts you'll be feeling it. 
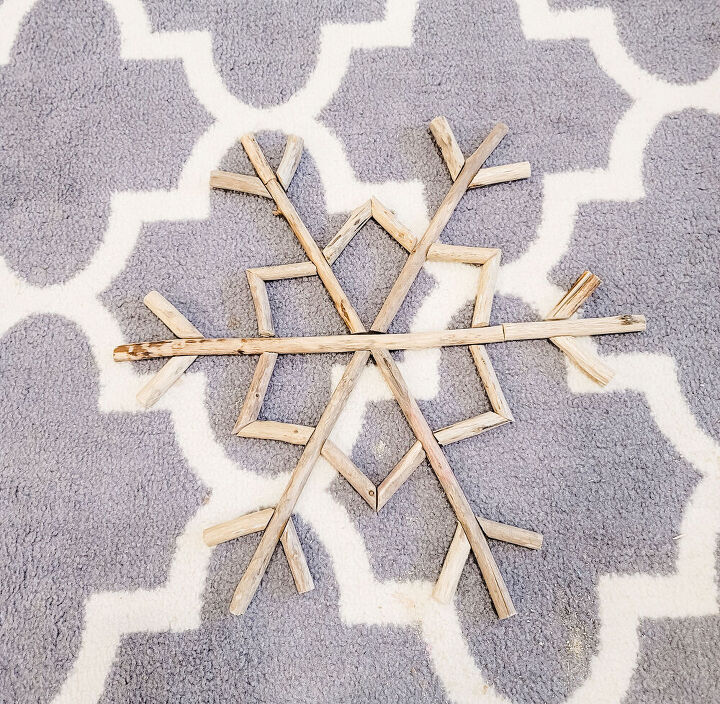
The outer points are also 2 inches long with the intersecting end cut at a 45 degree angle and the other end is a flat cut.
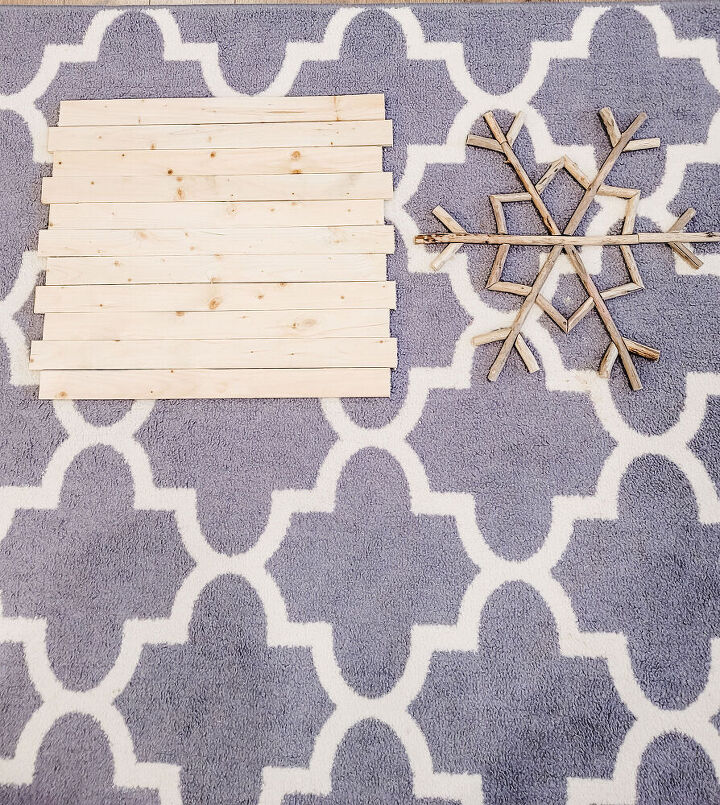
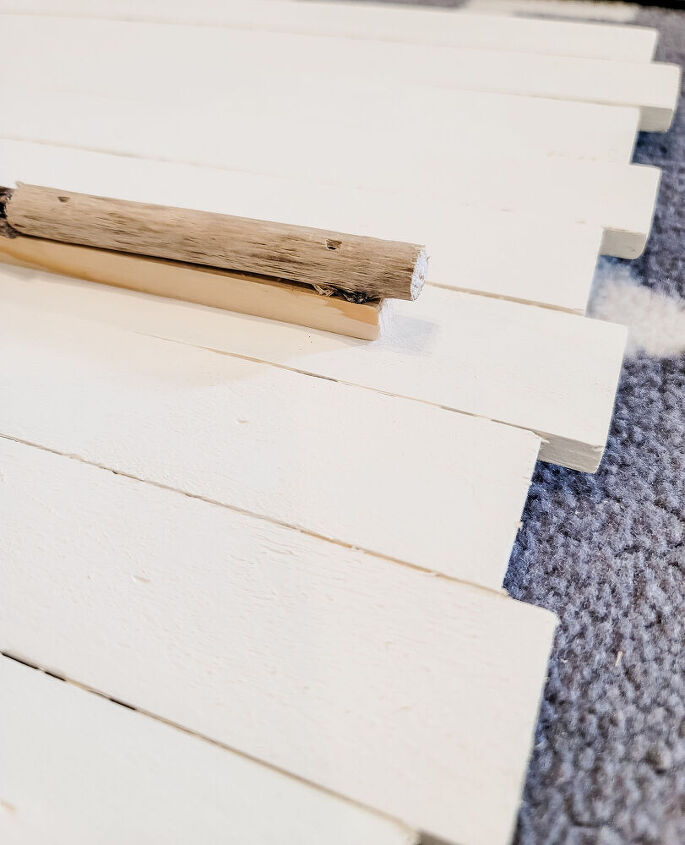
I lined up my lath boards and determined how many I'd need for the plank background. Pottery Barn has an additional top and bottom plank on their design, but I kept my look more square. You can also alternate shorter boards every other one, or keep them all even. My shorter boards are 1 inch shorter than the others.

I used a ruler to make sure the shorter boards went in a half inch from the longer ones. Once it was all lined up, I used a brad nail gun to attach a vertical board to each horizontal plank board. The vertical board goes in about 2 inches from the edge.
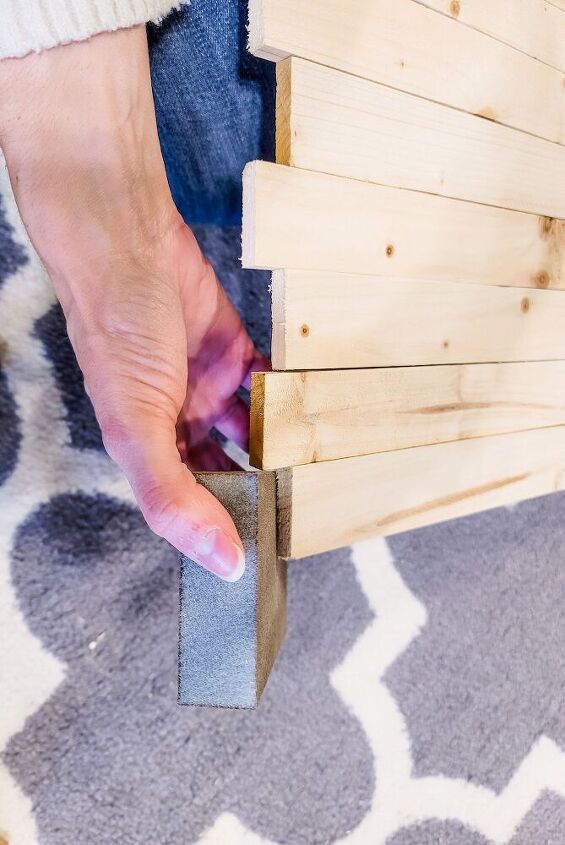
Once both vertical boards are attached, be sure to sand off any rough spots.
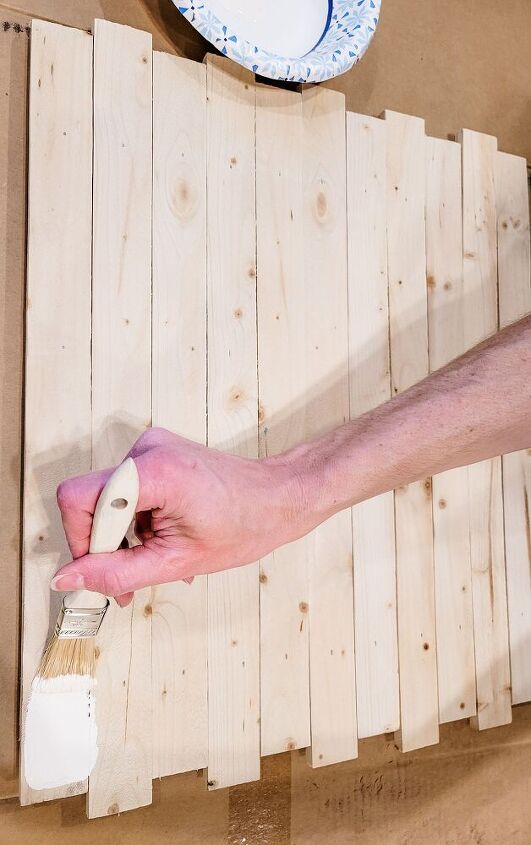
I used a tube of acrylic craft paint from Hobby Lobby ($2.99). It took three coats to fully cover the knots in the lath boards.

The Pottery Barn design has a square dowel under all the driftwood pieces. I made sure to buy dowels that were more narrow than my driftwood so that it would just give it a raised dimensional look without showing the dowel.
Measure each piece of driftwood, starting with the longest pieces, and cut the dowel about 1/2 inch less.
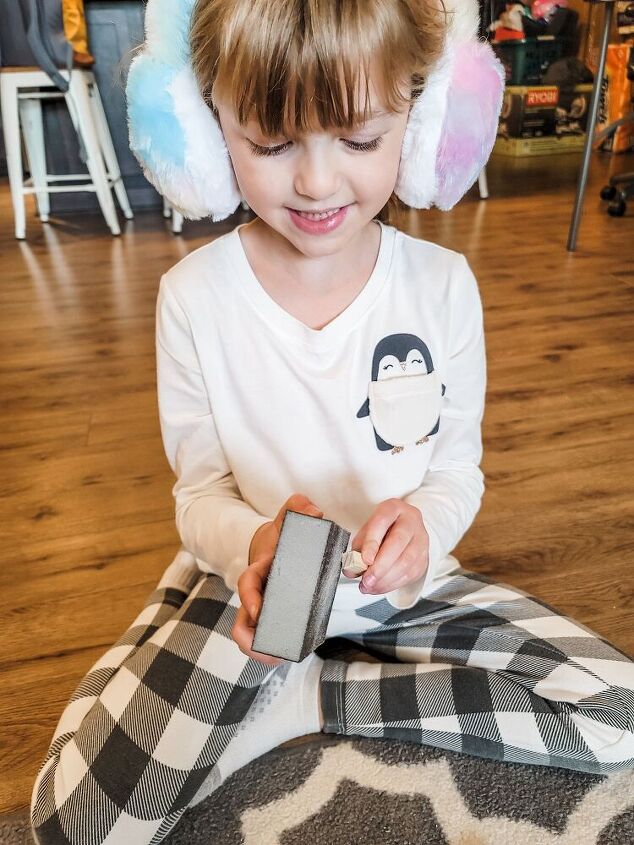
My six year old daughter helped me sand the dowel pieces. It doesn't have to be perfect, but you want long slivers sanded off at least.
I used a brad nail gun to first attach the dowel to the plank backdrop. Then I used a brad nail gun to attach the driftwood. In hindsight, I could have just glued the driftwood. I only split one piece of driftwood because I nailed into the nail in the dowel. It was by luck that it didn't happen more.
Just like with the pieces of driftwood, cut and attach the longest dowels and then onto the inner points and finally the outer points.
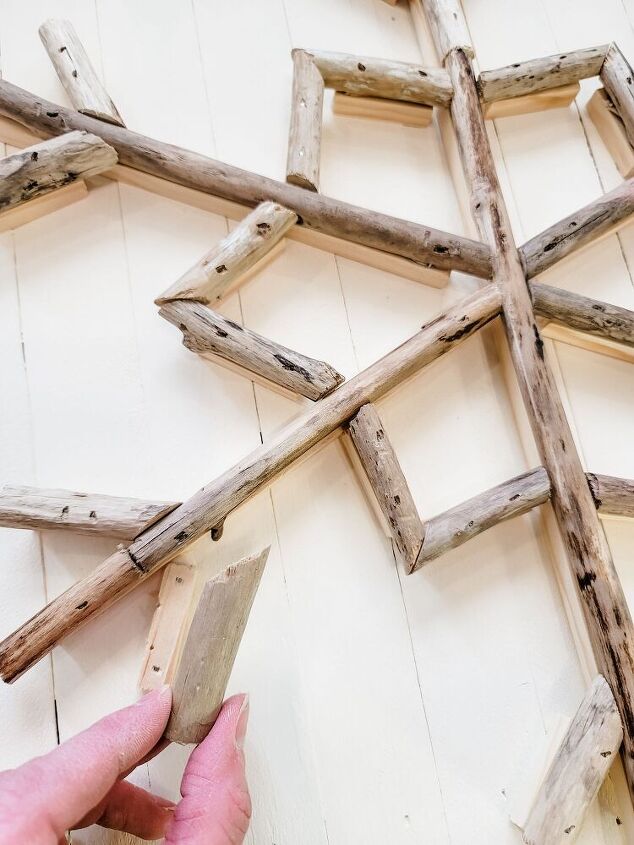
Use a ruler to make sure that all your outer points are starting in the same place around the snowflake.
As stated before, you can glue on the driftwood to the nailed down dowel pieces. I actually love the nail hole looks in the driftwood, but it was tricky holding the round driftwood and precisely nailing it.
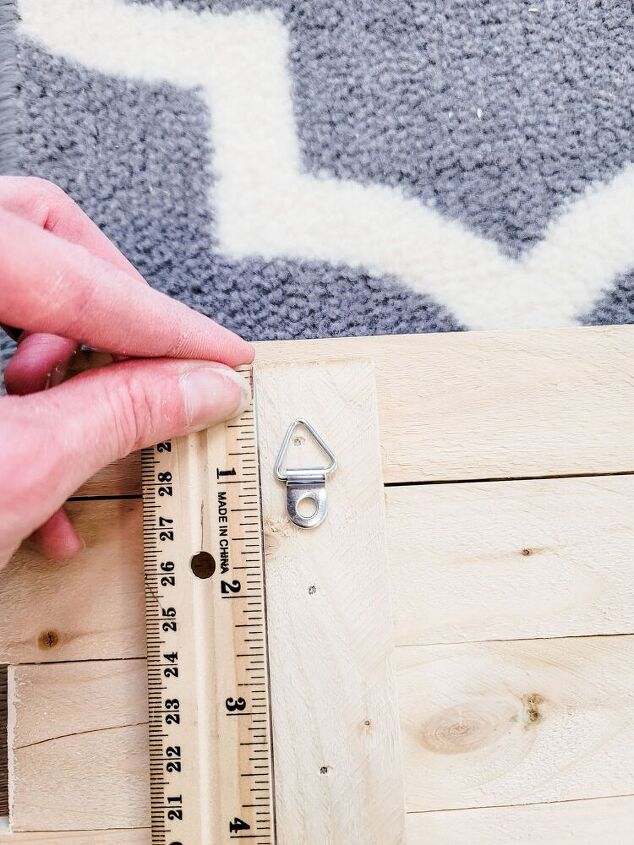
I like to add hardware low enough to a piece so that the nails on the wall don't show once it's hung.
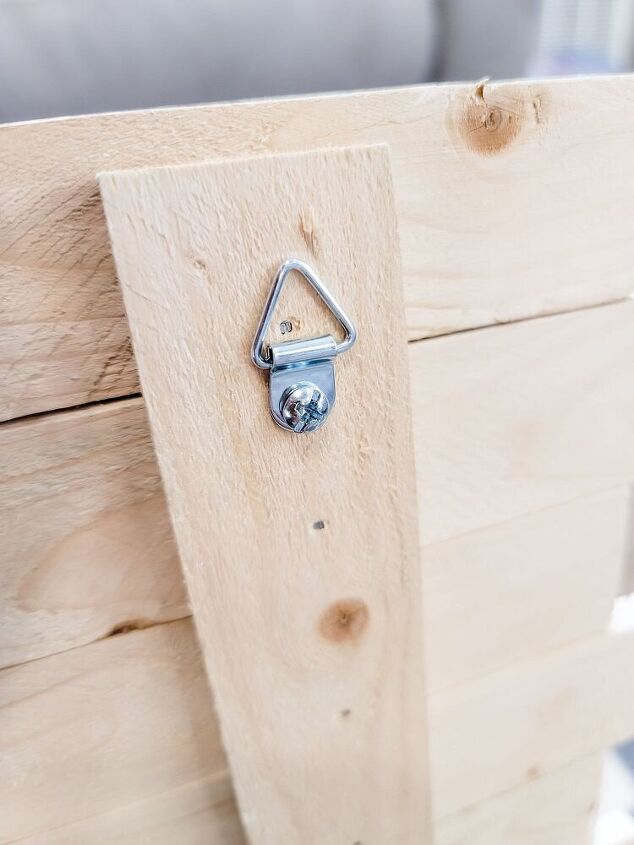
Be sure to predrill wherever you marked the spot and then screw in the nail. Lath boards aren't hardwood and they're already thin.
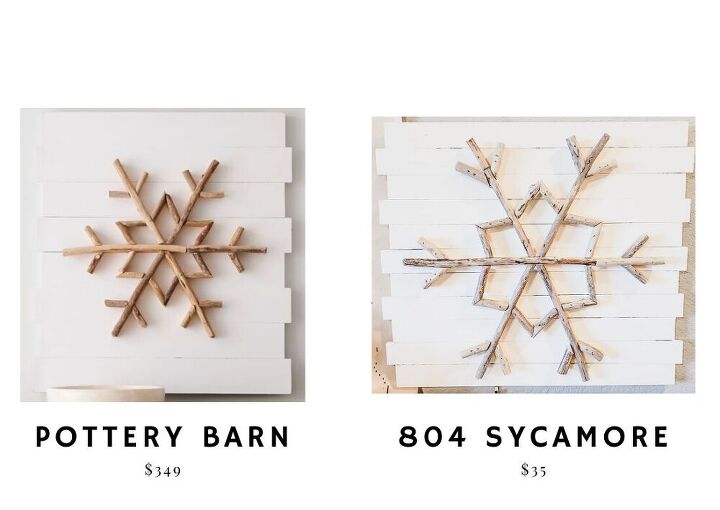
I love the clean look of Pottery Barn's planks - very smooth and thicker. And their driftwood looks conditioned or waxed. My design is more rustic and has that handmade quality, but my mom is going to love it and I love the price savings!
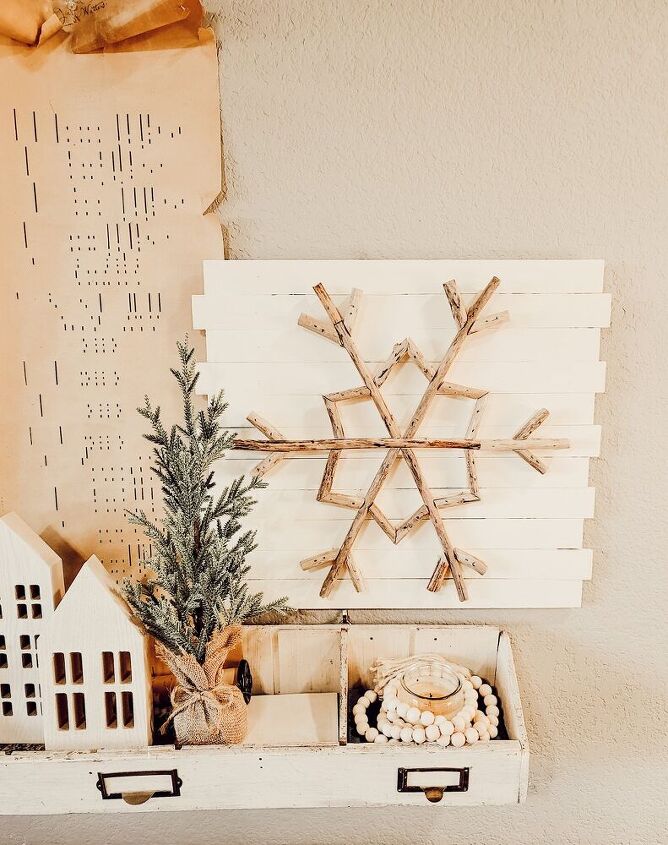

This wall decor will look so great in my mom's coastal decorated home for Christmas. It's neutral and should go well with all her other pieces.
Resources for this project:
See all materials


Comments
Join the conversation
-
That's such a huge compliment! Thank you, Gwyn.
-
Where ever did you find those player piano music scores? My Aunt had a player piano many years ago when I was small child. It fascinated me so much.🙋🏻♀️


Frequently asked questions
Have a question about this project?