


Grandma’s Table Gets an Update

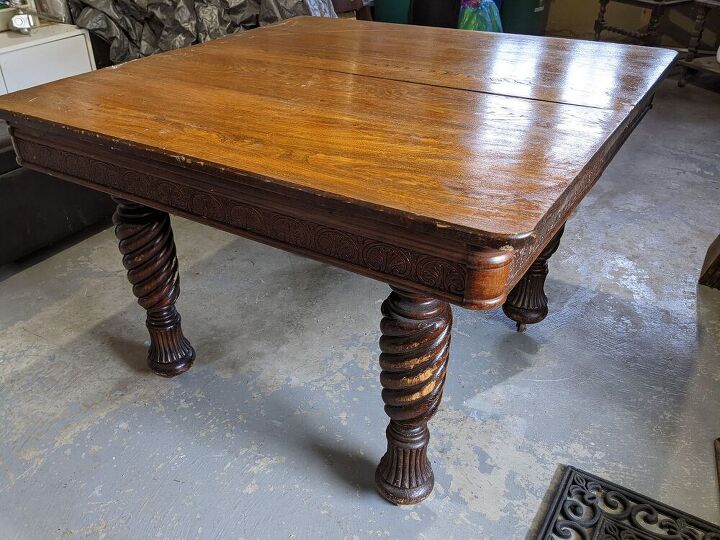
I had mooned over an old table in my friends’ basement awhile ago, with barley twist style legs, that had belonged to his grandmother. A couple weeks ago, they showed up at my door with the table! He said it was mine, with the caveat being that “if” I decided to sell it, I would give him first shot at buying it. I offered to do whatever he wanted to it, for the cost of supplies, but he said “No, do whatever you want to it.” I don’t really need a table, as I recently updated our old set. Plus, I really wanted them to have his grandma’s table back! So I decided to update it in a way that would blend with their décor style. Their home has dark wood furniture and black leather couches, so white farmhouse style wouldn't work in their space.

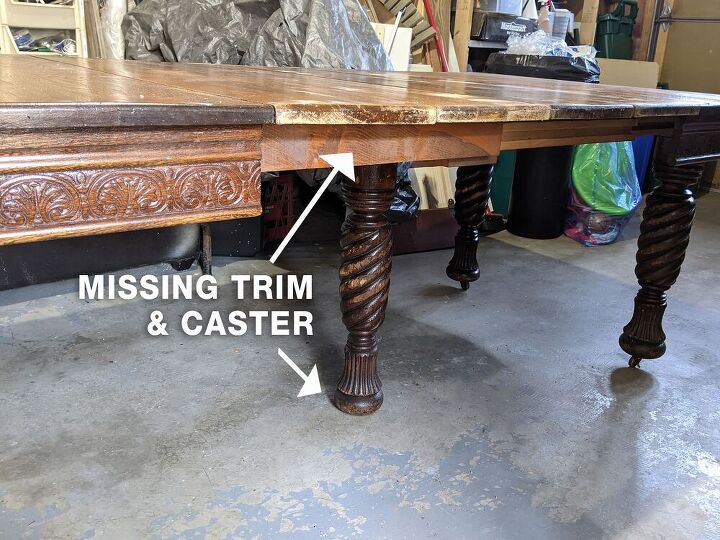
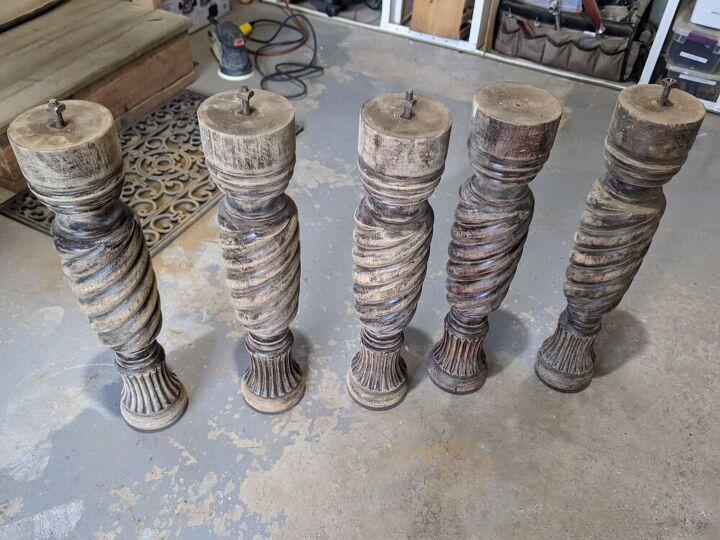
The first thing I did was put the table together in my garage, to see if all the parts were there. It had four leaves, but strangely they did not have the same decorative trim as the rest of the table. One leaf had a big crack in it and a couple others were warped and the edges didn’t line up perfectly. So I decided not to work on the damaged leaves. My friends have a cute little bungalow and I’m sure a table that large would never fit anyway! But I kept the leaves in case they want to salvage them later.
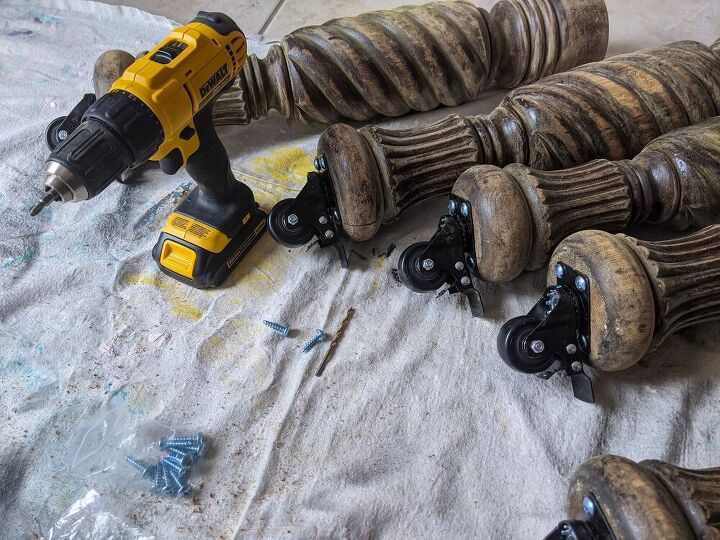
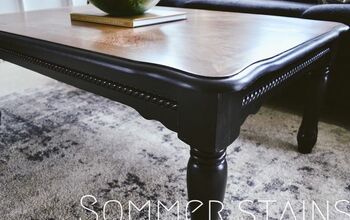
The next thing I noticed was that one of the five legs was missing the ceramic caster. My first thought was just to remove them all together, as they looked too small for the scale of the table, in my view. And the chunky legs would have looked great without casters. But the issue was the table would be too short, without the added 2” of height from the castors, so I’d need to replace them. I found some that would have worked perfectly with the vintage vibe, but they were rated for “small projects” like coffee tables and I didn’t want to take the risk, as this table is heavy!!! So I ordered new heavy-duty, non marking, casters with brakes. I went with black, in the hopes they would blend in and not look odd on this antique table.
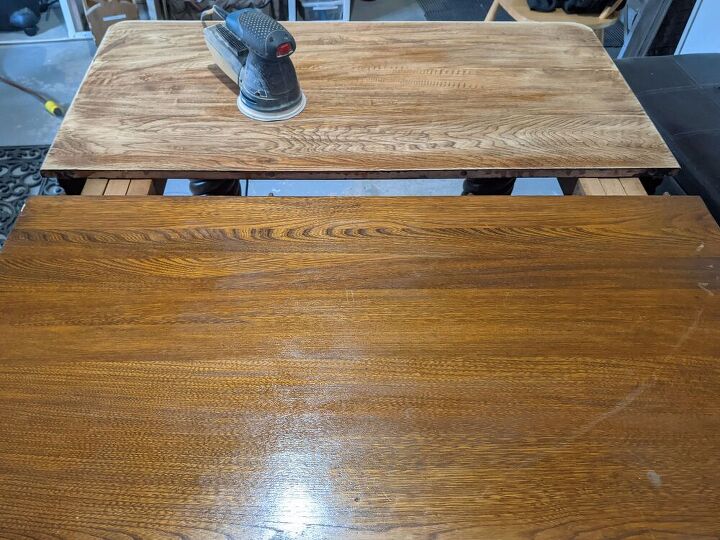
I sanded the table top using an orbital sander and 80 grit paper and removed as much of the old stain as possible. It didn’t come off 100%, but I was planning to use gel stain on it so this would work. Then I went over it again with a 220 grit to give a nice smooth finish.
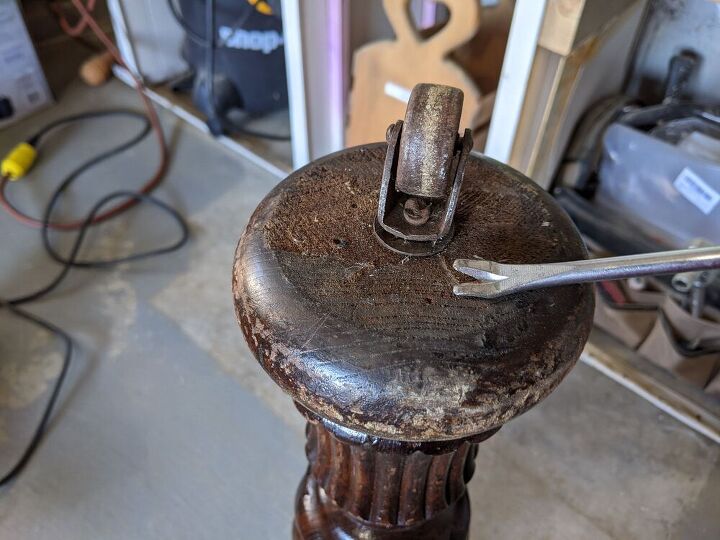
I then removed the legs from the tabletop and removed the four casters. I used a little prybar screwdriver to wiggle under the plate and then pulled the castors straight up. They came off easily.
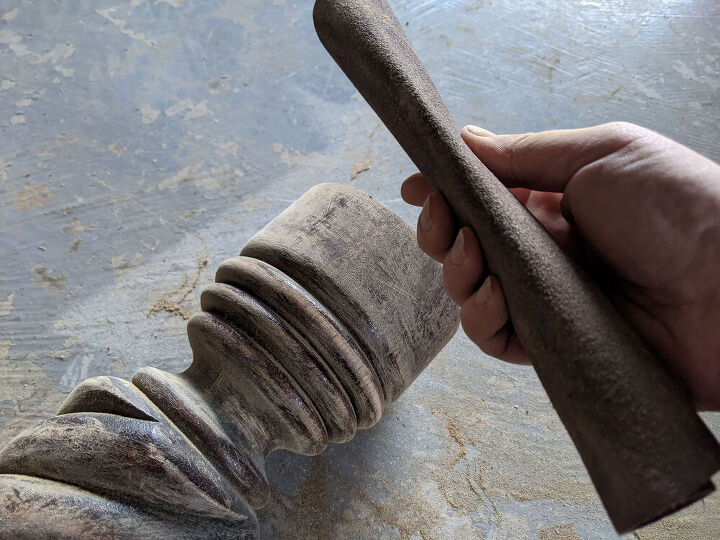
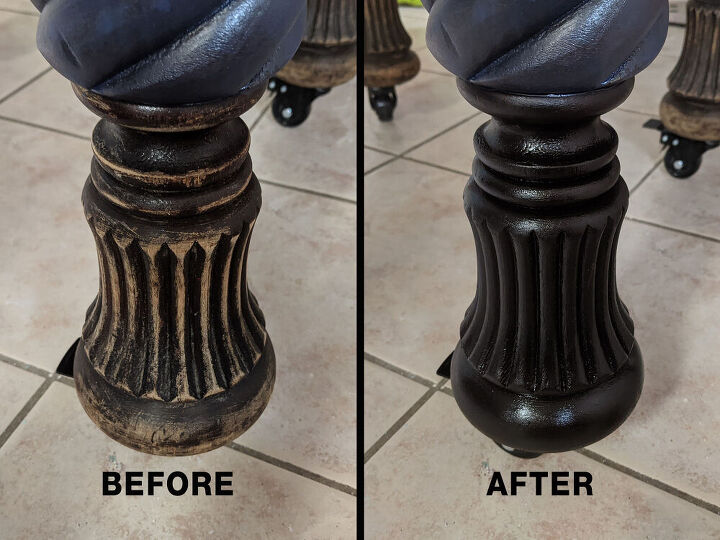
I sanded the decorative trim on the tabletop as well as the legs, by hand, using 80 grit sandpaper. There were a lot of gouges and rough spots on the legs that I also smoothed out with the sandpaper as much as possible. I won’t lie, this was a time-consuming step! I spent roughly two hours sanding the legs! I found it helpful to roll the sheet of sandpaper and ‘pinch’ it to form a wedge shape to get into the grooves.
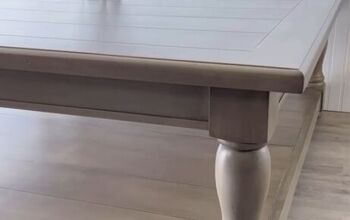
Once the sanding was complete, I brought all the pieces inside so I could finish the makeover. First, I attached the new casters. Even though the legs were large, I drilled pilot holes in case the wood was brittle. Then I screwed the casters on. These looked like a better scale for the size of the table, even though they didn’t have the vintage feel I would have preferred.
I re-attached the legs to the table top using a wrench to make sure they were nice and tight. Then I gave everything a good cleaning with TSP. I use the powdered kind that you dilute in warm water. I used a toothbrush to get into the grooves and details. Not only did this make a better surface for staining, but it also helped remove the musty wood smell that came from this piece having been stored in a basement for many years.

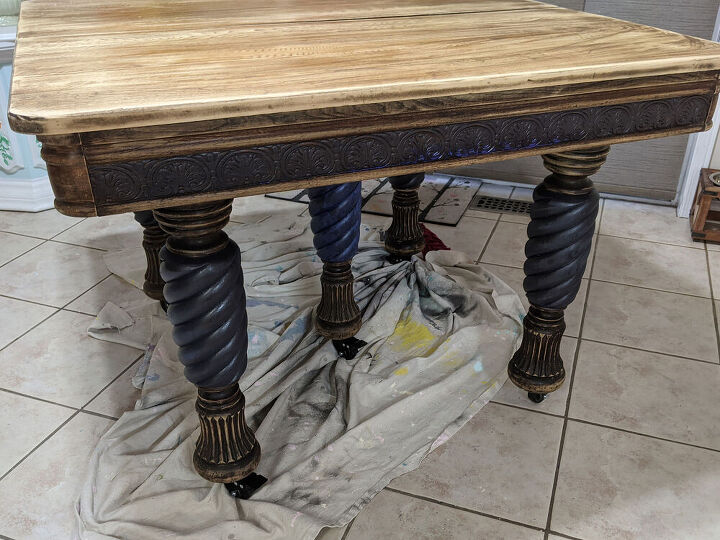
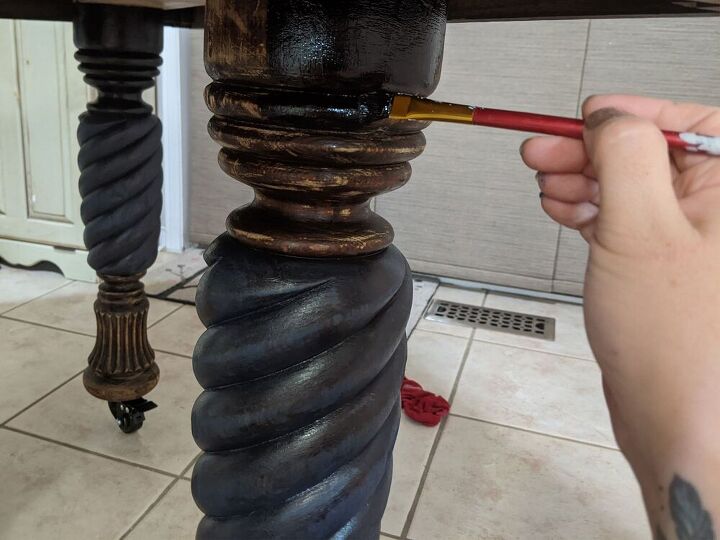
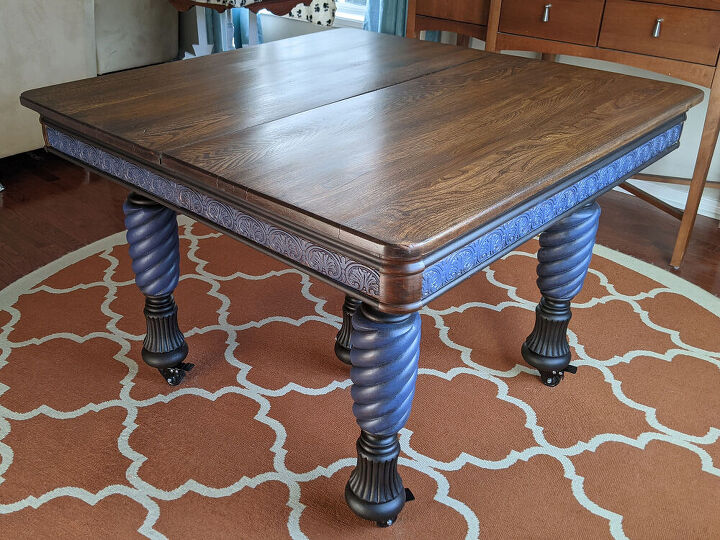
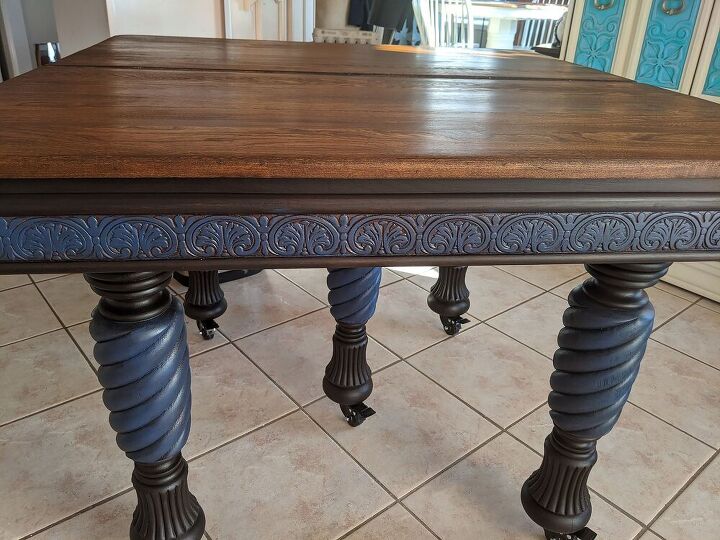
I decided to do a dark blue colour wash on a portion of the legs, as well as the decorative trim on the top. I mixed 1 TBSP of blue paint with 1.5 TBSP of water and brushed it on with a chip brush. I did all five legs and the trim using only 1 TBSP of paint! I know this step will make some readers salty (paint on antique wood **gasp**) but I assure you, this watered-down paint will be a LOT easier to remove than stain, if someone else makes this table over again in the future. I absolutely love antique wood too and I would never do anything to destroy its integrity.
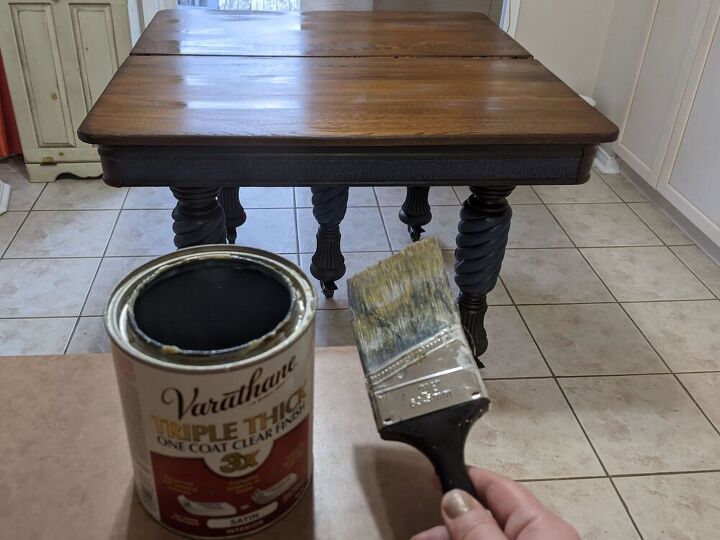
The remainder of the trim and legs I stained with a very dark gel stain, almost black. I used a precision brush and painted the stain on. This gave it a beautiful smooth finish! One thing to remember if you ‘paint’ with stain this way, you need to wait at least 24 hours for it to dry. It takes longer to dry than if you apply stain with a cloth.
For the tabletop and four corner pieces, I decided to go with a lighter shade of stain. I felt the black stain on top would make the piece too dark. And having the two shades of stain would make it much easier to match their antique chairs with this table. The stain on top is dark walnut. I applied the stain with a chip brush and then buffed it with a lint free cloth.
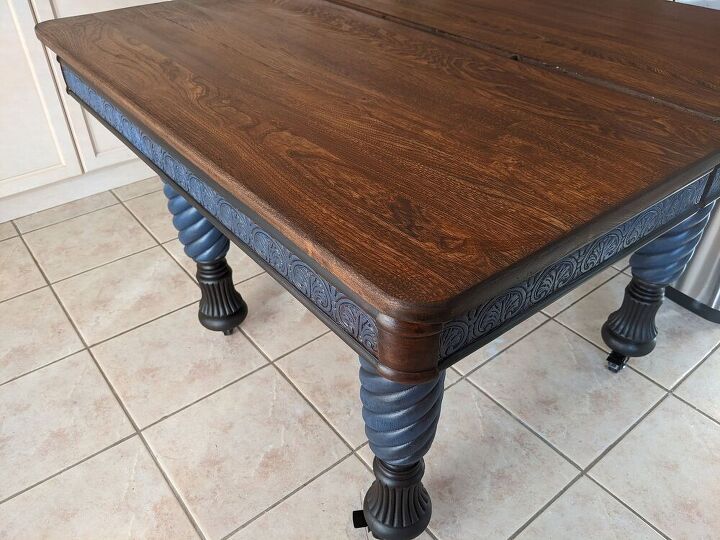
The final step was to seal the top. I did two coats, applied with a paint brush, with a light sanding between coats.
And this project is complete! I emailed photos to my friends and they love the new look. I’m delighted that they will be breaking bread around grandma’s table once again, after all these years of it kicking around their basement. 😊

Resources for this project:
See all materials


Comments
Join the conversation
-
It's so beautiful!!! Colors are amazzzing!! The legs are gorgeous!! Totally a job well done!! Love it!!
-
Exquisite Valerie !! Tasteful and beautiful !!


Frequently asked questions
Have a question about this project?
How many hours do you think this took you ? I can never get enough paint or stain off furniture I’ve tried
How did you replace the missing trim?
How did you replace the missing trim around the edge? I don’t think you mentioned that…