


Mixed Media Christmas Tree
I can 100% guarantee you have never seen a Christmas tree like this before. This is for all the steampunk fans out there, or people looking for a non traditional Christmas tree. The whole tree has been made using recycled materials that I found around my house. It is mainly cardboard and common recycled bits and bobs. I must warn you the process looks like something the cat chucked up but the final results are really pretty.
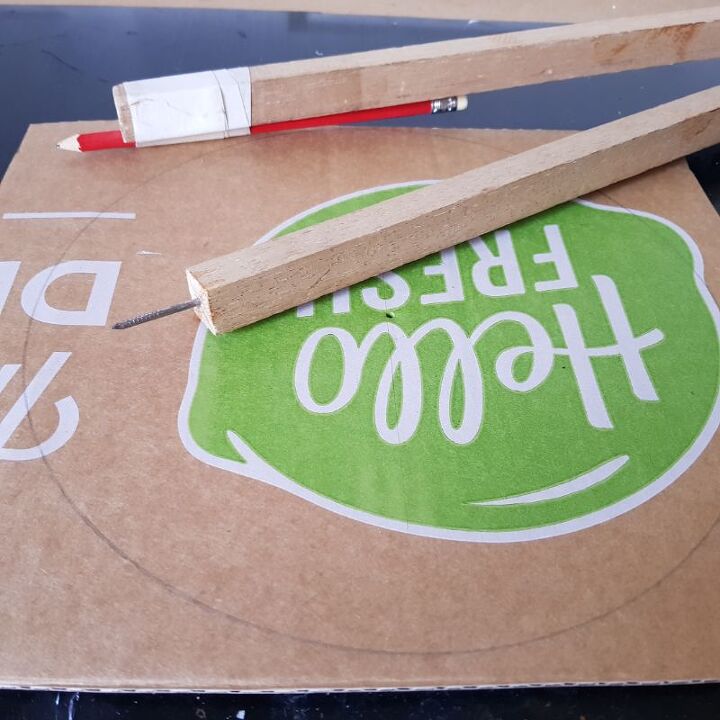
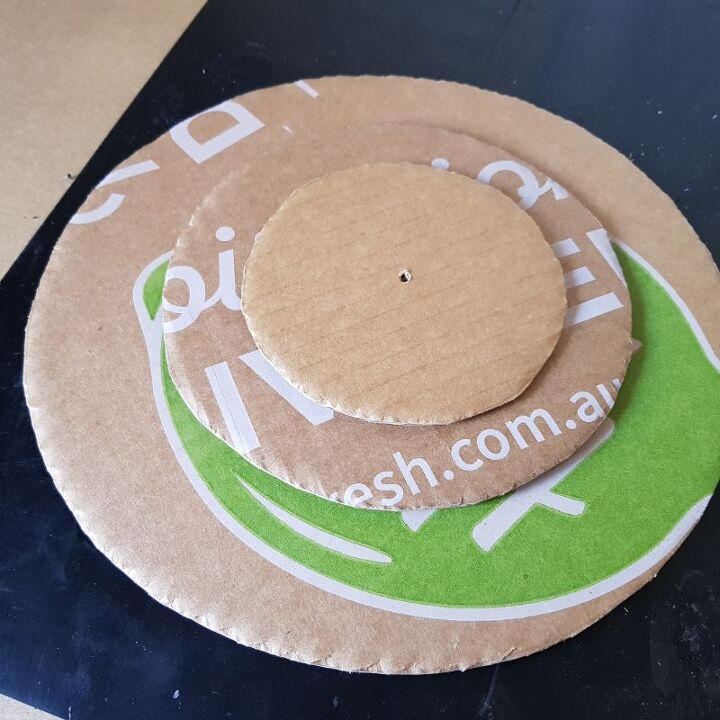
The gears were all made from a regular cardboard box. Using a large compass I made some circles for the gears. I cut out 4 with each one being 5 cm smaller than the last.
You can use a craft knife to cut out the circles. I found some images of gears that I liked and printed them off to use as a template.
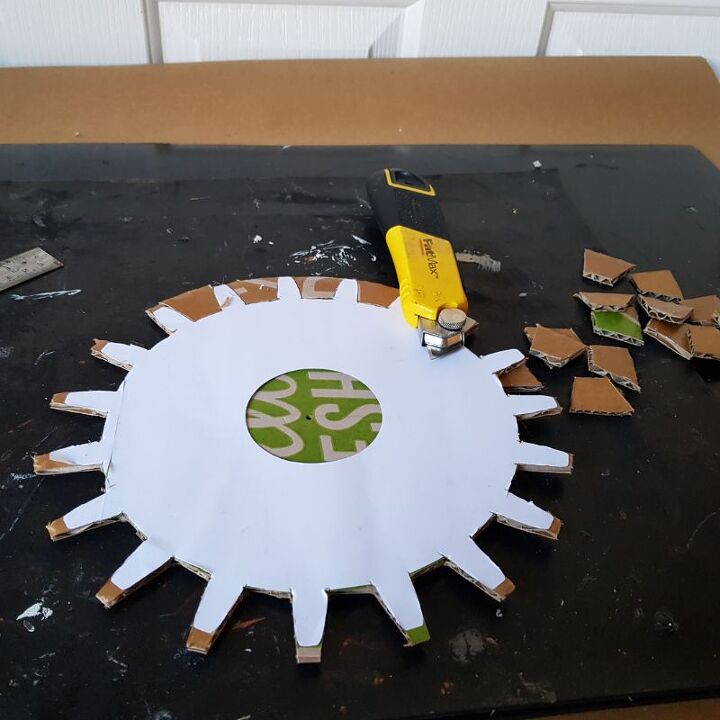
The paper gears were glued onto the cardboard as a cutting guide. You can use a sharp knife to cut out the cardboard.
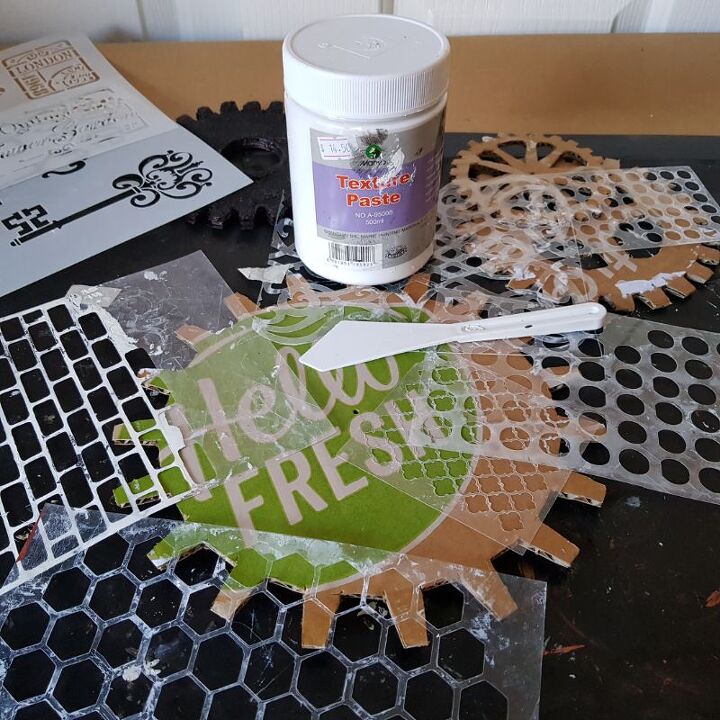
Nobody wants a cardboard Christmas tree, so I wanted to disguise the fact that is was cardboard. To do this I used some texture paste and stencils.
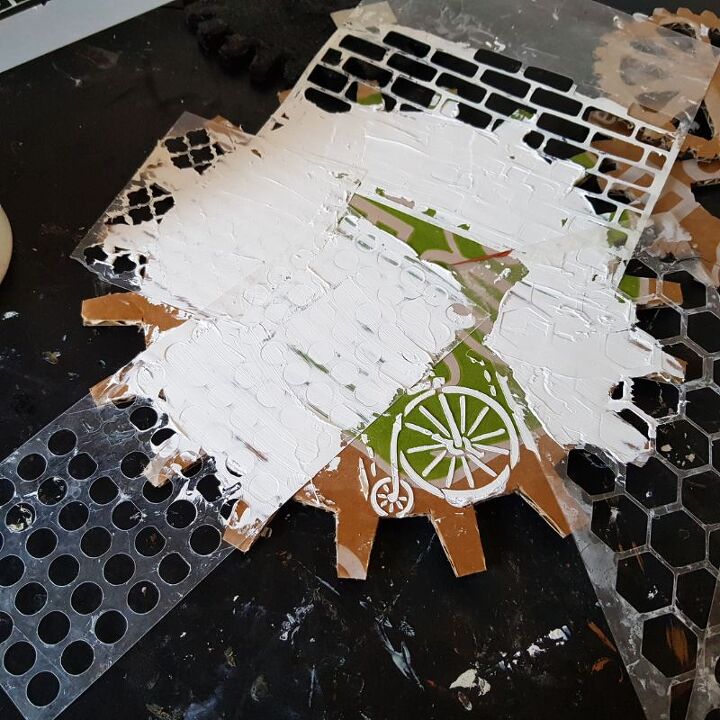
It really does not matter what stencils you used because this is just the basecoat. You will see the benefits of this step later. I used a few different stencils on each gear. This step is just added randomly.

I messed up on this gear and accidently cut out the centre. So I had to cut some cardboard to glue to the bottom to fill in the hole so it will attach to the pole. The texture on this gear was created by adding a layer of texture paste and pushing it down into sand. It is not special sand It was my nieces sandpit. 
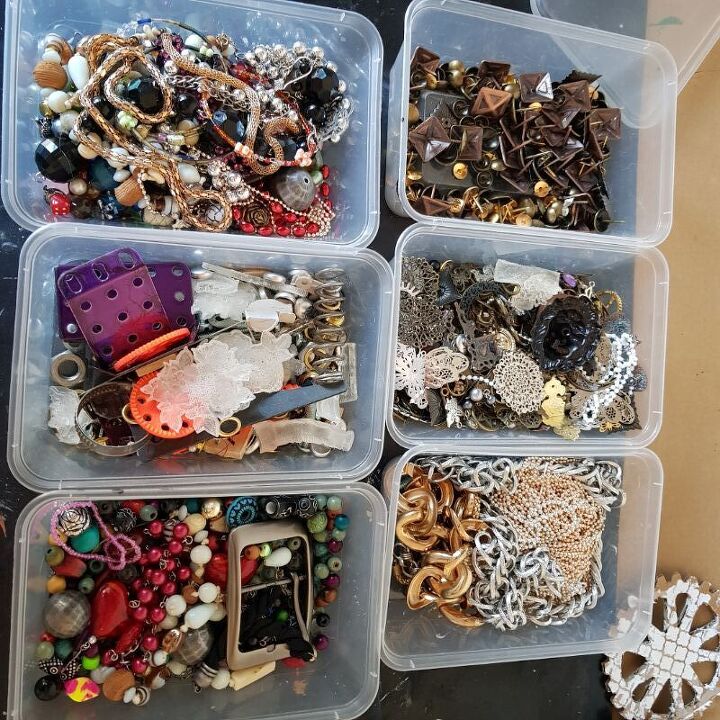
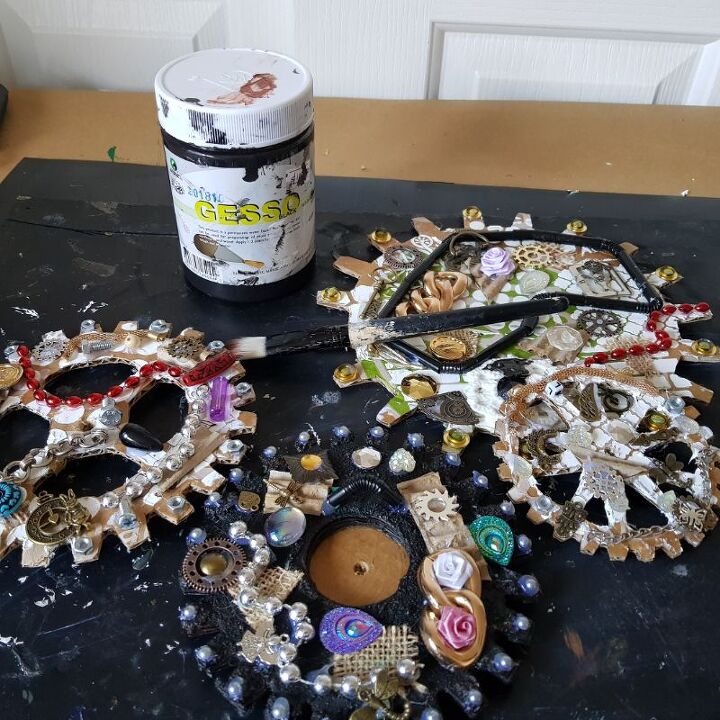
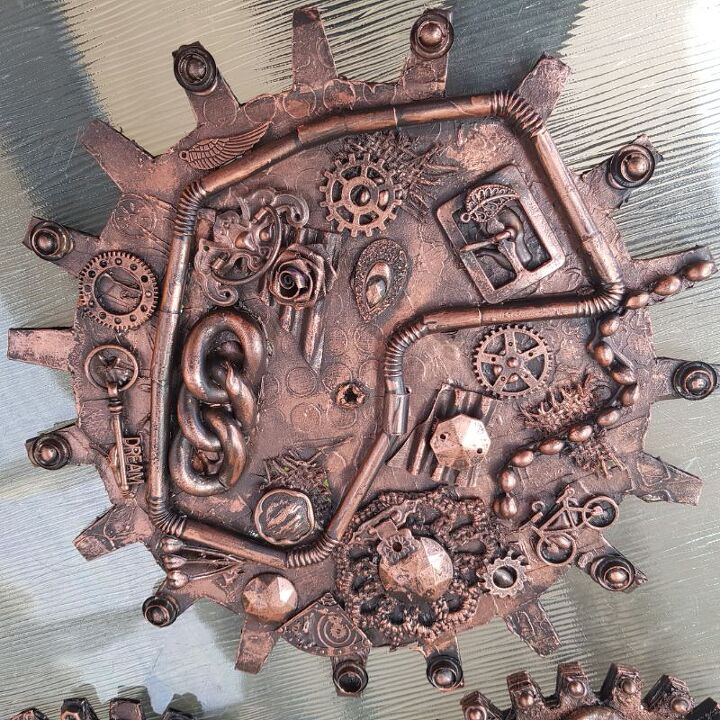
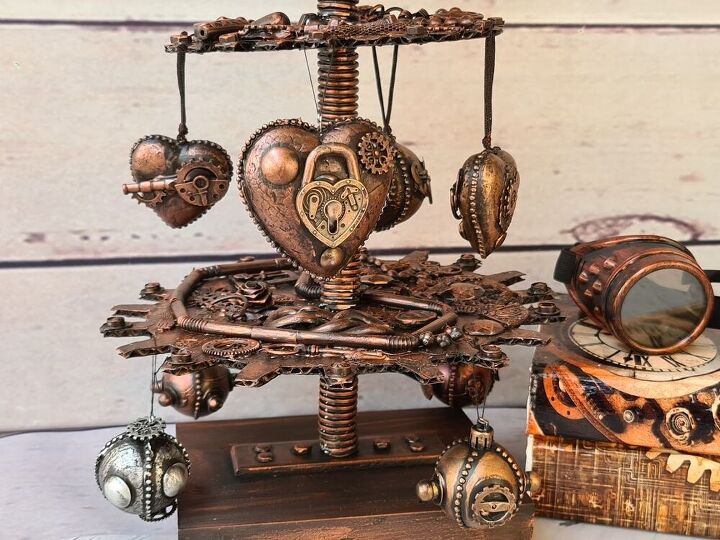
Because I do mixed media art, I collect every little piece of junk I find at home to add to my projects. I used mainly broken jewellery from thrift stores and junk from my workshop. The clear embellishments were made using resin and silicone moulds. And some charms were bought in bulk from Amazon and China.

To glue the embellishments onto the gears I used craft glue for the small items and fabric and hot glue for the rest. The idea is to randomly cover the gears and layer the embellishment to get a 3 dimensional effect.

I have added close ups of the gears so you can see the items that I used.
You can use just about any junk because it will all be painted.
There is no need to put everything perfect or to be overly concerned about any messy glue. This will all add to the effect at the end.
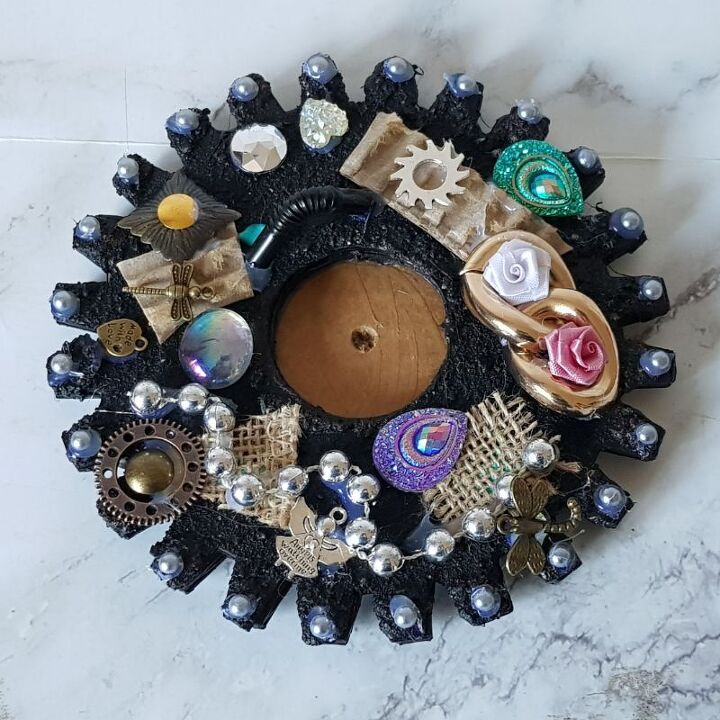
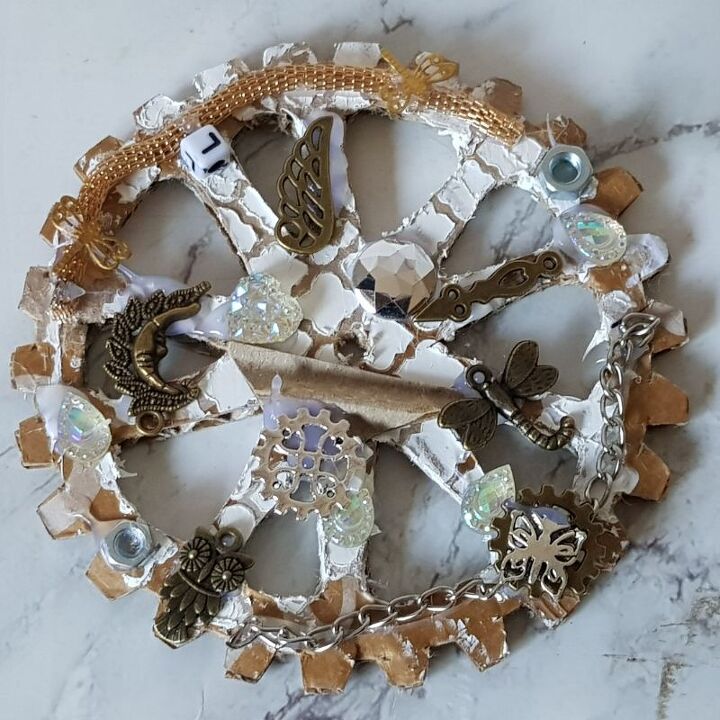
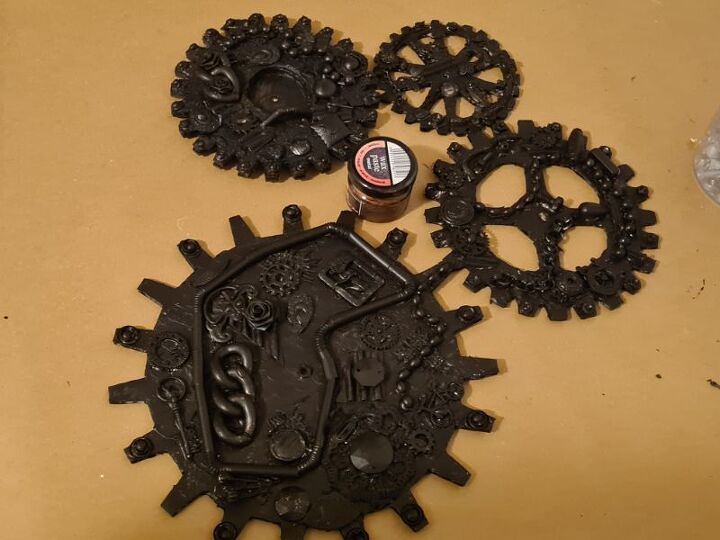
Next, use some black gesso to paint everything making sure to get into all the nooks and crannies.
This is where the magic happens. Using copper wax paste you can now highlight the raised surfaces first.
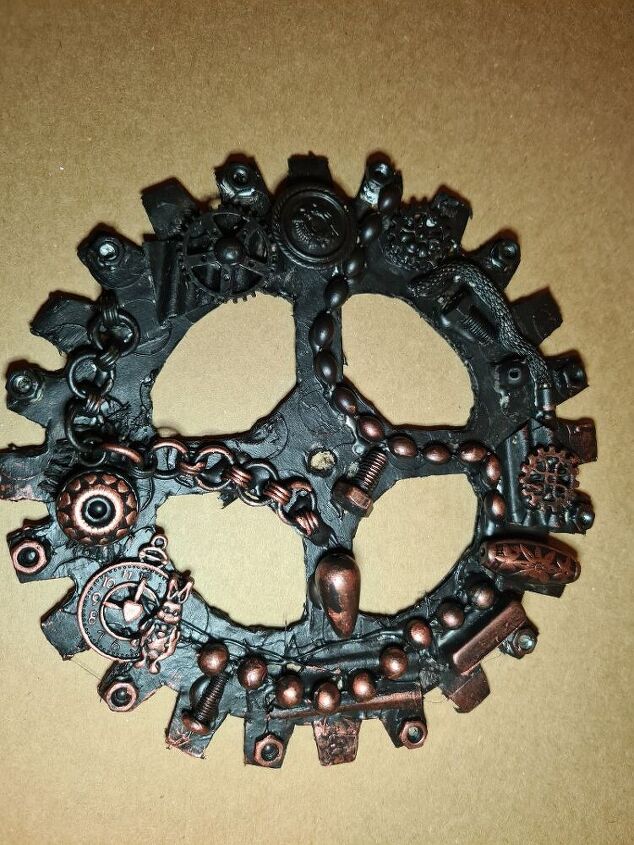
Touch the surface of the wax using your finger and rub some over all the raised surfaces. The idea is not to cover all the black, you still want the two tone effect.
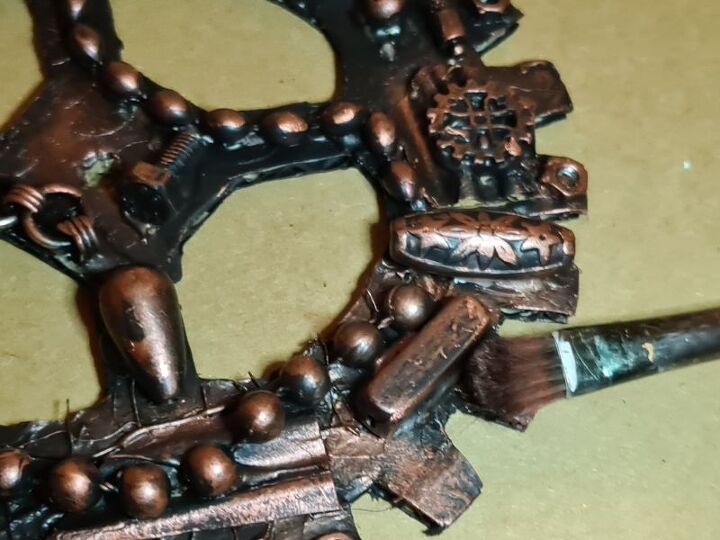
Once all the raised surfaces are covered, you can add a very light coat to the rest. I like to use a soft makeup brush with the tiniest amount of colour on and add it to some of the flat surfaces. You are not trying to paint it just highlight small areas.
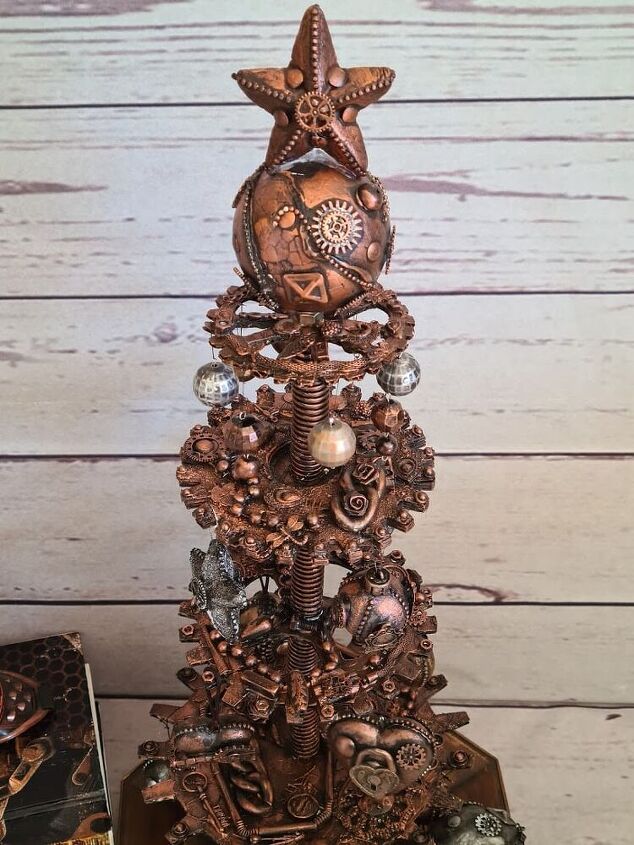
It will look like this when you are finished.
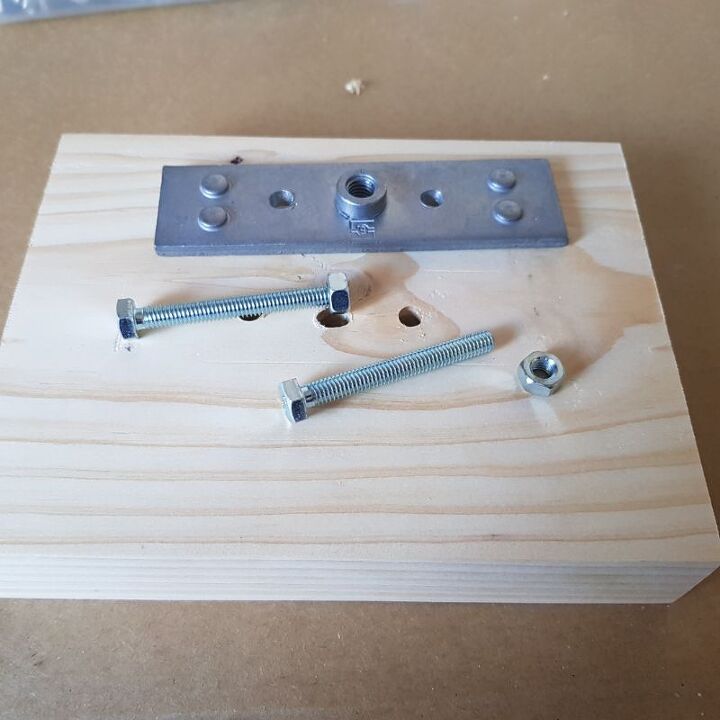
To make the stand, I used a piece of wood and a threaded plate. I had the plate and threaded pole in my shed so I have no idea what it is called. It was left behind by the previous owner. You can screw the plate into the wood and screw in the threaded pole. The gears are held in place using nuts above and below each gear.
Once I put it together it did not resemble the idea I had in my head. I did not like the look of the threaded pole.

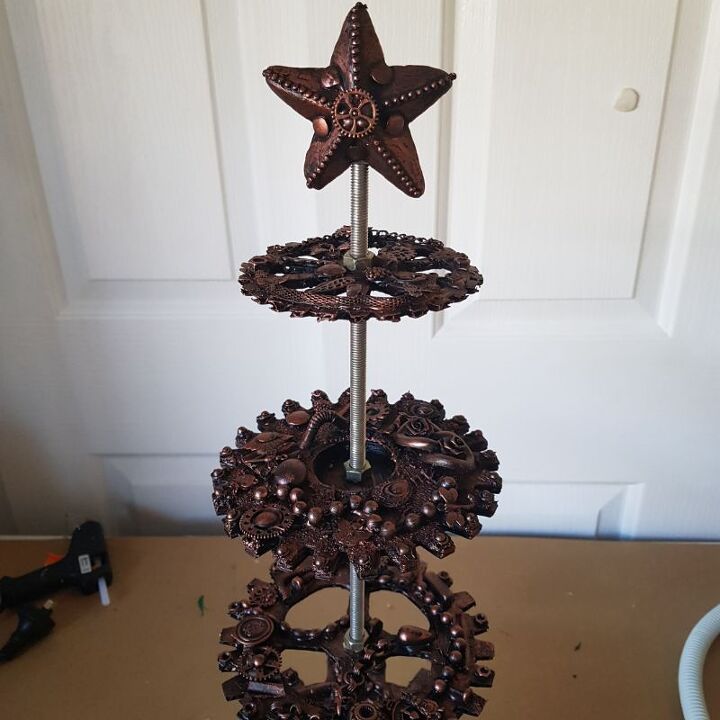
I cut a small piece of pipe of my greywater pipe that I use to water my garden. This was painted black and highlighted with the copper wax paste. Because I make my projects up as I go along I do tend to change things as I build. I get new ideas along the way.
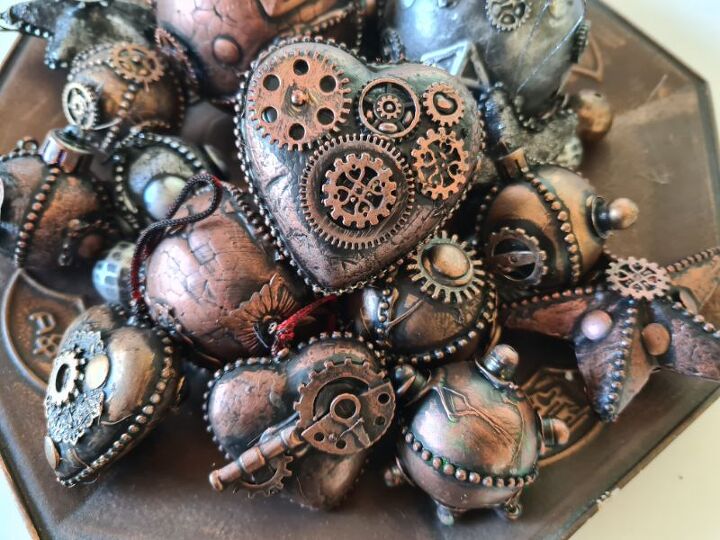
The Christmas tree still looked to plain to me so I make some steampunk style baubles from Styrofoam balls and old Christmas decorations.
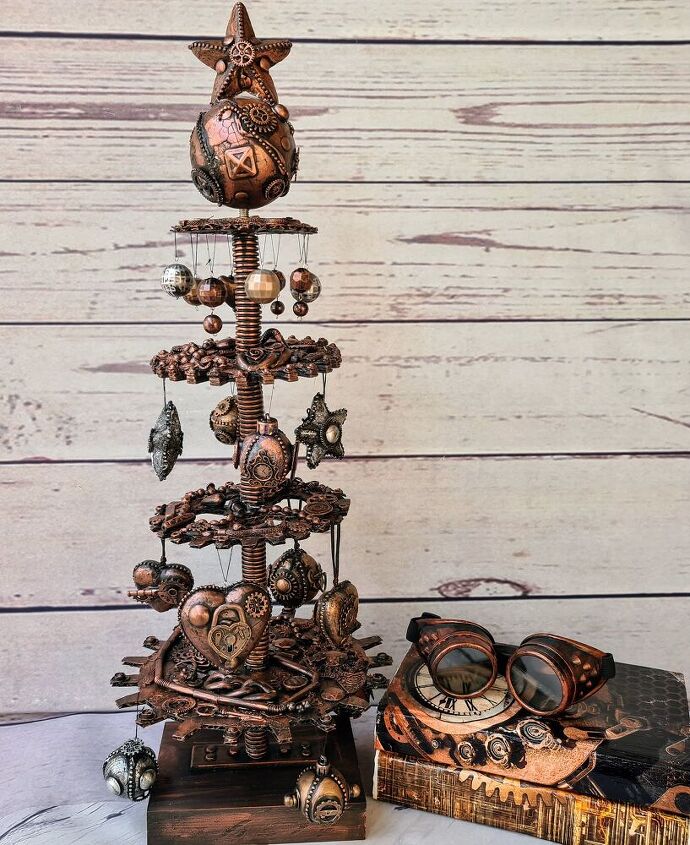
And this was my final Christmas tree,100% unique.
My cost for this project was very low because I used all items I had at home. Your cost will depend on what items you need.
For more detailed instructions or to just see more images you can visit my website listed at the bottom of the page.

More DIY Christmas ideas for you. These cute frames were made using recycled photo frames.

Another alternative to the traditional Christmas tree is this wooden corner Christmas tree shelf. It can be used at Christmas as a Christmas tree. After Christmas it can be used as a regular shelf.
Resources for this project:
See all materials


Comments
Join the conversation
-
I love streamline stuff! I will give this a try. Love repurposing and save all kinds of ornamental junk just like you. Lol.
-
I love this technique. So many things we can do!! Thanks!!


Frequently asked questions
Have a question about this project?
Can I use black chalk paint instead of black Gesso?
Very cool steampunk decor! Love it!