


DIY Wooden Christmas Tree
While planning our Christmas decorations I decided to make some new items. I cherish our heirloom decorations, but I wanted something new too, therefore, I decided to DIY some new tree decorations, stockings, blanket ladder, and tree box.
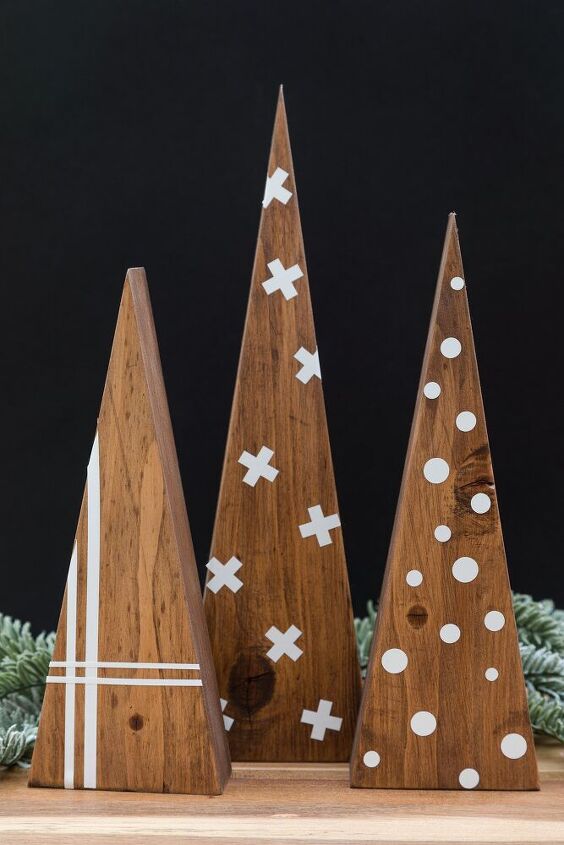
Since all our walls are white we needed something to warm up the decor so I wanted to add wood tones to our Christmas decor in the dining room. Hence, the Scandinavian Christmas Trees would be easy using the leftover wood from the blanket ladder and using the same vinyl designs I used on my DIY Christmas ornaments.
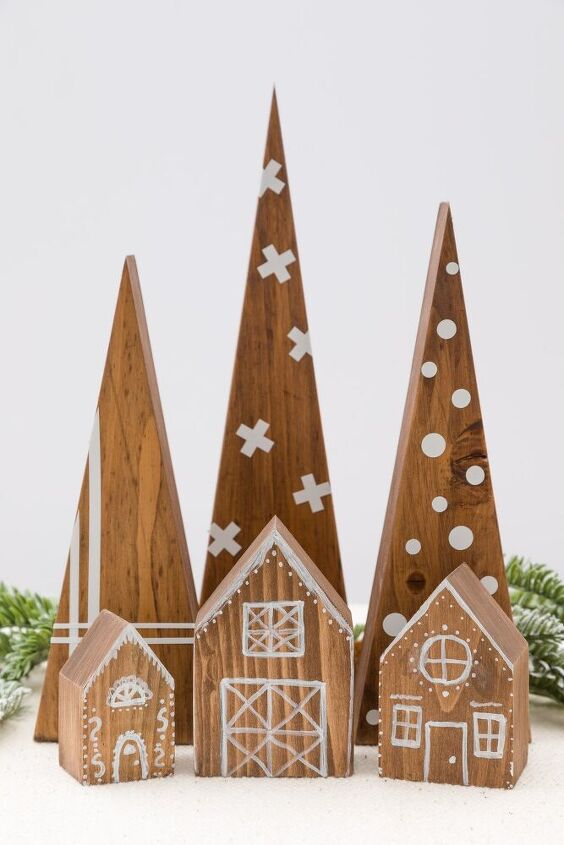
Those cute little gingerbread houses we made with the leftover wood (you can see how HERE.)
How to Make Wooden Christmas Trees
Supplies and Tools
- 2 x 4 wood scraps
- Table saw
- Sandpaper (100, and 200 grit)
- Pencil
- Patterns
- Stain
- Chemical Gloves
- Foam
- Vinyl Decal
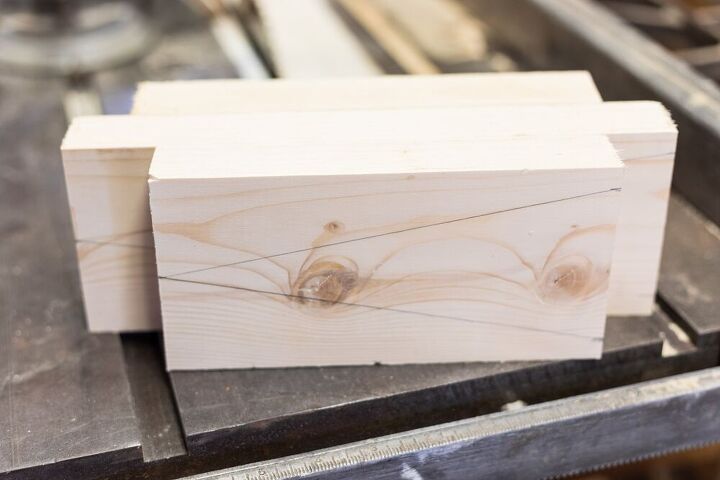
Use your printed pattern and trace out the trees on the wood (this is will be your cut line.)
.
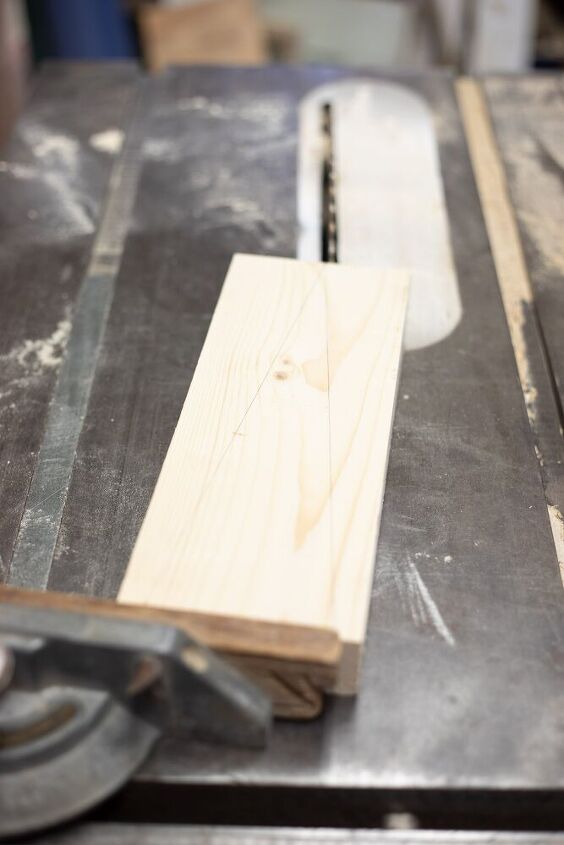
To establish the correct angle for each size of trees you will need to line up the traced line on the right side of the tree starting at the top point. Then push the miter fence to meet the bottom of the block of wood and secure the fence at the angle.
Note: Each size of the tree will be a different angle
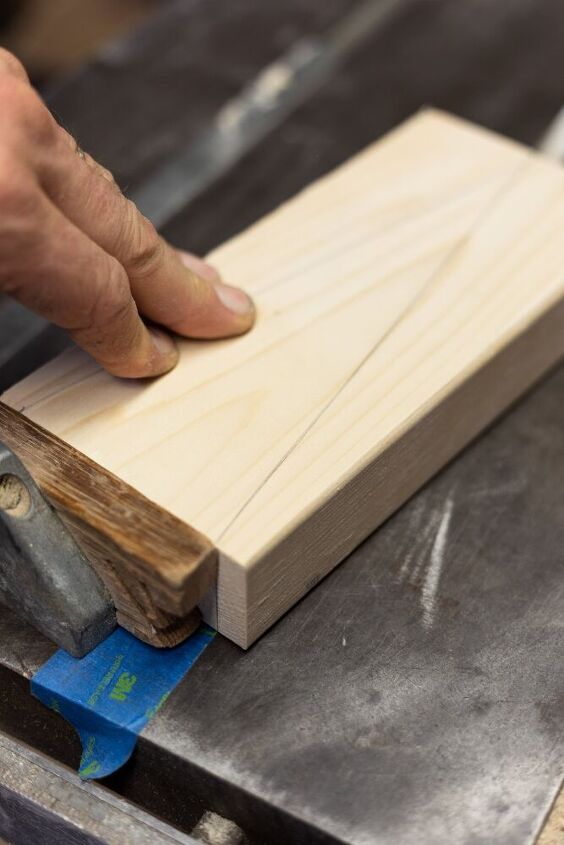
We added a piece of painters tape to mark the center of the saw blade.
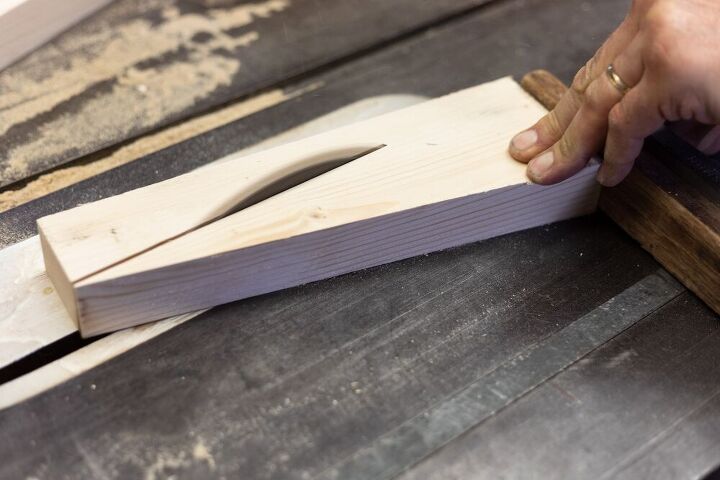
To cut the other side you will turn it over and cut in the same fashion as the first.
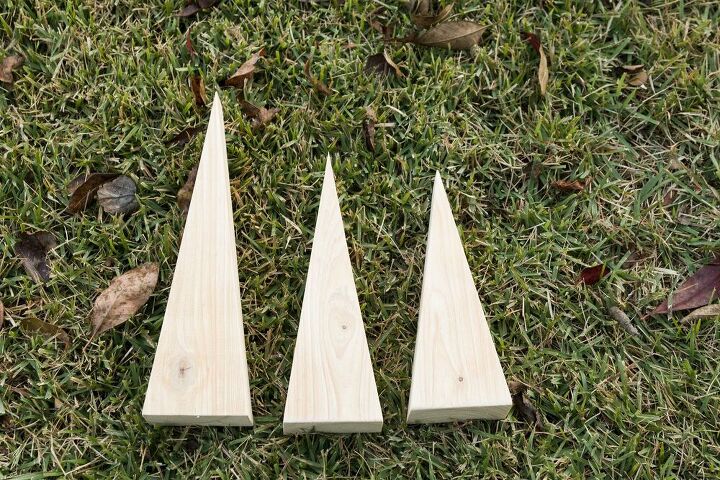
Once the trees are cut out you are ready to sand any rough edges first with 100 grit sandpaper and then again with 220 grit sandpaper.
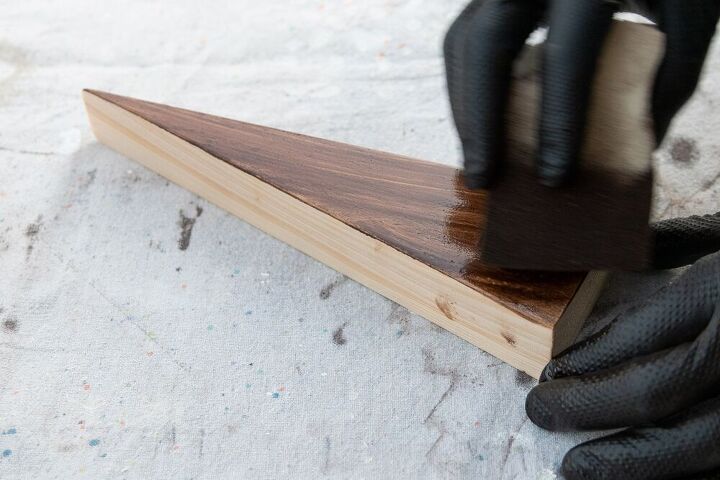
For our favorite method of staining, we use a piece of upholstery foam and simply dip the foam into the stain and apply it to trees. Follow the manufacturer's instructions on the can.
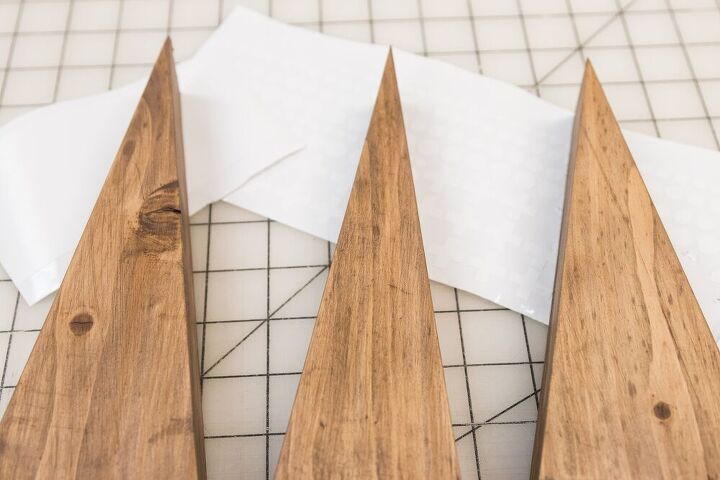
Apply decals on the trees in any design you like. I used the same designs I used on my Christmas ornaments.
Thank you so much for your visit today. I hope you found some inspiration.
See you soon,
Kippi
Resources for this project:
See all materials


Comments
Join the conversation
-
I like!😍
-
Super cute! And actually doable!


Frequently asked questions
Have a question about this project?