


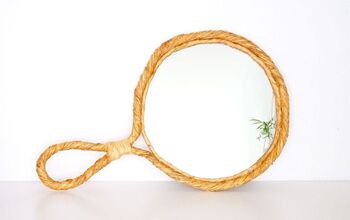
How To Make Sun Shaped Mirrors

by
Joy
5 Materials
$20
90 Minutes
Medium
Sun-shaped mirrors are in! They are fun and original accessories that, without a doubt, make any room unique. With just a circular mirror, a bit of wood and a few straws you can make yours … Are you up for it? Be careful step by step!
WHAT DO YOU NEED? Tools
WHAT DO YOU NEED? Tools
- Spade bit Compass Pencil Sandpaper keyhole saw Drill Scissors
- Instant adhesive with brush Mirror Wood or MDF board Paper straws Spray paint
1. Cut the circular pieces
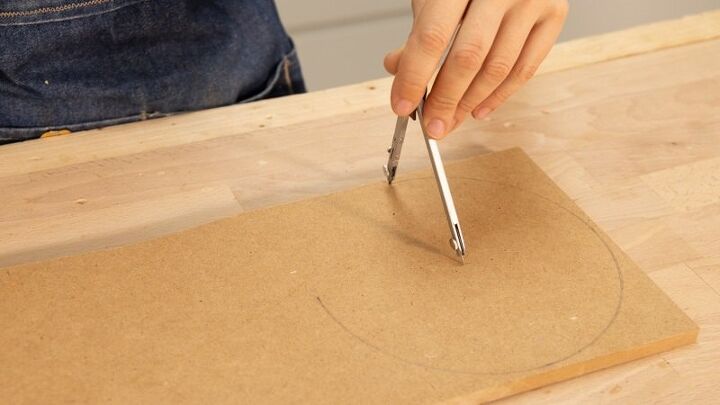
Let’s do it! The first step of your mirror in the shape of the sun is to create the base on which your mirror and the straws will be placed.To do this, start by drawing two circles of equal size on a DM board. The diameter of these should be a few centimeters larger than that of the mirror, at least two centimeters, since this extra space will serve to hold the straws. Then, within one of the circles, make another concentric one, this time of equal dimensions to your mirror.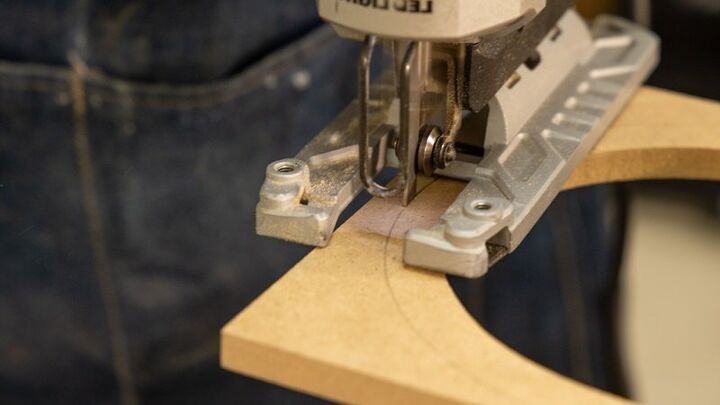
You have already drawn the two pieces of wood that make up the base of the mirror: one closed circular and another, also circular, but with an interior space, in the shape of a ring. The first will be the base that will hold the mirror and the second will act as a frame.Cut both pieces with a jigsaw, following the marks you made with your compass. The hoop-shaped piece requires a bit more work: to cut the inner circumference, the easiest thing is to take a drill and a spade bit, and drill a hole inside the wood surface to be scrapped, like this you can easily insert the saw.

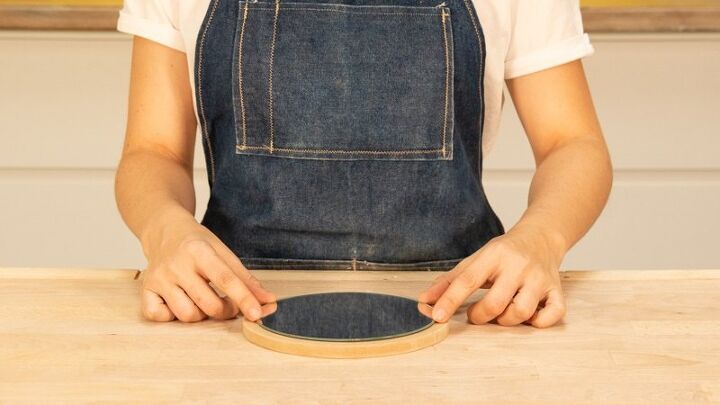
2. Sand the pieces
To improve the finish and make sure the result is as smooth and professional as possible, take sandpaper and run it along the edges of both pieces of wood.
3. Glue the mirror to the base
Next, you have to attach the mirror to the base. To do this, take mounting adhesive and apply it to the back of your mirror. Then, join it to the base by moving both pieces slightly to set the adhesive, and press hard on the joint for a few seconds. At the same time, make sure the mirror is as centered as possible.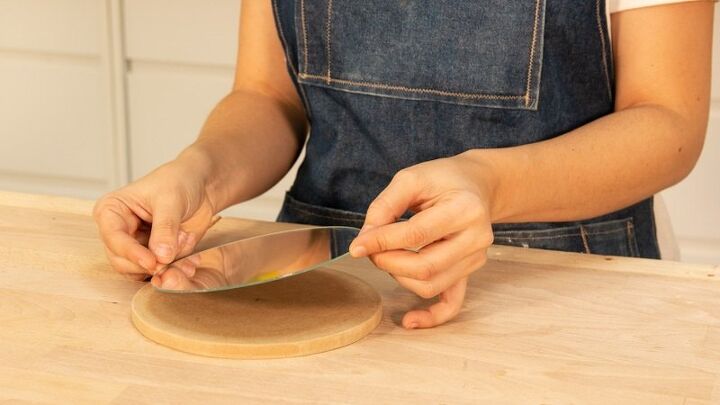
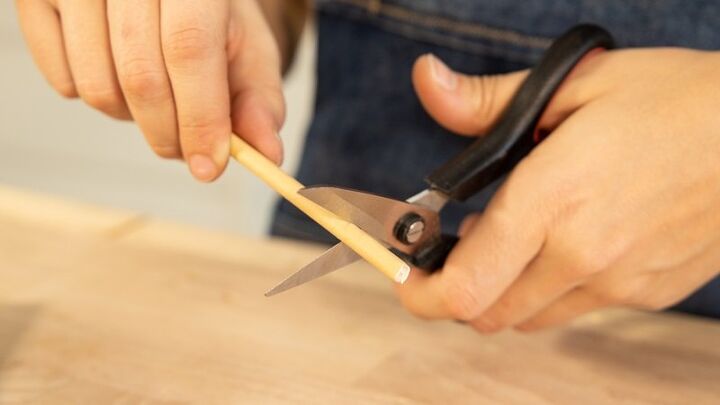
4. Cut the straws
Time to cut the straws that will make sunbeams! This step is key, as it will be the one that gives the most personality to your mirror, so take your time to decide what shape you want to give your sun. We chose a design that called for straws cut into 6 different sizes.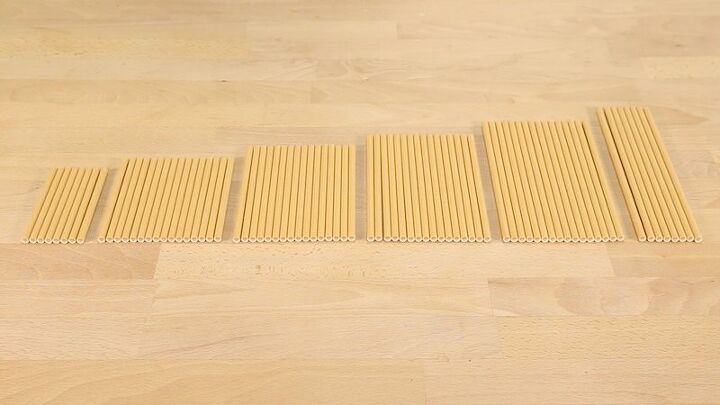
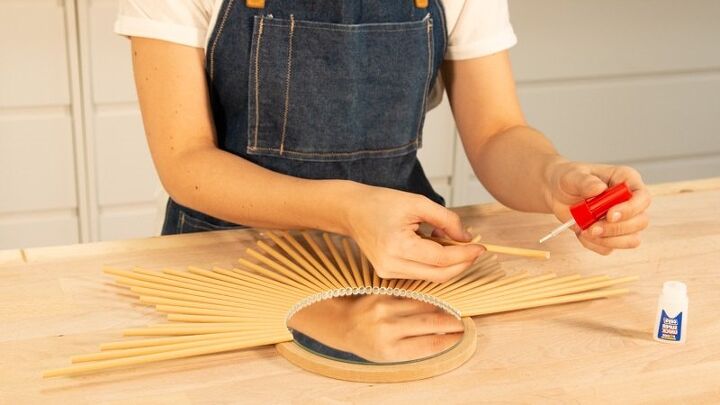
5. Glue the straws
Next, glue the straws according to your design. We have been interspersing the sizes, so that, gradually, they will form 8 large “peaks” or rays of the sun. To do this, apply a little liquid glue on one of the ends of the straws and press them on the wood that surrounds the mirror, until all your “sun rays” are perfectly adhered.It is best to use a glue that acts instantly, so that the process is much faster.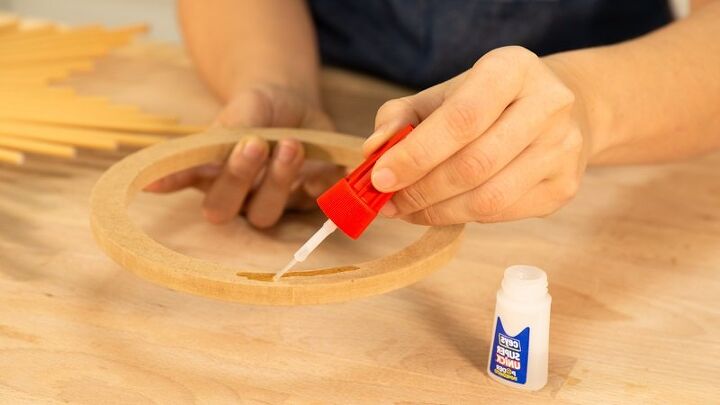
6. Glue the front piece
Now, you must finish the structure of the sun by placing the wooden “ring” that you cut at the beginning. This time, you have to place it framing the mirror, over the straws. Apply the same adhesive that you used to glue the straws on one of its sides and adhere it.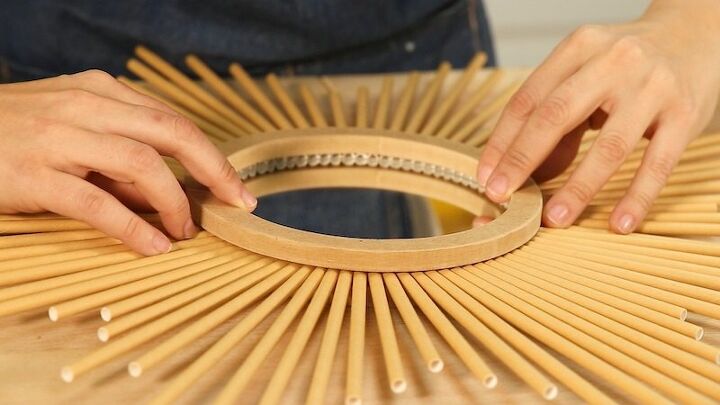
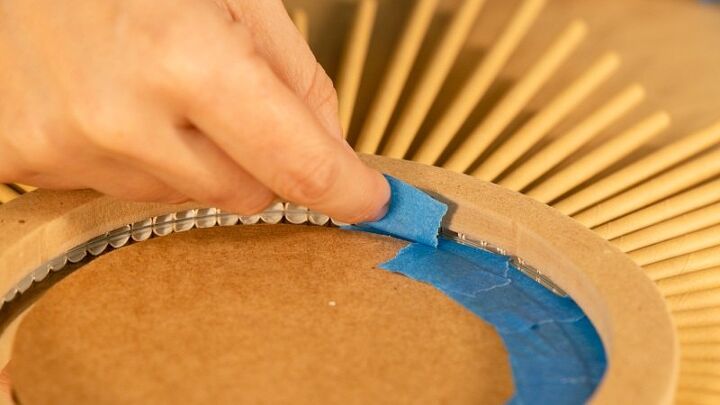
7. Paint the pieces
Time to color your mirror! In this case, spray paint is the most convenient and easy to apply. Before applying, cover your mirror to prevent product stains (you can do it with a circular piece of wood and masking tape). Then, spray the paint over the entire surface and let it dry as long as the manufacturer indicates.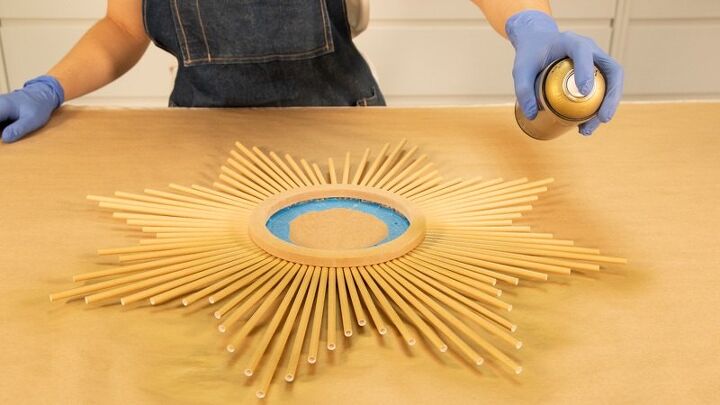
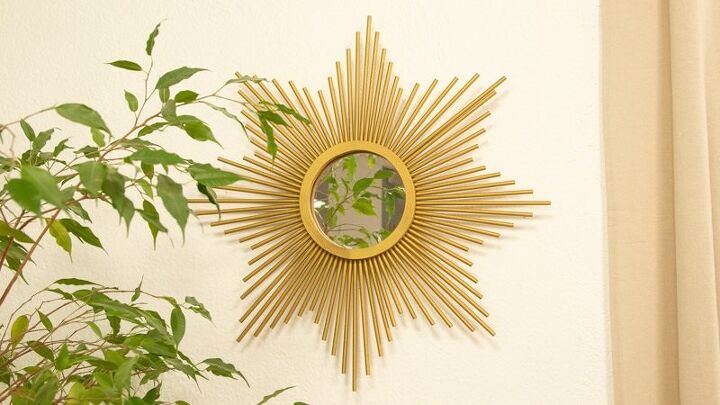
And ready! What do you think of this original mirror? Tell us about it, as well as any questions or suggestions, in the comments section.
Resources for this project:
See all materials


Any price and availability information displayed on [relevant Amazon Site(s), as applicable] at the time of purchase will apply to the purchase of this product.
Hometalk may collect a small share of sales from the links on this page.More info
Want more details about this and other DIY projects? Check out my blog post!
Comments
Join the conversation
2 of 20 comments
-
Gorgeous
-
Awesome


Frequently asked questions
Have a question about this project?
I HOPE THAT SPRAY PAINTING THE STRAWS WOULD NOT CAUSE THE PAPER TO WILT AND COLLAPSE. APPARENTLY NOT, SINCE YOUR PROJECT IS REALLY BEAUTIFUL.
Do you have much trouble dusting it?
Love the end result! Questions: (1) Could you have spray painted the straws and MDF first before using glue? (2) Can you see the end of the straws inside the mirror area after painting?