


How to Make a Plaster Bench
The plaster is not only used to cover cracks and holes … Did you know that you can use it to do a lot of crafts? This time we bring you a simple tutorial so you can learn to make a very original decorative bench with it.
WHAT DO YOU NEED?
Tools
- Round bowl
- Spatula
- Flexometer
- Sandpaper sheet
- Pencil
- Pallet
- keyhole saw
- Sandpaper block
Materials
- Masking tape
- Plaster
- Wood Ribbons
- Painting
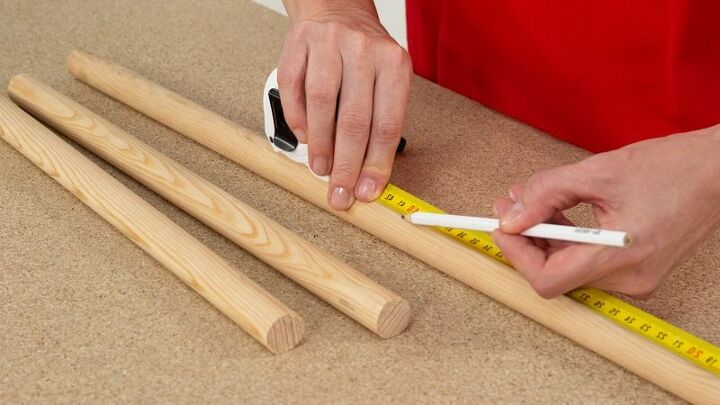
1. Measure and cut the bench legs
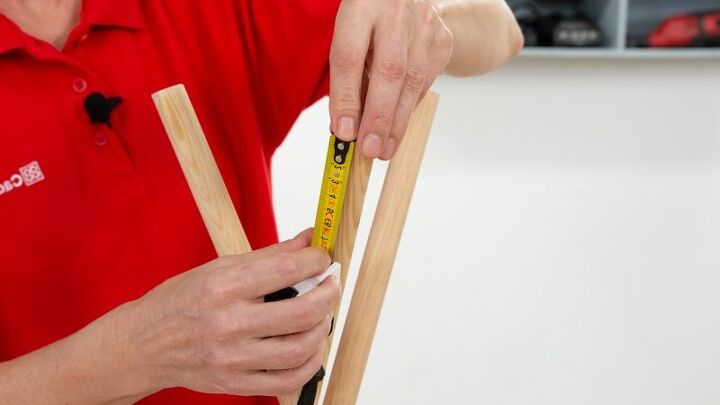
Let’s do it! The first step is to create the legs for your plaster stool. To do this, start from a long, cylindrical wooden slat.
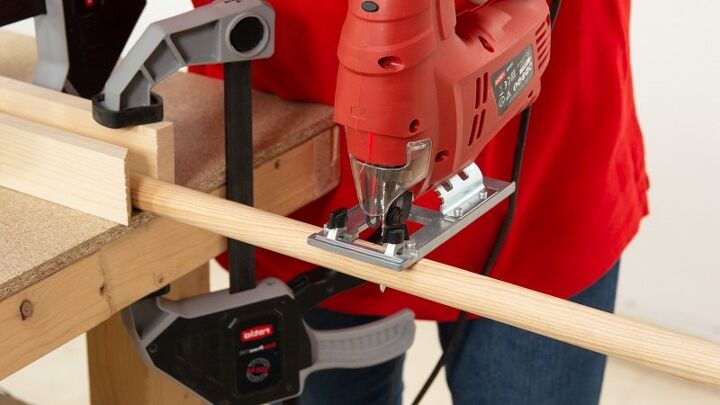
You have to get three equal legs. When you’ve decided how long you want them to be, take a pencil and make some marks on the ribbon to be your guide during cutting. Then you just have to cut with your jigsaw following the marks.
To make the cut in the safest way, we recommend that you place each cylindrical slat between two flat sergeant slats, thus significantly improving stability and preventing accidents.
The measurements of the legs can be adapted to your preferences. In this case, the legs were 40 cm long and the diameter of the slats was 3 cm. We recommend not using a smaller diameter, as it may not support the weight of the seat.
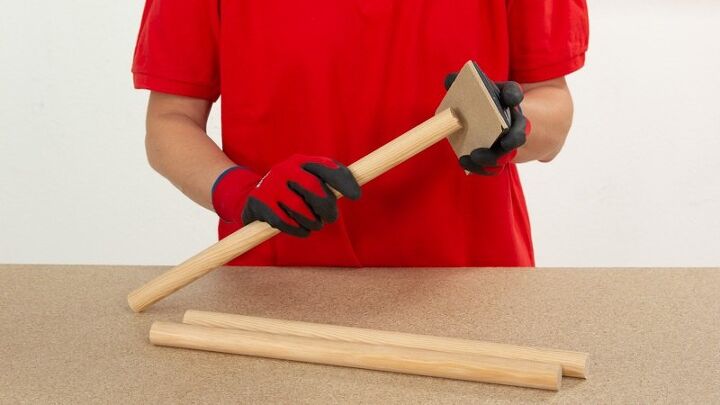
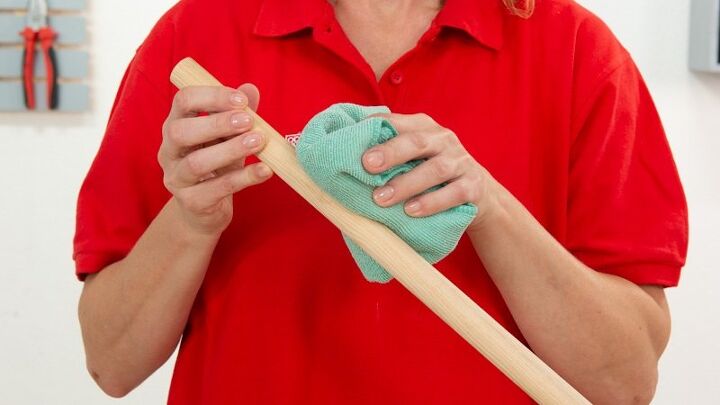
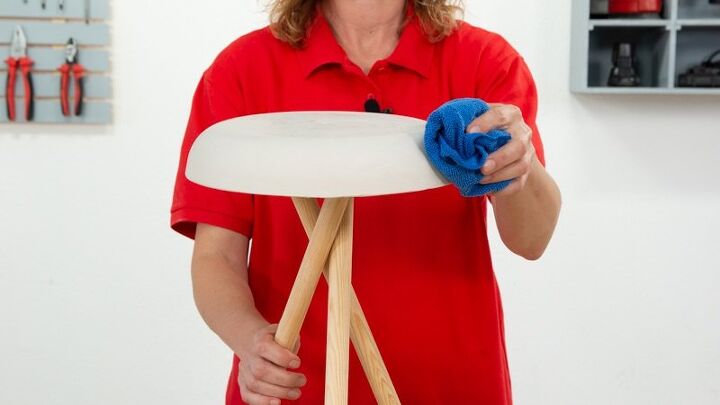
Once you have the three legs, you can improve their appearance by sanding the ends or any imperfections that may have occurred in the wood at the time of cutting. You can also wipe the entire surface with a damp cloth to remove any dust or dirt.
2. Create the plaster seat
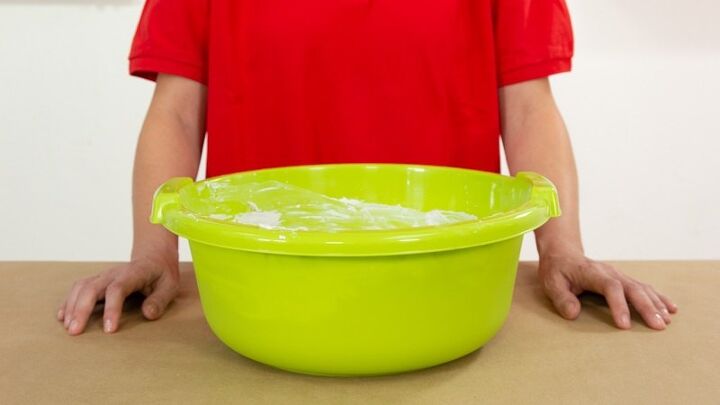
Once the legs are ready, it is time to begin making the bench seat.
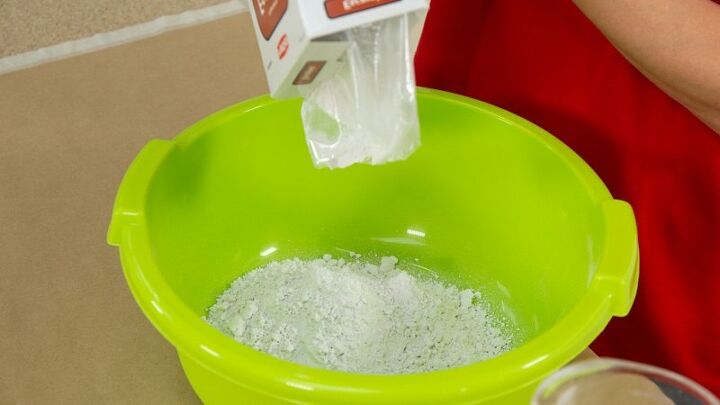
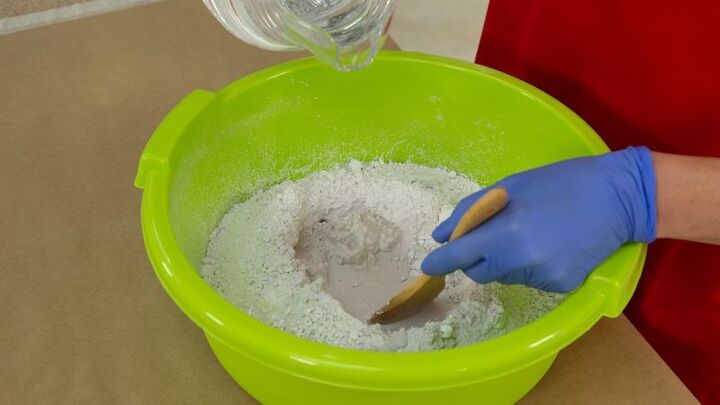
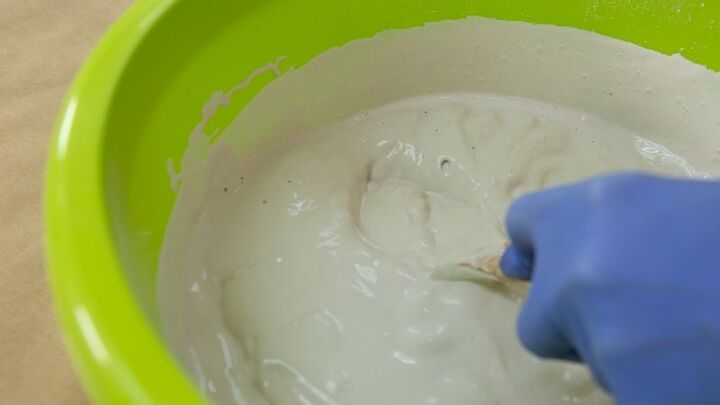
To do this, take the bowl that you are going to use as a mold for the seat and make the plaster mixture inside. The process consists of pouring in the product, while mixing it little by little with water, until obtaining a homogeneous paste without lumps. To remove it you can help yourself with a wooden spoon.
When you are done, tap the container a few times to remove any air bubbles that may have formed inside the mixture.
The correct proportions of water and plaster will depend on the product you are using, so read the manufacturer’s instructions carefully. In this case, 750 ml of water was used for each kg of plaster.
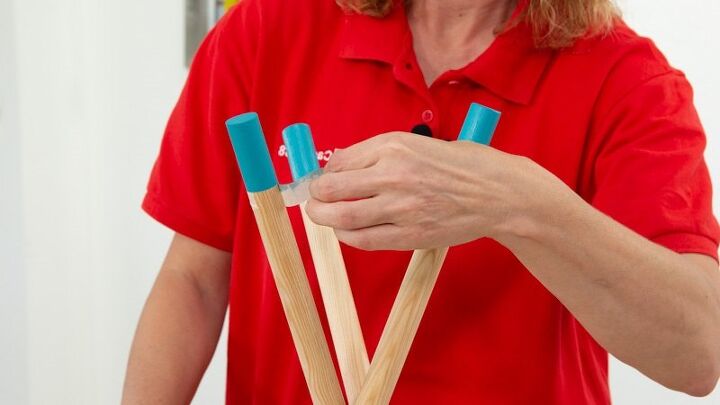
3. Attach the legs to the seat
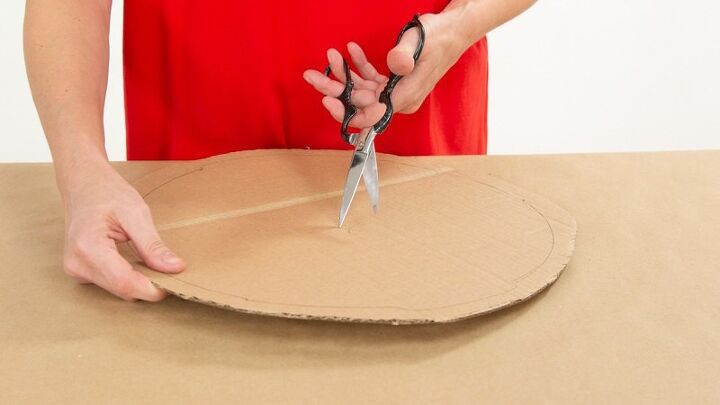
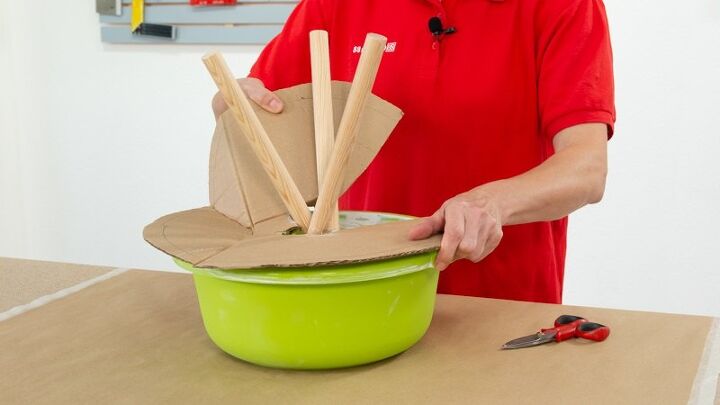
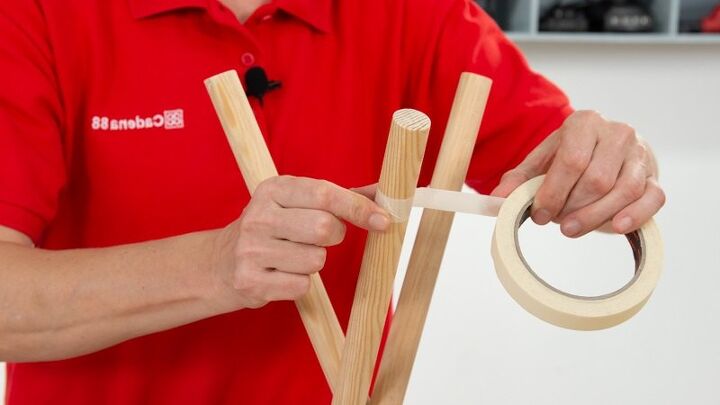
Before the cast dries completely, insert the legs into it so that they meet the seat and the stool is complete. To do this, you will need a sheet of cardboard a little larger than your container or bowl as a guide. Use scissors to make a hole in the center of the cardboard piece and place it over the container.
Next, insert the three legs of the bench through the central hole, giving them the necessary opening for stability.
To avoid setbacks, have the piece of cardboard ready before making the plaster mix, especially if your plaster is quick-drying, like the one used in this case.
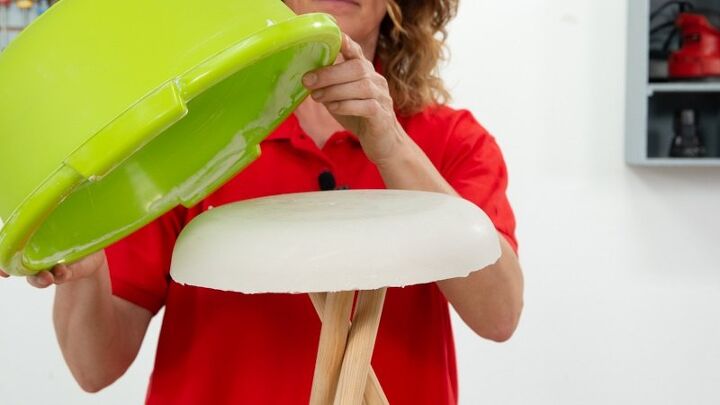
When you see that the plaster has dried, remove the cardboard and, without fear, go around the side. Open the edges of the container a little several times and you can quickly separate it from the side.
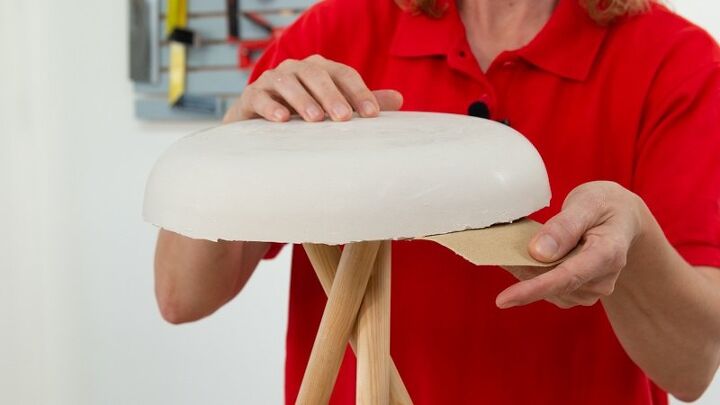
Then sand the base of the seat if necessary and remove any dust with a clean, dry cloth.
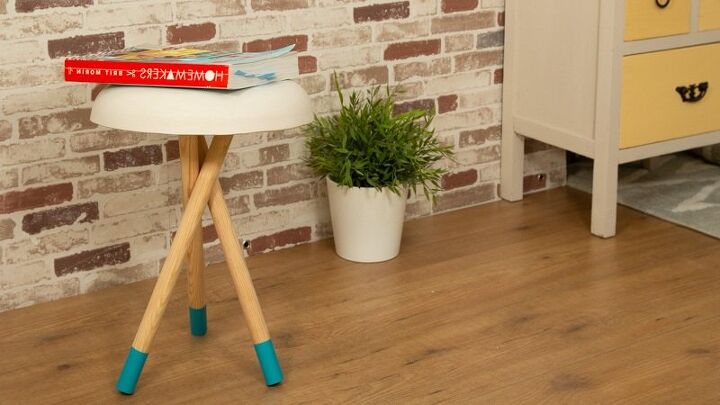
4. Customize the bench legs
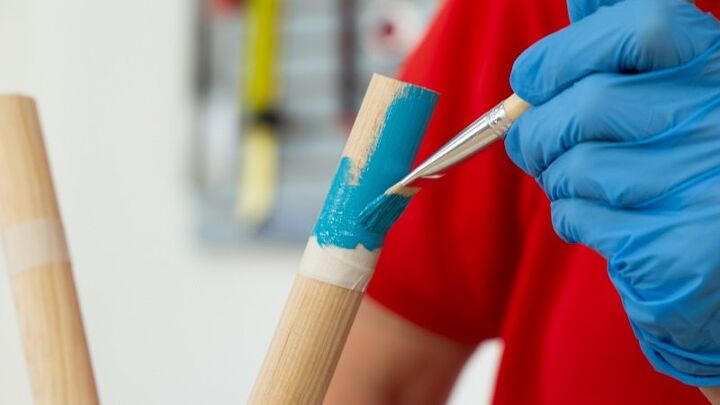
You already have the structure of the stool ready! But if you want to give it a little more personality, we encourage you to add a touch of color to the legs.
You can do like us and paint the final centimeters of each leg in a vibrant color. With a tape measure and a pencil, mark how far you want the touch of color to go and separate it from the rest of the leg with masking tape. Paint the ends according to the guide, and when you’re done, peel off the masking tape. And voila, you have your finished decorative bench!
What did you think of this idea? We invite you to tell us in the comments section.


Comments
Join the conversation
-
looks like a stool to me. and i agree with Julianna Smith, concrete and metal pipe legs would work well also :)
-
https://za.pinterest.com/nico3865/vermiculite-light-weight-concrete-plasters/
answered above but try vermiculite or perlite mixed with portland cement and you could even throw in some fiberglass or other strengthening mesh to make it super strong and almost as light as the plaster, a great idea either way.


Frequently asked questions
Have a question about this project?
Would this process be sturdy for a much larger bench like project?
Have you sat on that stool? Not sure if I would. I didn't think plaster used like that would be strong enough to hold anything much heavier than a good sized plant if that. Other than that it is a nice looking stool :)
Can the plaster be painted? Maybe spray paint in a couple of light coats?