


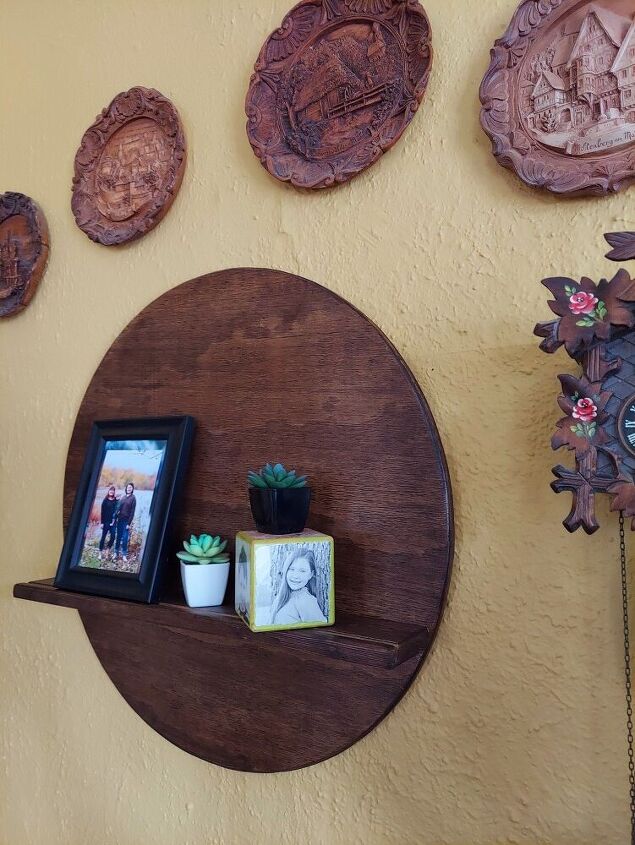
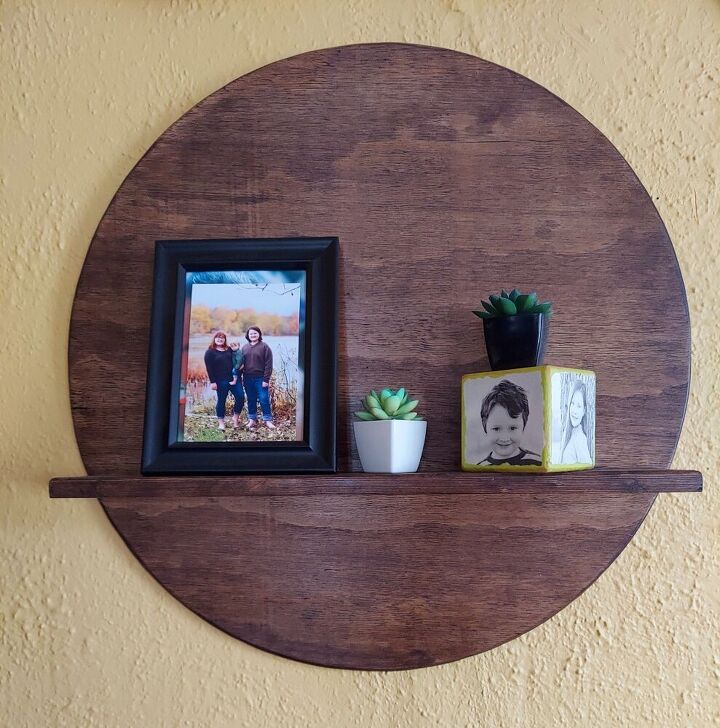
Big Round Wood Shelf DIY

After rearranging the furniture in my living room I had a space on my wall in need of "something" where a china hutch had been. Because there were some things left on that wall that I didn't want to move I wanted something rounded to fit below them. I looked around online and didn't see anything in my price range (I'm cheap, it's always hard lol). So asked my hubby if he had any scraps of wood to make me something....and this is what we did...
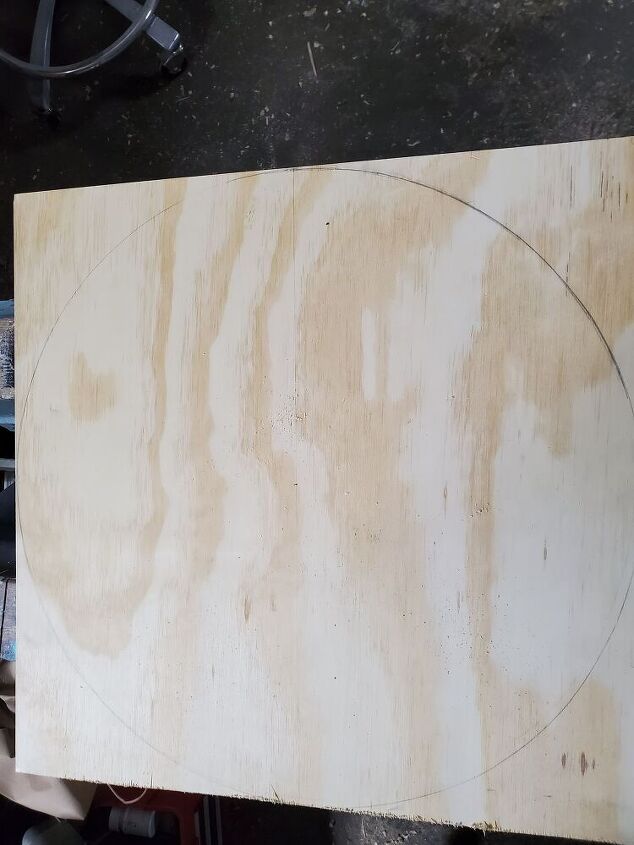
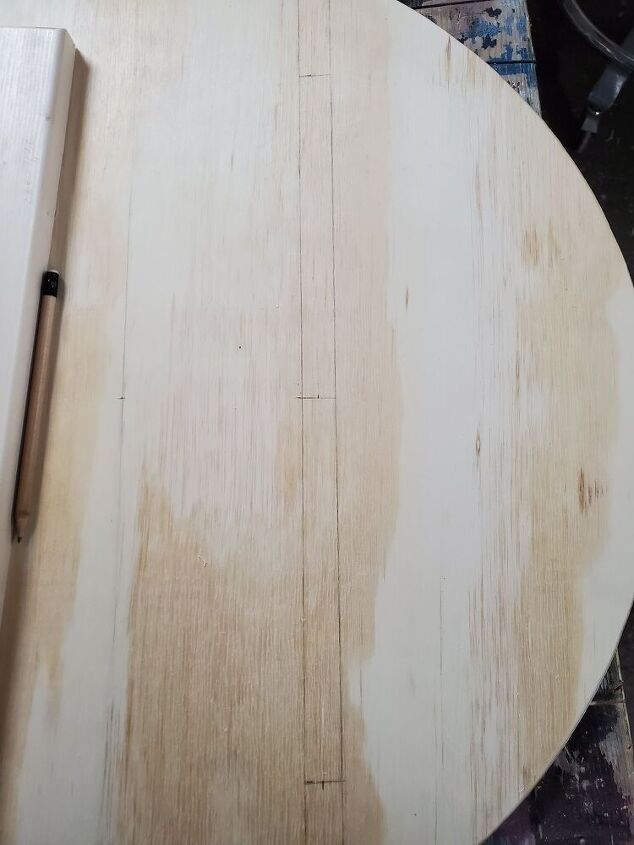
Nice plywood scraps are the cheapest way to make something. This is a 2'x'2 square piece and it's easy to draw the circle on with a nail, wire and pencil.
You can buy 2'x2' pieces of plywood for about $10 or a better deal is a '2x4' for $12. No brainer to buy the bigger piece and cut it in half and you're ready for a future project. OR you can always buy the precut round wood but it will cost a bit more for those.
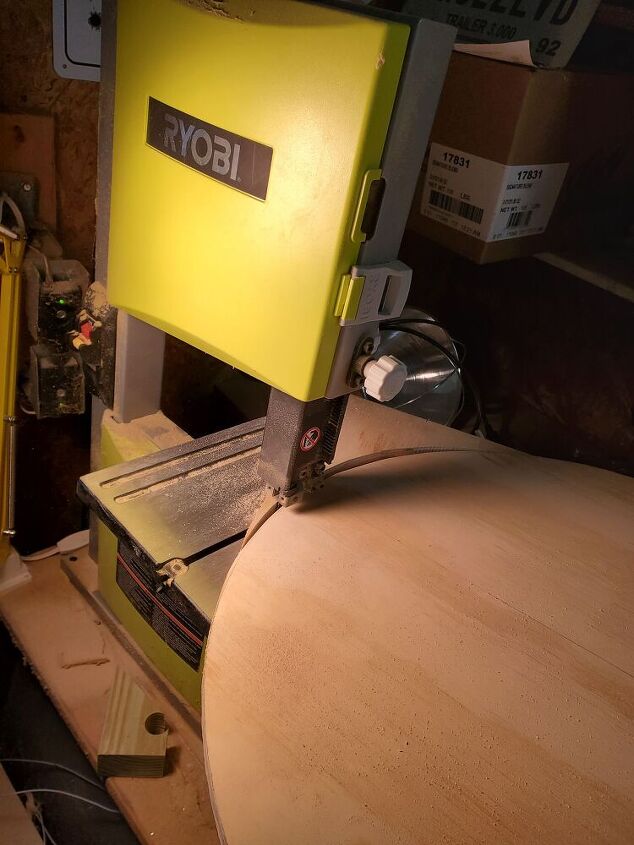
Using a bandsaw cut your circle out and sand it well.
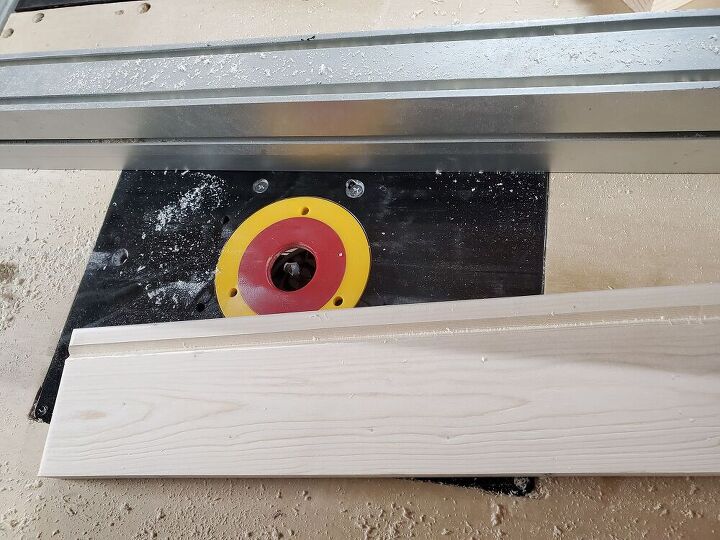
Here we used a scrap piece of wood for the shelf. Cut it to fit your round piece. If you have a router you might want to put a groove in the shelf so pictures don't slide off.
After you've decided where you want the shelf (middle or lower) you can pencil it in and attach it with screws in the back. You can glue for even more stability.
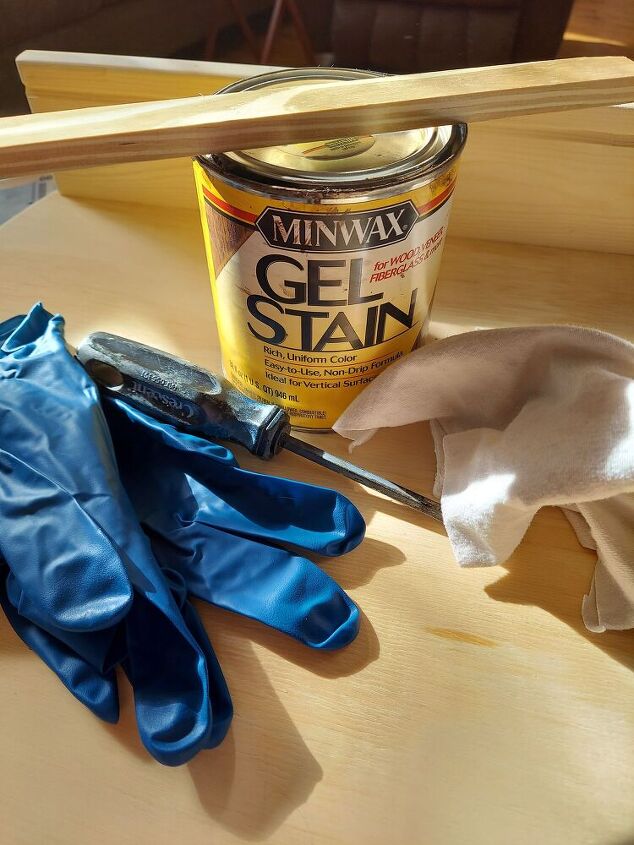
This is my part of the project- I enjoy staining and getting the shade exactly like I want.
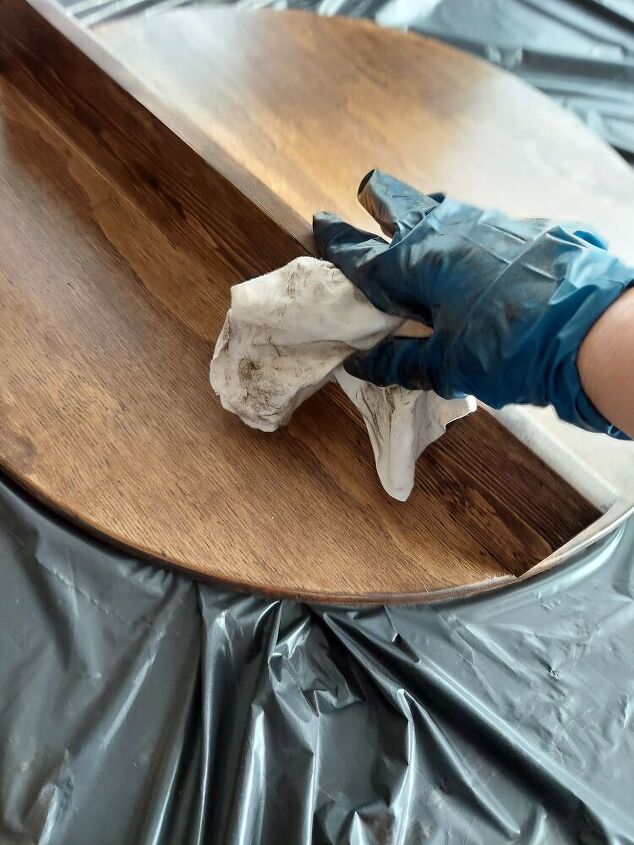
Rub that stain on, let it set, then wipe it off. If it's not the right shade you can always choose another color to change it.
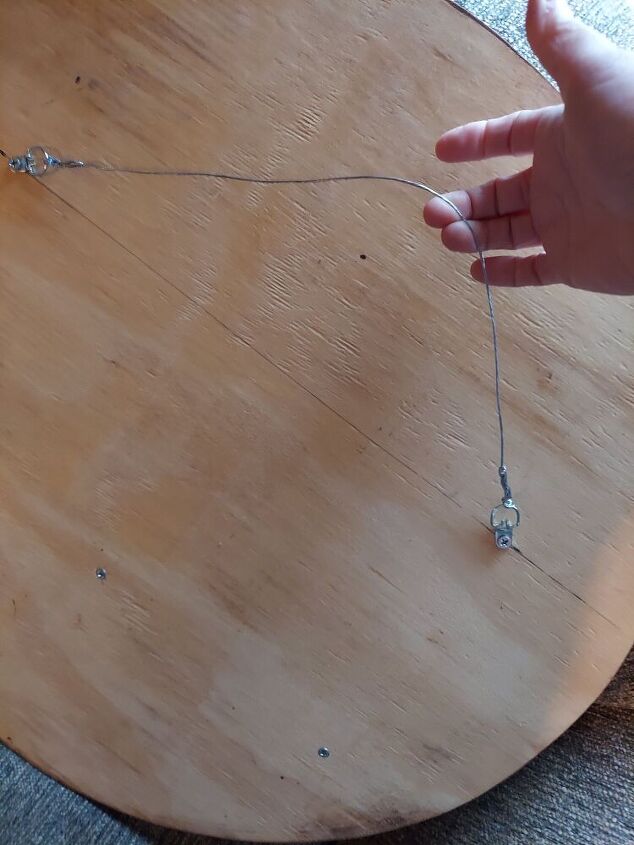
Since this is a shelf it's important to find a way to keep it straight and steady. If you use wire like this use two nails in the wall to hang it.
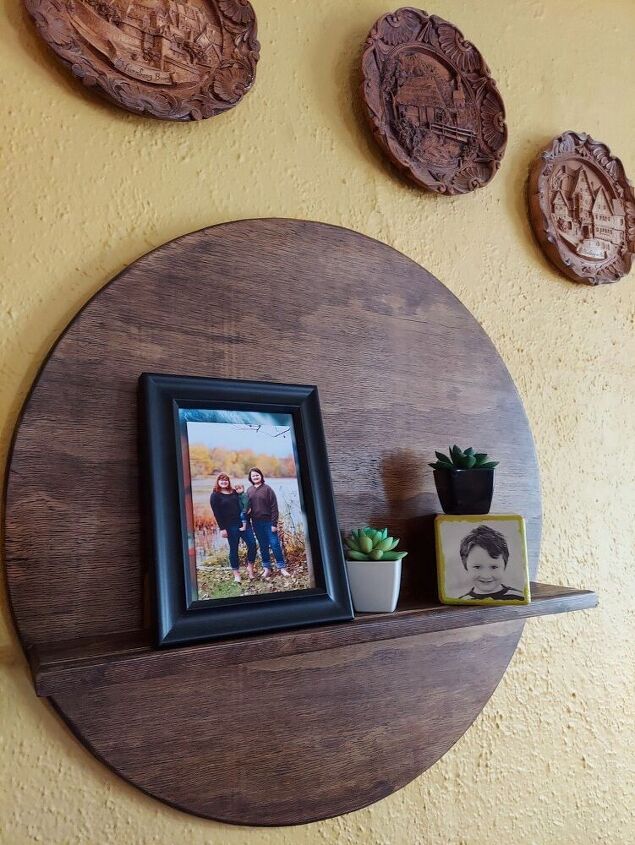
All done and I added some succulents (fake, cause I'm a plant killer) and some photos.
This was a quick, easy, cheap project!
This was a quick, easy, cheap project!
Resources for this project:
See all materials


Comments
Join the conversation
-
Love this!😍 I have been staring at a blank wall behind my love seat trying to decide what I wanted in place of the pictures that hung there. This is a fantastic idea! I especially like being able to display items on the shelf. Thank you for sharing.
-
Love it


Frequently asked questions
Have a question about this project?