


DIY Tooth Fairy Pillow
Every kid loves the tooth fairy, and they all look forward to her reward. It makes them just a bit braver when they have a loose tooth that needs to go.
But taking that tooth from underneath the pillow at night is a tricky task for us, parents. If only there was a better method for the whole thing, one that’s not as risky...

Well, now there is, and it’s called a tooth fairy pillow! The best part about it is that you can make it yourself!
It’s a special pillow that is just for the tooth fairy and not for sleeping. Your kid can put their tooth in the pillow pocket and you can replace it with money without waking them up!
If you want to learn how to make this DIY tooth fairy pillow, read on!

Prepare the pattern and cut the fabric
Download our free pattern here and print it out on a piece of paper in full size. Cut out the excess paper and the pattern will be ready for use.
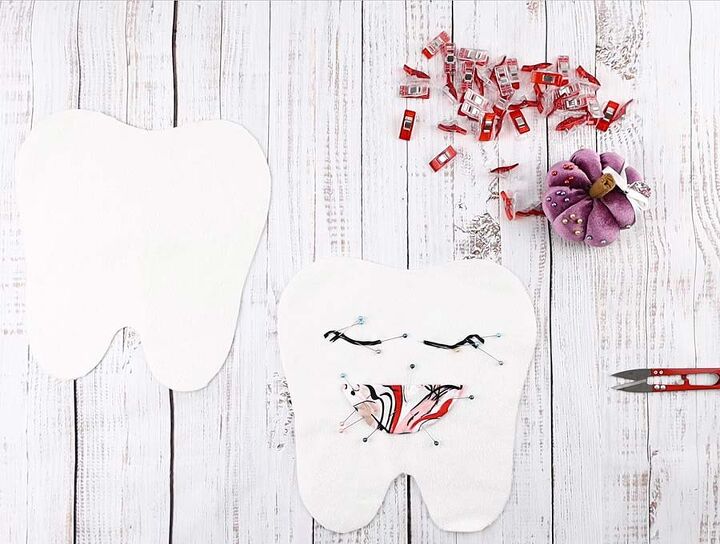
Wash the fabric thoroughly before you cut it. Use the pattern as a guide and cut out two identical pieces from the white felt and one from the colored fabric for the mouth. Do all the cutting on the fold.
 For the full step by step tutorial (and video), check out the full Tooth Fairy pillow tutorial here.
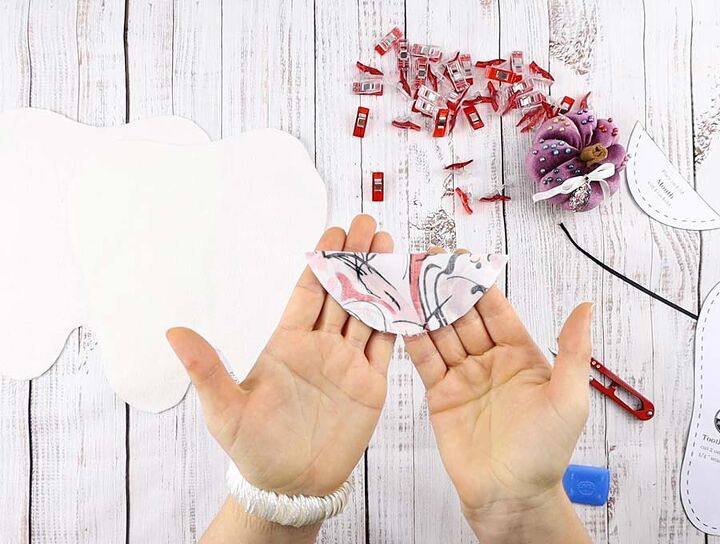
Make the mouth
Fold the mouth fabric in half wrong side in, and sew along the curve. Leave a gap unstitched for turning the fabric.
Turn the fabric inside-out and clip the corners and the curve.
For more precise instructions, check the full article here.
Make the eyes
Pin the mouth piece onto the right position on the main fabric piece.
Use short strips of ribbon to make the eyelashes. Consult the pattern for the proper position of the facial features.
Stitch the mouth and the eyes to the main fabric with a running stitch. Don’t sew on the long edge of the mouth, leave it unstitched so that it forms a pocket.
===========================================
 Check the Tooth fairy video tutorial here

Finish the tooth fairy pillow
Place the second main fabric piece over the one with the face, keeping the right sides in.
Align the edges and sew around the entire thing. Leave a gap unstitched for turning.
Clip the curves and turn the pillow inside-out.
Fill the pillow with stuffing and close the gap by hand with a ladder stitch.
The tooth fairy pillow is ready!
Hope you liked the mini tutorial!
Check the full diy tooth fairy pillow tutorial here. Have fun with the tooth fairy!
Quick video how to make this lovely pillow

Comments
Join the conversation
-
i made this craft for my 2 grandsons(5&3)! i usjust had to, i thought it was the cutest thing. i don't have a printprinter so i just free handed the pattern. i lovelove the way they turnerturned out! can't wait to give them to them! thanks for the idea!❤

-
oh and so wanted a tooth to be missing from them of course,lol


Frequently asked questions
Have a question about this project?