


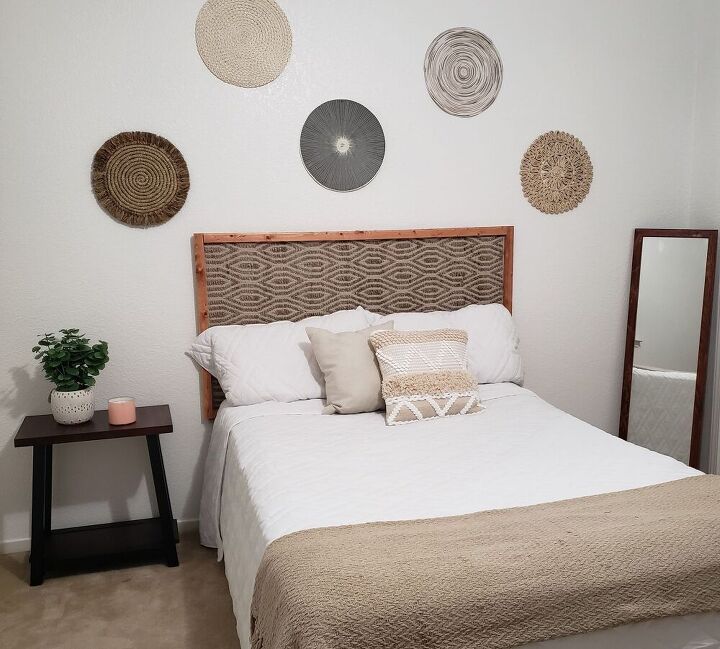
Simple, Inexpensive, yet Elegant Head Board

My daughter wanted a new headboard for her room. She had some ideas she saw on the internet so we took a rug she found at Hobby Lobby and, with some scrap wood, designed and built her a simple headboard.
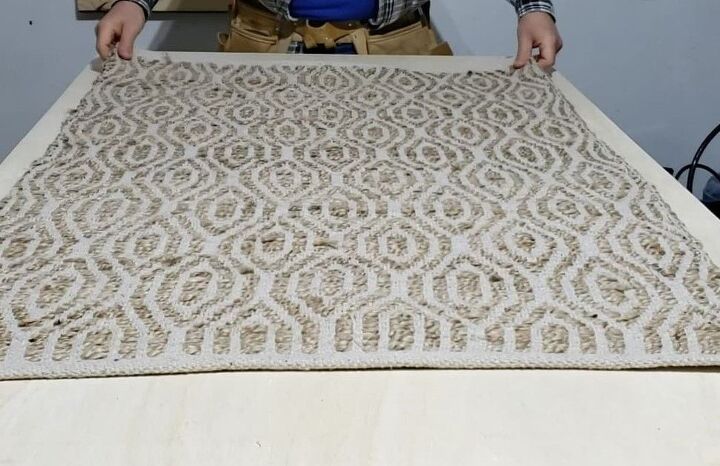
We purchased the rug from Hobby Lobby and laid it out for measurement. Now, the rug is able to be stretched but you don't want to stretch it too much since that can put strain on your staples that will hold the rug to the frame. Once I got the length and width, I added one inch to each side just to give it a little tightness once it is installed.
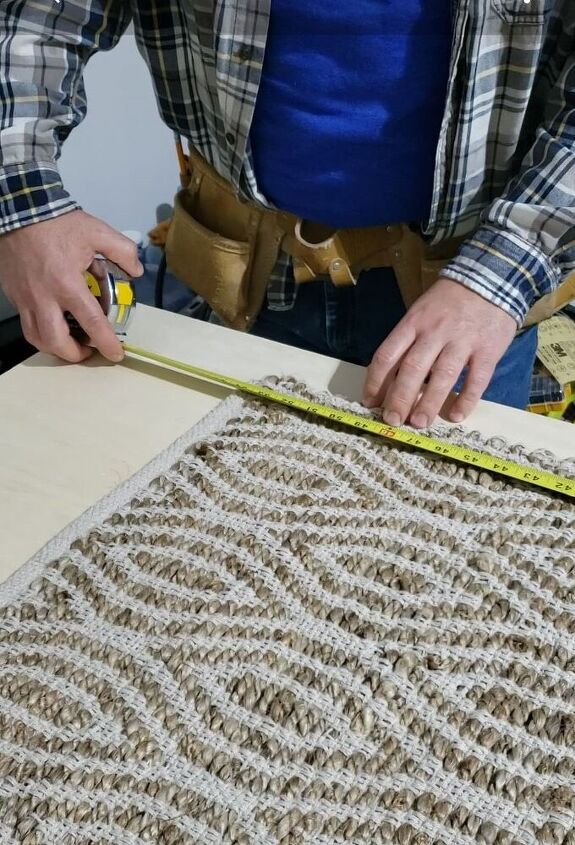
After I measured the rug I cut the 1"x2" wood into the desired lengths. I used a miter saw to get straight cuts. It is important that the cuts are really nice so that they sit flush up against each other. That will also give you some nice looking corners with the finished headeboard.
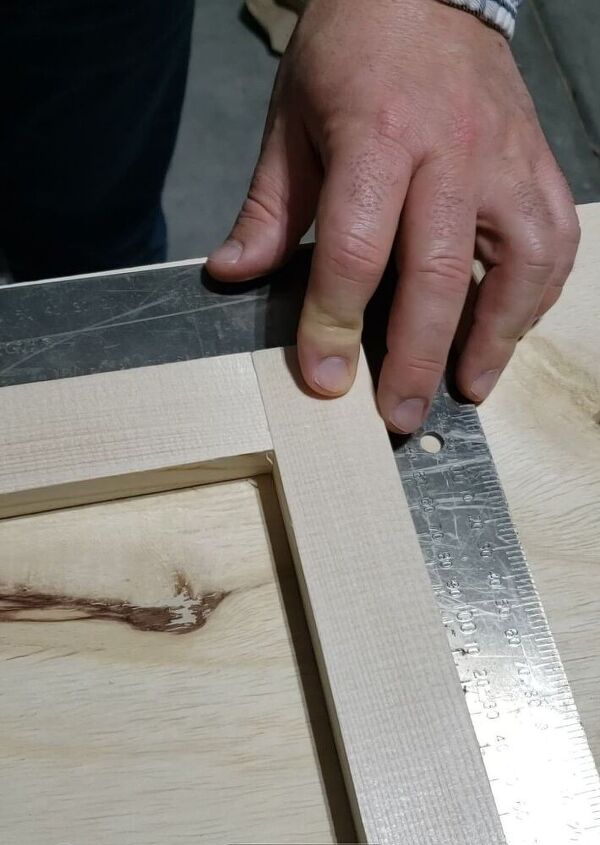
Here I am using a metal square to get a perfect 90 degree angle between the joints. That will help you get a seamless look to your frame.
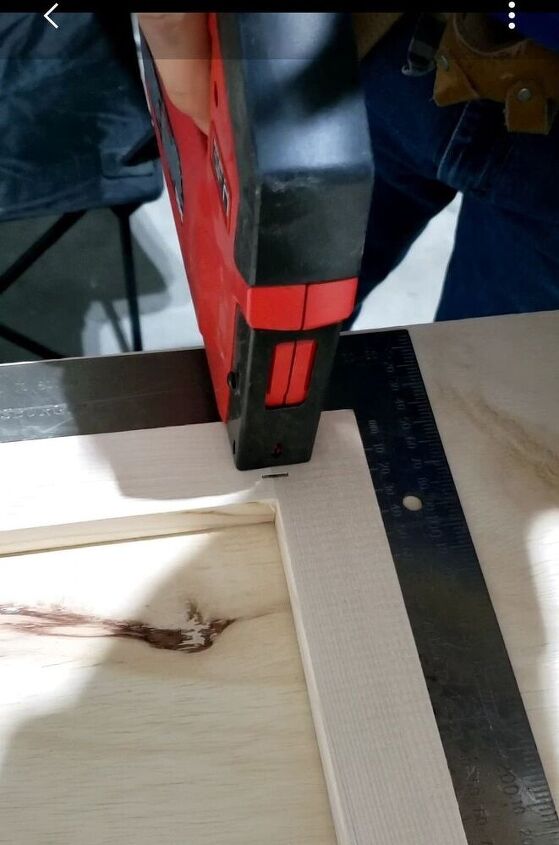
After the frame is laid and the corners flush, I used a stapler to hold the ends together. Now, this might seem like it's not strong enough to hold the joints but this is just the first step. The side you put the staples on is going to be the back side so take that into account when laying out the wood. Once you get the staples in, carefully turn over the frame.
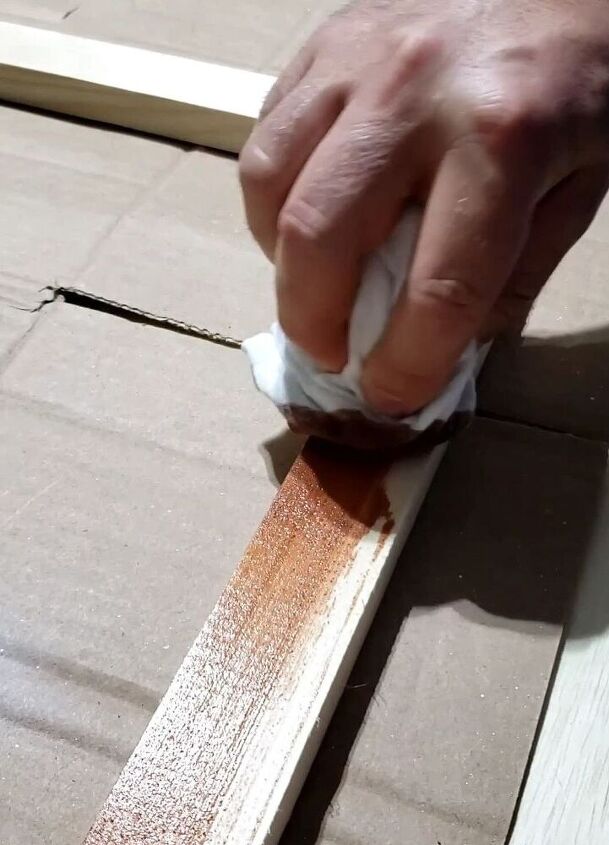
Once the frame is turned over you can now stain. If the wood is slightly rough you can give it a light sanding to start. On this project I used Minwax stain called Gunstock. After a coat of stain let it dry overnight. That way you can flip the frame over and it will not stick to your table.
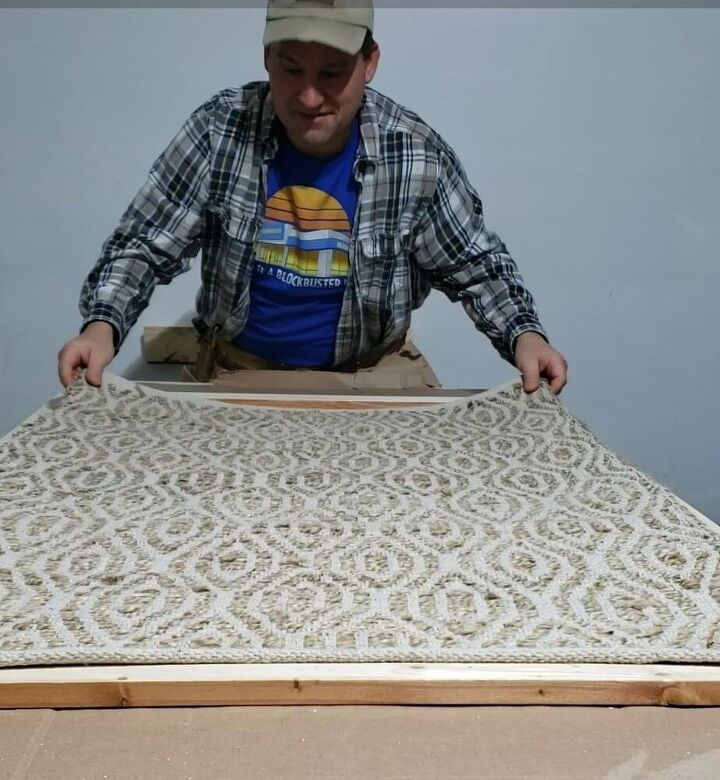
The next day I turned over the frame and laid out the rug. You will want to start on one end to start fastening your staples.
Starting at one corner I started stapling the rug to the back of the frame. I used an air stapler to do this part but you can use a good industrial stapler from the hardware store. If you don't already own one it's a good idea to invest in one since you'll be making many more projects going forward.
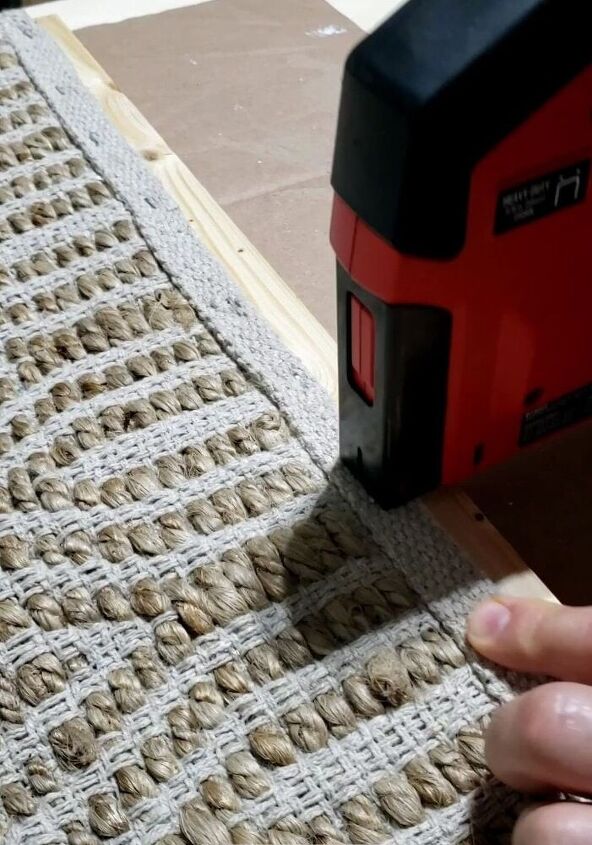
After you got one side stapled, go the the other end and give the rug a slight pull to tighten it up. Staple that end starting at one corner and working your way down. You should be putting in a staple every four inches. Once you get two sides done you can finish the other two sides. This is why you don't want to make your frame too big where you have to pull on the rug. It will put too much strain on the fasteners.
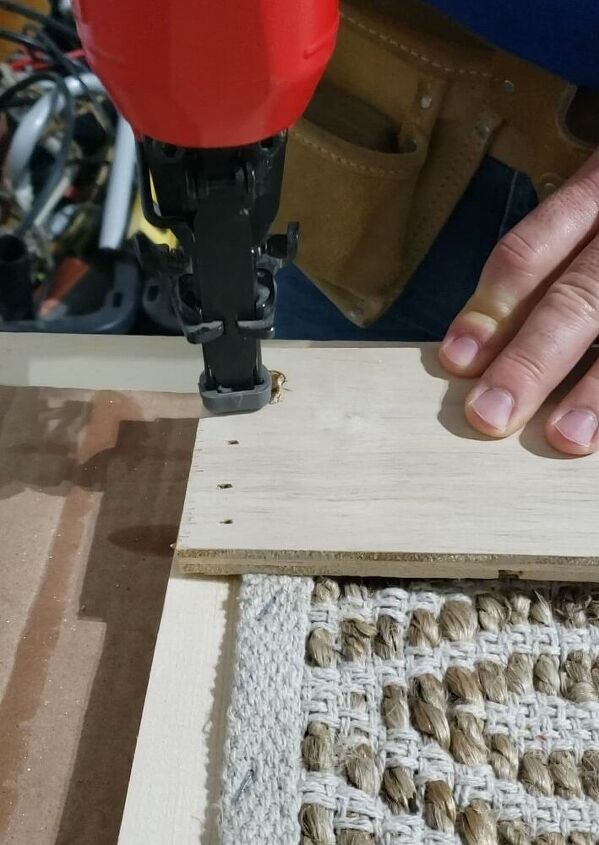
Now, we are getting close to a completed project. Here is where we install the pieces of wood to strengthen up the frame. I used four pieces of 5 inch by 8 inch plywood nailed to the corners of the frame. I was able to use a brad nailer but you can use some screws if you are more comfortable with that or do not have an air nailer. I installed these plywood braces at each corner on top of the rug. The best part is when it is hung from the wall it will give the look of a slightly floating frame since it will be about 3/4 of an inch away from the wall.
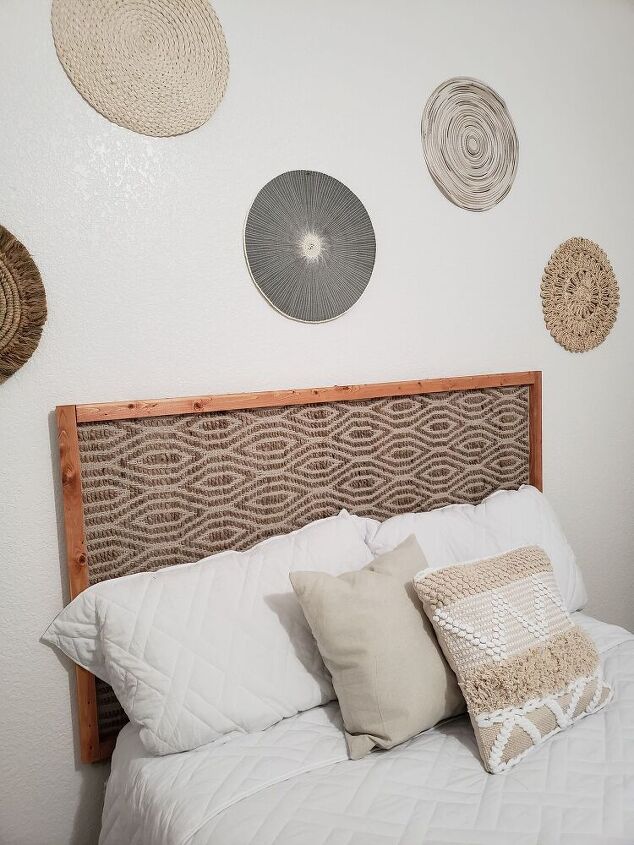
For the last step I used screws to hang the headboard to the wall. The whole piece is very light and looks amazing. My daughter then decorated her room with placemats and placed the furniture in place. She absolutely loves it. We have more projects for around the house coming up so give me a follow to see more future projects. Hope you all enjoy.
Resources for this project:


Comments
Join the conversation
-
Love it!
-
That is wonderful! I am so inspired. I would like to make one with a bright green bamboo type rug for spring and summer and a rich Persian type for fall and winter. Easy to change out to fit the decor. Thank you!


Frequently asked questions
Have a question about this project?
I like this idea. It's only not clear to me how you used the screws to attach the headboard to the wall.