


Easy Hack For Organizing Charging Cords

Cords are SO messy, huh? Nothing looks more cluttered than a wad of charging cords piled on the counter or stuffed in the corner of your desk drawer. Don’t think you need to spend money on expensive cord organizers, because you can DIY your own for zero dollars and zero cents using some supplies you’ve already got in your junk drawer.
Ready to get crafty AND organized*ish?
Hometalk Recommends!
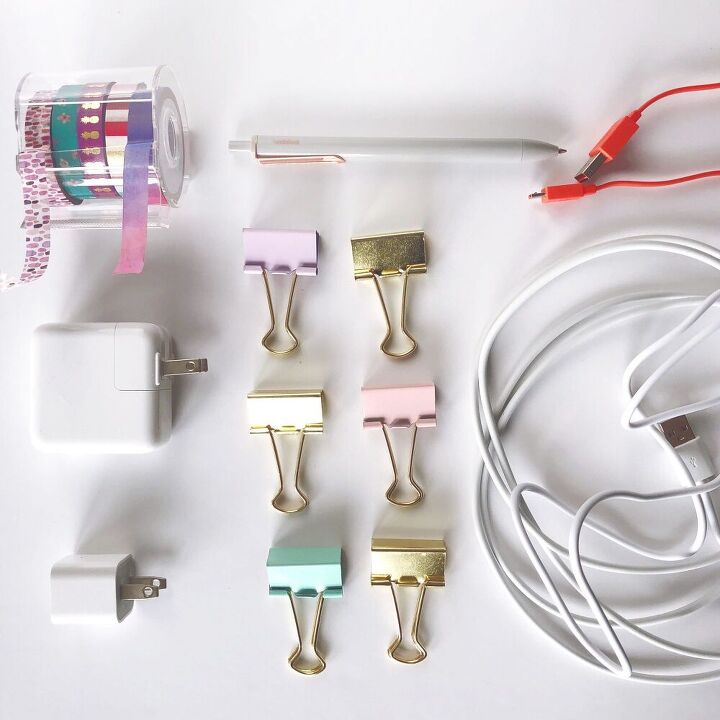
What You Need:
- Large and Extra Large Binder Clips
- Washi tape
- Scissors
- Fine Point Pen or Sharpie Pen
How Long Will It Take?
Approximately 1 minute per label. Basically faster than you could even find cord labels on Amazon and read one single review.
How To Make Binder Clip Charging Cord Organizers
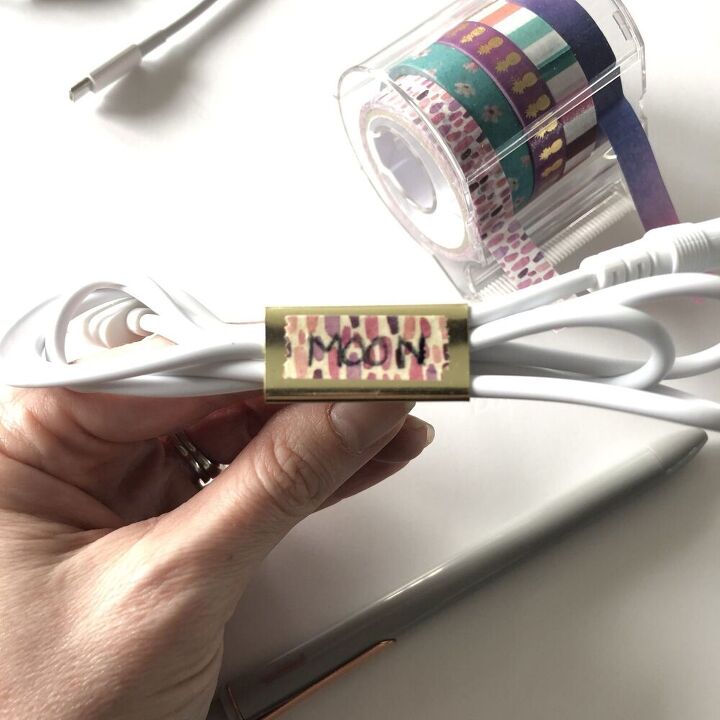
- Roll cord into a circle, then grip the circle together in the middle to bunch it up.
- Clasp the middle of the cord bunch with a binder clip of appropriate size.
- Pull off enough washi tape to fit on the flat part of the binder clip.
- Write your cord label text on the washi tape.
- Stick tape on the flat part of the binder clip.
- Repeat for the rest.

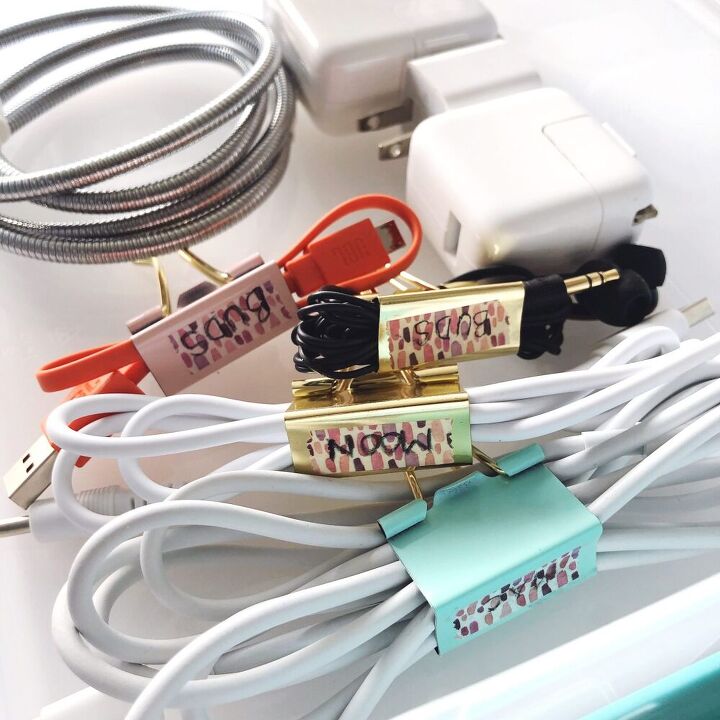
Where To Store Your Bound Cords?
I like to keep mine in a little craft container I got from Target, and the top half holds our batteries. You can store them anywhere now that they’re all bound together in clips and won’t make a huge mess.
Some good storage places are in a divided section of your junk drawer, desk drawer, or nightstand. Or a basket in your family room would also be ideal.
Want More DIYs?
You can scroll my entire DIY project library that dates all the way back to 2015 in this section of my blog. You’ll find all kinds of fun tutorials and ideas for all skill levels and time allotments. And be sure to follow me on Pinterest so you can save some of these projects for a rainy day.
Resources for this project:
See all materials


Comments
Join the conversation
-
The clips work so perfectly. Great idea!🙌
-
Just be sure to get a clip large enough to put over the cord. You don't want any portion of the cord caught in the pinchy part, for the integrity of the cord. I've stored my corded headphones this way for years. Nice and neat.


Frequently asked questions
Have a question about this project?
How can I cover the electrical box