


Easy DIY Modern Bookends
I rarely plan ahead enough for occasions that require gifts: Christmas, birthdays, etc. That means I’m often scrambling at the last minute to figure out what to buy for someone. Are you like this too? If so, I have an easy DIY bookend project for you! They make for beautiful, personalized gifts.
Sign up here to always stay updated on my latest projects!
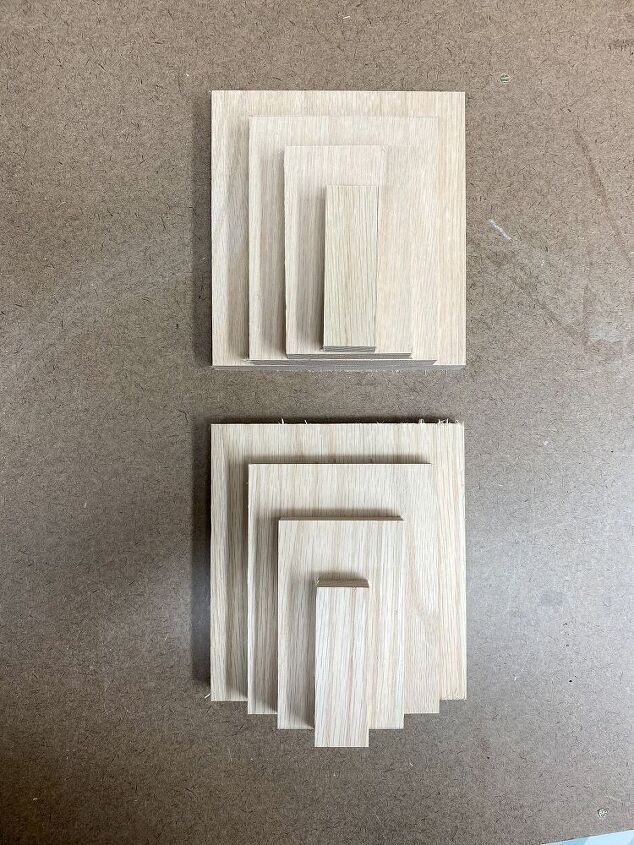
STEP 1: Cut wood.
Using scrap wood or a 1″ x 6″ x 6′ oak board, cut the following pieces to size using a miter saw:
- (2) 6″ x 5 1/2″
- (2) 5″ x 4″
- (2) 4″ x 2 1/2″
- (2) 3″ x 1″
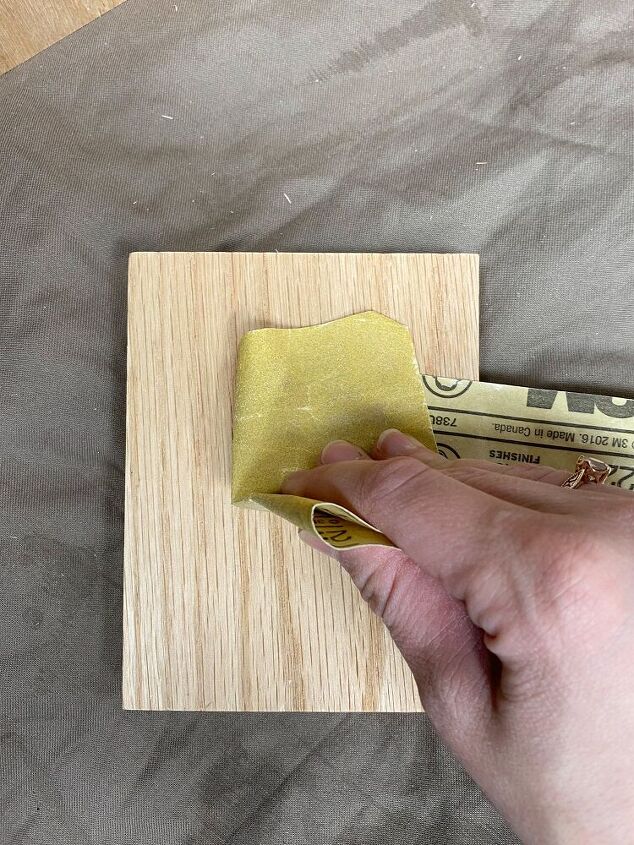
STEP 2: Sand the wood and use a tack cloth to remove any sawdust
My wood was pretty smooth already so I just quickly sanded it using 220 grit sandpaper to make sure the edges were smooth as well.
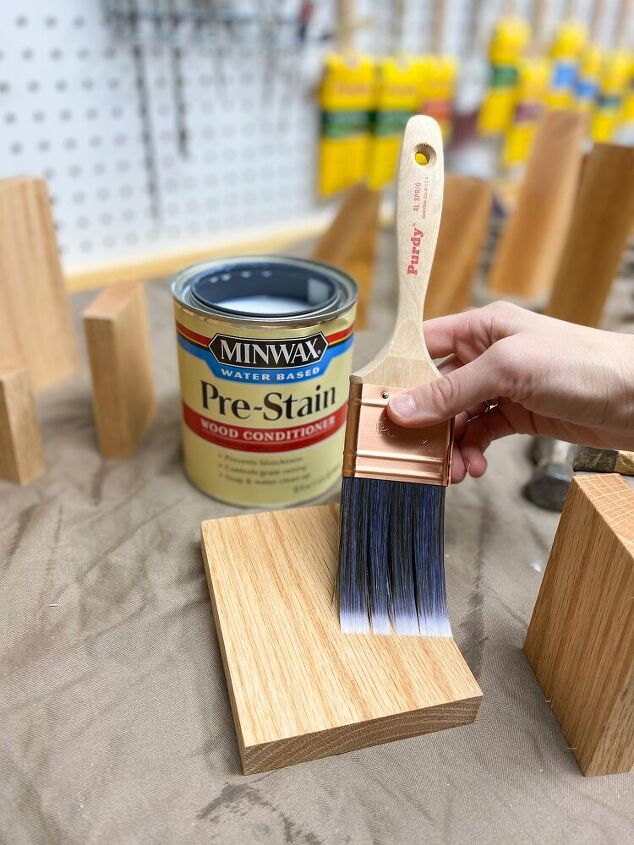
STEP 3: Apply Minwax Water–Based Pre-Stain Wood Conditioner using a Purdy 2” XL Sprig Paintbrush.
This pre-stain wood conditioner helps ensure that your stain will go on really evenly. I’m choosing to use a water-based wood conditioner because I will be using a water-based stain on top of it.
After you have applied it, remove any excess with a rag within 1-5 minutes of application. After 15-30 minutes, lightly sand the surface with 220 grit sandpaper.
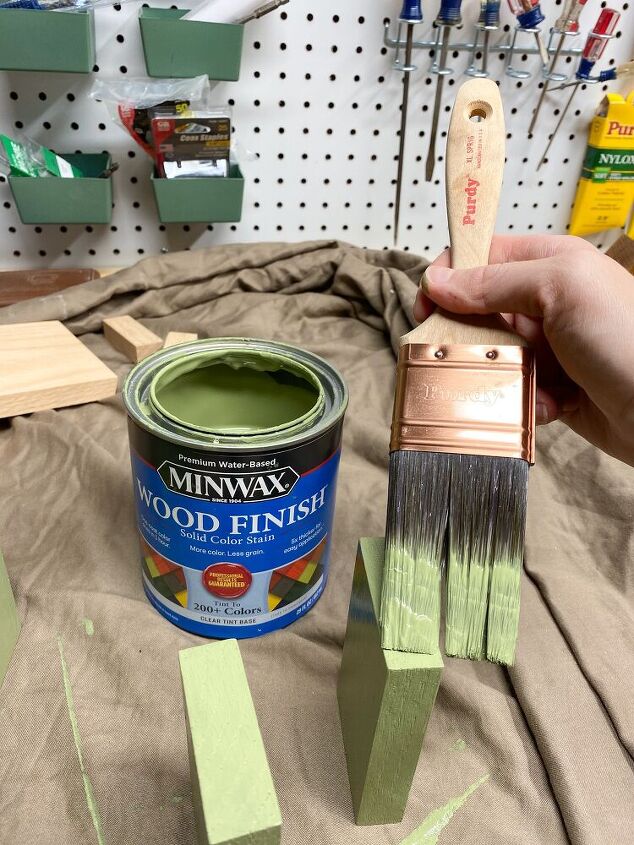
STEP 4: Apply Minwax Wood Finish Water-Based Semi-Transparent Color Stain and Minwax Wood Finish Water-Based Solid Color Stain.
I decided to alternate colors with my wood blocks. I chose a green color, Gentle Olive, in a solid color stain and a white color, Pure White, in a semi-transparent color stain. Both are water based, which means they dry quickly and are really easy to clean up! Plus, there are over 200 color options to choose from!
Apply the Solid Color Stain using a Purdy 2” XL Sprig Paintbrush. Immediately (within 2 minutes) remove any excess stain with a synthetic pad.
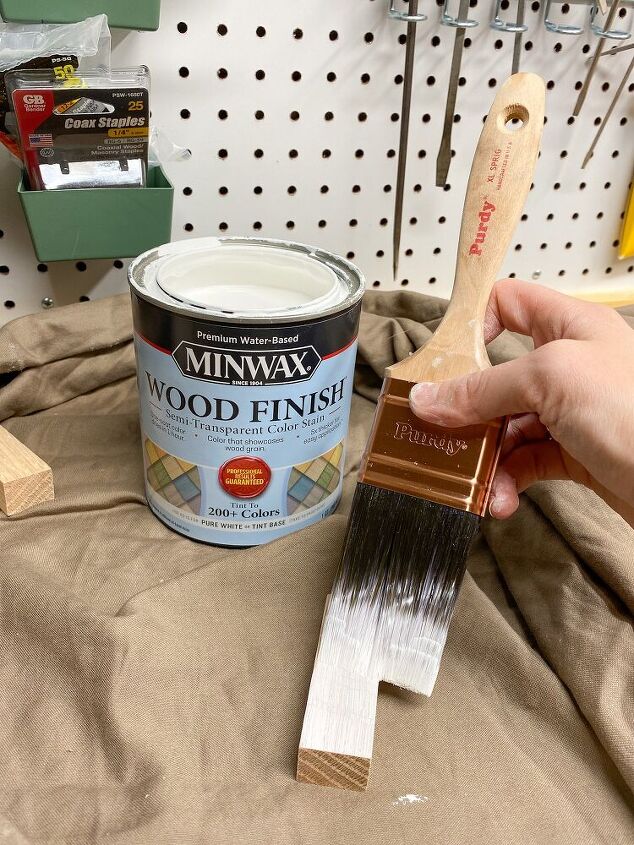
Apply the Semi-Transparent Color Stain using a Purdy 2” XL Sprig Paintbrush. Immediately (within 2 minutes) remove any excess stain with a rag.
STEP 5:
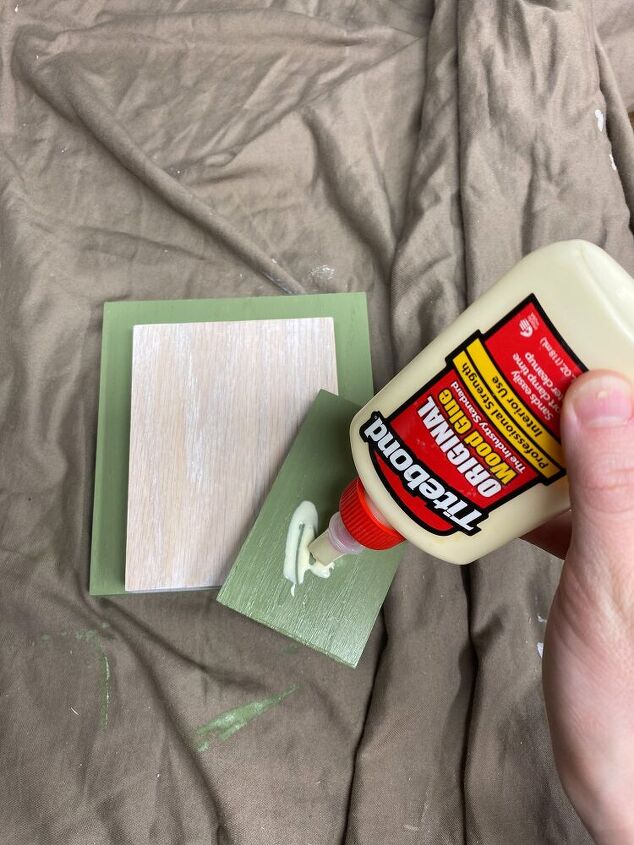
Once the stain is dry, glue the pieces together using wood glue.
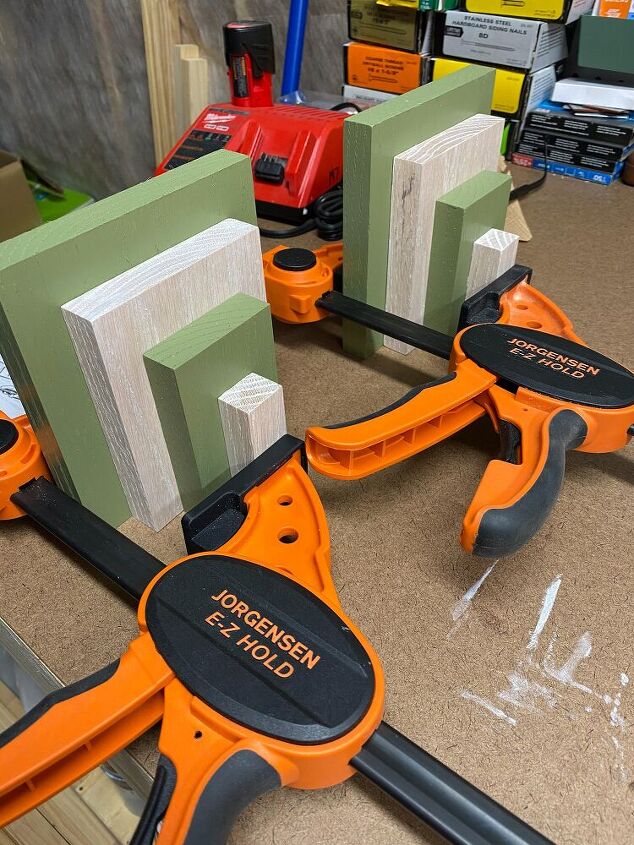
Clamp them together until the glue is dry.
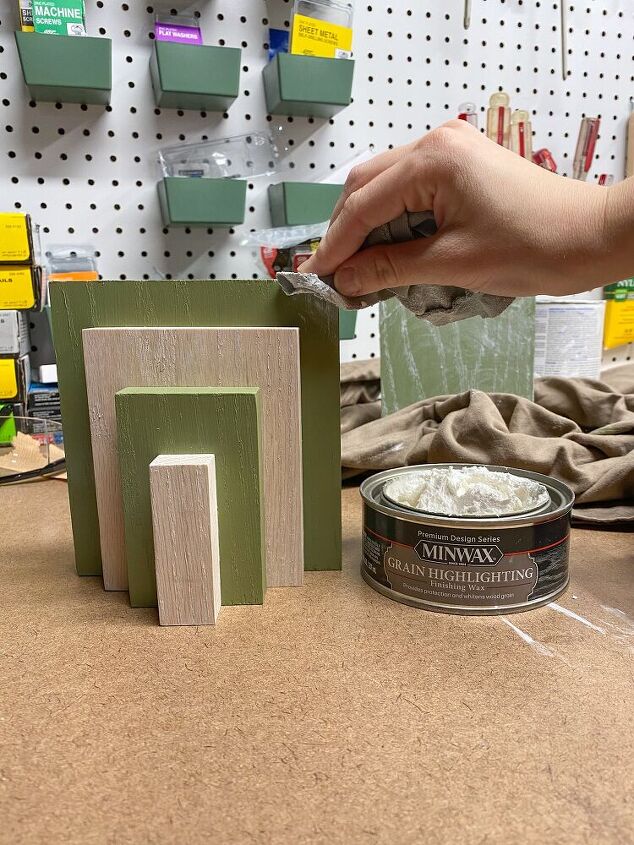
STEP 6: Apply Minwax Design Series Grain Hilighting Finishing Wax with a rag.
I absolutely love this wax! It’s so beautiful how it highlights the grain, especially on top of solid color stain.
First you mix it. Then you apply it in a circular motion with a rag.
After 3-5 minutes, remove any excess wax with a rag going against the grain. You’ll notice that the wax will stay in the wood grain, creating a beautiful look on the wood.
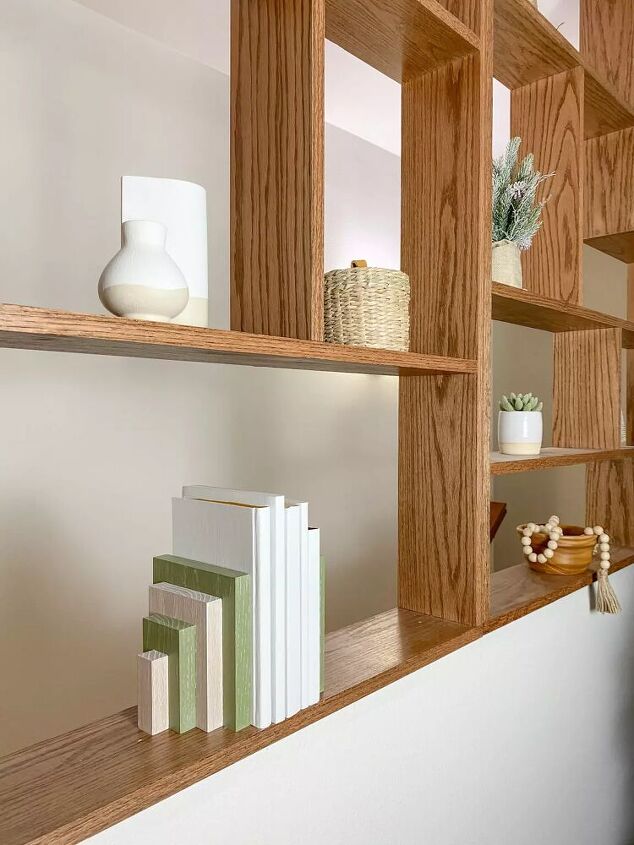
The Finished Bookends!
Now you have a beautiful set bookends that you could use in your own home or give to someone else as a gift. There are so many great options for DIY bookends that are both functional and beautiful!
Interested in more easy DIY projects? Check out my Mountain Bookend project here!
Resources for this project:
See all materials


Comments
Join the conversation
-
Very cool! I’m admiring your shelving as well. A mid century look turned awesomely modern!
-
Those book ends are FABULOUS! So creative and modern. I indistinguishable beauty. Well done.


Frequently asked questions
Have a question about this project?
I liked the bookends. I loved the floating wall shelf! Did you do that too? I'd like directions for that too! Thanks
Did you use oak for its weight…or it was available?
How are the bookends heavy enough?