


Home Bar Glow Up
I gave our wet bar a glow up makeover with new paneling and stools.
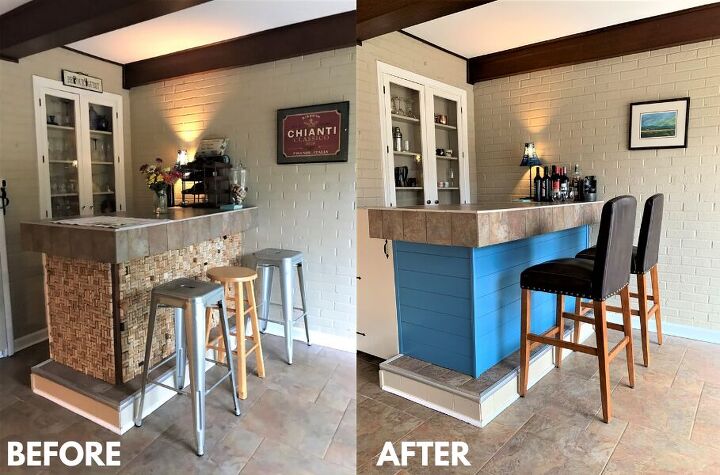
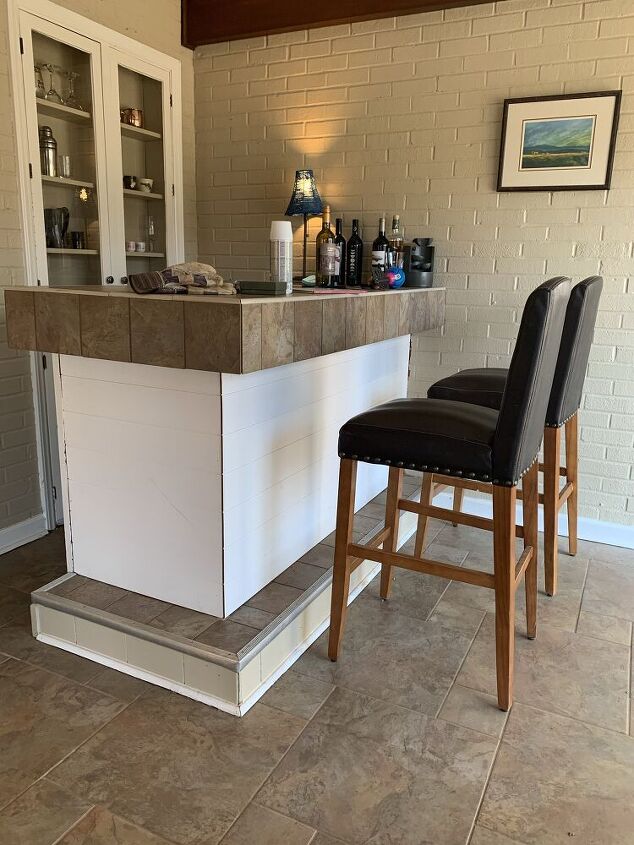
One of the features we love about our new house is the wet bar in the family room.
You walk in sliding glass doors from the patio and are welcomed by a nice bar. It's great for entertaining!
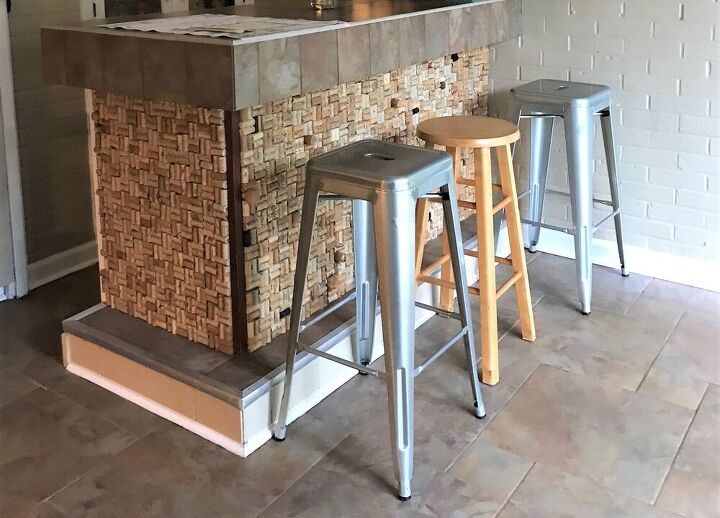
I wasn't a huge fan of the corks that the previous owner covered it with, though.
They were put on with hot glue and there were big blobs visible. Some of them were coming loose and falling off.
And to be totally honest, it made us look like huge winos. I didn't want to have to explain to everyone that comes over that I actually didn't consume the wine suggested by the corks LOL.
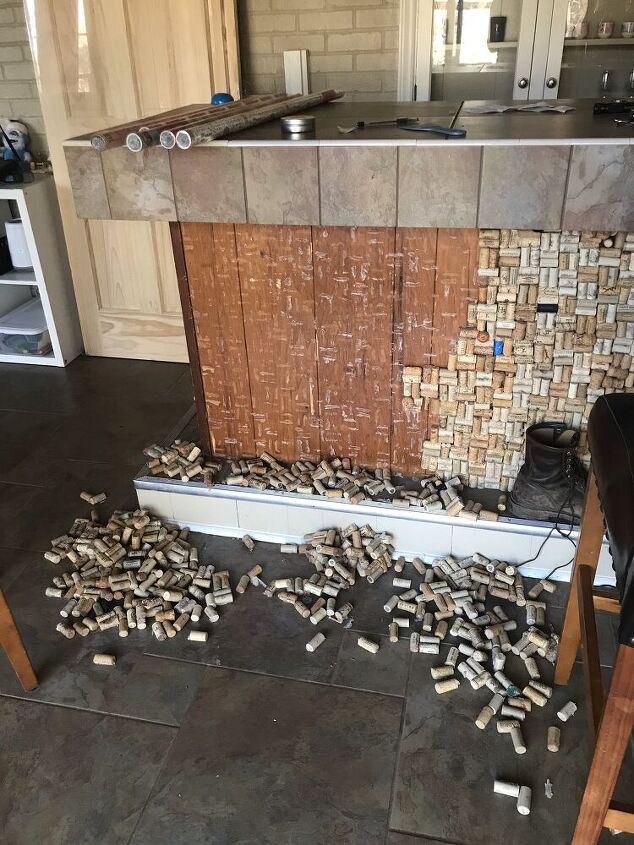
So I started the makeover by removing the corks. I found old 70's style wooden paneling underneath.
Some I could pull off by hand but the process went much faster with a hammer and chisel. It took me a few hours to remove them all and I was SO glad when that was over.

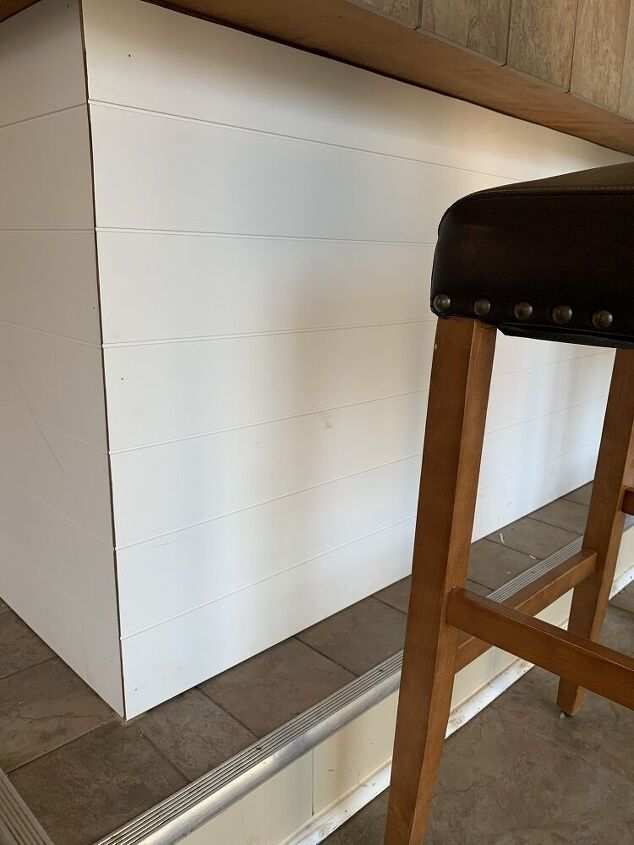
I wanted a cheap solution to covering up the old paneling.
I decided on this faux shiplap paneling from Home Depot. It was $28 for a 4 foot by 8 foot panel, which was more than enough to cover the bar.
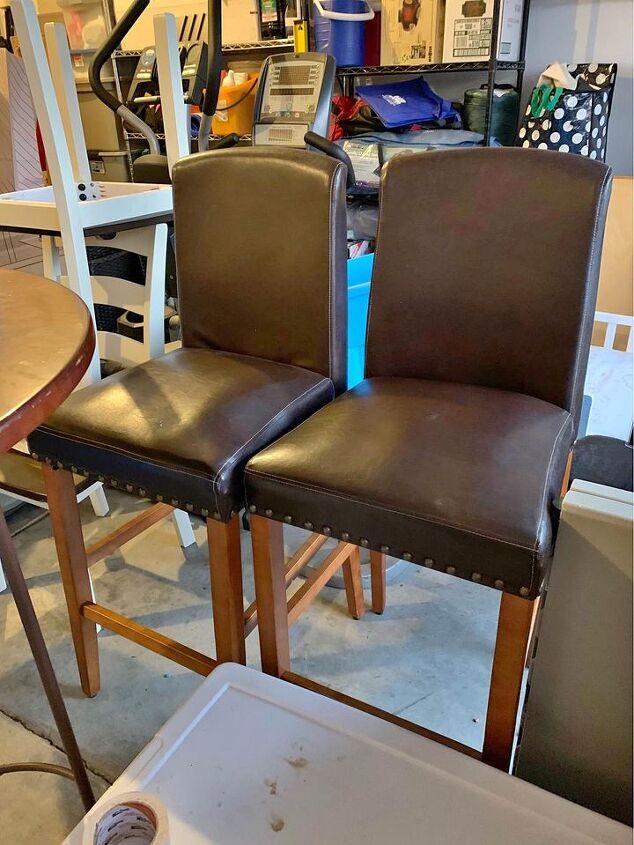
I also wanted to upgrade the stools. I'm most comfortable in stools with a back so I started a search for some secondhand stools.
I saw this pair of leather bar stools on Facebook marketplace for $70 and I scooped them right up!
Here is the shiplap paneling on the bar. My husband cut it to size and was able to nail it right to the old paneling with some trim nails. It took all of five minutes to install!
I liked the look of it but the white was too jarring. The room is neutral with some splashes of blues and greens (it's beach themed) so I decided it needed some color.
It also needed some trim to cover the new outside corner and inside corner where it met the wall.
I bought some cheap molding and had it cut to size at Lowe's. I actually attached it with clear Gorilla Glue and wow, is it stuck on there!
The molding was $9 for both pieces and the glue was $6.
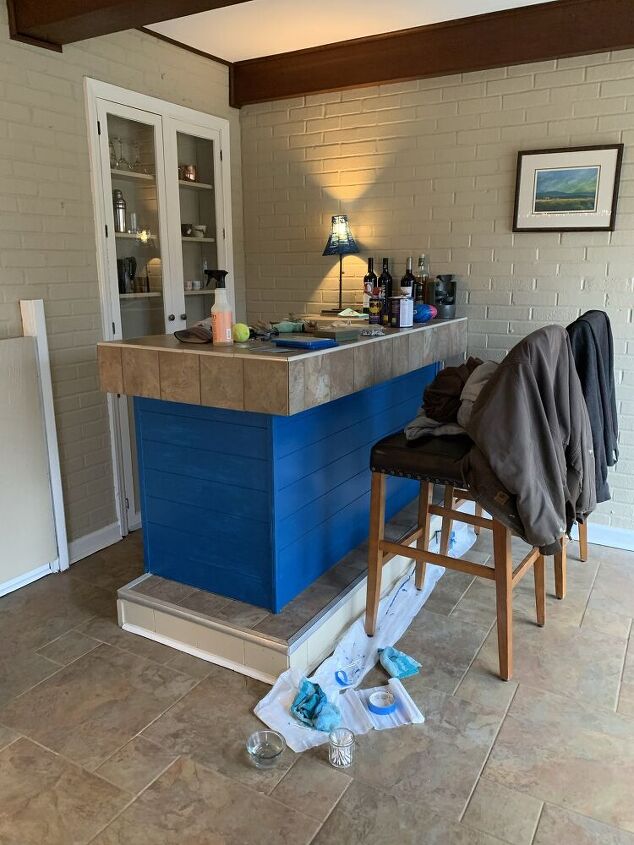
I wanted to go bright and bold with the paint but my first attempt was just a little TOO bold!
I've decided the paint matching the painter's tape is not a good sign.
The quart of paint was $16.
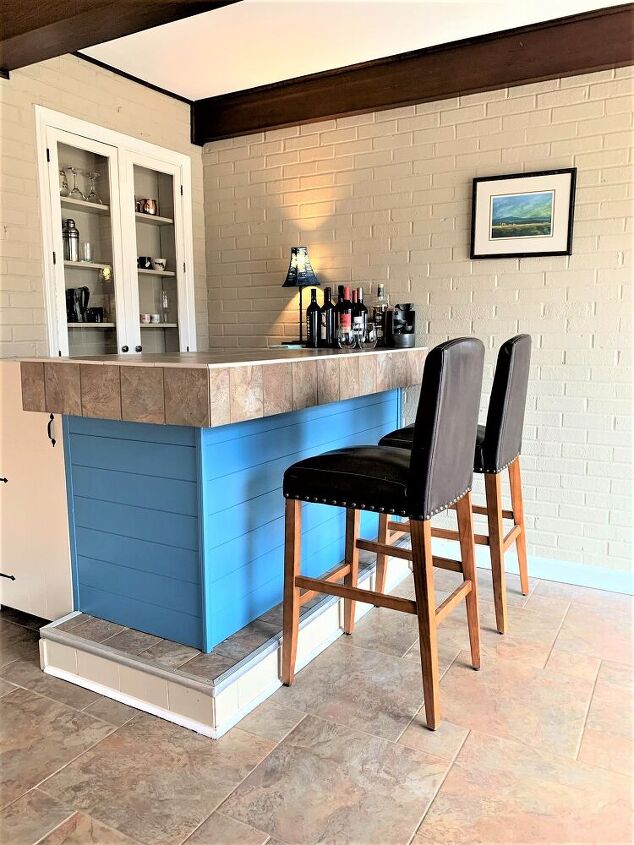
I got adventurous and mixed some light grey paint I already had in with the blue to make my own toned-down color.
I'm actually still on the fence about the color! I think it is winning me over but I could change my mind and repaint it at any point.
Regardless, the bar definitely has a more grown-up vibe now. And I don't have to keep the hot glue gun handy.
The total cost for the bar makeover was $60, and with the cost of the stools added in still only $130. I think it turned out great for the price.
Resources for this project:
See all materials


Comments
Join the conversation
-
Not a question but I have found when removing hot melt glue, especially in this massive case, a blow dryer or heat gun on low, melts glue quickly and allows easier removal to pop off without chisel and far less elbow grease


Frequently asked questions
Have a question about this project?
I love your bar!
Could YOU have painted the bottom the part near the floor toe-kick, etc, not certain if that is tile, vinyl? Maybe another piece of ship-lap painted blue at the bottom?
I hate bar-stools all are uncomfortable but I see your new stools with backs a big improvement over the original stools.
You did a GREAT job!
Kevin
The new look is great! I like how the blue gives it a nice pop of color.
I was also wondering about the strip around the bottom, close to the floor. What if you painted it a grey to help it blend better with the floor? The nice thing about that is you can always change the color back to the original if you don't like it.