


How to Whitewash Wood - Easy Furniture Flip
Today I'm going to show you how I whitewash wood with chalk paint. This furniture painting technique is a great way to update wooden furniture without losing the grain of the wood. It's fast and easy and in the space of a day, you could give your furniture a brand new look!
This is an abbreviated tutorial. The full tutorial is far too long for me to reproduce on Hometalk, but you can find the detailed tutorial including more photos by clicking the link to the full blog post here: How to whitewash wood - easy furniture flip' or at the bottom of this Hometalk post. Thanks for understanding!
IN CASE YOU WERE WONDERING: You will find an estimated cost of the project below. If you are a DIYer like I am, you probably already have most of the tools on hand to complete this project. I've estimated for if you had to buy all the tools and materials from scratch so that's why the estimate seems a bit high. 
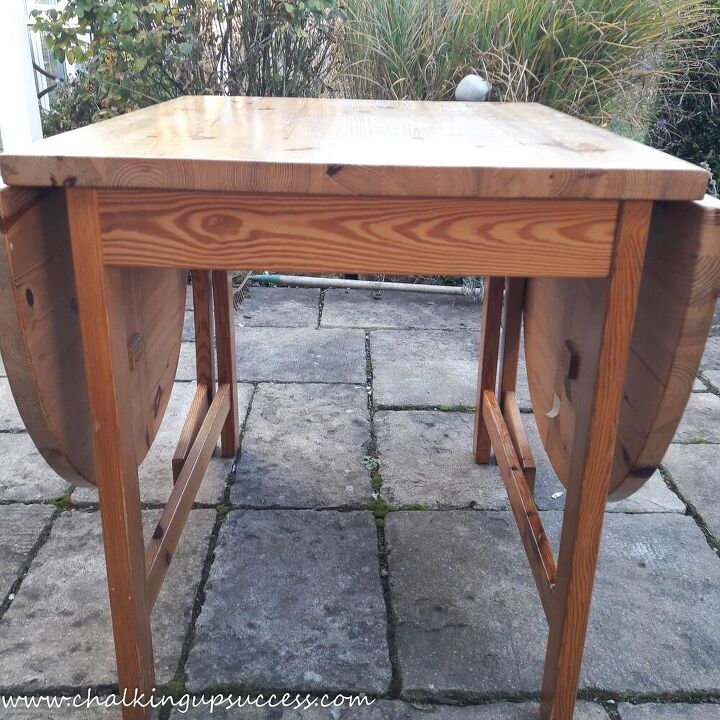
This is how the pine table looked directly after I brought ít home.
STEP 1 – CLEAN THE FURNITURE
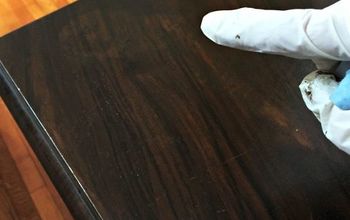
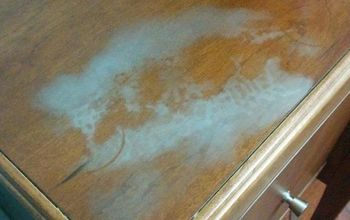
It's always a good idea to clean your furniture before applying any kind of paint technique. During the washing process, you may find spots of grease, cracks, splinters or defects which may need attention.
If there's a spot of grease on your furniture, this could ruin your finish.
Whilst washing down this table, I found quite a few strips of clear tape stuck to the wood.
Read part one of my 'Easy Bookcase Makeover' post over on the blog, for more details on cleaning furniture pieces.
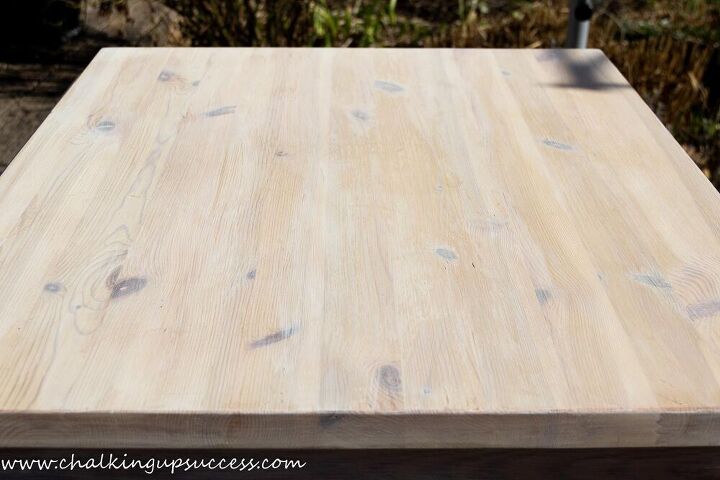
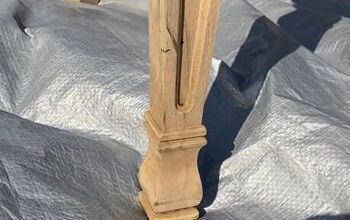
STEP 2 – REMOVE THE PREVIOUS FINISH
SAND BEFORE YOU WHITEWASH WOOD.
Start with grade 80 sandpaper to get rid of any varnish and scratches. After that, sand with grade 120 and work your way up to 240-grade sandpaper. This will make the wood surface smooth.
STEP 3 – BRUSH THE WOOD
Brush the table with a wire brush to get all of the sanding dust out of the grain and then wipe it down with a damp cloth.
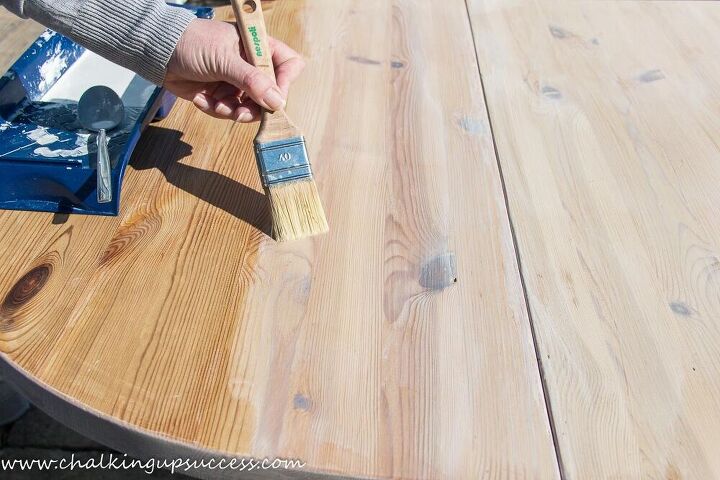
STEP 4 - WHITEWASH THE WOOD
Make up a whitewashing solution. Use the paintbrush method or the paintbrush and rag method to whitewash the wood. (See original post for details on how to do this).
STEP 9 - WHITEWASH WOOD - FINISHING
How you finish your whitewashed furniture depends on two things.
- How you intend to use the furniture
- Personal preference
For tabletops and surfaces which will see a lot of use, I use a water-based polycrylic for the finish. It's important to find one which does not turn yellow when exposed to sunshine. Polycrylic creates a hard-wearing, water-tight seal which means, your furniture won't get ruined by spills or small scratches. (See the original blog post for more details and sources).
For everything else apart from tabletops, I use clear wax. If you prefer to seal your furniture all over with polycrylic, you could do that too. I love the smooth feel of wax on furniture but it's totally up to you what you want to do.
If you need instructions for applying wax to furniture, take a look at part four of my 'easy bookcase makeover' post for that.
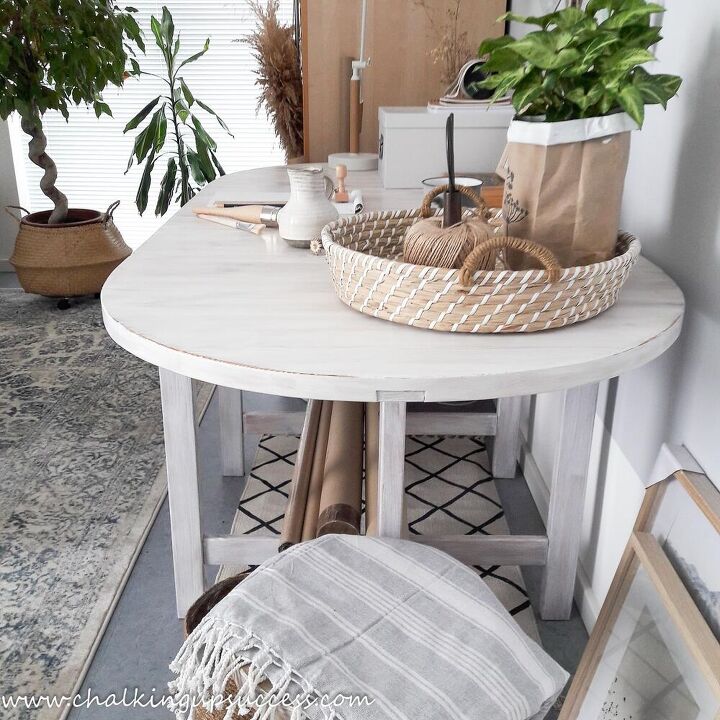
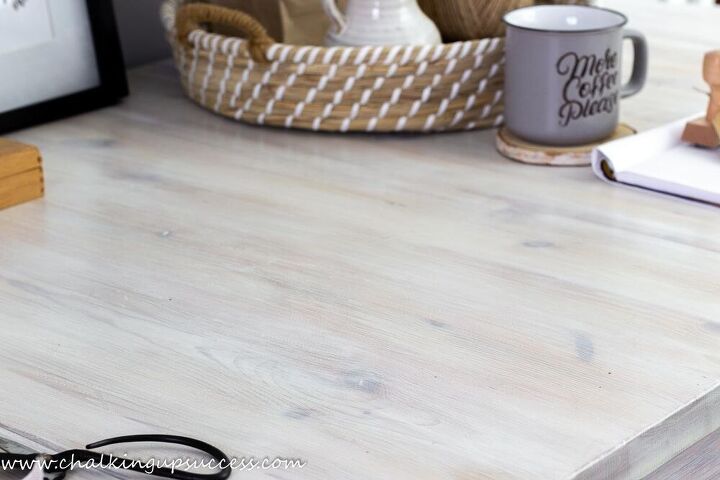
FINISHED!
The finish is not as subtle as your usual whitewashing technique but it's exactly how I want it to look. That's the beauty of whitewashing, you can add as much or as little as you like to suit your style.
WAIT!
Before you go, if you’re not part of our amazing creative community yet but would love to join us, I would love to have you stop by my blog 'Chalking Up Success' for the full tutorial or to sign up for my latest posts, DIY, inspiring home decor, natural home recipes and more.
FREE RESOURCES
By signing up, you’ll also receive a copy of the free ‘Furniture Flip Checklist’ and gain access to all the other printables, e-books and labels in the VIP Resource Library.
FOLLOW CHALKING UP SUCCESS
CHALKING UP SUCCESS ON YOUTUBE
Subscribe to my YouTube channel to see more DIY, home decor and crafts - https://www.youtube.com/channel/UC4uyVGrJxoo8-7qlAg5_x-g?sub_confirmation=1 I can't wait to see you there!
Join our Facebook Group for creatives - Why not? It's FREE!
https://www.facebook.com/groups/organizedecoratecreatechalkingupsucces
Like us on Facebook:
https://www.facebook.com/chalkingupsuccess/
Follow us on Instagram:
https://www.instagram.com/chalking_up_success/
Follow us on Pinterest:
https://www.pinterest.de/chalkingupsuccess/
Phew! That was a lot but thanks so much for your support, I really appreciate it! 


Frequently asked questions
Have a question about this project?