


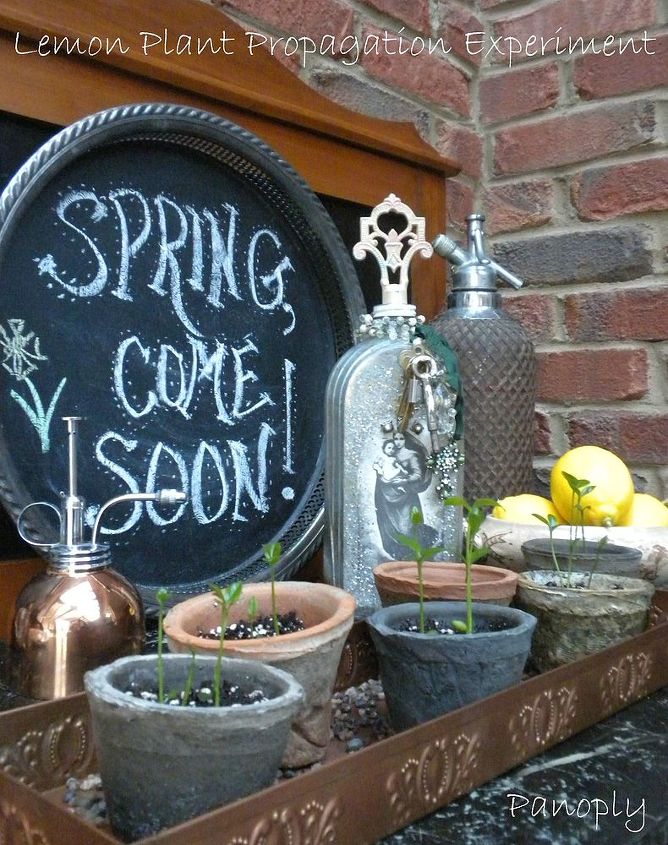
Lemon Plant Propagation Experiment
I've said before that I wish I could grow my own lemon tree, but I only live in Zone 7a climate, so the chances of a tree lasting through a nasty winter like these last two are slim. I'm enough of a science nerd to try growing my own lemon plant while the garden sleeps with - get this - seeds salvaged from my grocery store lemons!
Not ready to call it a tree by any means, but it sure beats the $69.95 price for an 18-24" plant from Williams Sonoma! The hope is to have the fragrance of lemon wafting in my home by summer (oh, okay, I want lemons - ha, maybe in a few years??)
Not ready to call it a tree by any means, but it sure beats the $69.95 price for an 18-24" plant from Williams Sonoma! The hope is to have the fragrance of lemon wafting in my home by summer (oh, okay, I want lemons - ha, maybe in a few years??)

These lemon babies are ready to grow!
Day 1: The process to get the lemon seed germination started was fairly simple, but tedious. It took about 1 hr to yield 20 or so seeds. From the photo below, I'll take you through the steps.
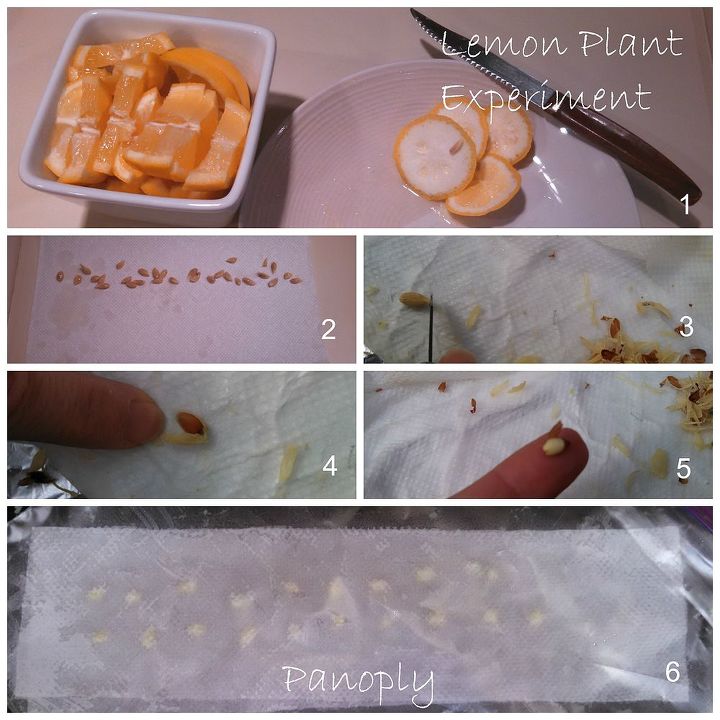
Step 1: Slice your lemons to yield your starting seeds. I cut two lemons every 2-3 days, and not all of them yield seeds, but these two had many. I started with about 24, expecting to lose a few while preparing for germination.
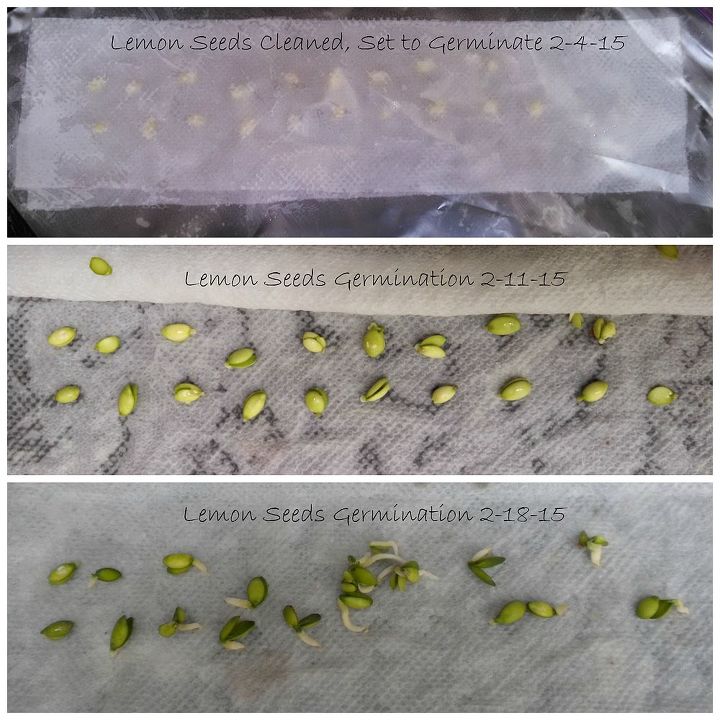
It is important to place the seeds in a sunny, warm room, where they're exposed to sunlight at least 3 hours or more daily. Even though it was mid-winter with freezing temps, I placed mine in my south-facing, heated sunroom, where the ceiling is all windows.
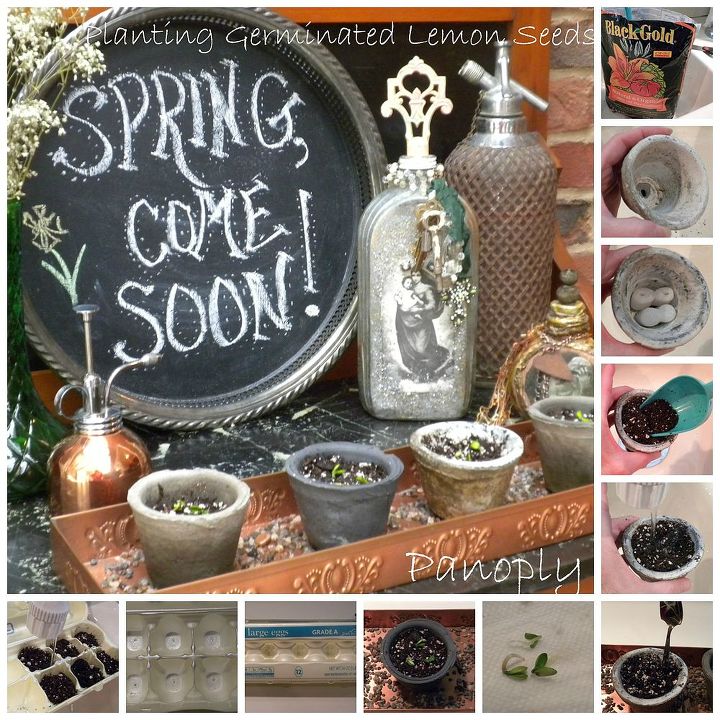
Day 17: I planted the seedlings. The photo collage above shows the sequence (counterclockwise, starting from the postage stamp photos at top, right). Keys to planting success: a good soil, and containers with drainage.
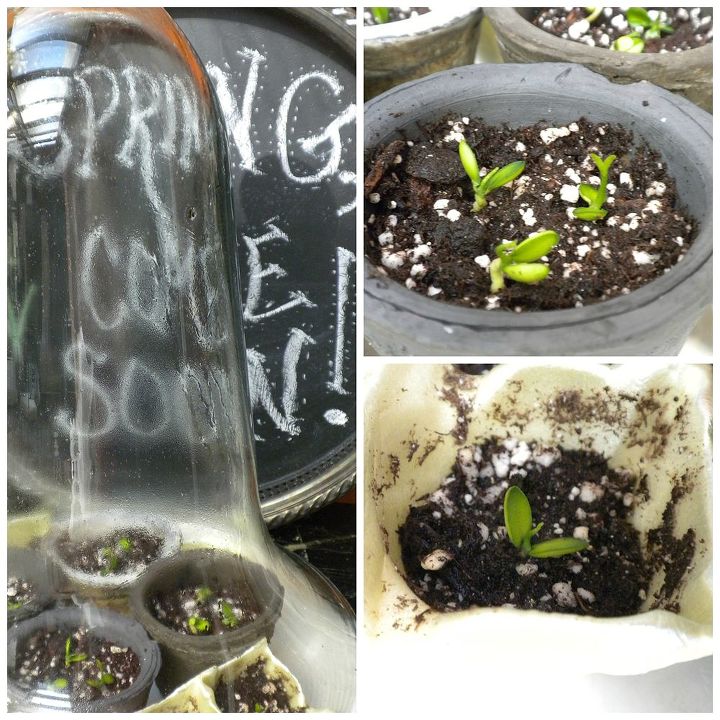
Day 18: I set the 4 clay pots on an old dinner plate, placed a cloche over it, and left the styrofoam crate out (since it was still holding moisture).
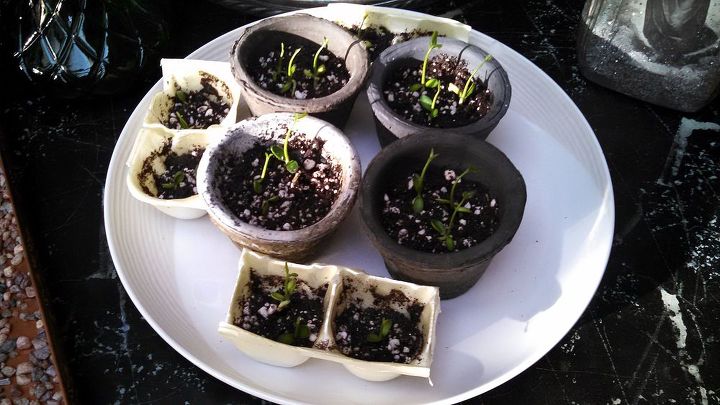
Day 22: After a few daily checks of the seedlings under the cloche, I noticed one clay pot looked to be showing the beginning of mold growth around its edge, above the soil line. I removed the cloche lid, carefully scraped the inside of that pot with a wet rag, and left the cloche off of the seedlings. I continued monitoring the seedlings daily.
Day 31: I removed seedlings from the styrofoam egg crate and planted them into two additional clay pots. The above photo is day 33, and these babies are just waiting for no-freeze temps to be able to grow outside! I'll keep you posted on the progress.

Want more details about this and other DIY projects? Check out my blog post!
Comments
Join the conversation
4 of 8 comments
-
My lovely little mango tree got to about a foot high....but....the tasty seed beneath the soil was scavenged by a squirrel and the little tree was destroyed! I never had the heart to try all over again. My Dad's mango tree was forcibly removed by the State of Florida as they were fighting some disease. All gone.
-
I started seeds last year and now have a 14" baby tree (two actually). I will have to keep it in a pot because in my area of AZ (HOA rules) I can't plant in the ground anything not native, but I have done this before and ended up with a nice tree about 3' tall.


Frequently asked questions
Have a question about this project?
Have you ever sprayed a light coat of peroxide on the wet paper towel to help the seeds germinate?
There are no lemon trees in Costa Rica and I,m thinking of starting one there. I have heard that a 50 50 water peroxide mix helps the seeds germinate in the wet paper towel. What do you think?