


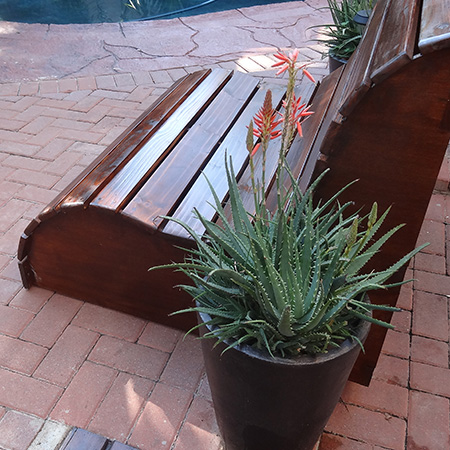
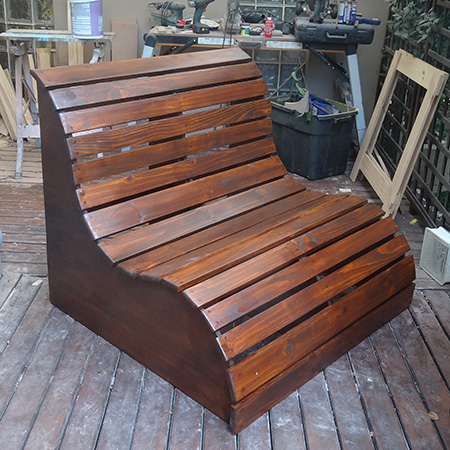
Slat Garden Love Seat
This garden love seat is made using pine slats and marine plywood supports. Once sealed there's no reason why the bench shouldn't last a lifetime with regular care and maintenance.
If you prefer not to use pine you can use almost any hardwood to make the slat garden love seat.
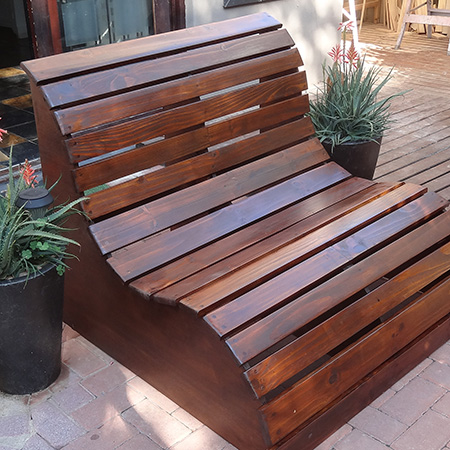
This seat is large enough for two, but you can make it a single seat, or make it longer by adding additional supports and longer slats.
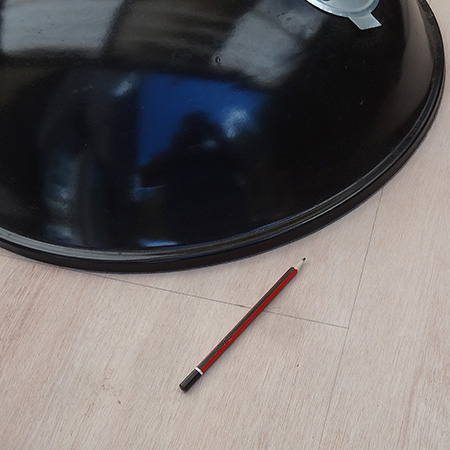
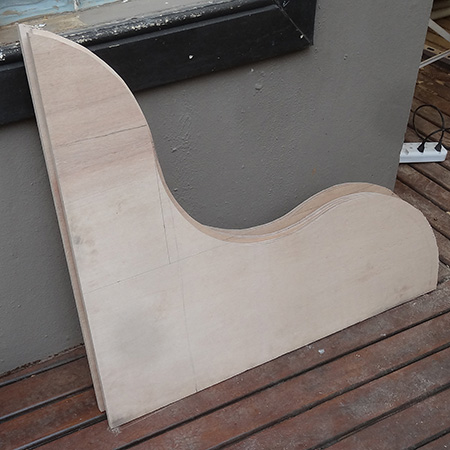
1. The sides and centre supports were cut from the 900 x 900mm piece of marine plywood. The curves were drawn using the lid from a bbq. Any large circular item can serve as a template.
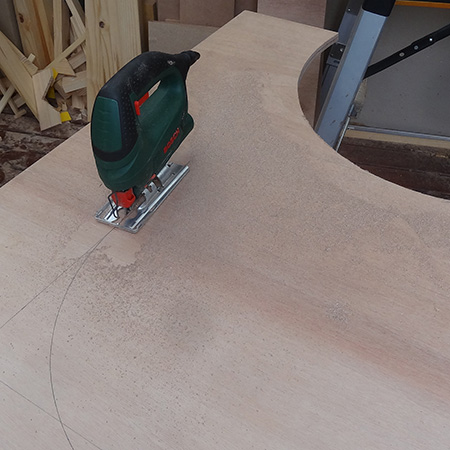
2. After cutting out the sides the remaining piece was used to cut the centre section. There wasn't enough to cut a complete section, so pieces were cut to make a whole section and these were joined together using a biscuit joiner and exterior wood glue.
DIY TIP: If you want to add more supports - for a solid centre section or longer bench - you need to order a second sheet of 900 x 900mm marine plywood.
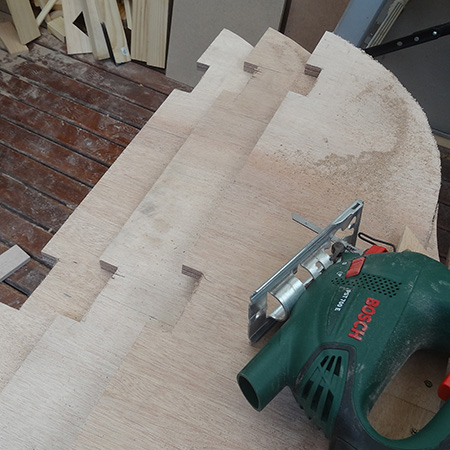
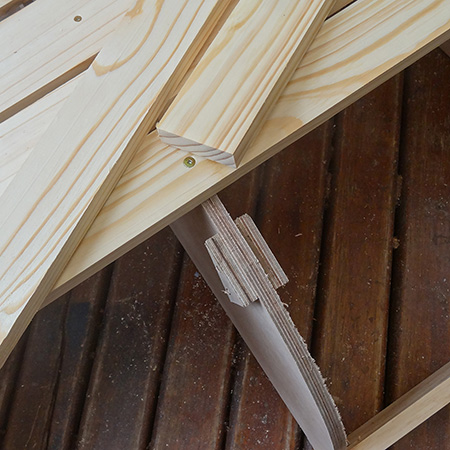
3. Along the back of each support 3 slots were cut for mounting the 20 x 69mm back supports. One slot 100mm from the top - one in the centre - and one at the bottom.
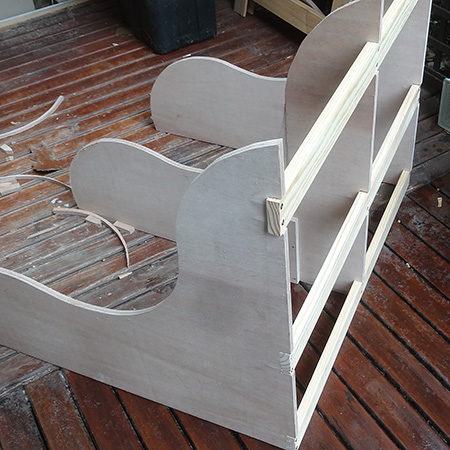
4. Drill 4mm pilot holes through the pine into the plywood supports and secure with 50mm screws - two screws at each join.
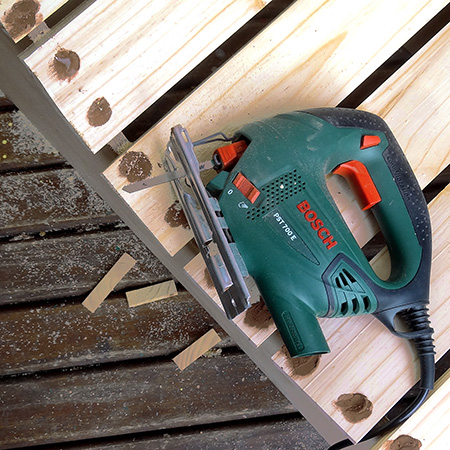
6. There are two 94mm planks at the top back and front bottom, as well as three 94mm planks on the seat, the remainder of the planks are 69mm. Dry fit the seat planks as best as possible and then use spacers to make sure the gaps are equally spaced before securing to the supports.
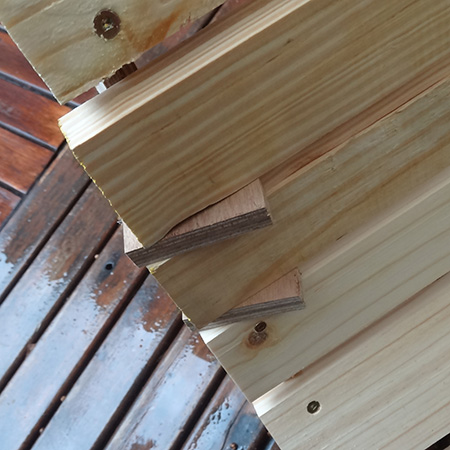
7. For this project insufficient 69mm wide planks were ordered and offcuts were used to create a full plank span. To allow for this blocks of marine plywood were secured to the centre support to allow for the screws for mounting the split planks.
8. All the holes can be filled with wood filler. Match the colour of the wood filler to the final colour that you will stain the bench. We used imbuia wood filler on all the holes. Let the wood filler dry.
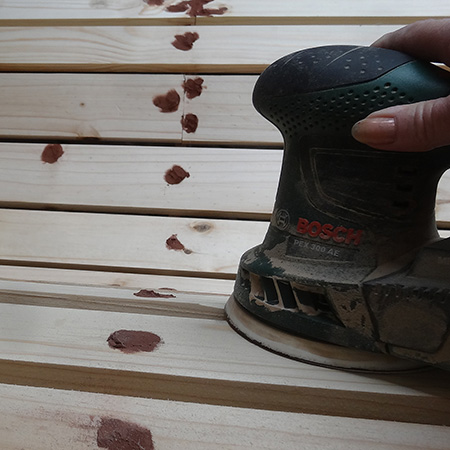
10. Use 60-grit sanding pads to sand away the sharp edges between the slats. You want the finished seat to be as smooth as possible. Also sand away any rough edges on the sides, and round off the edges of the slats. You could also use a router and roundover bit on the edges of the slats.
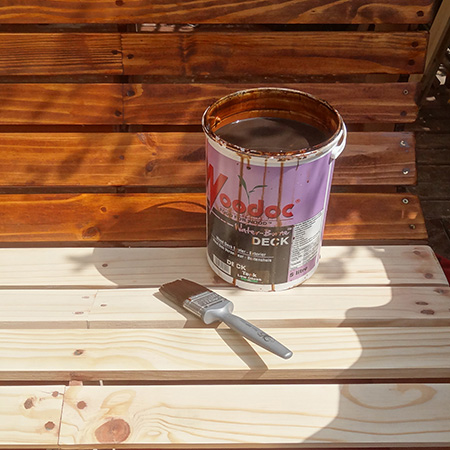
Finishing

Want more details about this and other DIY projects? Check out my blog post!
Comments
Join the conversation
2 of 89 comments
-
I am definitely going to make this, possibly for our family room, which is sooo lacking furniture. I am thinking of adding a futon for comfort.
-
I do wish the dimensions were also in non-metric measures.


Frequently asked questions
Have a question about this project?
What is diameter of circles created by grill lid?