


How To Distress Furniture With Sandpaper

Do you love the look of exposing natural wood through distressed, shabby chic paint? Come see this tutorial all about distressing with sandpaper!
{
"id": "2970764",
"alt": "https:\/\/youtu.be\/mDU84_CQPmg",
"title": "https:\/\/youtu.be\/mDU84_CQPmg",
"video_link": "https://www.youtube.com/embed/mDU84_CQPmg",
"youtube_video_id": "mDU84_CQPmg"
}
{
"width": 634,
"height": 357,
"showRelated": true
}
How To Distress Furniture With Sandpaper | Painted Wood Furniture Distressing Technique
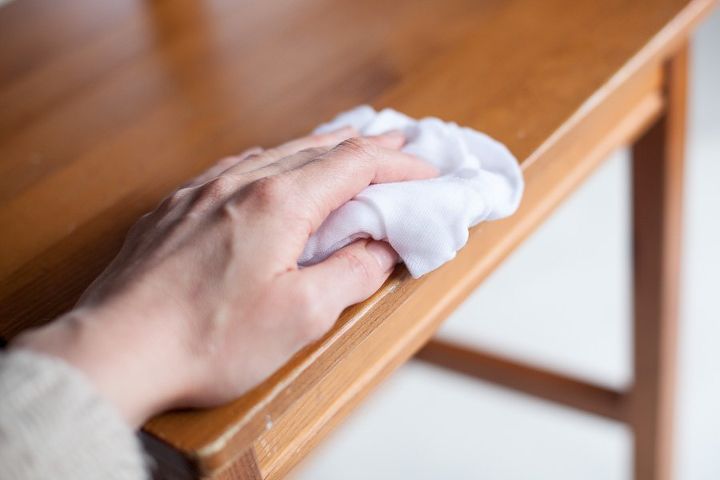
Step 1) Prep your surface
It's always a good idea to wipe down your piece before painting it to remove any dust or oils that may be on the surface. Depending on what type of product was previously used on it, you may need to do a bit of sanding as well. For more tips on how to prep your piece before painting, check out our surface prep tutorial at http://www.countrychicpaint.com/tutorials/surfaceprep.
Step 2) Apply your first coat
Once your surface is ready to be painted, you can crack open that paint can. Make sure you shake and stir the can well before dipping your brush in! For more tips on how to get a smoothly painted finish, come see our tutorial on paint application at https://youtu.be/kS1wT-yApXA.
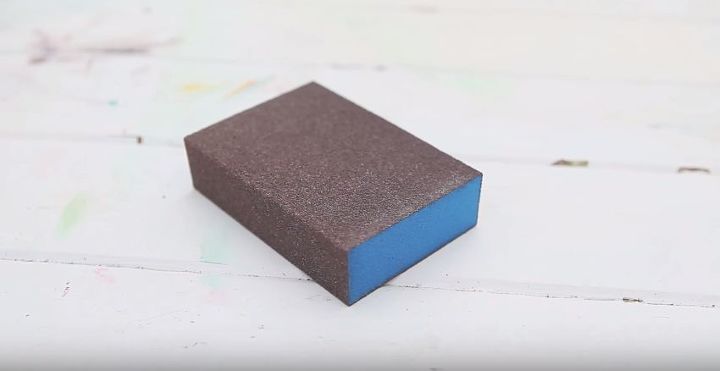
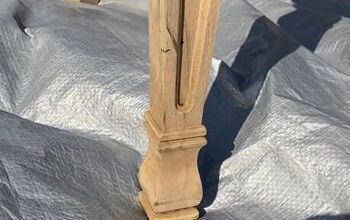
Step 4) Distress
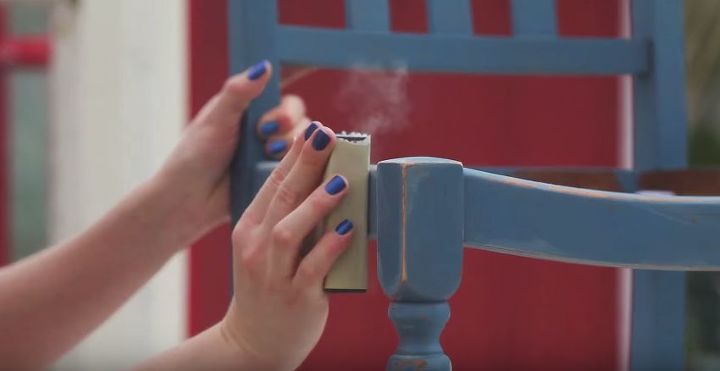
Step 4) Distress
Once your paint is fully dry, you're ready to start distressing. You can use any type of sand paper but we recommend sanding sponges or sanding blocks. They're easier to control so you'll be able to distress exactly where you want to. Start out with a fine-grit sand paper (around 180 grit) and see how you like the results. Remember, the higher the number, the finer the sandpaper! If you use sandpaper that's too course, the distressing won't look natural.
Comments
Join the conversation
1 comment
-
Hi. I have a bench that is painted white. I want to destress the white paint and then add a color on top. Can you direct me to a video or information that would teach me how to accomplish this? Thank you.


Frequently asked questions
Have a question about this project?