


Build a Pallet Sectional - Pallet Furniture DIY

You can find different creations with pallets all over the internet. From shelves, to tables, to chairs, to whatever your mind can think of. I wanted patio furniture, but did not want to spend a ton of money for it. So, we decided to jump on the pallet furniture band wagon with this 2 piece pallet sectional.
I hope you enjoy this Pallet Furniture DIY
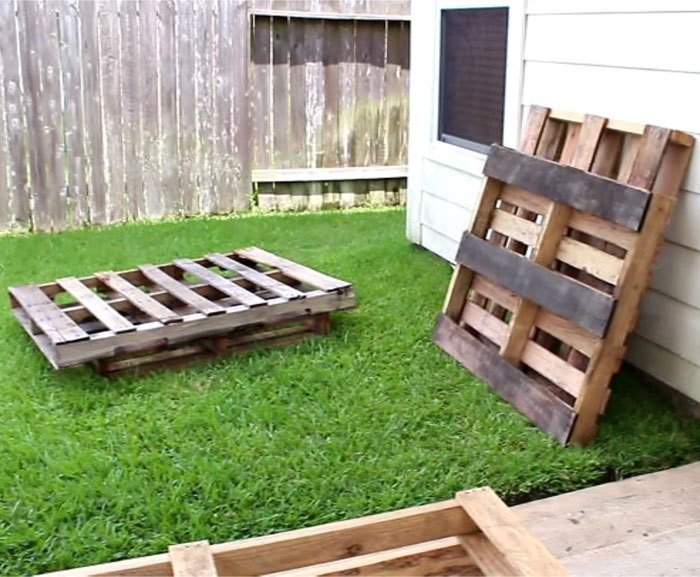
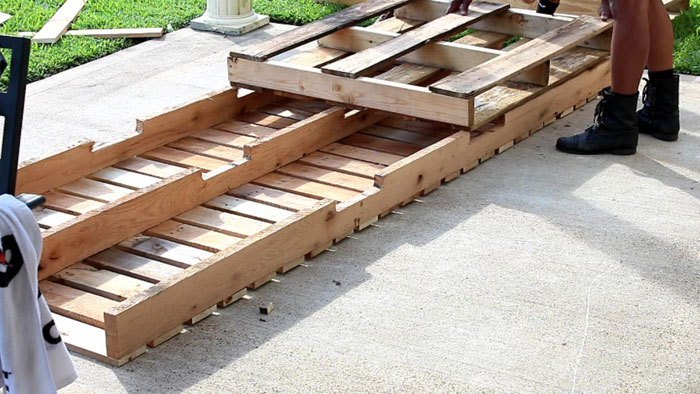
First thing's first. Collect as many pallets as you can. Make sure they are different styles and sizes. You never know what pieces you will need from each. We found a pallet that was long which we used as the chaise part of the sectional.
Note: After some research, we decided to stick with pallets from grocery stores. All pallets are treated with chemicals. Those used by grocers tend to be the least harmful. (After all, they carry our food )
Double note: It's a good idea to ask for the pallets. Usually, we found someone who worked there in the back and asked. We were never told no.
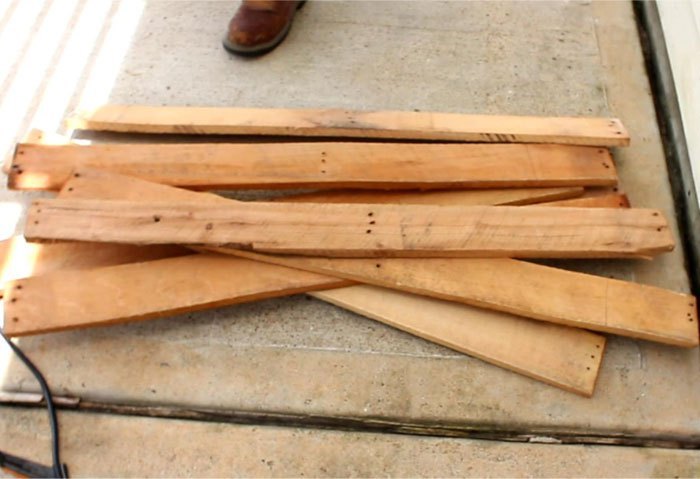
Disassemble the pallets and select the best planks. These planks will be used to assemble your seating.
Note: The easiest way to remove planks from the pallet is turn the pallet upside down on a saw horse, and hammer downward to knock the plank off. Gravity truly works in your favor here. See this in action in the video above.
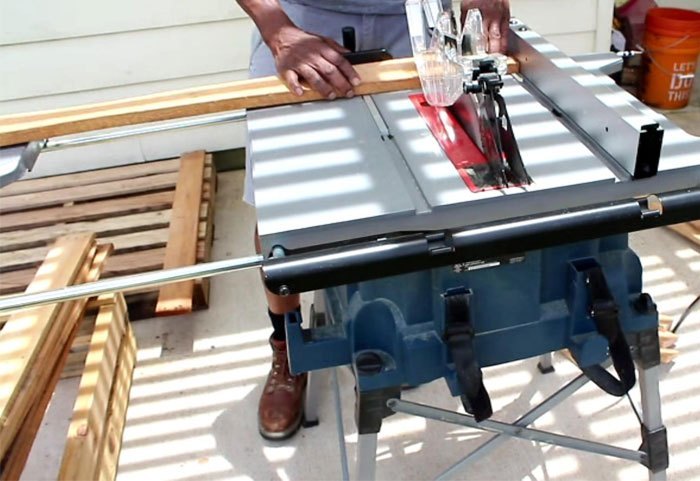
Because you are using different size pallets, you will need to cut the good planks down to size.
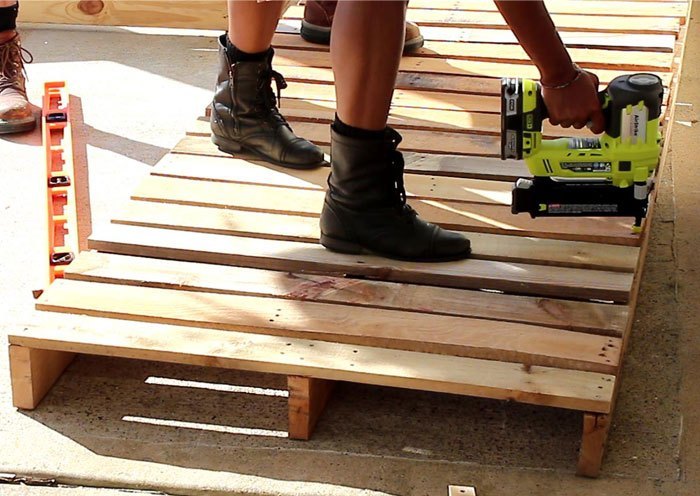
We re-assembled our pallet with the planks selected and cut to size. Leaving about 1/4" to 1/2" of space between each plank.
We flipped over the seating and added 1 more layer of pallets. This gave our sectional much needed structure/support as well as additional height.
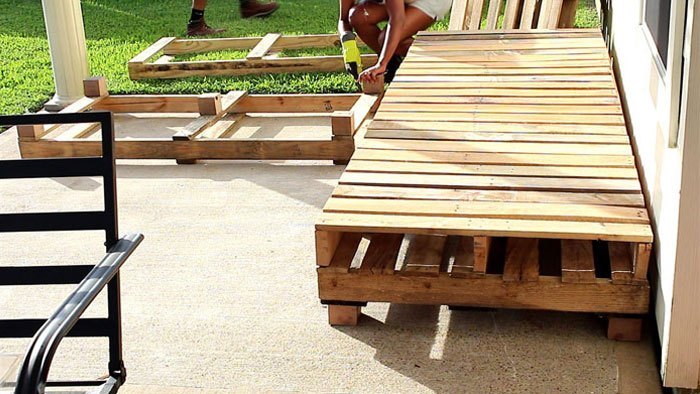
We also added feet for additional height and to keep the bulk of the wood off of the ground.
Note: We used a long 4x4 piece of wood to make the feet. This was found on an irregular pallet. Which is why collecting all shapes and size pallet is so important.
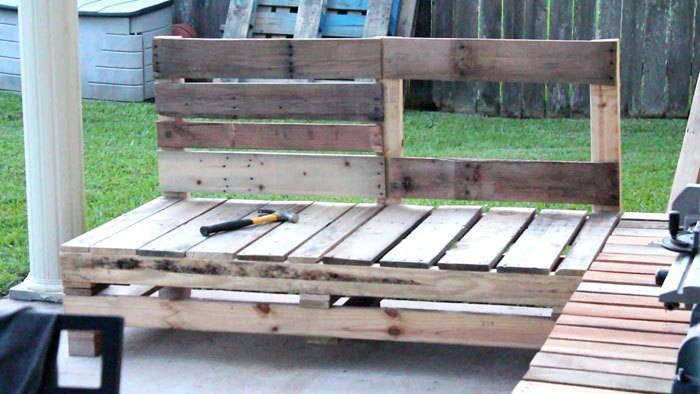
To create the back, we used scrap 2x4s that we found when we were collecting pallets.
The 2x4s are cut to size then screwed to the base of the pallet. 3 on the sofa part of the sectional and 2 on on the chaise.
Once the structure was in place, we nailed large planks to them.
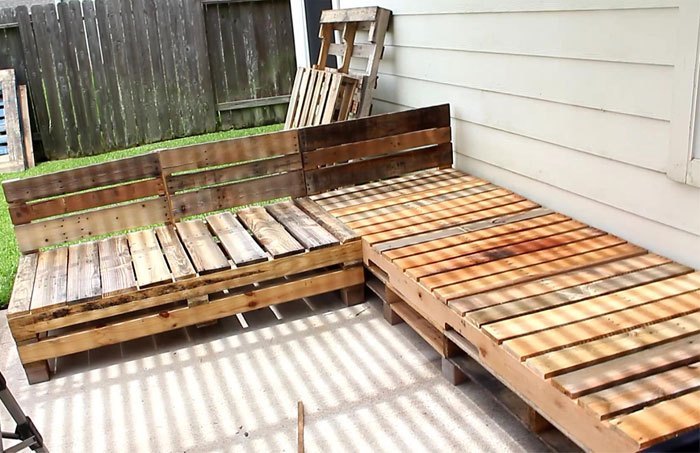
This is what my 2 piece sectional looked like before painting. If you like the raw, exposed wood look, you could leave it like this. Just be sure to seal and protect the wood.
Note: We power washed the pieces with bleach and water before painting just to make sure any skin irritating chemicals were removed.
Double Note: Some people recommend sanding so that you are not plagued with splinters. We did not sand and HAVE NOT had one splinter.

Painting was the easy part .
I purchased black flat exterior paint from the hardware store and went to town.
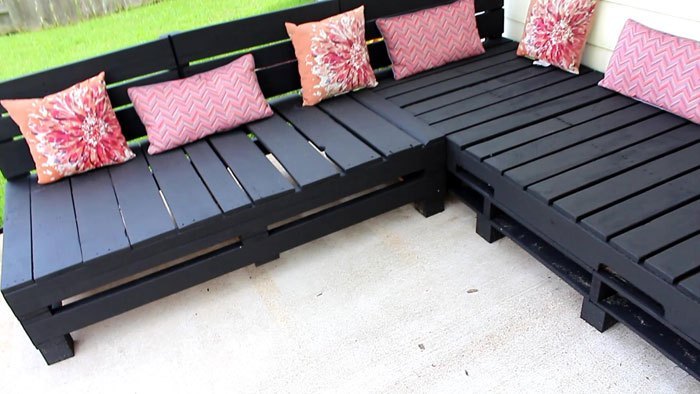
Here's a shot of the sectional before I added the seat cushions. We were extremely satisfied with how it turned out. It looked so nice like this, I didn't bother to add cushions for 2 years.

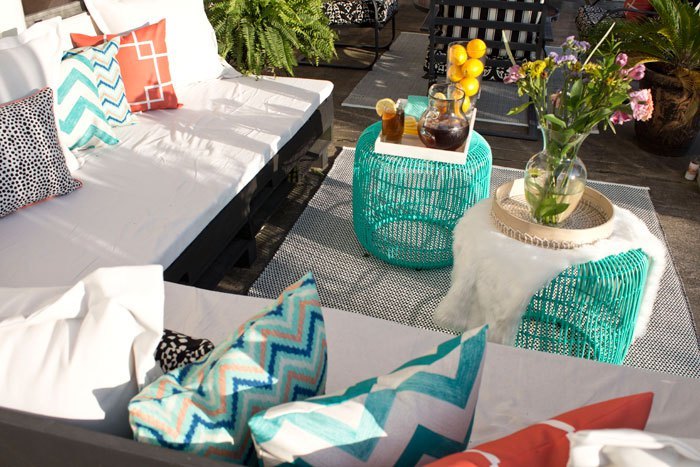
Over the two years, our patio had been seriously neglected. The entire area in need of an overhaul. Since I was in the process of sprucing up the space, I decided it was a perfect time to finally add some seat cushions.
I am using a foam mattress topper for the cushion. I did consider buying foam, but I had a hard time finding the right size and would have ended up spending a lot more money. I found the mattress topper to be the best option.
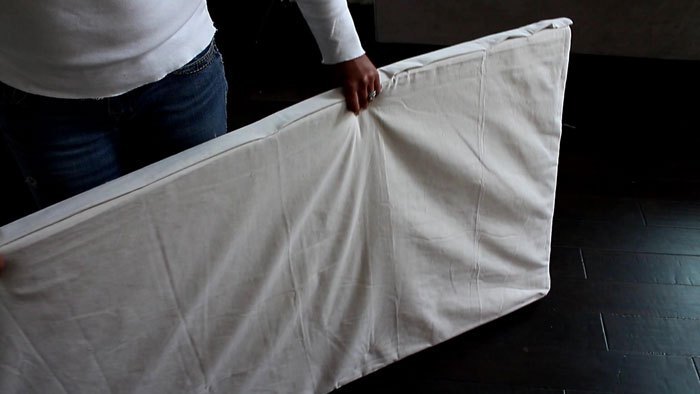
I covered the foam with canvas drop cloths purchased from my local hardware store.
Note: I opted to hot glue this together instead of sewing. And it worked out just fine.

A'last, my pallet section was finally complete!!! Cushions and all .
Add a few pillows with a bit of color and the seating looks amazing.
I hope you all enjoyed the step-through of my pallet sectional.
To find more details about this project, please visit my website:
www.angelaeast.com/pallet-furniture-diy-patio-sectional
If you are interested in seeing the before and after of my patio refresh, check it out here: www.angelaeast.com/outdoor-living-patio-makeover
Hope you all have a wonderful day forward.
Angela East
Resources for this project:
See all materials


Comments
Join the conversation
-
Love it!
And thanks to Dmotan for the tip of using Neverwet. Never heard of the product before. I had tried other waterproof products that didn't really work.
-
Like it better without the cushion. But I understand the need for comfort


Frequently asked questions
Have a question about this project?
Is it necessary to take the pallets apart if they are the right size and in good shape?
Do you bring the cushions inside when they’re not in use or when it rains?
Why do you need to use pallets? Why not buy pressure treated lumber, which can still be painted/stained, and just as customizable? Hate to see folks pass on this just because they can’t find pallets or pallets found have been exposed to who knows what in their former life? Tools can be rented. Btw and this could be great project for learning basic carpentry skills