


DIY Dresser Makeover With Paint From The Earth!
I would like to thank Dixie Belle Paint for sponsoring this DIY Dresser Makeover.
I have been flipping furniture for more than twenty years. It is something I started because I wanted to decorate our first house like I had seen in magazines and on TV but our tight budget was not going to allow that. I had to get creative. Flipping furniture was one way I could furnish our home on the cheap and get the exact look I wanted. My husband Matt and I have learned so much over the years in flipping hundreds of pieces.
I still flip because I can't pass up a piece of furniture that has a lot of potential and Matt loves a good project so it is a win-win. In this post, I am sharing a dresser makeover and I am using a new line of paint for the first time.
I have used Dixie Belle paint for many years and they just came out with a new line of clay paint called "Terra Clay Artisan Paint".
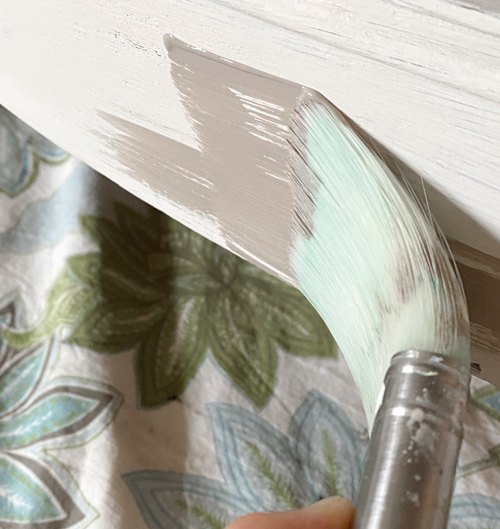
Terra Clay Paint is straight from the earth. It is heavily pigmented. You can apply this thick paint with a brush, a spatula, or your fingers! The sky is the limit. You can layer the paint in thin or thick layers. Once you have finished your piece, make sure to seal it with Terra Tuff, Tera Seal, or Terra Wax. You can use this paint on wood, canvas, tile, fabric, walls floors, and more.
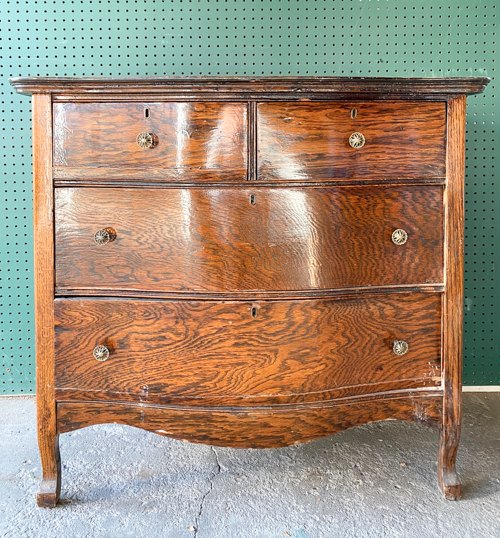
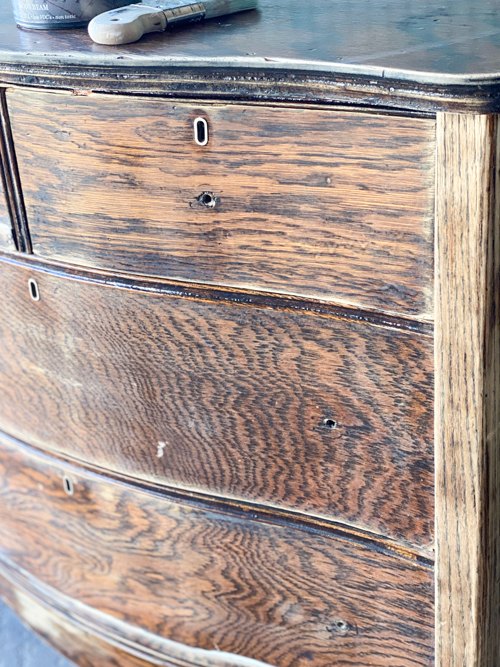
This new paint line had me intrigued, so I wanted to try it on my latest furniture find. I found this dresser at a thrift store.
{Affiliate links are used in this post.}
Supplies Used In This Makeover
Scrap Wood & Trim
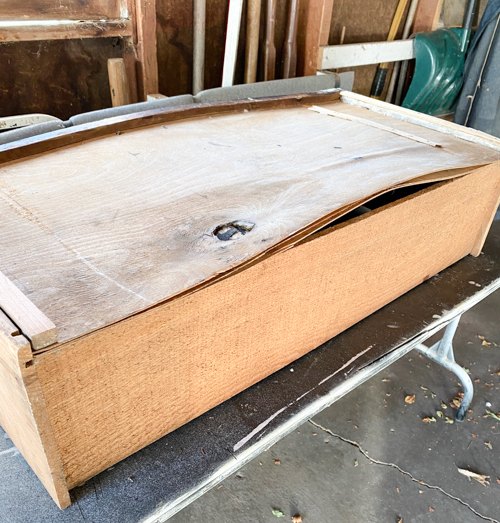
When I saw this dresser in the thrift store, I knew immediately it might be a good candidate to flip. Upon further inspection, I noticed there were some things wrong with the piece. There were some veneer spots that needed to be filled and the bottom drawer needed to be fixed. These are easy fixes for us after flipping for many years. It is also something I love to teach others how to do so they don't walk away from amazing pieces for their home.
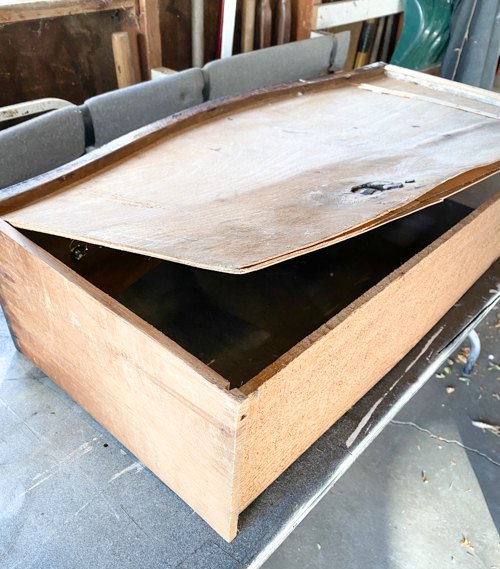
How to fix the warped part of the drawer:
The "floor" of the bottom drawer was warped and coming apart from the drawer. We cut some scrap wood we had in the garage to hold the bottom of the drawer in place.
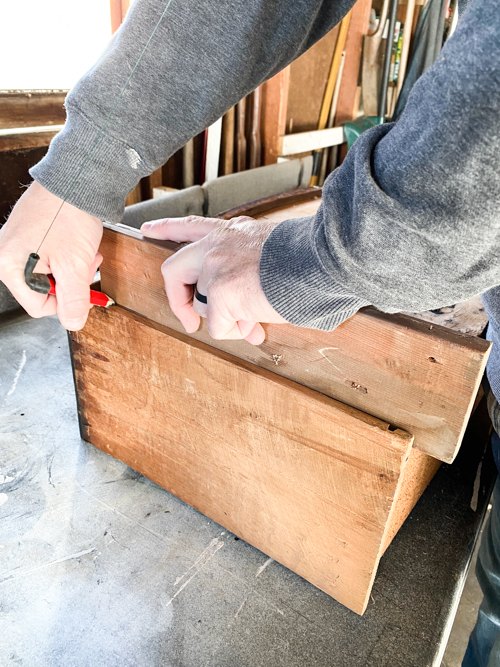
We measured and cut a scrap piece of wood to fit the bottom, left side of the drawer. To measure, Matt put the board up against the side and used a pencil to make the mark where to cut.

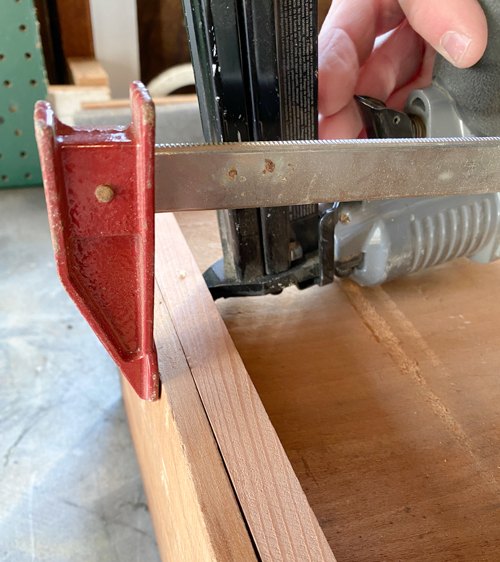
Then, he used a table saw to cut the wood.
He used clamps to hold the sides of the drawer tight as he nailed the cut piece to the side.
Once the side piece was attached, it was time to work on the backside of the drawer.
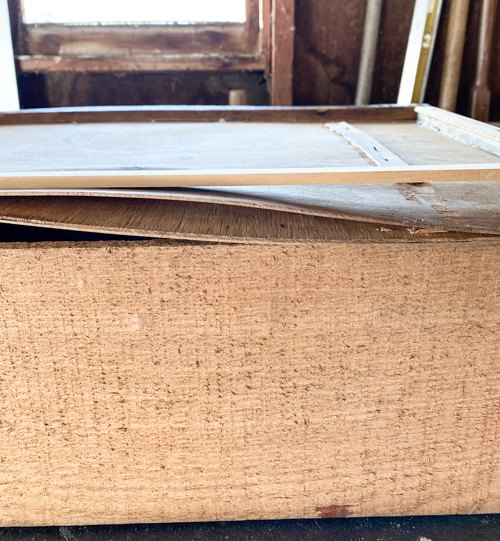
For this, we used a thin piece of plywood cut down to size.
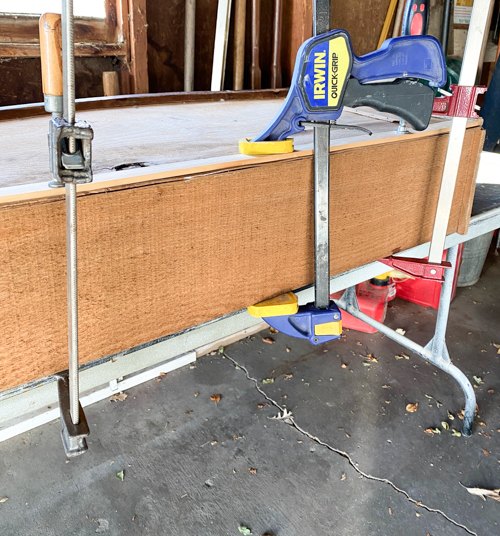
Again, we used clamps to hold the board in place as Matt nailed it secure. The drawer is fixed! Now, it was time to tackle the missing veneer.
I love using Dixie Belle MUD to fill veneer.
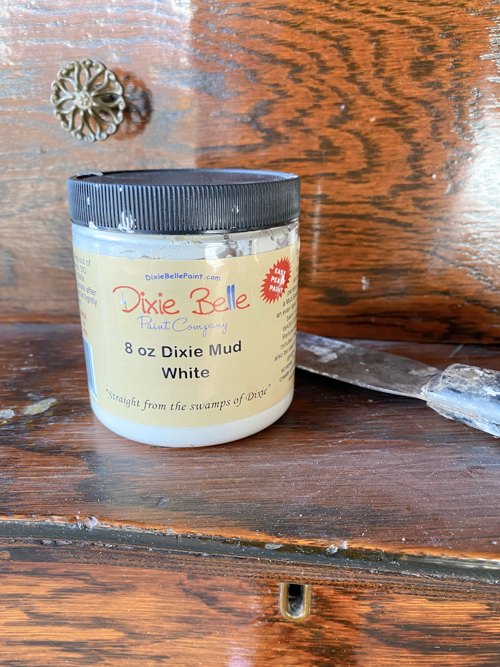
It is easy to use and works so well for pieces you are going to paint.
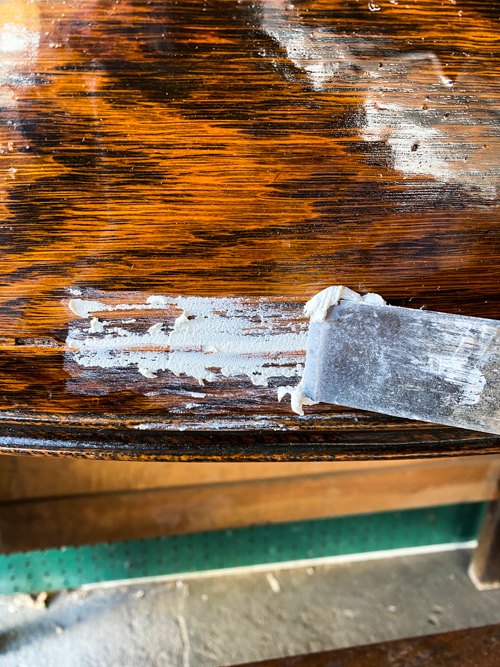
I use a small putty knife to apply the MUD.
MUD TIPS:
- DO NOT dip your putty knife back in the container after you have applied it to your piece. You don't want to get any debris or dust inside the container. I make sure to get a good amount out of the can and put it on a piece of cardboard or scrap wood and use it from there.
- DO NOT clean your putty knife in your kitchen sink. You don't want the MUD going down your drain. I use a wet paper towel to get all the MUD off the putty knife and put it in the garbage.
Once you have the missing veneer covered, let the MUD dry completely.
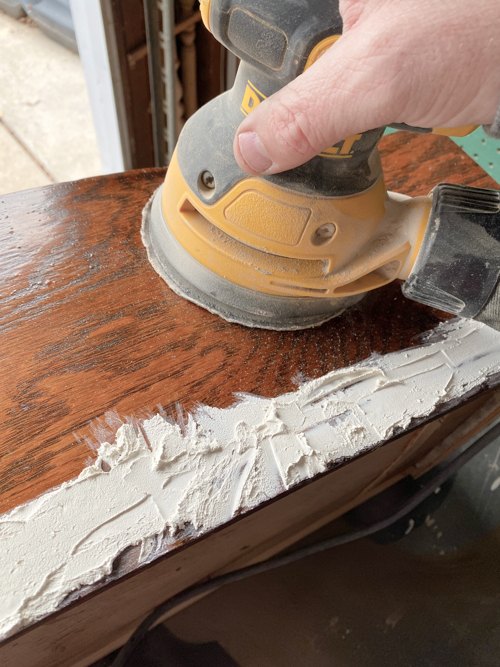
Once the MUD is dry, sand it down smoothly and make sure it is flush with the rest of the piece. If you sand down too much, you can apply more MUD and do the process over again.
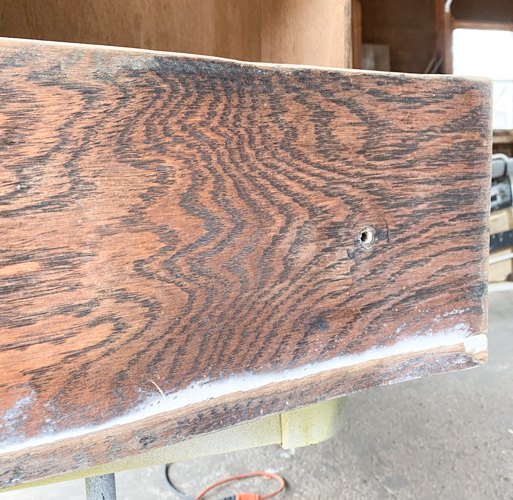
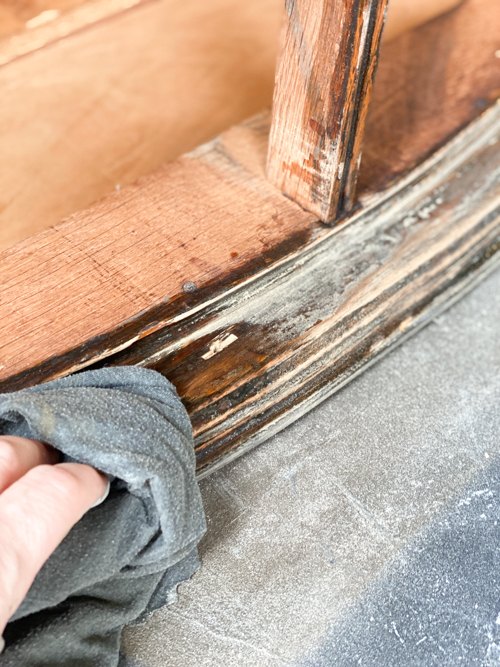
If I am filling veneer on a piece of furniture, I wait to do the scuff-sanding of the entire piece until the MUD is fully dry. Then, I get it all done at once. I had to fill many spaces with the MUD and this piece had a thicker sheen to it so I used my orbital sander to do all the sanding.
Once the scuff-sand is done, it is important to clean the piece. I use a damp rag to clean away any dirt or dust left over from the sanding. You don't want any of that in your paint.
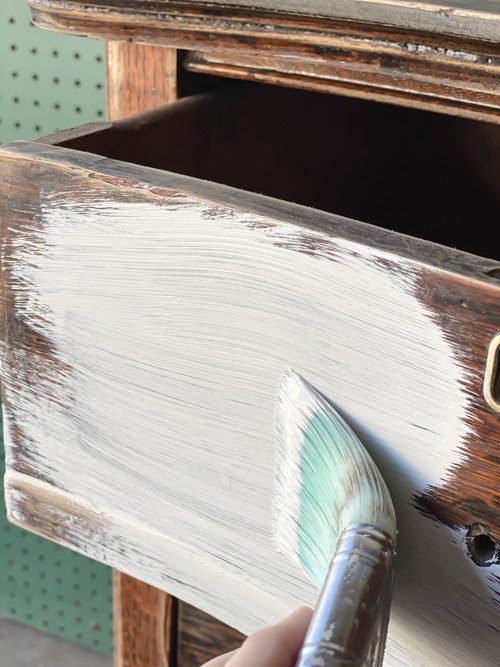
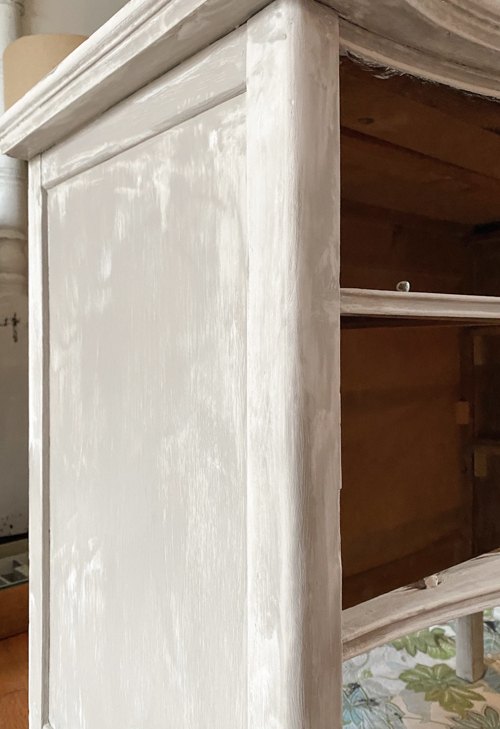
Once the piece is dry from the cleaning, I started to paint.
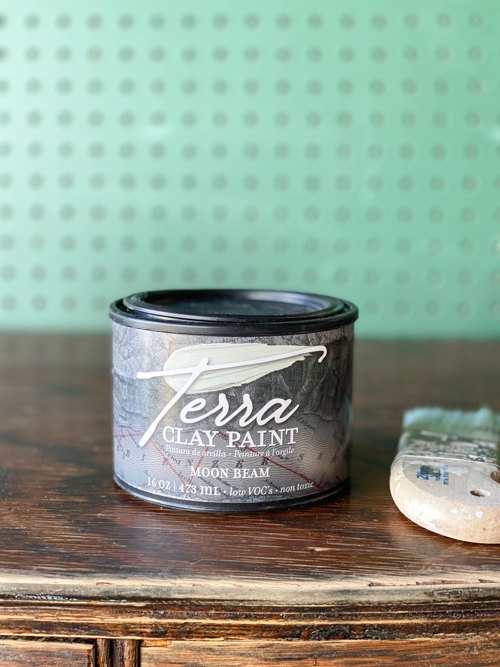
I started painting the piece in the color "Moon Beam". (After the first coat, I decided to paint this piece in a different color).
Things I noticed from the first time using this new Terra Clay paint:
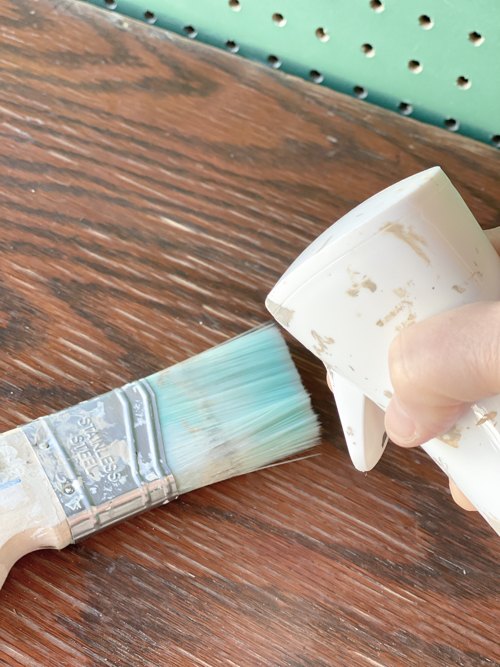
- This paint is thicker than other paints I am used to.
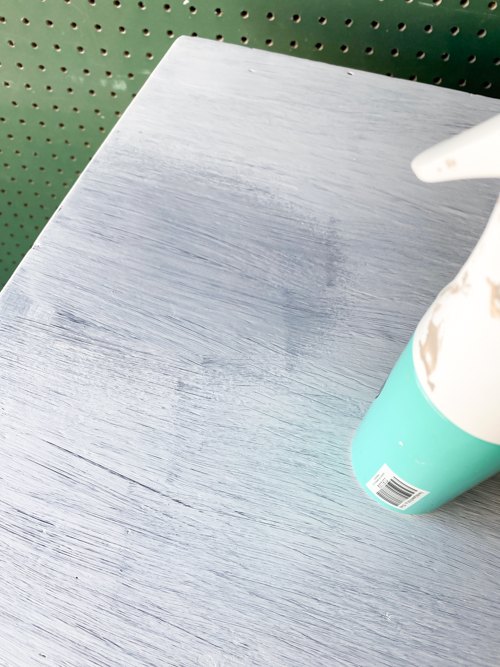
- It will reactivate with water.
- It is best to spray your paintbrush with water before dipping it in the can of paint. It helps the paint glide over the piece easier.
- If you don't like the way the paint is on the piece, you can spray the paint with water and it will reactivate so you can work with it a bit.
- The paint feels like clay. It is made of clay so it should be, but I was still surprised. I got some of my fingers and it dried and felt just like clay on my hands.
- You can layer this paint as thin or as thick as you want.
- The paint dries a different color than when you apply it. Don't judge the color until it is fully dry.
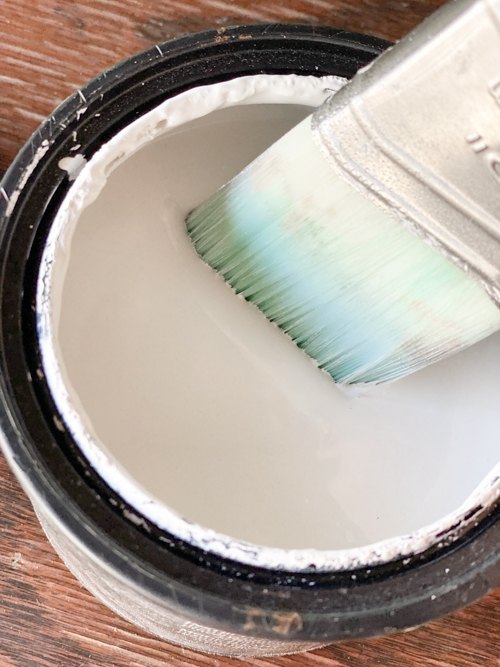
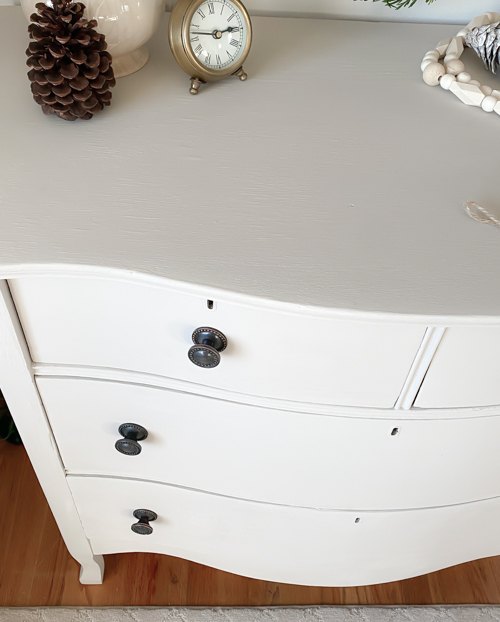
The "Desert Tan" color was a much better color for this piece.
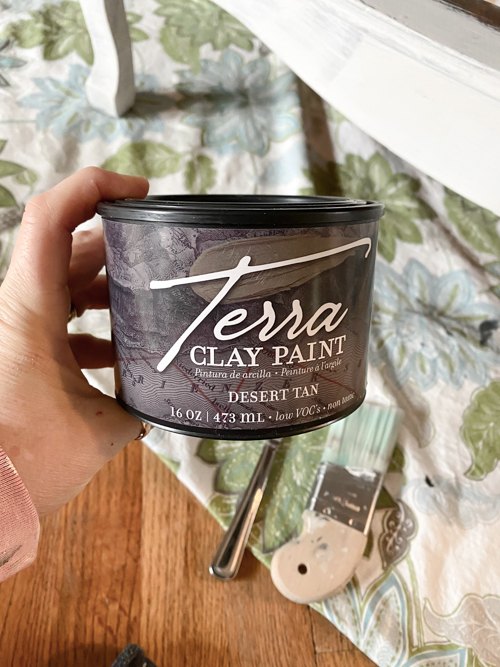
As I said earlier, the color changes. This "Desert Tan" goes on a lot darker and dries to a beautiful, lighter greige color.
I was blown away when I saw the color it was going to be as it dried.
You want to wait at least two hours before applying another coat and wait a full 24 hours before adding the top coat.
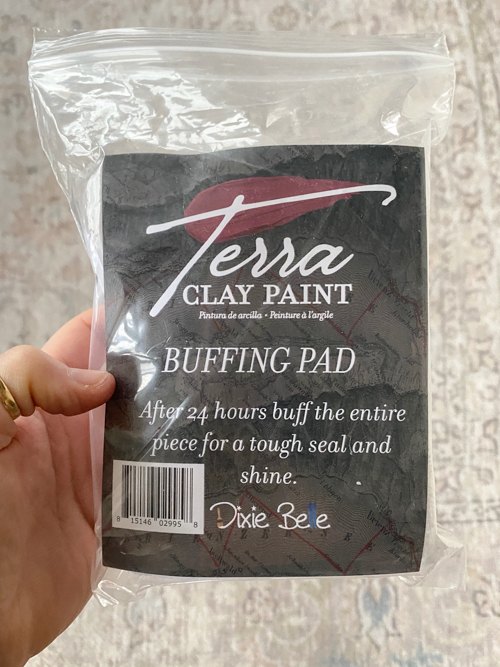
After 24 hours, I used a buffing pad on the dresser, and then it was time for a topcoat.
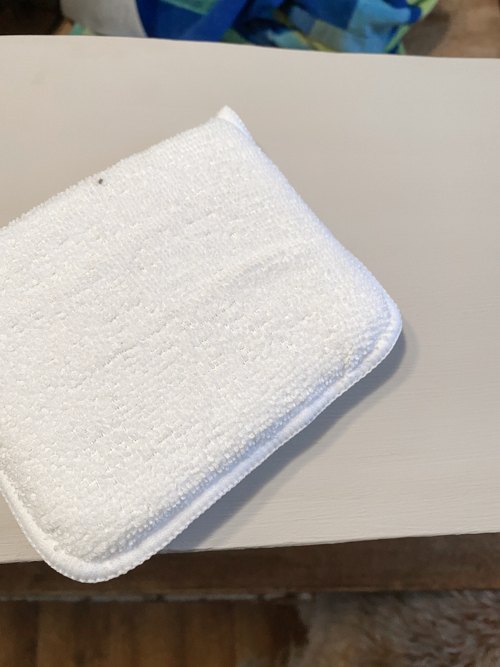
It is important to use a Terra topcoat on the piece to seal the clay paint. You just need a thin coat. There are a couple of different top coats for the Terra Clay paint. I used the wax that was available when the paint line first came out, but now they have Terra Seal and Terra Tuff that are a lot easier to apply with a synthetic brush or blue sponge.
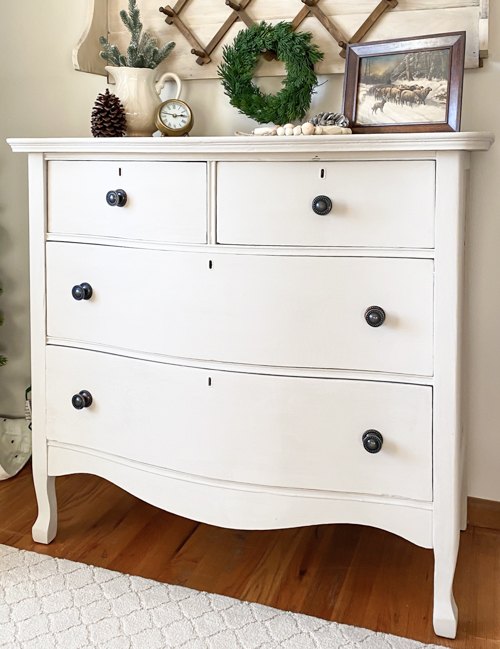
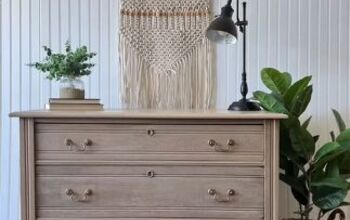
Look at this dresser now!
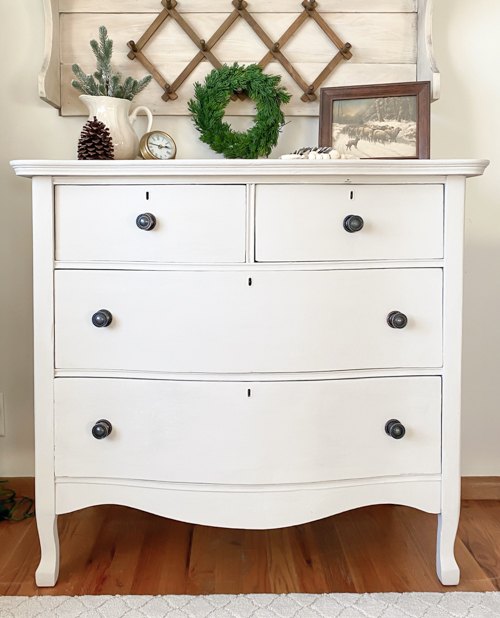
This paint color is so pretty.
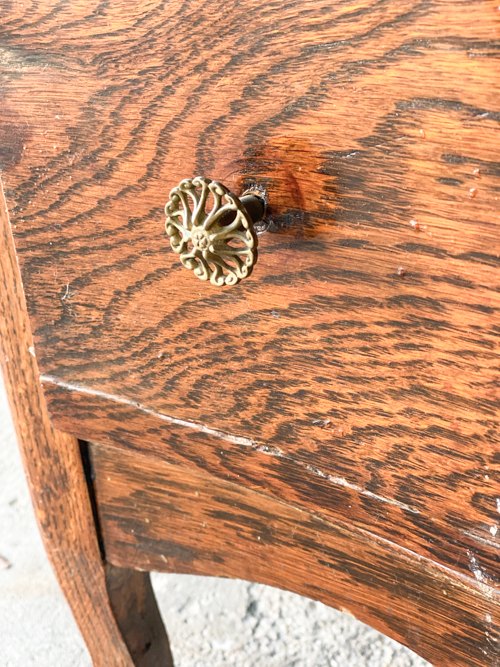
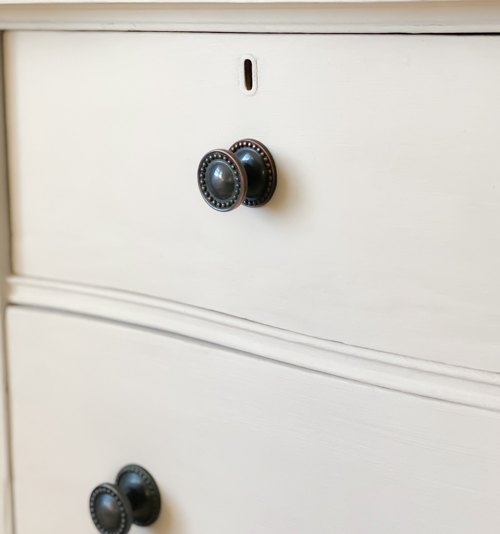
I added hardware that we had on hand. I am always picking up hardware when I find it at yard sales, Restore, and thrift stores. It saves so much money when making over furniture pieces.
I am a big fan of Dixie Belle paint. This Terra Clay paint is different than their other paints. I think it would be fun to use this thicker paint on a piece that you hand-painted with a scene or mural if you have that talent. I have seen some amazing hand-painted furniture pieces that are stunning. This paint would be perfect for that.
I hope this project inspires you to make over furniture you already have or pick up a piece at a thrift store or yard sale that has a lot of potential. Flipping furniture is a great way to furnish your home on the cheap and to get the exact look you want for a lot less!
Resources for this project:
See all materials


Comments
Join the conversation
-
That wood was so gorgeous
-
Beautiful piece! Great job! Ty for sharing!!


Frequently asked questions
Have a question about this project?
How hard would this be to take off if in the future you wanted to go back to the natural?
I thought you said you saving money by using the earth? Dixie Belle paint is not cheap!