


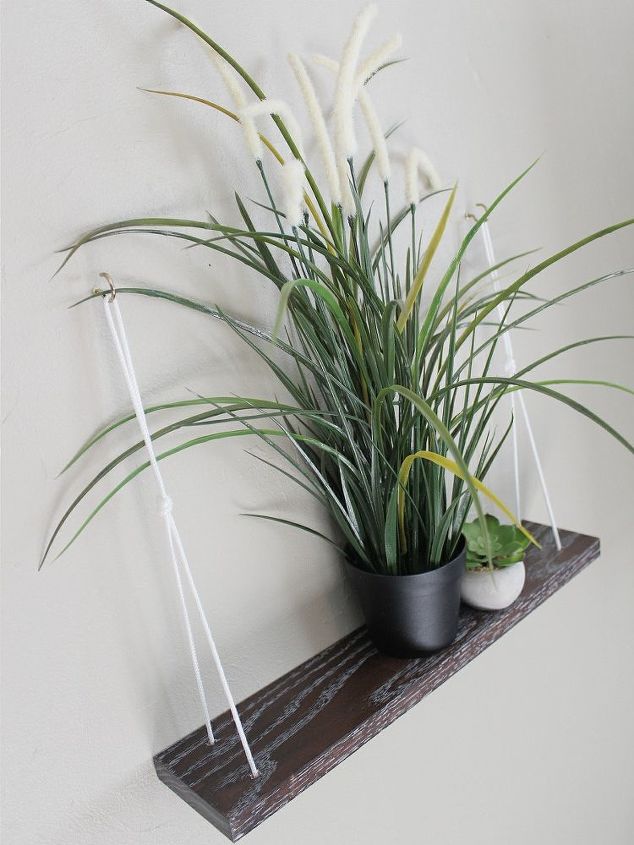
Creating a Limed (cerused) Finish on an Oak Shelf (and More)!

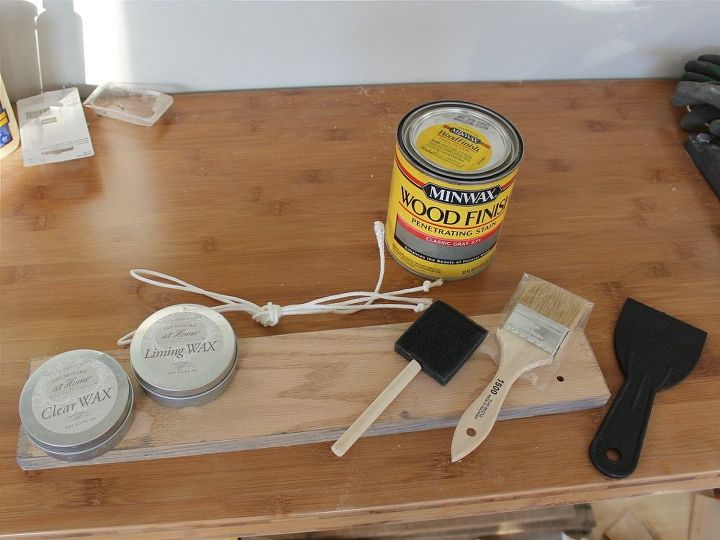
4 Materials
$35
2 Hours
Medium
Do you know what to do with Liming Wax? I sure didn't! For quite some time, I eyed this mysterious little tin can at the hardware store and wondered how on earth it should be used. I'm reasonably familiar with a wide variety of paints, stains, and finishing techniques, but this one had me stumped. After a little research and a whole lot of trial and error, I've fallen in love with the understated, gorgeous look that you can achieve with this unusual white wax, and I think you will too! This is a very simple introduction project, and I hope that it inspires you to try liming wax and incorporate it into a variety of home improvement projects!
So what is liming? Well, from what I've learned, it's a very old tradition and style where wood grain is enhanced by filling the open grain with a white wax. I won't give you a full history lesson, but feel free to look it up! It can be done on raw, unstained wood to create a gorgeous whitewashed appearance, or it can be used on wood that was previously painted, dyed, or stained. Liming wax is most effective on wood with a distinct, open grain - like oak. If you choose to use it on a wood like pine, the wax will not penetrate the wood and will merely create a soft white finish. If you want to achieve the exact look pictured in this tutorial, you must use oak or some sort of textured piece of wood.
So what is liming? Well, from what I've learned, it's a very old tradition and style where wood grain is enhanced by filling the open grain with a white wax. I won't give you a full history lesson, but feel free to look it up! It can be done on raw, unstained wood to create a gorgeous whitewashed appearance, or it can be used on wood that was previously painted, dyed, or stained. Liming wax is most effective on wood with a distinct, open grain - like oak. If you choose to use it on a wood like pine, the wax will not penetrate the wood and will merely create a soft white finish. If you want to achieve the exact look pictured in this tutorial, you must use oak or some sort of textured piece of wood.
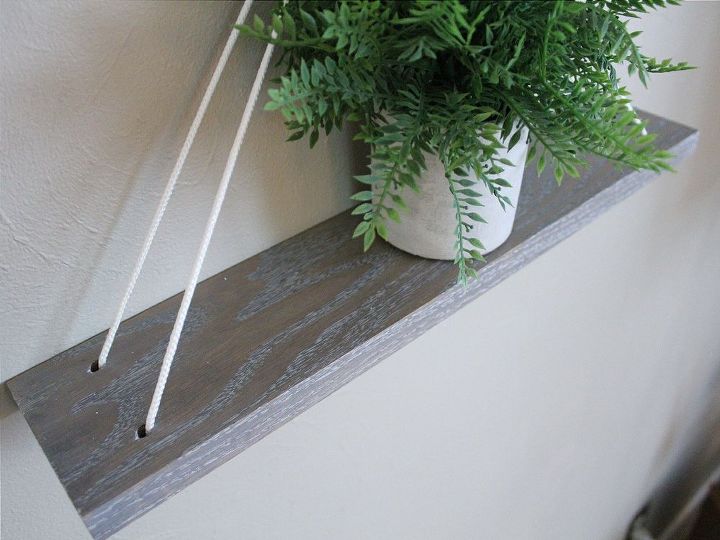
Again, you can do many things with liming wax, but for this tutorial, we'll just be making a simple hanging shelf. Drill 4 holes through your board, with each hole measuring in 1" from the end and sides of your board. Make the holes an appropriate size for your cording, as this is how your shelf will hang at the end.
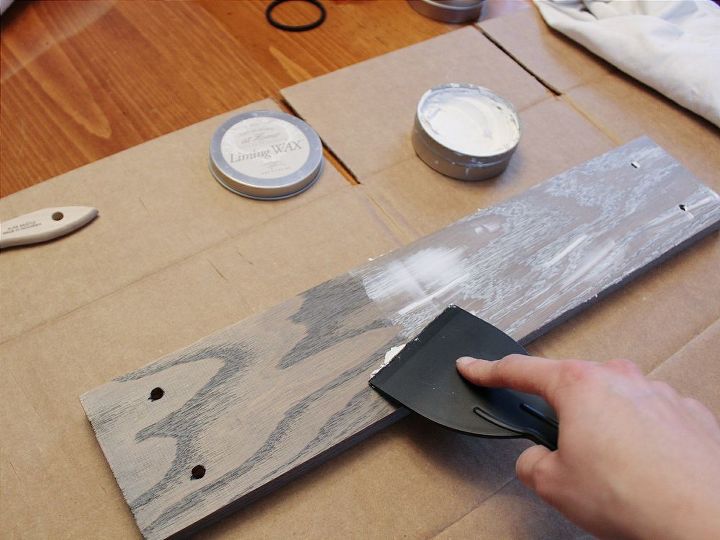
Once your stain has thoroughly dried (I recommend leaving it overnight), you can apply the liming wax. Since stain is very watery and penetrates into the wood, you should still have distinct, open grain lines in your piece of wood. The goal is to now fill those grooves with the liming wax. The best way to do this is with a plastic putty knife (I wouldn't personally use metal, lest it scratch my wood).
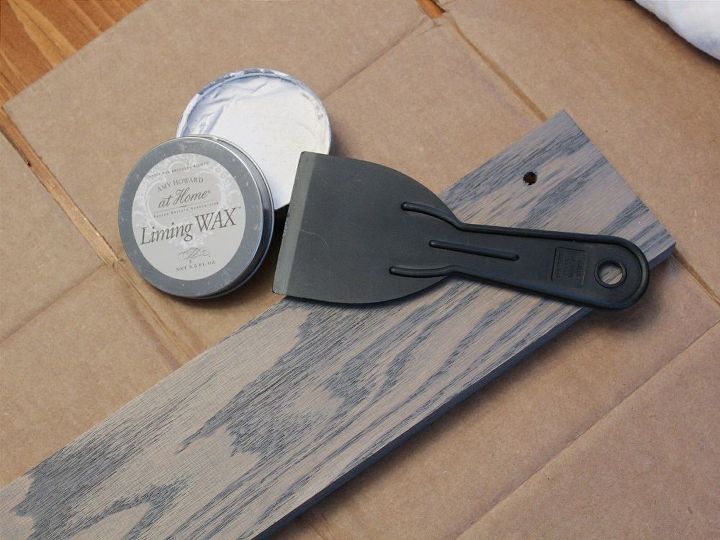
Scoop a quarter-sized portion of liming wax out of the container and start firmly pressing it into the wood. Press it in, then carefully scrape off the excess. It's like you're applying putty to a wall - press, gently scrape and pull away. Be sure to work the wax in all directions so you completely pack the wood grain. See how the grain is starting to really pop?
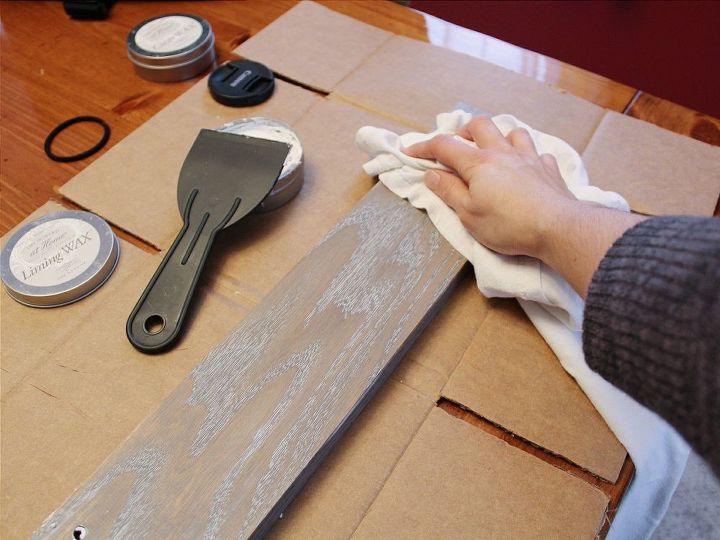
The wax does start to dry rather quickly, so try to work in sections. Once you've completely waxed an area, scrape off the excess, then gently wipe clean with a soft rag, preferably an old t-shirt. The rag should entirely clean the wax from the surface but leave the wax in the grain intact. Repeat the whole application process until the surface is complete! I recommend allowing the wax to set for about 20-30 minutes before you flip the board and apply the wax to the other sides.
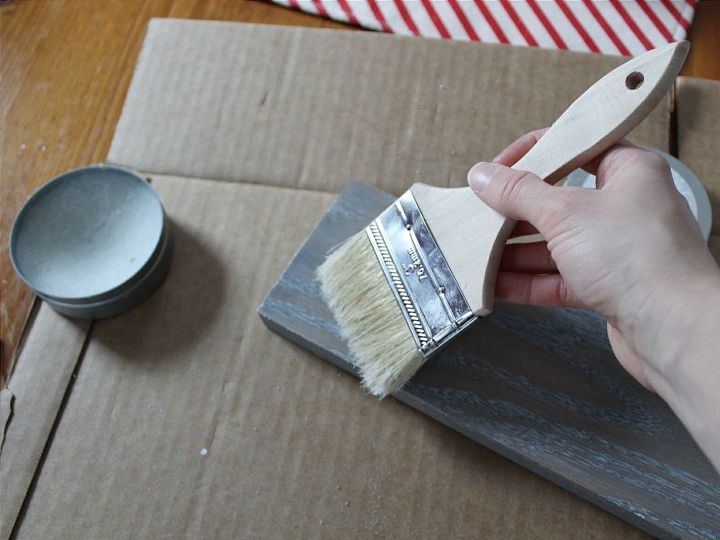
Once the liming wax has completely dried (I'd let it sit for 30 minutes to an hr), we will apply a clear coat of wax to seal everything and give the wood a soft shine. Again, I used Amy Howard at Home Clear Wax. The clear wax is applied with a soft, china bristled brush (chipping brush) that has natural fibers. Do not use a brush that has synthetic fibers or a coating on the bristles. Work the brush into the clear wax and allow it to collect wax on the bristles. Be careful that you don't OVER apply the clear wax - allow it to collect on the brush, but not to the extent that you have globs of wax. Before you start applying the wax to your wood, you need to offload your brush on a clean piece of cardboard. Simply move the brush against the cardboard in a criss-cross pattern to work the wax into the bristles and smooth any little clumps of wax. This shouldn't take long - you don't want to unload ALL of the wax before you even get to the wood!

Apply the wax to the wood in a cross-hatch pattern, making quick criss-cross patterns across the entire surface. Be sure to offload your brush every time you go back to the container for more wax! When it comes to waxing the surface, less is always more. Stick with a thin coat, because you can always do a second application if you think it needs it. The entire board should feel slightly tacky - if it feels sticky and slimy, you've got too much.
Allow the wax to dry for at least 30 minutes. Once it has dried, take a clean soft rag (like an old t-shirt) and buff the wax to a shine. Simply grab the rag and gently polish the board - don't rub it or put a lot of pressure into the polishing. Use big sweeping motions, as if you were polishing a shoe! The wood will soon have a soft shine. Repeat this entire process on all sides of your shelf.
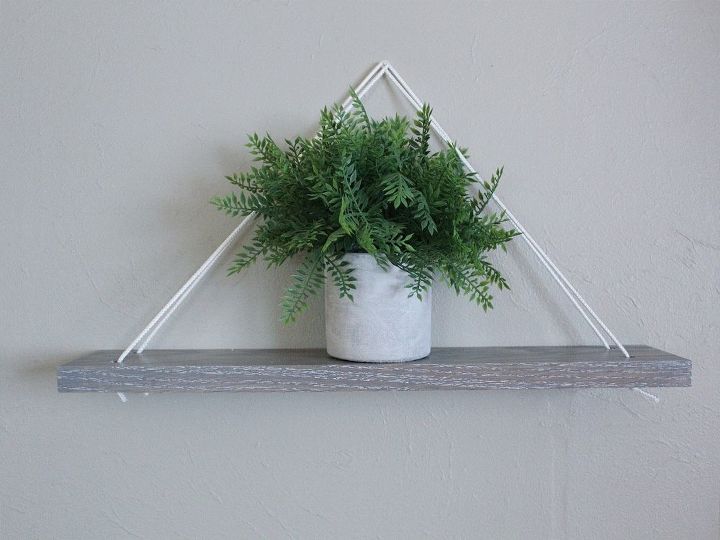
Now, as Amy Howard would say, sit back and enjoy the bragging rights! I've included another example below where I used a dark java stain. I love how bold the white wax looks against the dark wood! Keep in mind, you can use the liming wax over paint as well. HOWEVER - if you paint your piece before liming, the grain will be much less pronounced because the paint will fill the grooves and leave less space for the wax. You could choose to apply the white wax over a painted surface much like you applied the clear wax in this project, and it will produce a soft, white-washed finish. Be brave! Try the liming wax on a variety of surfaces and let me know how it goes. I'm still eyeing my oak cabinets and contemplating a massive kitchen overhaul!
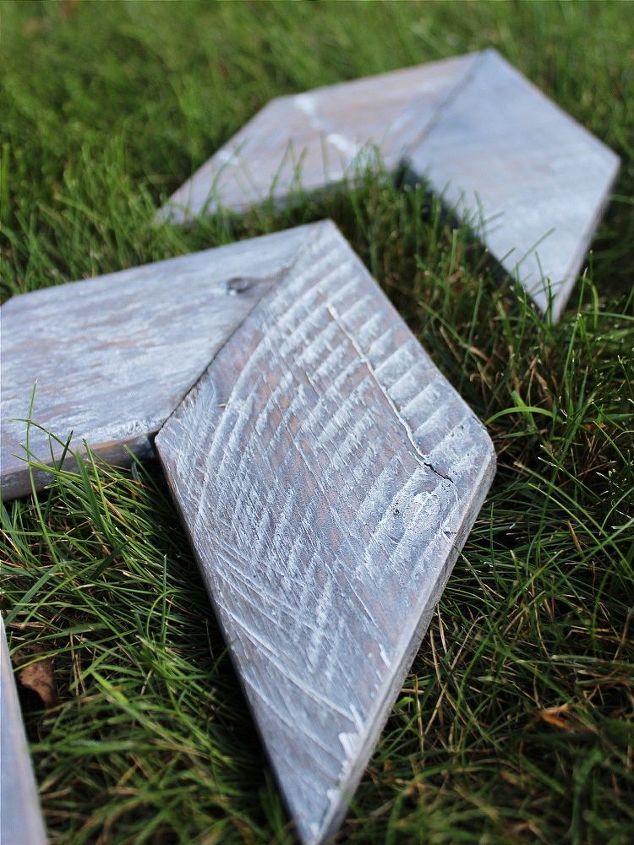
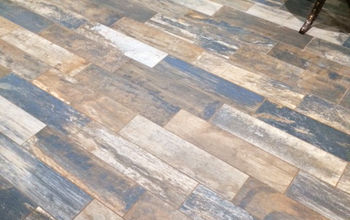
One more thing - I also love the look of liming wax applied to rough, reclaimed wood. It's perfect for achieving that weathered, white washed look! Here's a quick peek at how it looks in that application.
Comments
Join the conversation
2 of 29 comments
-
Love 2 try it
-
I really love this shelf! I would love to give it a go! Great job, great tutorial!


Frequently asked questions
Have a question about this project?
I just installed oak steps -the wood is raw - if I do this can it be protected for high traffic with lots of coats of polyurethane or some other varnish or shellac?
Could I use liming wax to fill small gaps in hardwood floors? I have a house built in 1915 and I do not want to cover the floors with new floors... I think previous owners had carpets and removed them so they aren't in bad shape except under where the dining room table is... I'm definitely going to stain and poly too... I've already found a color that matches all the rest of the woodwork... There's just like splinter like pieces that have come up... I don't want to tear up the floor, so if there is a way to just fill those small gaps, that's what I want to do...
fantastic! I don't have Amy Howard waxes but I do have the required waxes by rustoleum. Would there work just as well, I guess they would?