


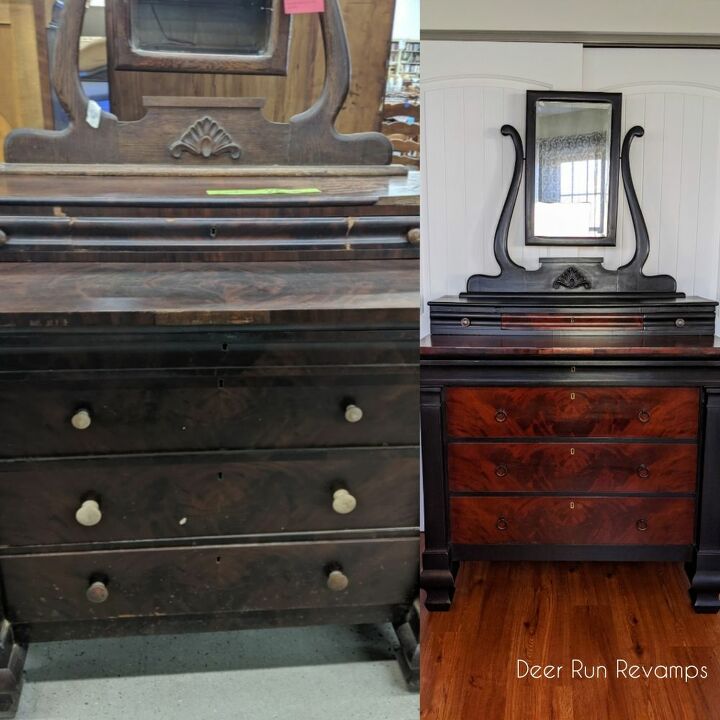
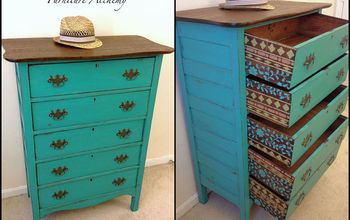
How To Rescue An Antique Dresser That Was Destined For The Trash

13 Materials
$80
4 Days
Advanced
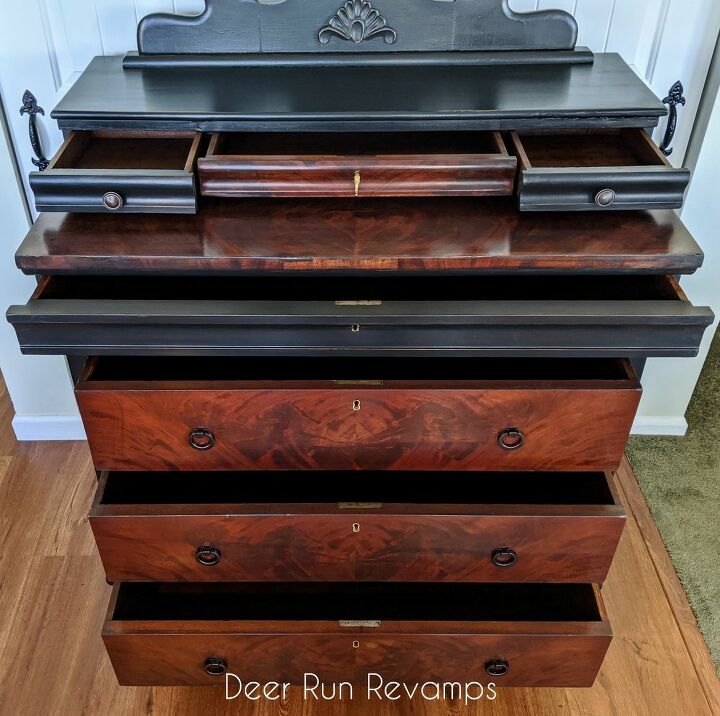
I stumbled across this piece in the back corner of a habitat for humanity restore while walking another piece back to my van. I asked them if it had sold since there was no tag on it, they said no, it wasn't for sale since it was unusable and dangerous (the top mirror piece wasn't attached and easily falls over). When I saw this piece, I immediately fell in love. I was able to see that crotch mahogany veneer under all that dirt, grime and dark stain. Yes, it needed MAJOR work. Structural work as well. But, chipped veneer, necessary reinforcing, and rebuilding corners has never stopped me before when it comes to rescuing these old beauties. For a $10 donation, I loaded this baby up too! Here's how I brought this 1890's dresser from a broken ugly duckling to an absolute show stopping piece.
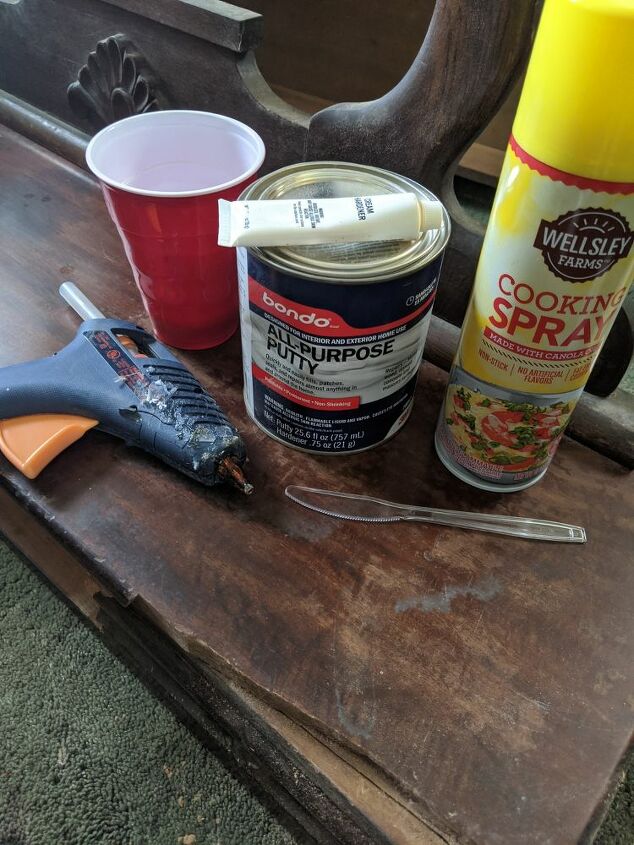
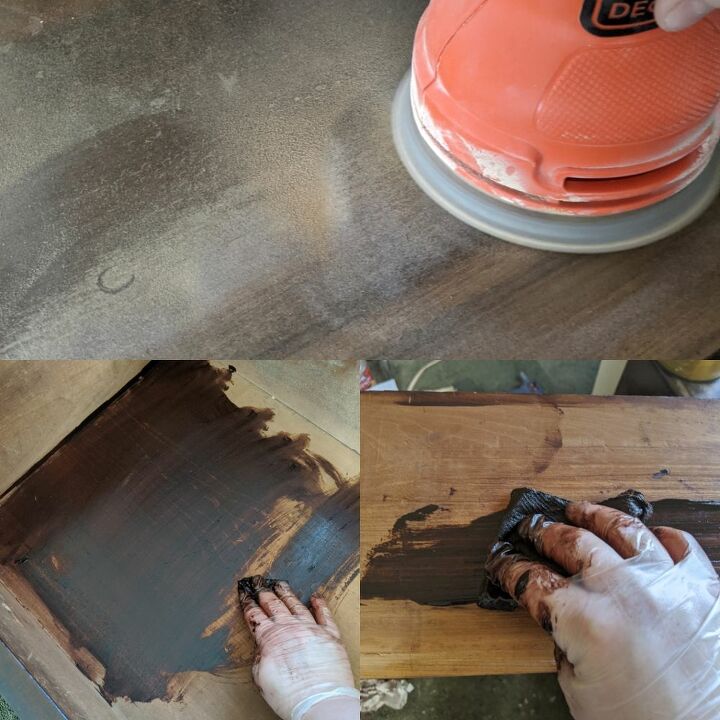
First, scrub the piece down with Frenchic's Sugar Soap. This is a non toxic cleaner that removes the dirt and grime easily. Then wipe down with plain water. I knew I wanted to save as much of this gorgeous veneer as possible, so I filled in all of the little nicks and missing pieces with wood filler. The larger chunks were filled with Bondo, then a layer of the brown wood filler to make it easier to blend into the wood. The top part was completely missing the right corner edge. So I had to rebuild it. I've done this technique in previous tutorials with missing molding, missing details, even completely rebuilding feet! And since this kind of repair comes about quite often with refinishing furniture, I'll share again. To rebuild a corner, molding, detail ect, all you need is Bondo, hot glue gun and glue sticks, cooking oil spray, and a mixing cup and stirrer that can be thrown away afterwards.

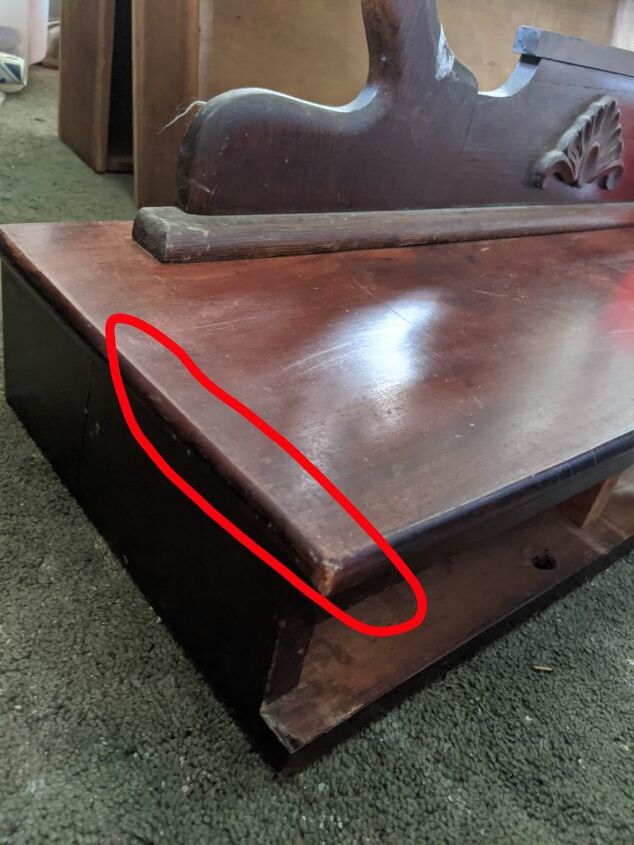
This is the broken edge 😫
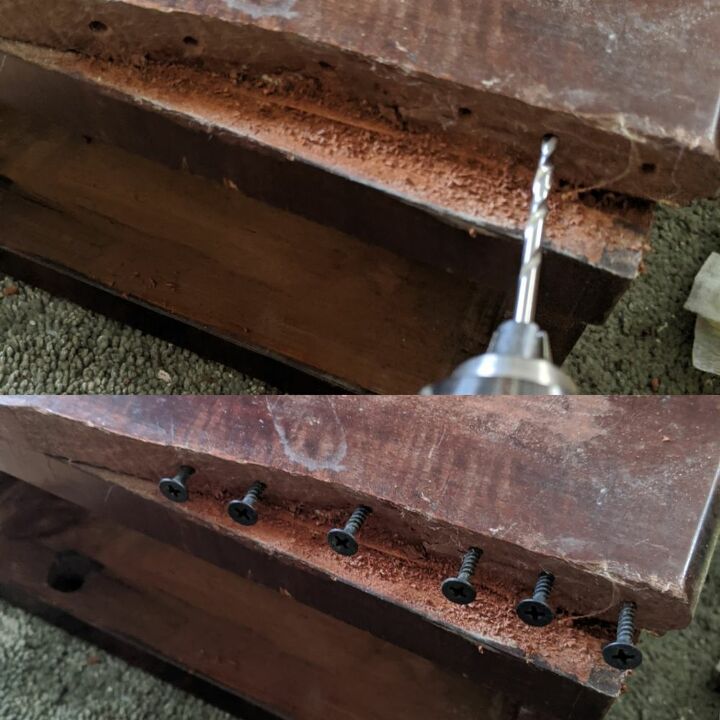
Since the Bondo will be replacing a larger piece, I needed to add anchors for the Bondo to adhere itself to and strengthen the edge; screws that will stick out as far as possible without protruding the edge. I first drilled out holes for the screws (by drilling out the holes, you lessen the possibility of the wood spliting), then screw in the screws.
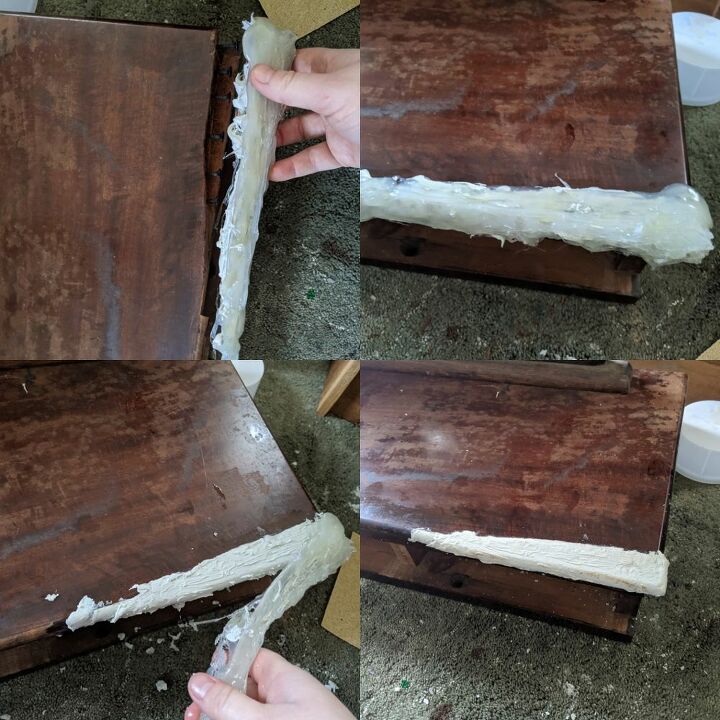
Now, figure out which area you need to make a mold of that will fit the missing edge. To fit the broken front right edge, I needed to make a mold of the left side edge
Spray the area you are making the mold of with cooking oil. Then cover it completely in a thick layer of hot glue, making sure you have no holes where the Bondo can ooze out of
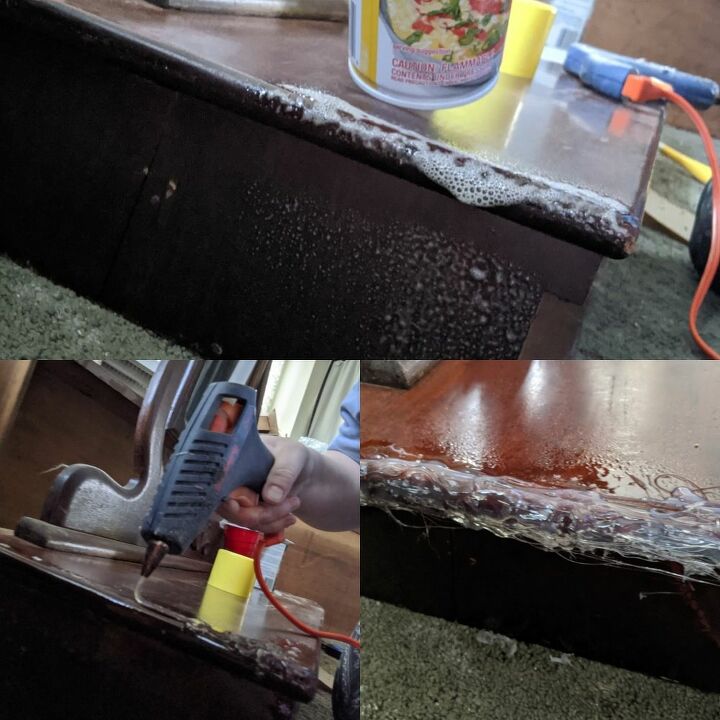
After the glue has dried (about 10 minutes), pop off the hot glue mold. It will come off easily. Spray the inside of the mold with cooking oil. Mix up your Bondo according to the directions on the can in a disposable cup using a disposable stirrer. If you've never used Bondo before, be aware, the smell is very strong and the work time is very little. It starts to harden within minutes. So if you're doing an extra large area, I recommend doing it in sections. Go ahead and fill the inside of the mold with Bondo **Anytime you work with chemicals, I urge you to wear gloves, protective eye wear, and a mask
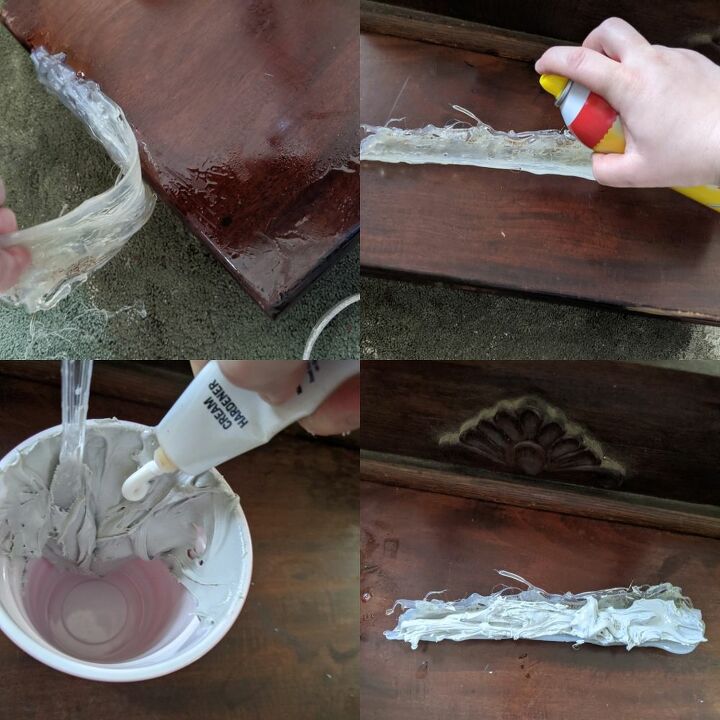
Press the mold into place over the screws. Wipe away any excess Bondo oozing out of the sides. Let it sit there for 10 minutes as it hardens and then remove the hot glue mold, it will pop off easily. Continue to allow the Bondo to set for 20 minutes
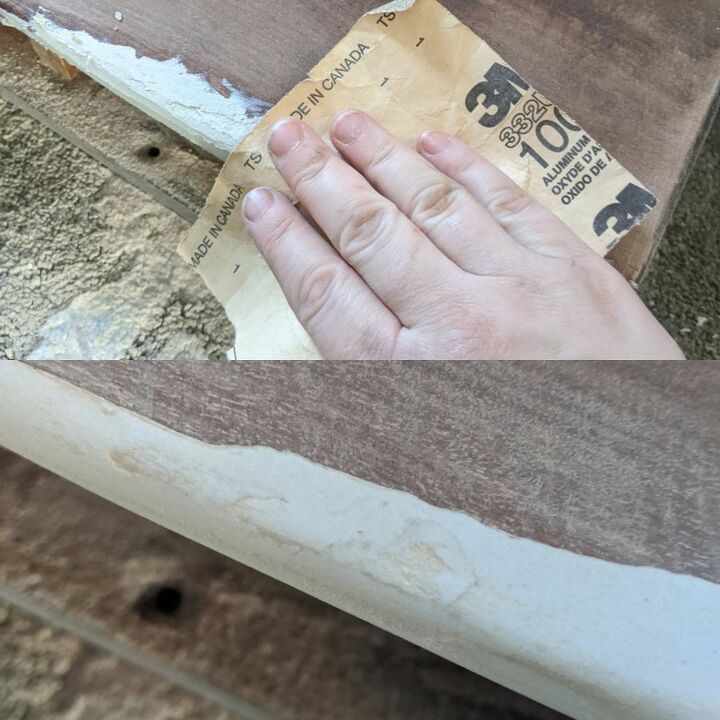
Now that the Bondo has hardened, you can sand and shape the new piece to match the rest. I first use my orbital sander and 150 grit sandpaper and quickly go over the whole piece. Then I move onto hand sanding with 100-150 grit to shape it. Finish off with 220 grit sandpaper to smooth it all out. If you have small dents in the Bondo, you can fill with wood filler.
Now, moving on to the refinishing part of the project. Once you have a vision for the piece, you can plan it out. I am known for my contrasting mix of wood and paint pieces, and this one was no different. I knew the wood would be the star 🌟 And I really wanted it to be dark, elegant and regal. I sanded down the main dresser top and drawer fronts. The veneer on the drawer fronts on the top piece needed a lot of filling, especially the 2 smaller ones, so those got painted. The middle drawer was salvageable tho. (The finish was mostly worn off on this piece, so I didn't need to strip anything. If your piece has a thick layer of varnish, stripping the wood first is recommended). Using my random orbital sander and 150 grit sandpaper, I carefully sanded down to the bare veneer. Then I lightly went over it again with 180 grit and then finished off with 220 grit. I then applied wood conditioner with a brush. This preps the wood for an even application of wood stain. After allowing the conditioner to dry for about 25-30 minutes, I applied varathane Mahogany gel stain using a sponge. You can use an old t shirt, brush, paper towels even. I only allowed the stain to sit for a minute before wiping back, so work in small sections. I also stained the drawer sides and entire inside if the drawers
I decided on painting the frame of the dresser, the 2 smaller drawer fronts, the long drawer front from the dresser, the top piece and mirror in Frenchic's "Loof", our blackest black from the lazy range
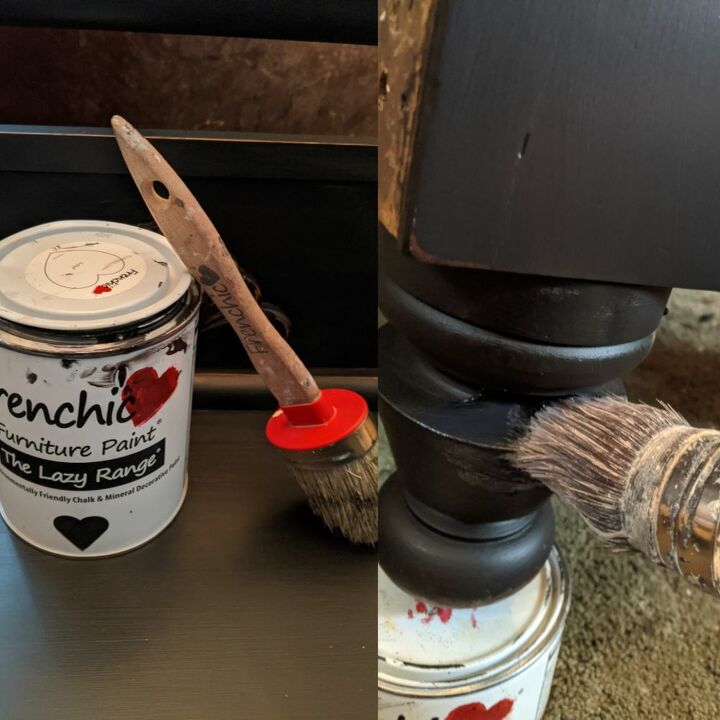
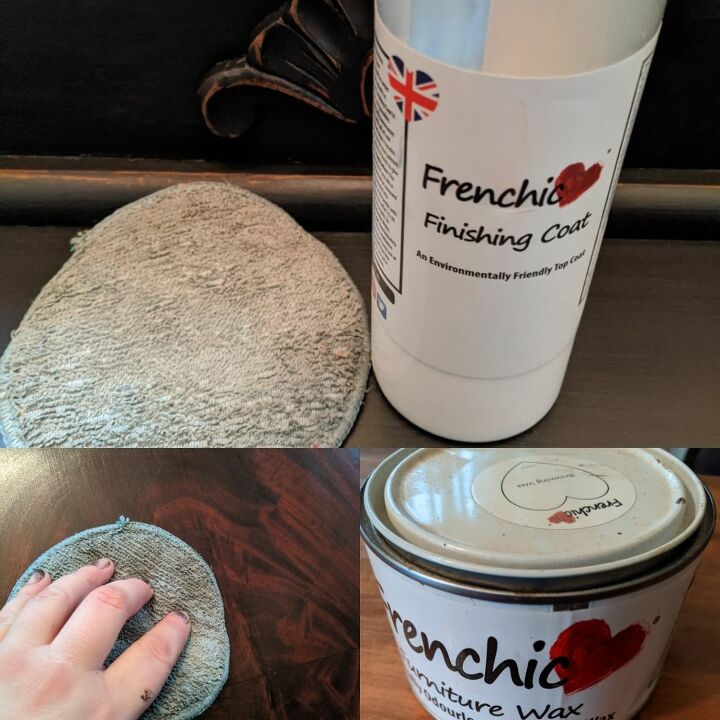
Frenchic's lazy range has a built in topcoat and is extremely durable after the 28 day cure time, no extra topcoat is necessary. But, since I sell my pieces, I always go that extra mile to ensure that my finishes outlast the passing down of generations. Once the paint has dried (about an hour), I went over it with 320 grit sandpaper to smooth it out. For the slight distressed look, apply some pressure when going over corners, edges and details until you see the wood peeking through. Time to seal all of that hard work! The stain needs to dry for at least 36 hours before applying my topcoat of choice (stain is oil based, topcoat is water based), so that is saved for last. When applying a topcoat to difficult colors such as whites, blacks, even reds, I have a tip. Add a bit of the paint to the topcoat and mix well! I needed about 1/2 cup of topcoat for this piece, so I added in about 1/8 cup of paint, the rest general finishes high performance topcoat, and mixed well. Using a sponge, I applied 3 thin coats of the tinted topcoat to the painted areas, waiting 2 hours between coats.

Now that the stain has had at least 36 hours to dry, we can apply the topcoat. I chose Frenchic's Finishing Coat for the wood. This is a super durable topcoat that has just the right amount of sheen. Using a sponge, I applied 3 thin coats of Finishing Coat to the wood surfaces, waiting 2 hours between coats. Frenchic's Browning Wax is a great versatile product! You can use it to protect surfaces, add it to details and blend it around edges for an aged look, or you can even apply it to bare wood instead of stain! A one step process that will give the wood a popular Java brown color! Using a sponge, I applied browning wax to the drawers to protect the wood. After the wax dried for about 45 minutes, I lightly buffed with a clean dry sponge.
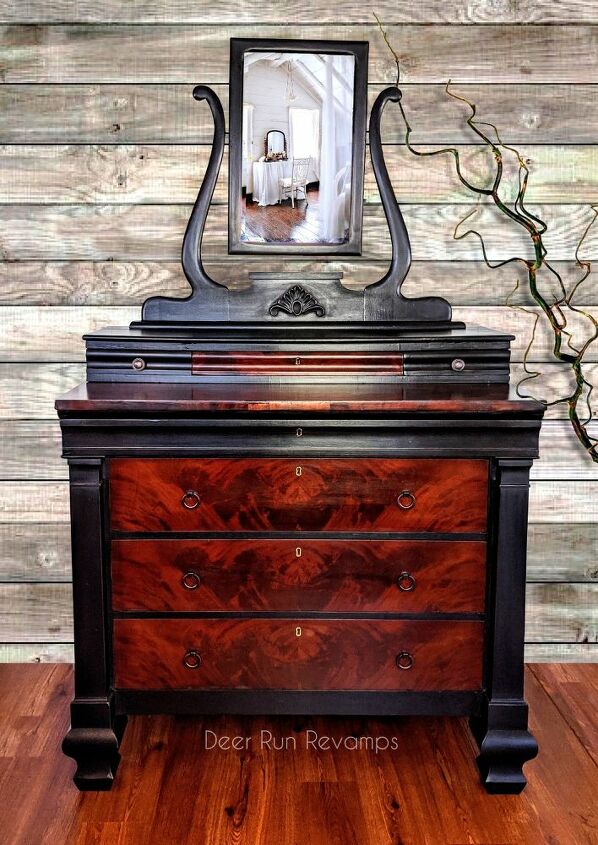
I installed the new hardware and then sat back and enjoyed the view ❤️This piece was a labor of love for sure! She has now risen to the top of my favorites list 😍
You can visit my Instagram or Facebook page to check out my other pieces and give me a like to follow my journey 😉 My Etsy shop is stocked with the full line of Frenchic Furniture Paint as well as many other products and furniture, including this gorgeous piece! Yes, we ship everything nationwide!
If you have any questions, feel free to reach out or ask below 😁
Resources for this project:
See all materials


Any price and availability information displayed on [relevant Amazon Site(s), as applicable] at the time of purchase will apply to the purchase of this product.
Hometalk may collect a small share of sales from the links on this page.More info
Comments
Join the conversation
4 of 183 comments
-
I am so happy to see this piece. Glad you did an amazing job of restoring this beautiful piece. It is wonderful you opted to do it, that you did not, bleached , pickled, painted covered with transfers. You are a fantastic restorer. Thank you for this.
-
Wow! Now that is a beautiful repair and renew. Fantastic appreciation for mahogany book veneer. And the structural repairs are great too. And kudos for using the minimal and age-appropriate hardware: that really lets the wood take centre stage.
(I hate it when people ruin good furniture with milk paint and the like, and I often get censored when I say so on this board.)


Frequently asked questions
Have a question about this project?
Have you thought about doing a little mahogany stain on the mirror? It looks separate from the bottom part and needs a little something extra to look cohesive. Otherwise, the look is beautiful.
What do you charge for such a beautiful
piece?
My mother bought a mahogany bedroom suite in 1960 and it was finished out exactly like this! Black on the edges and redder in the center. Beautiful work!!