


Old Foot Locker Brought Back to Life...

by
Dorinda
7 Materials
$50
3 Days
Medium
While going to some yard sales, I came across an old foot locker for $20 that was screaming to be made into a coffee table, or maybe just used for storage. The finished product will not be perfect, after all, there's only so much a person can do with torn cardboard, which is what the locker was mainly made of. I guessed at the price, as I had some of the materials at home, and the drill wasn't counted in the price. I listed it as 3 days to complete because I like to let the paint dry fairly well. I also listed it as medium skill level for having to use a drill.
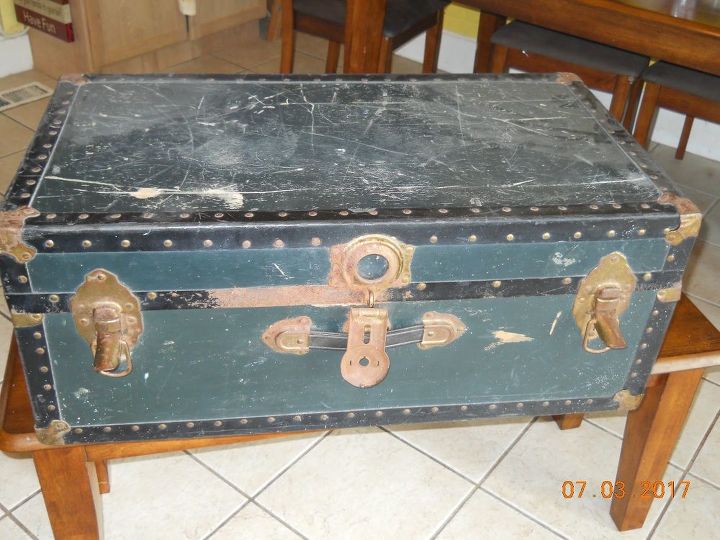
Here is what the outside looked like when I bought it. I took some 220 grit sandpaper and went over the whole thing, trying to knock down scratches and rust.
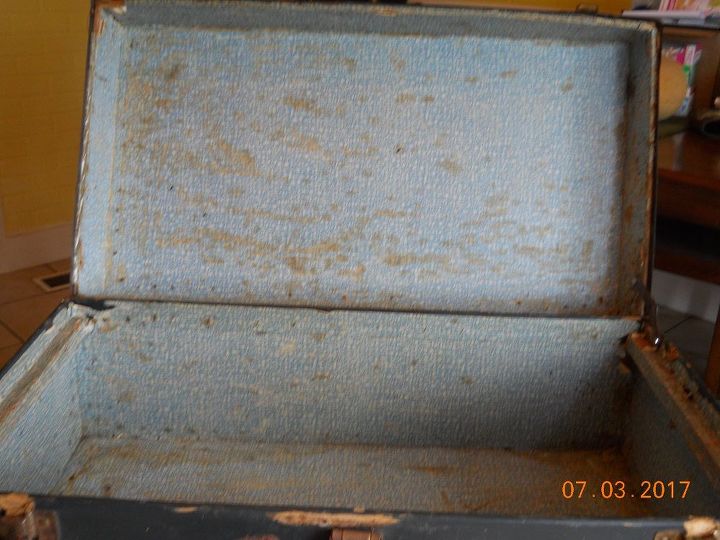
The inside was as bad as the outside. I peeled off what I could of the paper liner, but not all of it would come out. Then I sanded the inside with 220 grit sandpaper, trying to knock down the edges.
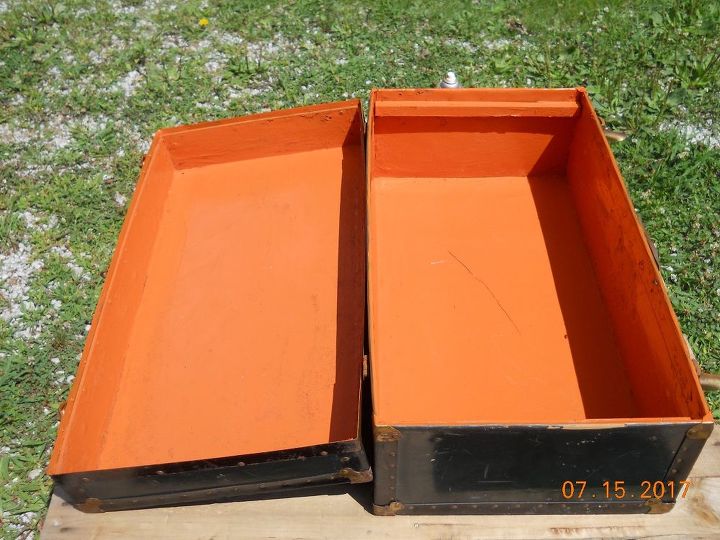
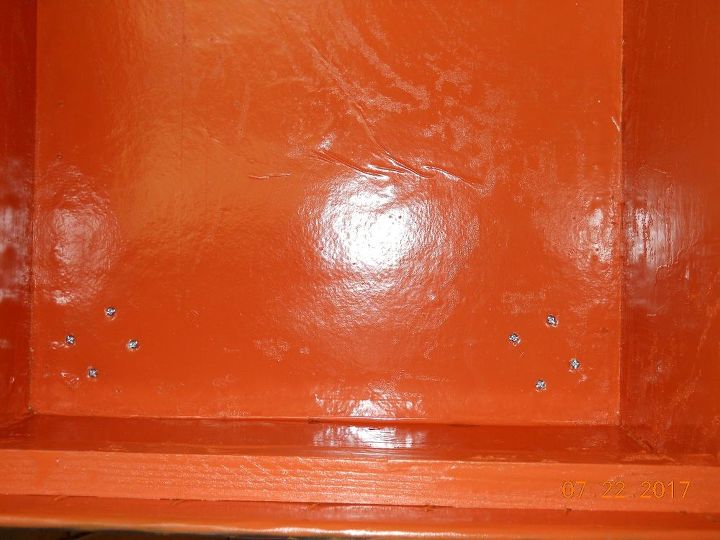
Next, I painted the whole inside with Rust-Oleum 2 x ultra cover spray paint in satin rustic orange for a pop of color. It took a few coats and 2 cans of paint to cover the pattern that was in the paper that I couldn't get. Word of advice, paint outside, or with a lot of ventilation, and a mask, or you may make yourself sick from the fumes of the paint.

I then closed the lid, and spray painted the whole outside 2 coats, handles and all, with Rust-Oleum satin spray paint in satin coastal gray. I used about a can and a half to make sure I coated it well.
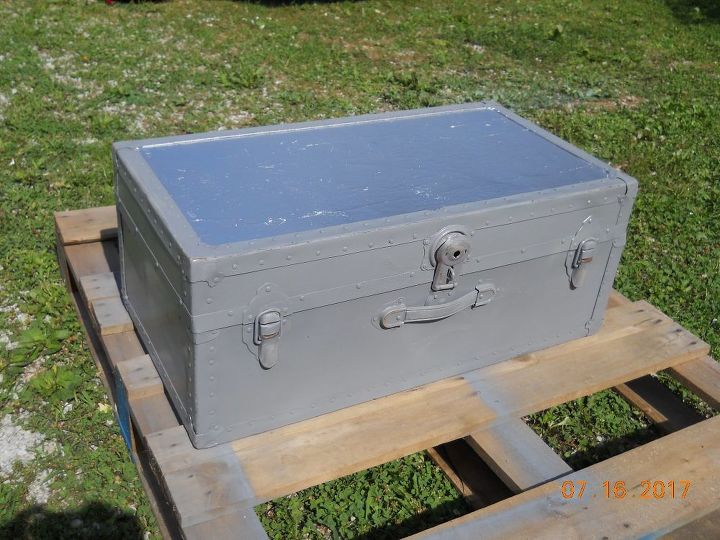
When the gray paint dried, I used blue painters tape to tape off the trim on the top so I could spray paint the top only. I used Rust-Oleum specialty metallic spray paint in metallic silver, and gave it one good coat.
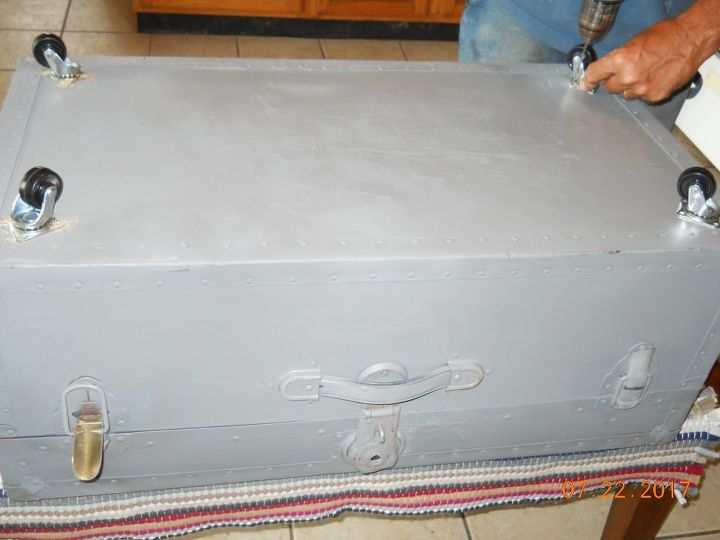
Next, my husband positioned the casters on the bottom of the trunk, and drilled holes where the bolts were to go to attach the casters. Make sure to get the kind of casters that swivel all around, otherwise your locker will only roll from one side to the other.
Lay the locker on it's side, and put the bolts thru from the inside of the locker. On the bottom side, put the bolts thru the casters, then attach the nuts and tighten down. This way you won't have much sticking up in the locker.
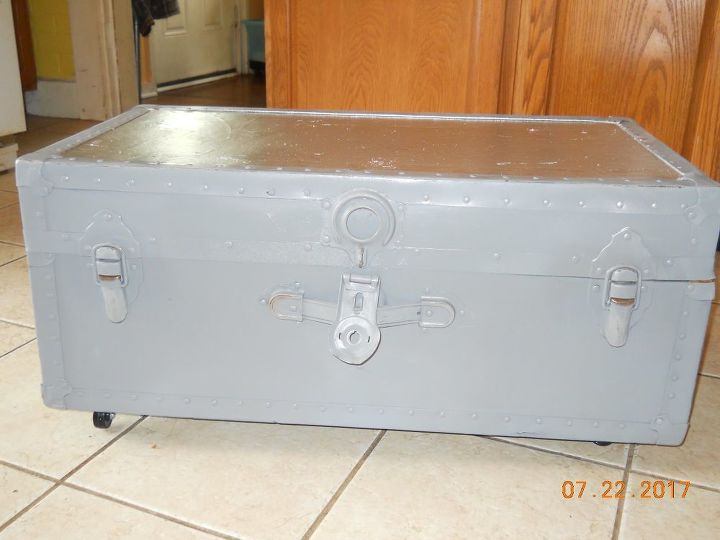
Here is a pic of the finished product after taking 220 grit sandpaper and distressing the edges and locks slightly. Now I have to say that when you open the lid, you will see a little bit around the lip that isn't painted...I did that for a reason. It was so whomever buys it will see what the locker looked like before I started. I also left a little metal on the locks so you could see how they looked before it was painted.
Comments
Join the conversation
4 of 6 comments
-
would have never thought of bolting wheels from inside !! THANKS !
-
This reminds me of my late husband’s footlocker from his army days. Are used to use it as a coffee table like yours years ago when we were being transferred from place to place. Now I’m using it for storage in the closet. I need to bring it out and refresh it and use it too so it can be seen and cherished now that he’s been gone for almost 30 years.
Thank you for reminding me. Yours turned out beautiful and I love the the wheel idea and actually doing it from the inside that’s great idea. Thank you again stay safe and have a wonderful day.


Frequently asked questions
Have a question about this project?