


You Have To See This Amazing Gradient Color Look On Furniture
Don't you just love a gradient color effect? I want to show you how to create this effect to give your furniture even more character!!
Growing up, I was ALWAYS a sucker for that font theme that you could use in Microsoft Word. You know the gradient color theme that was super colorful and fun? Naturally I have gravitated towards colors, blending, and unique paint finishes with this art I have found. I want to show you how I have figured out how to get that gradient color look on furniture!!
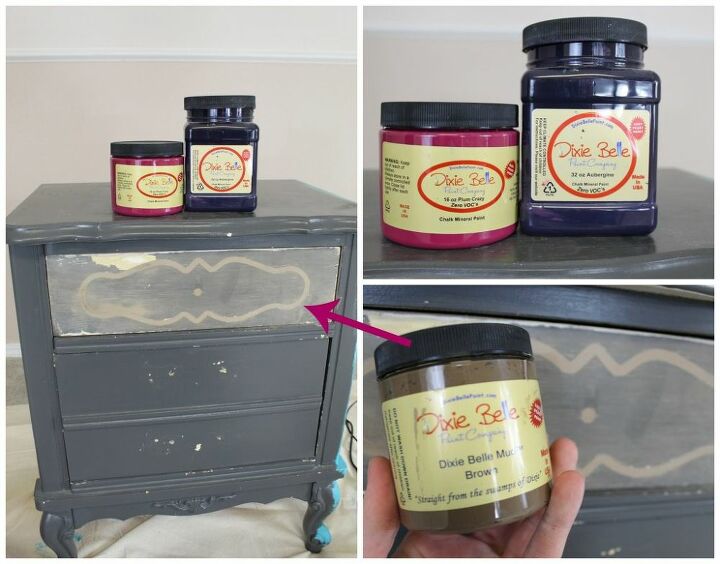
I want to first give you a list of supplies you will need. For a gradient color look I think it is better to use two colors that will blend nicely. One should be a darker shade and one a lighter shade. I did two different color combinations for you. One combo for the still pictures, another for the video. I don't call this finish ombre' because when I do ombre' finishes I generally use 3-4 colors. I am sure in reality they are all one in the same and similar but I like to keep them separate paint techniques.
So before you paint any piece of furniture you want to make sure you prep it well. You can see how I prep my pieces HERE!
This piece was prepped and I filled the inlay on the top drawer with Dixie Belle Brown Mud. I just didn't like it. So I filled it! You can check out this blog post where I go over how to fill hardware holes. It is the same concept.
Once the piece was prepped, I started painting.
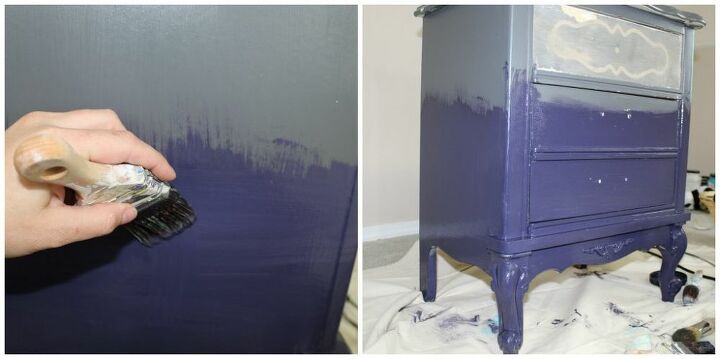
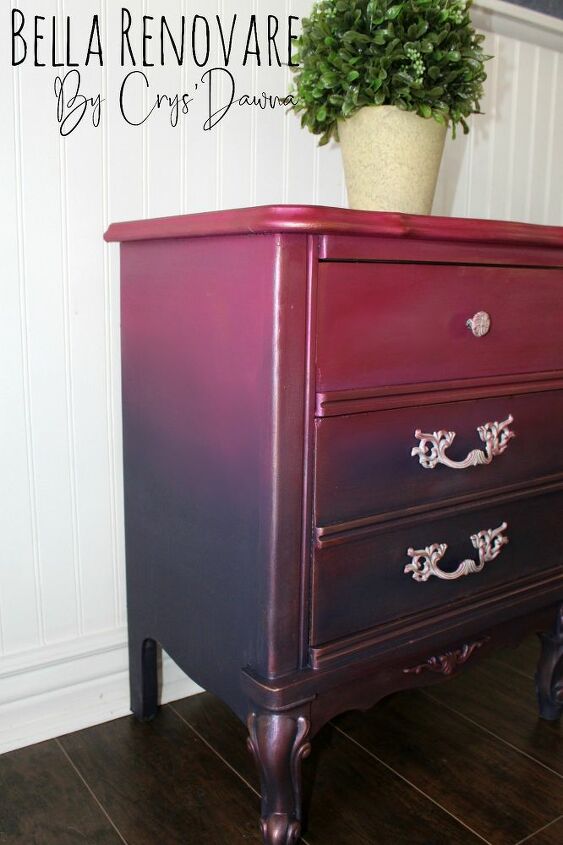
Remember I said a gradient color finish is generally two different colors that blend nicely? the first color I used was Aubergine. I start from the bottom to the top. I like to put at least 2 coast of a base coat of each color so I know that the furniture is covered. I also think it helps when you are manipulating the paint it is less likely to pull the paint away where it exposes your original finish. When you work paint with water sometimes you can pull existing layers so I always make sure there are enough layers in the first place to work with.
The first step I did here was to paint the bottom half of the piece in Aubergine.
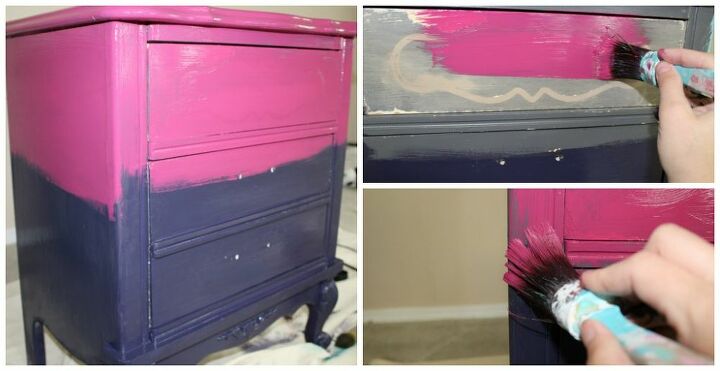
The second step in this process is to paint the second color choice. My color choice here was Plum Crazy. You want to paint the Plum Crazy right up to the Aubergine paint line.
After your first base coat dries, paint another coat the same way you did the first coat. Allow it to dry completely.
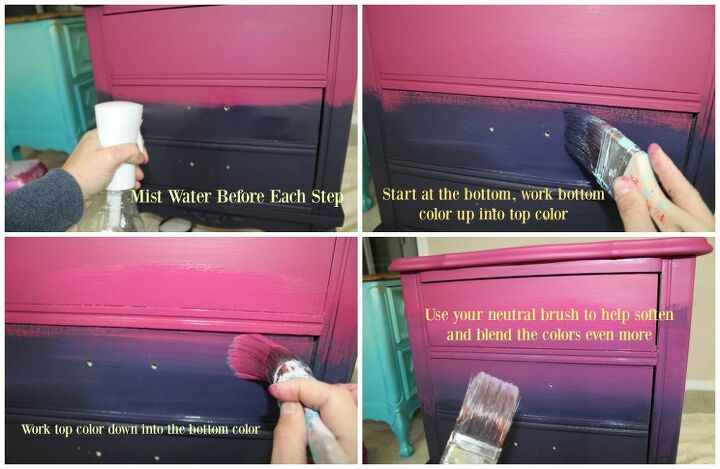
I will try to explain this process the best I can. First things first. You will want a brush for each color, then a neutral brush for the last softening/blending step. I usually work from bottom to top. Each step requires me to mist the piece. So I mist the piece (don't drench it). Then I get a small amount of the bottom color paint on my brush. I start in the center of the bottom color and feather my way up into the top color. Then I repeat this same step but going from top to bottom.
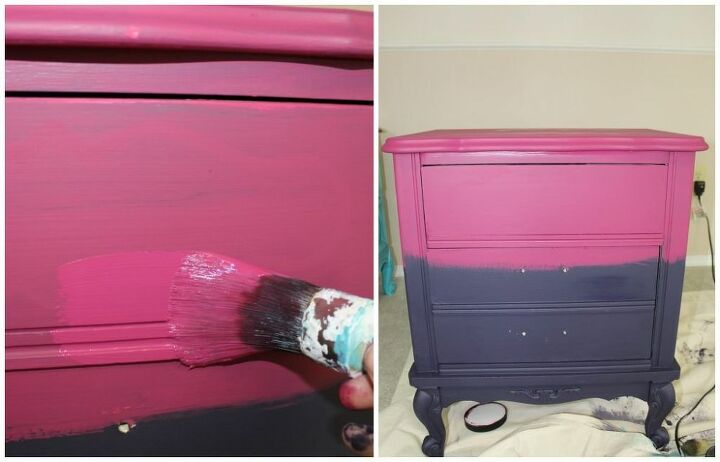
I repeat this process 2-3 maybe even 4 times to soften and blend the colors. Once I am about 95% happy with the blending, I grab my neutral brush. I mist the piece and then just feather horizontally and vertically at the blend lines with the neutral brush.
Once you have gone through that process your gradient color technique should be apparent. If you get frustrated allow your piece to dry, walk away. Come back and repeat this process. Blending paint is not difficult but it does take practice and a light hand. You do NOT want to mash on the paint. I suggest if you are just starting to try blending, start with two very close colors like the blue piece. When your colors are close in pigment, blending is MUCH more easy. I have attached the video for this technique below! Hopefully it will help you as well. Happy Creating!!


Comments
Join the conversation
-
Agree, and you are not alone....For someone who had painted so much in my lifetime, and crafted have tried this bendiing several times, only to give up and just paint it out with 1 color, and trim color if there is trim.
Beautiful work and blending, talented!
-
Just beautiful!


Frequently asked questions
Have a question about this project?
You must it with water?
I don’t have a question, I just want to thank you for sharing. You done an awesome job.
When I read the headline that this wasn’t for everyone, I thought, how bad is it? Seeing the first couple of colors being painted on, it didn’t seem possible any good could come from that. But that final picture, beautiful and amazing. Thanks for sharing.