


$40 Smart Canvas Drop Cloth Headboard
Looking for a fast, easy, inexpensive way to have a headboard you can thoroughly customize? Check out this idea!

Our poor hall bedroom. It's the last bastion of stuff, it's a dumping ground, and it's been long suffering from a lack of design attention.
Last I left it, I painted this small, dark, narrow room a shade of brown. Why dark brown? Why fight the darkness. Any light color in here would look dingy.
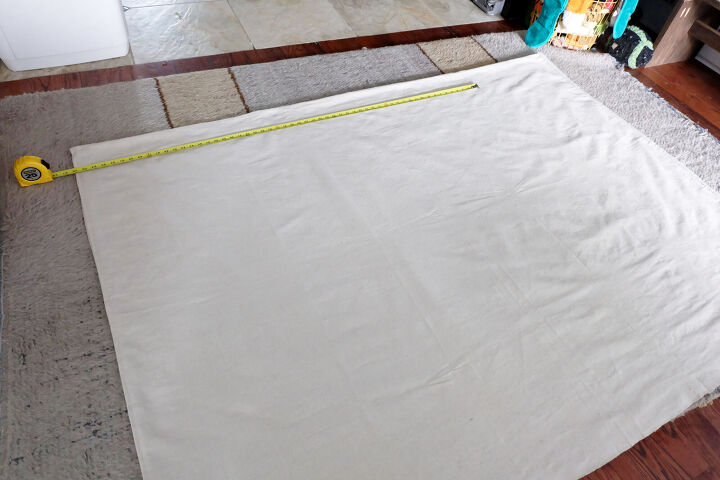
In an effort to give this room some renewed love, I picked up an inexpensive 6'x9' canvas drop cloth from the hardware store. Measured the bed, measured my wall space and went with a finished width of 54" and using the full 9' side folded it in half for a flexible height of 4 1/2'.
A little snipping, a little stitching.
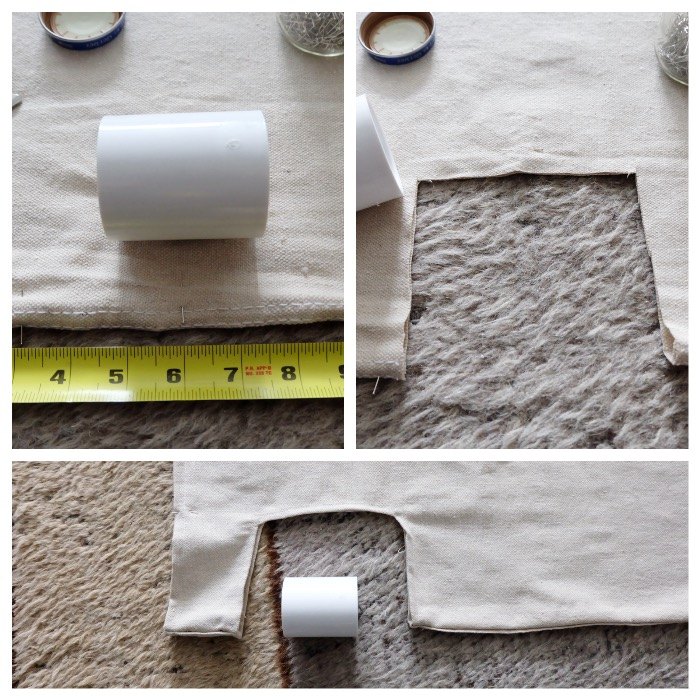
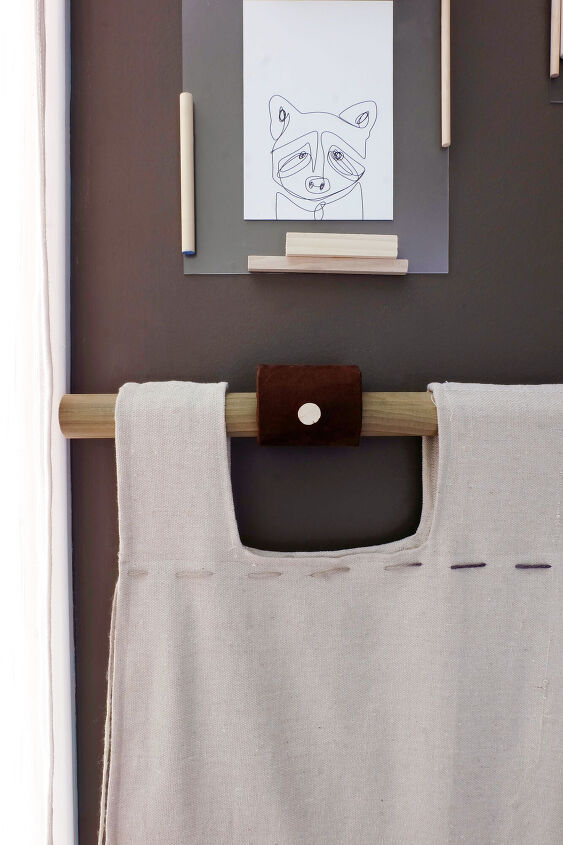
While I was at the hardware store, I picked up 3 PVC couplings which were to become my hanging brackets so next on my canvas was to trim out and stitch up some cutouts, essentially making a tab top curtain.
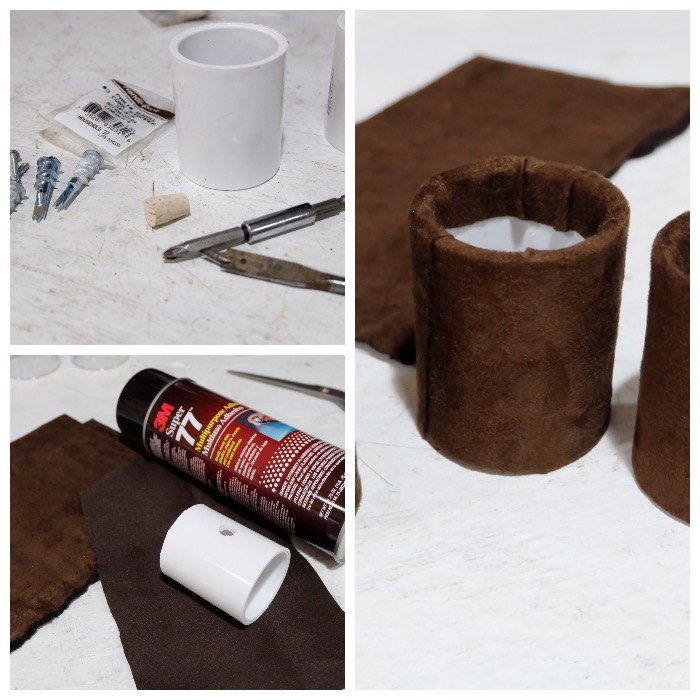
With the canvas drop cloth all set to go, it was onto those PVC brackets.
First I drilled holes straight through both sides of the 1 1/2" diameter coupling. Next I grabbed some faux suede and some spray adhesive, trimmed off a length of fabric, sprayed it with the glue, and wrapped the PVC. Carefully trim out the holes that were pre-drilled.
For more details on this project, be sure to swing by Flipping the Flip for this blog post.
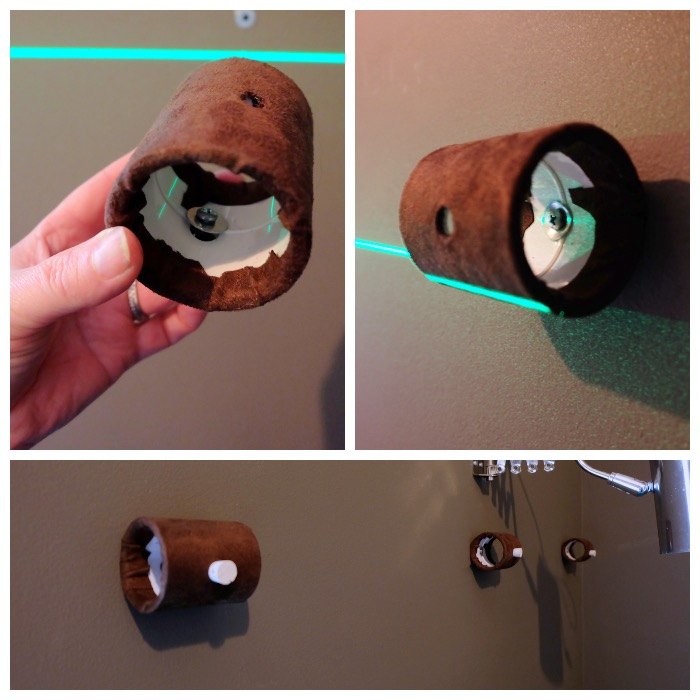
Ok! Time to install!
Lay out on the wall where you want your fancy new fully customizable canvas drop cloth headboard to hang based on your previously made canvas cutouts and get your center bracket installed first.
Drop a screw with a washer into the hole inside the PVC and drive it into the wall (either a stud or wall anchor) through using the outside hole. Neat, huh?
Plug those outside holes with corks.

Now just weave a 1 1/4" diameter 6' dowel trimmed to size through the canvas tabs and the PVC brackets. Tada!
So but what makes this a smart drop cloth headboard?
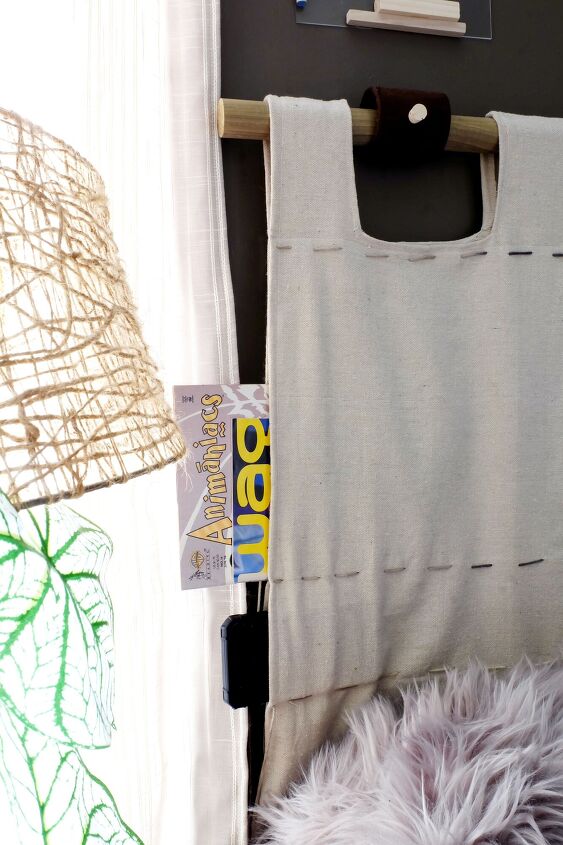
Using a yarn needle and some yarn, stitch some big fat stitches across horizontally, grabbing both sides of the fabric in the stitches. This created secret pockets! Super handy to hold a book or magazines, a tablet and also a cell phone. Smart, right?
For more smart projects, be sure to come by my site, Flipping the Flip!
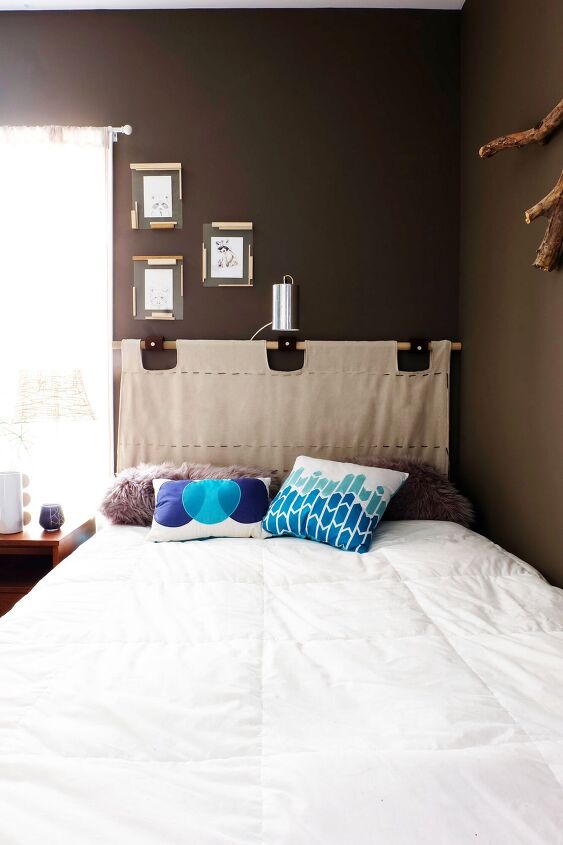
It's a dressy yet casual finish to this previously boring corner. And the premise and materials are simple enough -- feel free to customize this any which way you'd like!
Drop by my site by clicking below for info on these cute raccoon prints!
Resources for this project:
See all materials


Comments
Join the conversation
-
Very clever! I really like the simplicity of it all, especially using corks to close up the holes in the brackets. KUDOS to you!
-
Very clever & attractive idea.


Frequently asked questions
Have a question about this project?