


Create a Bathroom Bench From an Unused Bathtub
Do you have a bathtub that you are not using but you can't remodel because the timing is not right? Well, why not turn that bathtub into a bathroom bench! Find out how in this easy tutorial!
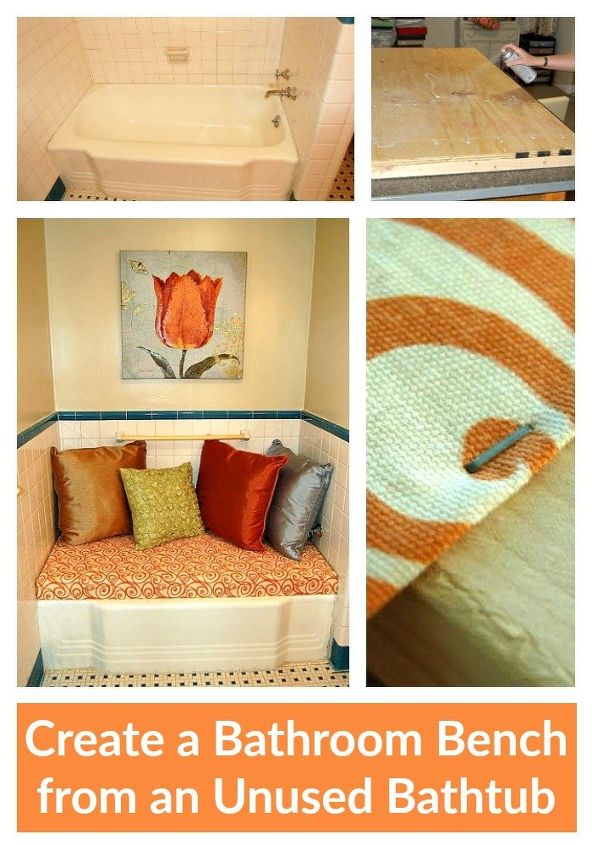
I was going through some old project posts and happen to run across that time where I turned an unused bathtub into a bathroom bench!
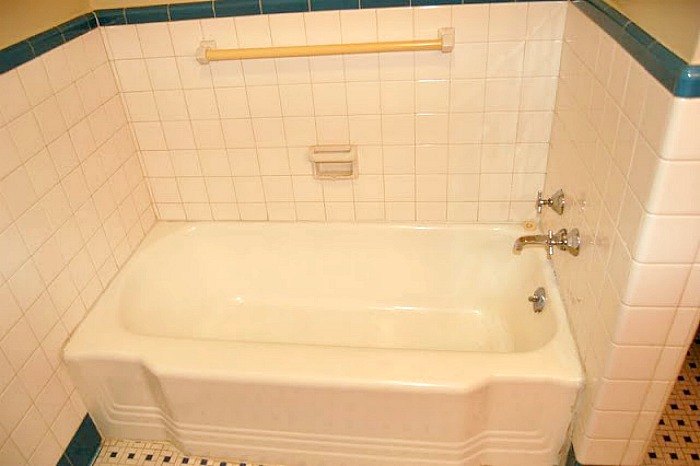
We (my husband and I) had been living in a particular house for almost three years and almost every day for those three years I had been saying that the tub in our master bath was an eyesore.
Neither my husband nor I are bath takers, so there it sat empty, taking up LOTS of room and gathering dust (and all other kinds of weirdness) with no useful purpose whatsoever. We were told by our realtor that we couldn't take it out, so I scoured the internet for some useful ideas (surprisingly - "unused bathtub" isn't a high traffic topic on the world wide web). Eventually, I came up with a vague idea for a seating area, but mostly I'd resigned myself to staring into the vastness of the empty bathtub for all eternity.
Until my friend, Erin came along.
Erin is one of those people who will tell you she isn't crafty, but who one day just casually mentioned that she builds furniture for fun. So after hearing me whine for the 69000th time about my bathtub she said: "I'm coming over to measure, I'm going to build you a bench". Now - it should be noted here that my hubby (Erin's too) was deployed at the time. I don't want his manhood (ie: ability with power tools) to be called in to question - I'm sure he would have built me a lovely bench 7.5 years from now.
So, I ending up getting my bathroom bench and really liked it!
I thought some of you might be interested in this idea, so today I am going to show you how to make your own bathroom bench!
Here are the supplies you will need:
- plywood (enough to cover your bathtub)
- 2x2s (you will want 4 in total)
- urethane foam sheet
- upholstery fabric
- spray adhesive
- measuring tape
- craft knife
- staple gun
- saw
- nails + hammer or wood glue
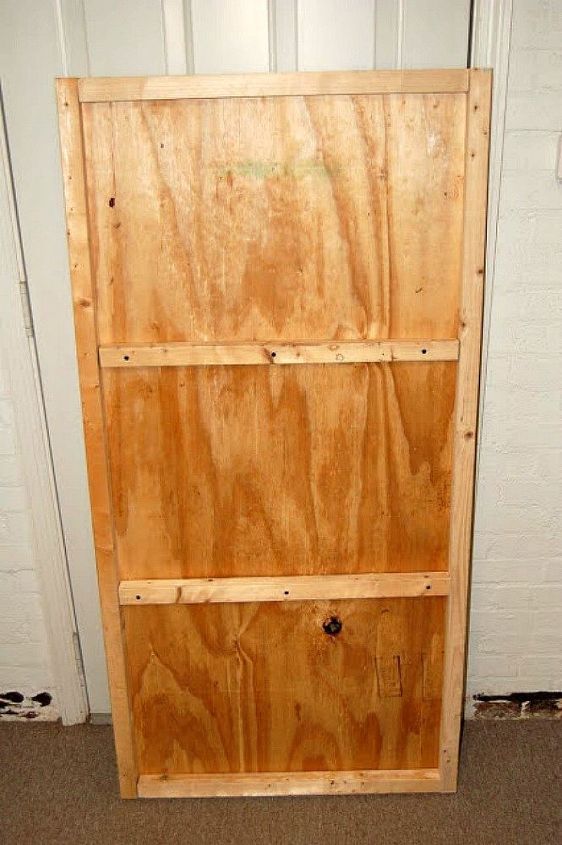
Step 1: Measure your bathtub and cut some plywood that is the length of the tub (this will be your main bench). Then add some 2x2s around the base and width of the bench.
Note: When adding the 2x2s you can either use a hammer and nails or wood glue.
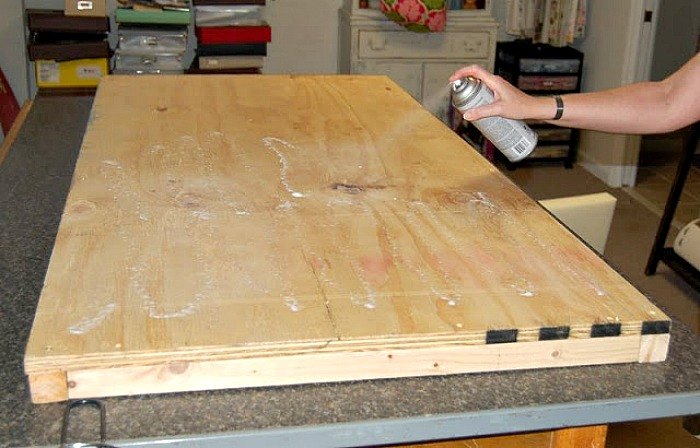
Step 2: Applied some spray adhesive to the top of the bench.
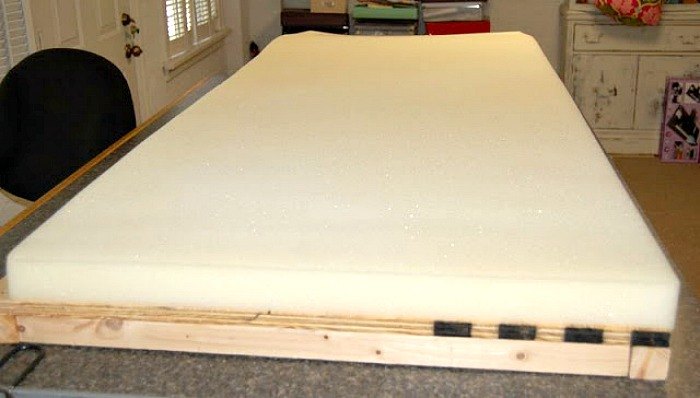
Step 3: After you have applied the spray adhesive to the top of the bench, lay a urethane foam sheet on top of the spray adhesive and cut the sheet to size with a craft knife.
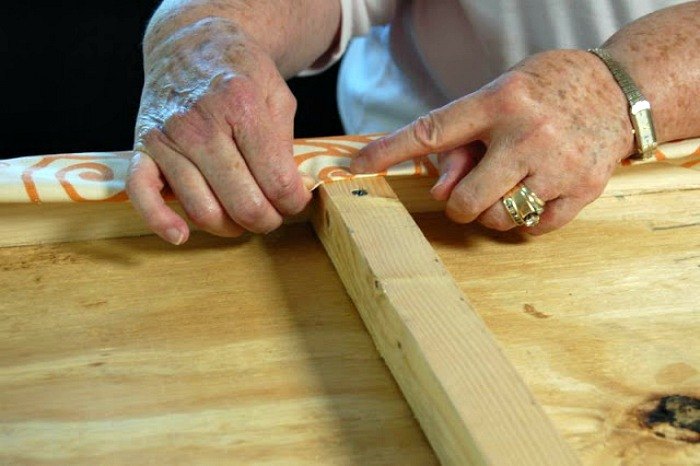
Step 4: I (actually we - thanks to my mom who was visiting for the weekend) added fabric to the bench. To do this you would do the following:
1. Lay upholstery fabric face down on your work surface.
2. Flip the bench (foam-side down) on top of the fabric.
3. Pull the fabric taut and then fold the edges of the fabric under.
4. Using a staple gun, staple the fabric to the wood around all four sides of the bench.
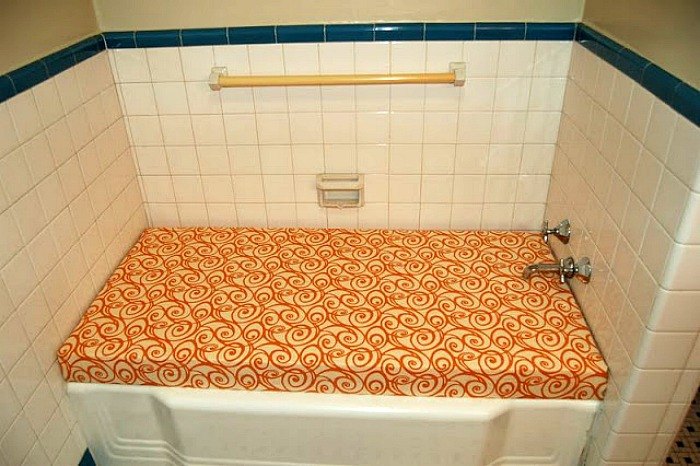
Step 5: Slid the covered bench over the top of the bathtub.
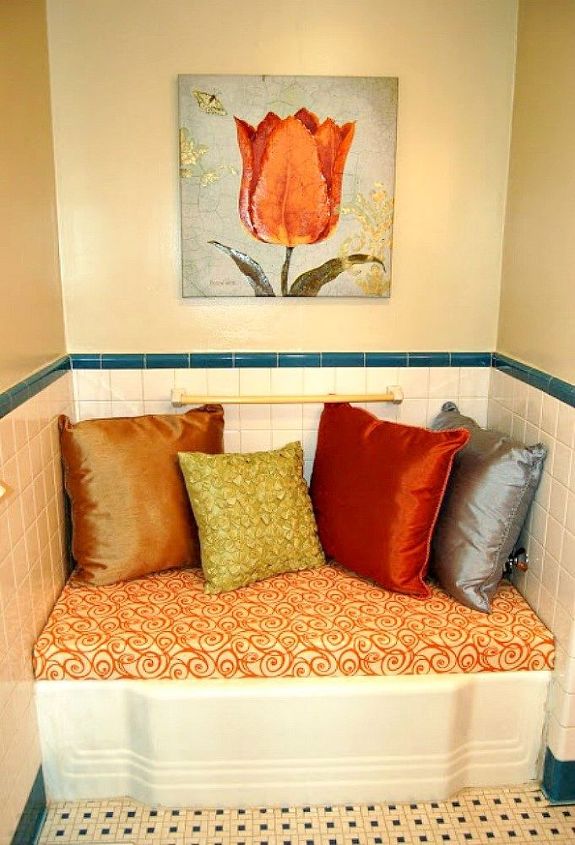
And voila! After adding a few coordinating pillows, any unused empty bathtub can become a cozy little nook where you can lay out your clothes or give yourself a pedicure!
Also, since the bench slides over the bathtub, you can now store items in the bathtub and hid it using the bench.
To get more project inspiration for your home and to learn more about the products used in this project, stop by my blog!

Comments
Join the conversation
-
I know how that he’s deployed act is. Just hired someone to do the honey-do list, so we didn’t have to wait. Plus when he returned nothing was waiting for him.
-
Might I add a suggestion? Using the same technique, you could create bolsters to cover the towel rack and faucet. Think of making "box lids" ... a rectangular frame of wood with a plywood rectangle attached. Cover with batting and cloth. Leave wood exposed on back to use 3M picture-hanging strips. Have bottom of bolsters resting on your seat bottom; press backs against the tiles. You can put 3M strips on all four sides so you can slide out the seat for storage from underneath them.


Frequently asked questions
Have a question about this project?
What did you do to prevent the tub rim from being scratched?
I love this idea! But , one question: how did you handle the water faucet? It was never mentioned.
Thanks