


DIY Folding Workbench
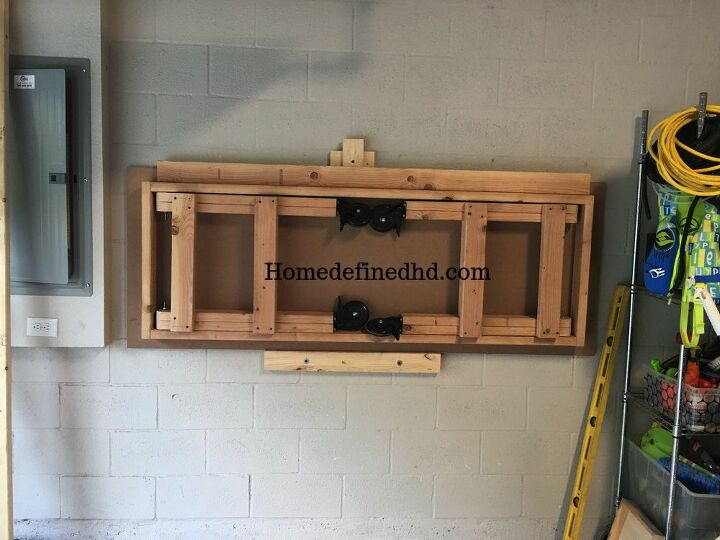
Need help deciding whether your garage will be storage space or a workshop? You can have both with this simple DIY folding workbench on wheels. Take it out when you need a space to work on projects and fold it up after you’re finished. It’s simple to put together and is built on wheels, making it easy to turn your garage into a workshop when you have a lot of DIYs on your to-do list.
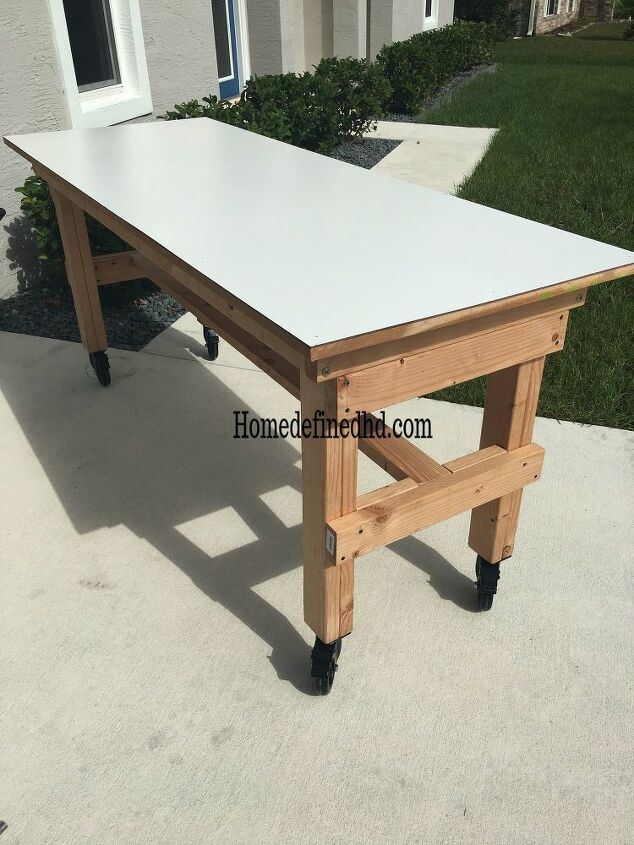
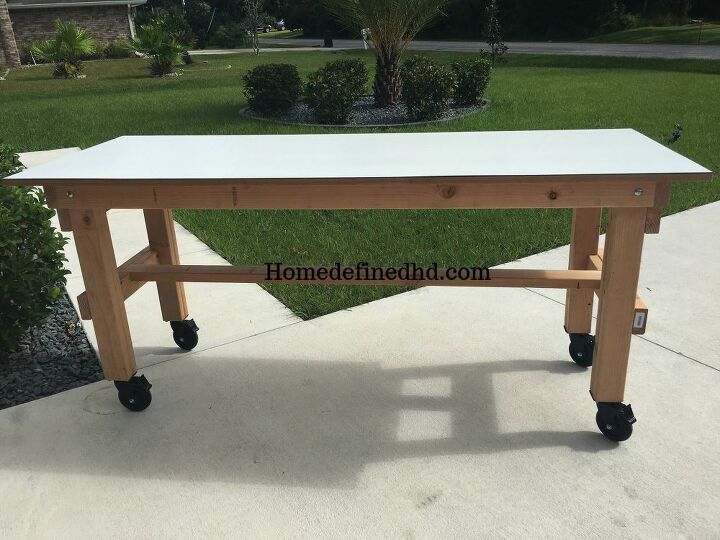
As we continue working on projects around the house we needed a more reliable work station. So we decided to build this easy and foldable workbench. It solved our problem of not having a work station but it also took little to no space in our garage.
We love it because since it has wheels we can use it inside or outside of the garage and we also built it high enough to make sure we are not slouching over while working on our daily projects.
This is how we made it our 30x70x36" foldable workbench.
Supplies:
- (6) 2x4x8 common boards
- (1) 1x4x8 melamine board
- 2 ½” Wood screws
- (4)nuts
- (4) ⅜” bolts
- (8)washers
- (4) 5" Heavy-duty caster wheels
- 100 grit sandpaper
- Wood glue
Tools:
- Hand saw
- Miter saw
- Drill/ Drill bits
- Orbital sander
- Compound square
- Tape measure
- Wood clamps
Cut list
- (2) 8"
- (2) 15 ¾"
- (2) 25"
- (4) 27"
- (8) 29"
- (1) 30"
- (3) 70"
- Tabletop 30x80"
STEP 1: DIY FOLDABLE WORKBENCH- Build the frame
Attach 2- 2x4x70" to 2-2x4x25 using wood screws to make a rectangular frame.
STEP 2: DIY FOLDABLE WORKBENCH- Build the legs
- Using the 8- 2x4x29". Join 2- using wood glue and screws - repeat with the rest to make a total of 4 legs measuring 4x4x29"
- Trace half circles on the top of the 4 legs.
- Cut the half circle using a hand saw.
- Sand the half circle using an orbital sander with 100 grit sandpaper to give a smooth rounded finish-this will allow them to move smoothly later
STEP 3: DIY FOLDABLE WORKBENCH- Attach the legs to the frame
- Using some long, thick bolts, washers, and nuts, attach the legs to the workbench.
- Predrill holes to avoid splitting the wood.
- Use a ½ inch spacer on top allow room for the legs to move once attached.
- Hold them in place using clamps and drill through both the frame and legs and proceed to put on bolts with washers.
STEP 4: DIY FOLDABLE WORKBENCH- Add brace support
- Attach braces to legs using wood screws.
- Attach one 2x4x27" to the middle of th leg.
- Repeat on the other side.
- Attach another 2x4x27" right below the frame on the legs- this will serve as a stopper. Repeat on the other side
STEP 5: DIY FOLDABLE WORKBENCH- Make inner support brace and attach.
- Cut out a slot in the middle of both of the 2x4x15¾ - 1½” deep and 4” wides to fit the long support brace.
- Attach to the inner side of legs, in front of the middle brace previously attached using wood screws.
STEP 6: DIY FOLDABLE WORKBENCH- Attach the wheels to the legs
- Using wood screws attach the wheel to all 4 legs .

STEP 7: DIY FOLDABLE WORKBENCH- Apply table top
- Apply the 1x4x8 melamine board tabletop using wood screws.
STEP 8: DIY FOLDABLE WORKBENCH- Hang on the wall
- Using the 2x4x30" - place it on the 35” inches from the floor. If placing the support bracket on a cement wall use cement screws, If not secure it wood screws on to the studs.
- Then attach the 2- 2x4x8 30 inches above the 2x4x30 -centered- by placing each board on top of each other using one screw in the middle. This will allow it to move freely to hold the table later on.

Comments
Join the conversation
-
That is a great workbench. Great instructions and photos. All that wood does make it quite heavy for one person. I would modify some of the construction to make it lighter. 1X4's for the top frame. Single 2X4's for the legs. 1X4 cross braces on the legs. 1X4 leg stretcher. Hollow core door for the top. I made a work bench using a hollow core door and folding banquet table legs. Put casters on one set of legs so I could pick up the other end and roll it where I wanted.
https://www.homedepot.com/p/Waddell-Folding-Banquet-Table-Legs-2-Pack-2775/100048820


Frequently asked questions
Have a question about this project?