DIY Square Farmhouse Coffee Table

Is your living room missing something? Perhaps it feels a bit empty, or you need a spot for place your coffee on. Well what better way than to add this awesome DIY farmhouse coffee table to your decor. It’s a super easy build and will probably take you a weekend to make.
So for tool wise you will need:
Drill
Miter saw or circular saw
square
kreg pocket hole jig
1 1/4” pocket hole screws
2 1/2” pocket hole screws
wood glue (Titebond is by far the best, blue or green bottle)
Your choice of paint, stain, and varnish
Material List:
4- 1x8x8
4-2x2x8
1- 2x4x8
2-1x2x8
1- 1/2” plywood cut @ 36”x36”
You can also grab the free building plans for this project at the blog. Link down below.
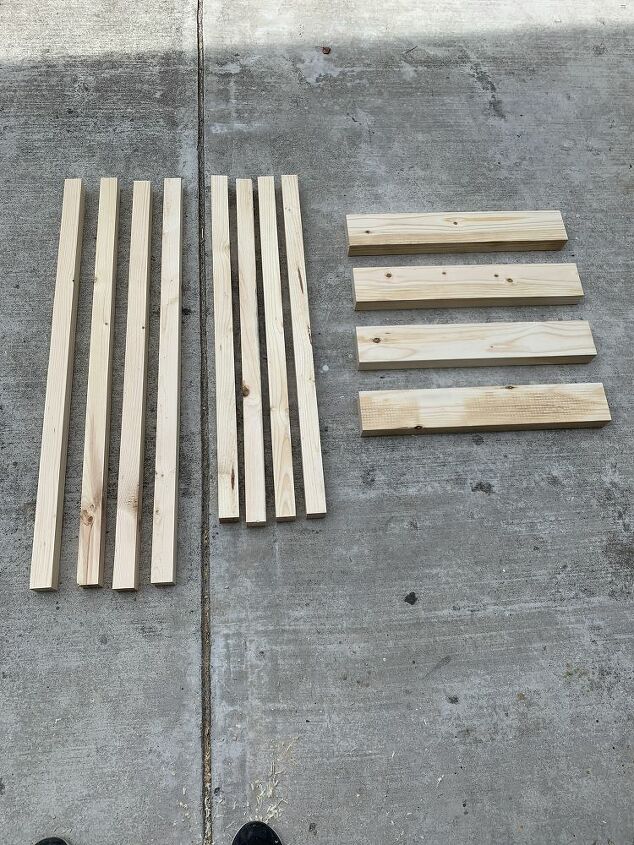
Get you cuts done for the base. You should have four 2x4s at 20”, four 2x2s at 36”, and four 2x2s at 32”.
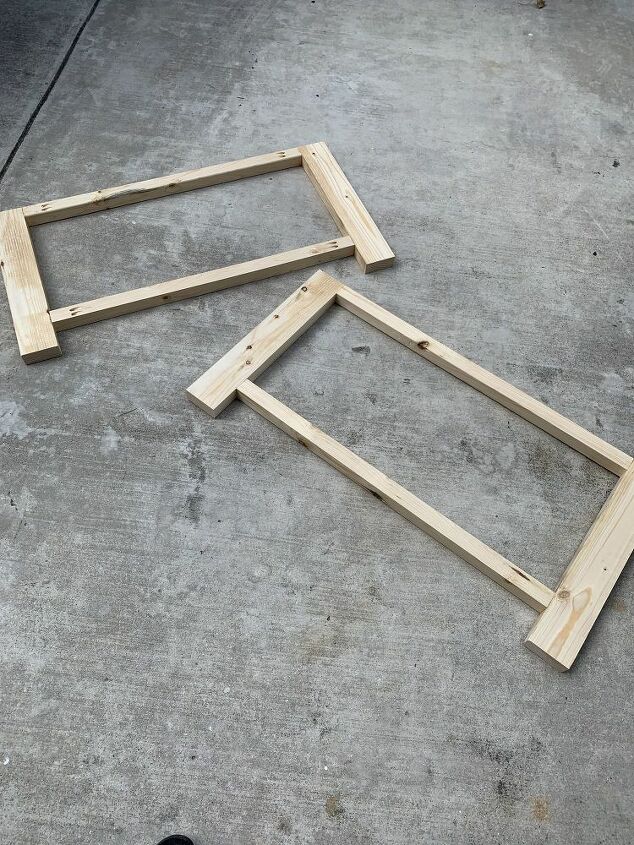
Make sure you drill your pocket holes into the 2×2 aprons. Use the 1 1/2” thickness measurement on the kreg jig.
When attaching the aprons make sure you using the right length. For the edge of the 2×5 leg the apron length will be 32 inches and 36 inches when connecting both leg base frames together.
Now when attaching the base frame there are different ways to connect you’re pieces together. I chose this way because its easier for me to keep the keep the shelf part and the bottom apron flush together. However, you can certainly just attach the base frame first before you attach the shelf.
I measured 3 inches from the bottom of the leg. This is where my bottom aprons and shelf will start.
The shelf is cut at 36 x 36 inches. I also drill the holes for the pocket hole screws. I attached with 1 1/4” screws to the bottom apron.
Next was the side bottom aprons. Made sure they were flush and then attached the shelf to them, again with 1 1/4” screws.
Next I went ahead and attached the other frame with wood glue and the pocket hole screws.
Now it's time to attach the other side. Use wood glue and 2 1/2'' pocket hole screws.
I started attaching from the top of the coffee table.
And then finally attached the shelf to the bottom apron with 1 1/4'' pocket hole screws.
Heres how it looks with just the basic frame assembled.
Let's more on to the star of this build, which is of coarse the x braces. I mean lets be real, without the Xs this would be an ordinary square coffee table and not a farmhouse coffee table right?
Anyway, according to the computer these should be cut at a 25 degree angle, however, to be safe then sorry I would just mark your cuts as shown below.
You can use a miter saw or a jig saw to cut your braces. I personally use a jig saw to cut the angles out. Ain’t nobody got time to be finding the right angle on the miter.
Wood glue, brad nails, and clamps to attach. I also wanted it to be extra sturdy so I added some spax screws from the top and bottom of the aprons.
Like the base fame assembly, you can assemble however way that is easy for you, but this is how I constructed the top. Since it’s going to be a perfect square, or at least that’s the plan. The angle cut will be 45 degrees.
I attached the outer top portion with 1 1/4 inch pocket hole screws.
Next I measure out each inside piece to cut and laid them out. Added my pocket holes and attached as well. Don’t forget your wood glue. Tip: always keep a damp rag around. Wood glue when dry will not let the stain seep into the wood. Clean off excess with the damp rag.
Sand your top down. I use 80 grit to get a lot of the top nice and flat, then go in with 120 and lastly with 220 for a smooth finish.
Go ahead and prime and paint you base. I used kilz primer and a basic acrylic white paint for the bottom.
So this stain technique is fairly simple. The stain i’m using is Varathane Carbon Grey. Stain both sides of your top and let dry before going on to the next step.
For the white wash it’s just a 1 part white paint to 3/4 part water. I wanted this way to get the paint a little more opaque. With a rag dip into the wash mixture and apply onto the top. Go with the grain. Let sit for a sec than wipe off excess. As you can see below I am going with the direction of every board. Once you have finished. let dry and then seal with a varnish of your choice.
And there you have it. A super cute and easy DIY farmhouse coffee table for you space. Again you can get the building plan with material & cutting list at the blog along with more in depth pictures. Can't wait to see you there.
Enjoyed the project?

Comments
Join the conversation
-
 Stephen Harris
on Sep 24, 2020
Need you to come make one of these for me Tamara.....

-
-
 Nick Battaglio
on Jul 13, 2022
Hi Tamara, do you have plans for matching end tables? Thanks.
-










Frequently asked questions
Have a question about this project?