


DIY Step Stool

My husband started cleaning out his pole barn and realized he need a sturdy step stool to reach some high shelves o er his work bench. He was sick of pulling out the large ladder and knew he could make something that could also double as a place to sit when working on smaller projects at the bench.
Since this project will be for the pole barn/garage it will be left in its raw state.
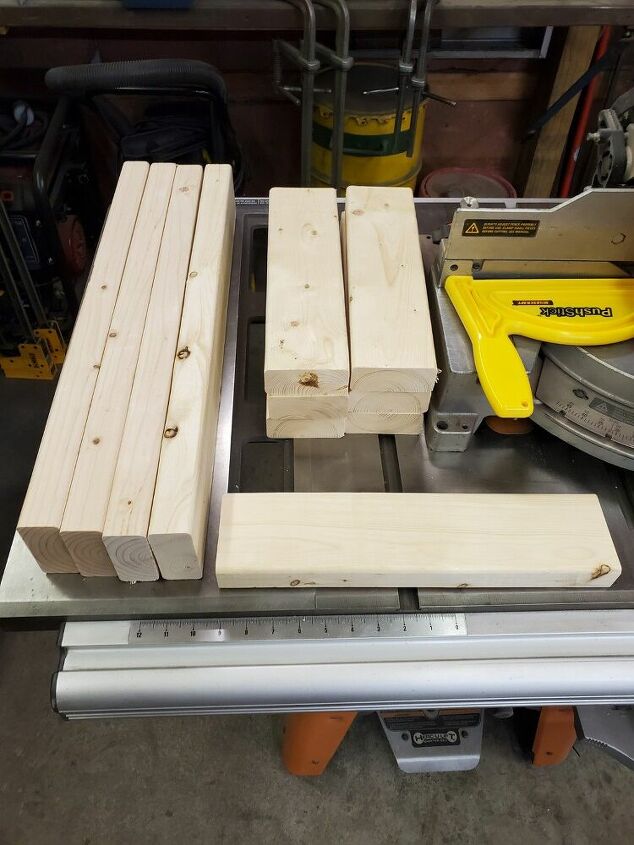
- 3- 2x4x8 boards
- 1- 2x8 @ 20" (we used a leftover piece from an old project)
- 2- 2x6 @18" (again we used leftover material but you can just buy the size board in a 6 foot length)
- Chop Saw
- Kreg jeg and 2.5" screws
- Biscuit joiner & biscuits
- Wood glue
- 6- 3 inch screws
2x4 Cutting list:
- 4 boards @ 24"
- 6 boards @ 13"
- 2 boards @ 18"
- 1 board @ 20"
- 1 board @ 15"
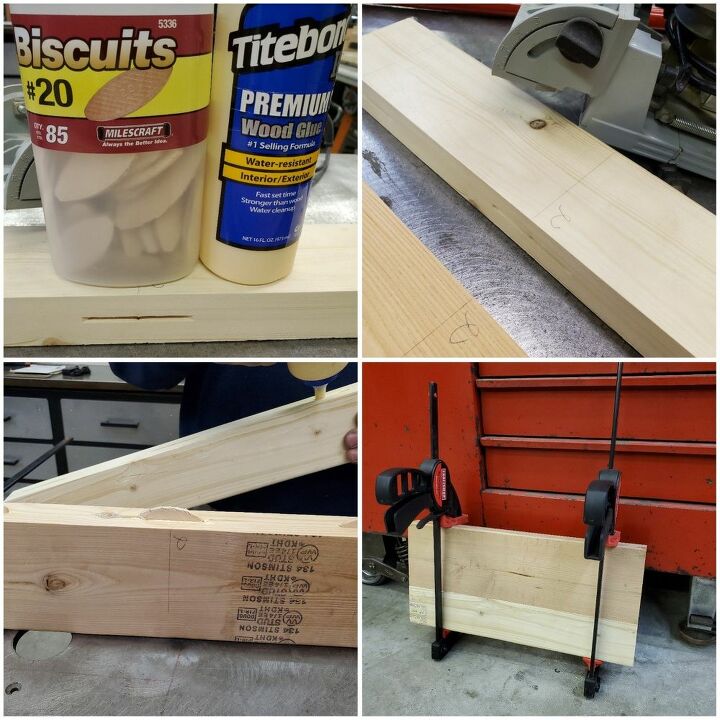
Once materials are cut to length, you will start to assemble the step and top seat. Doing this step first allows the glue more time to set up.
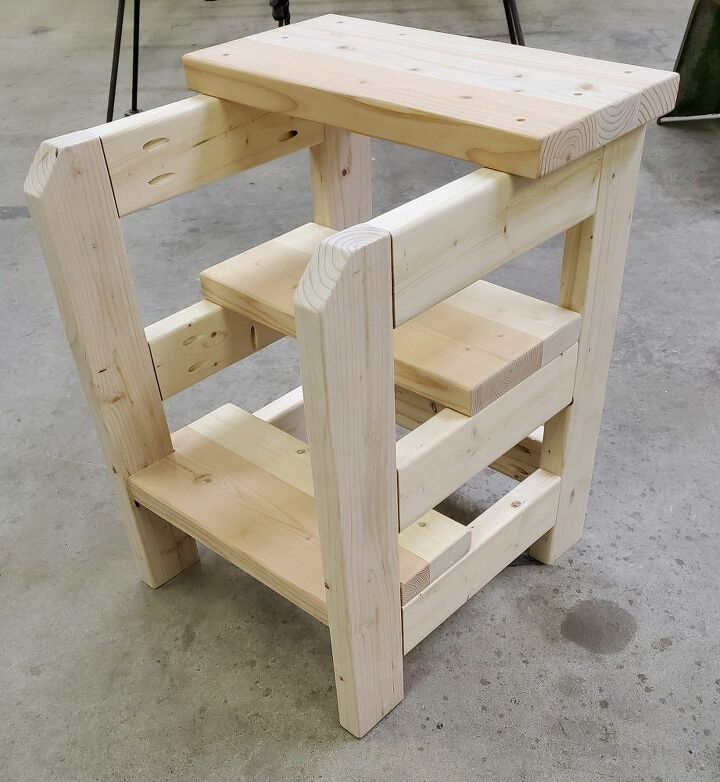
We will start assembling the two bottom steps. The bottom steps are the same size and the top seat is larger
You will need the 2- 18" 2x4 boards & 2- 18" 2x6 boards. Biscuit together one of each board together and then clamp the pieces together.
For the top seat you will need the 2x8x20" board & the 2x4x20" board. Glue them up and clamp them together. We like to allow glue to set up overnight.
While letting glue dry, you can build the rest if the stool.
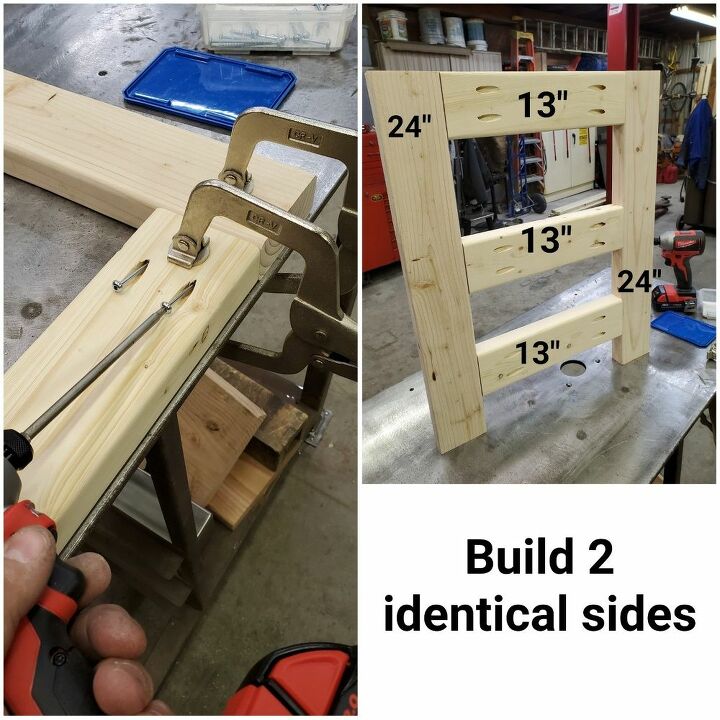
We decided to attach the boards using 2.5" pocket screws. In the photo you will see I labeled which pieces to use to assemble the sides. You will build 2 identical sides.
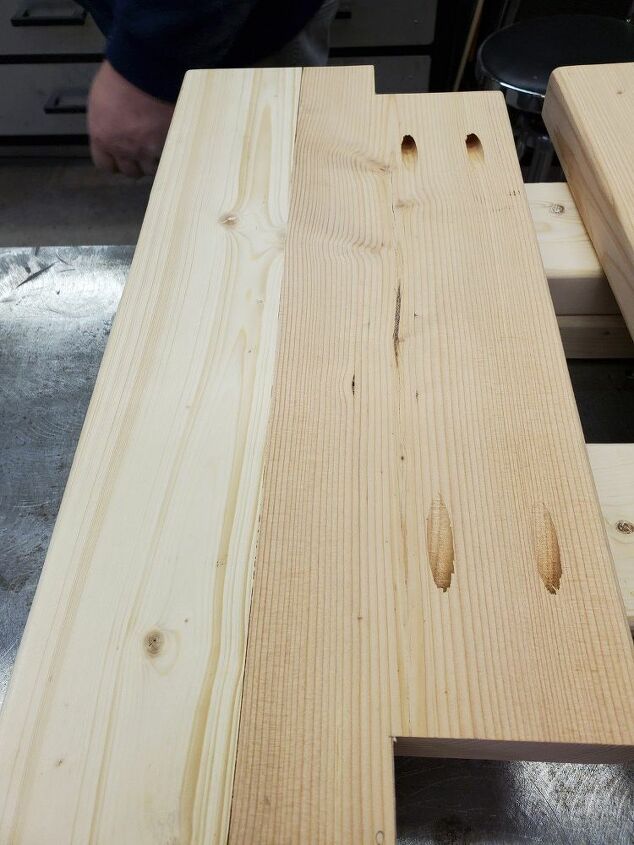
Use a table saw to cut out the 1.5" x3.5" spaces so it can sit snuggling on the bottom side brace. We used pocket screws to securely attach the step to the rails.
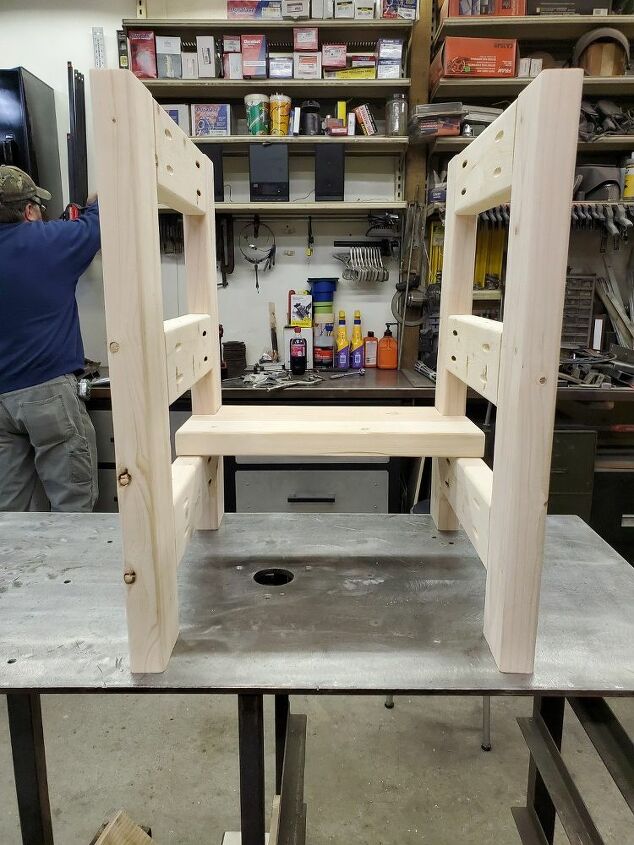
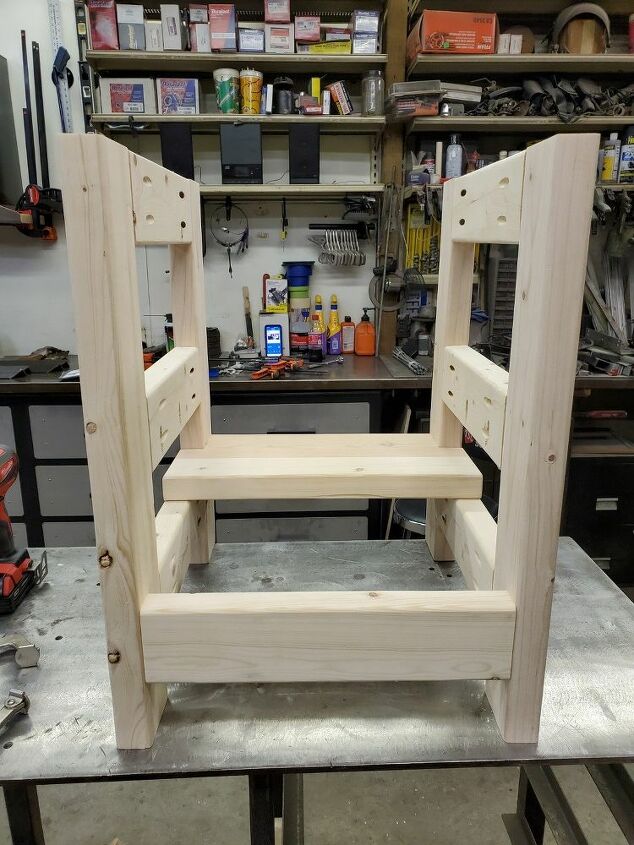
The bottom step is attached. This photo is looking at the back of the stool. The bottom step is placed at the front of the stool.
This is where you'll use the last board. This is the 2x4x15" board.
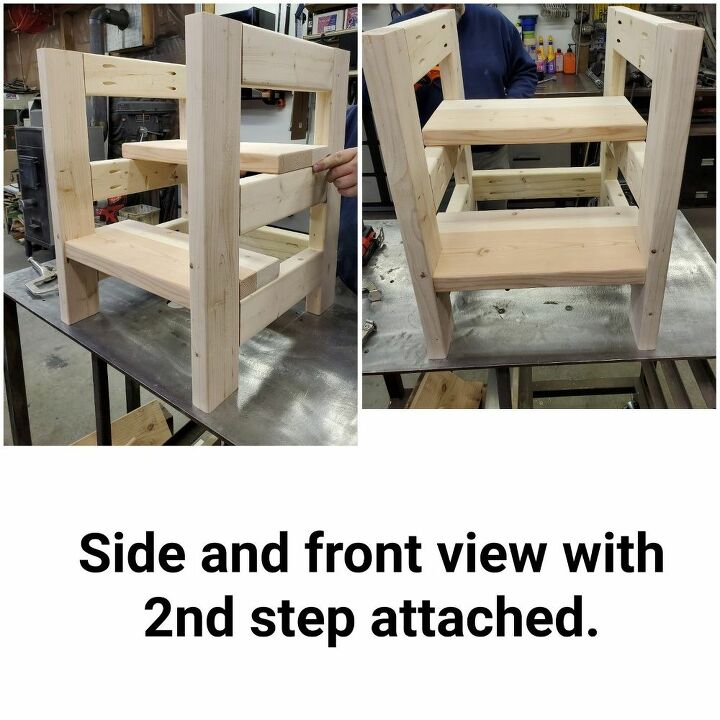
The second step is screwed into place on the middle rail and all the way to the back.
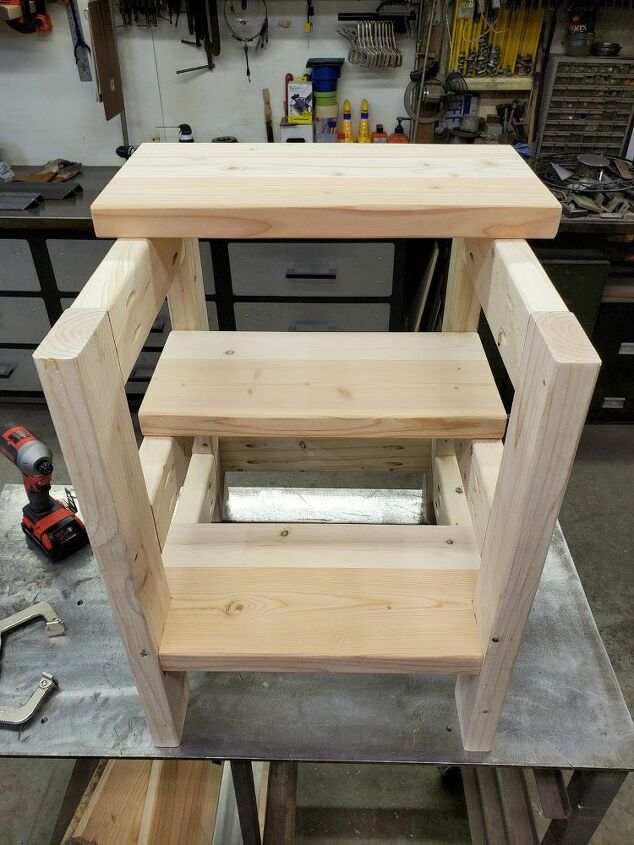
You'll now use the biggest step/seat and center it on the top of the rail.
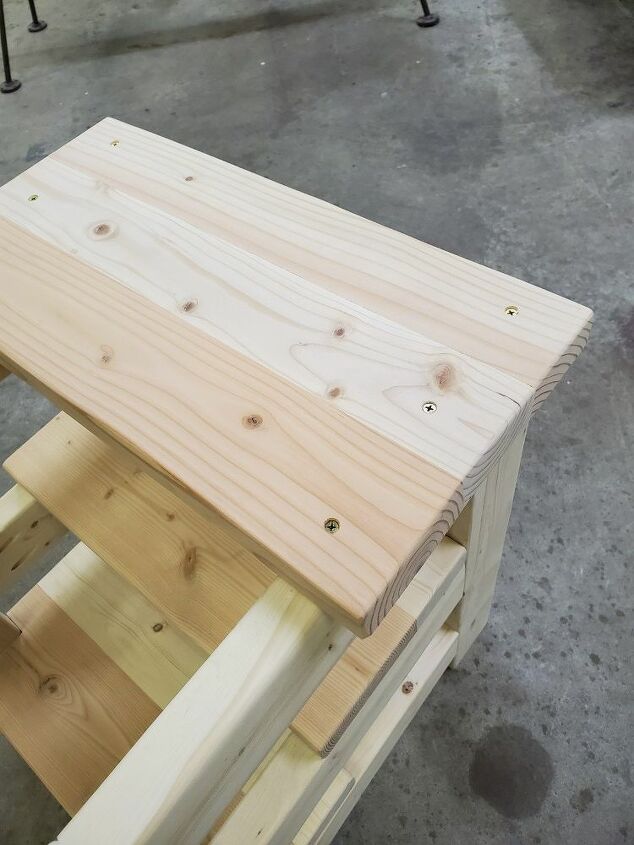
Attach the top step/seat with 6- 3 inch screws.
Side Note: My husband said he may add metal to the bottom of the stool legs, so the wood doesn't take a beating being slid around the garage.
Resources for this project:
See all materials


Comments
Join the conversation
-
That is an amazing step stool. This one will last for decades. Not like the cheap ones in stores that fall apart in a year or two. Great instructions and a great share
-
I love it and will make it. Thank you so very much! I will definitely make it with handles, as I am not getting any younger, and my boyfriend is getting wobbly and lightheaded.


Frequently asked questions
Have a question about this project?