


DIY Turned Leg Plant Stand
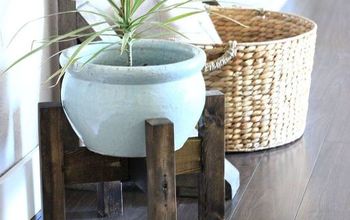
I recently discovered one of the plants in my room that I've been constantly tucking back into its pot, was in fact supposed to be free to spill over and sort of vine out. Whoops! Problem was, it was in a basket on the floor and didn't really have the room to stretch down and out like it needed. The best things are borne out of necessity right? One DIY plant stand coming up!
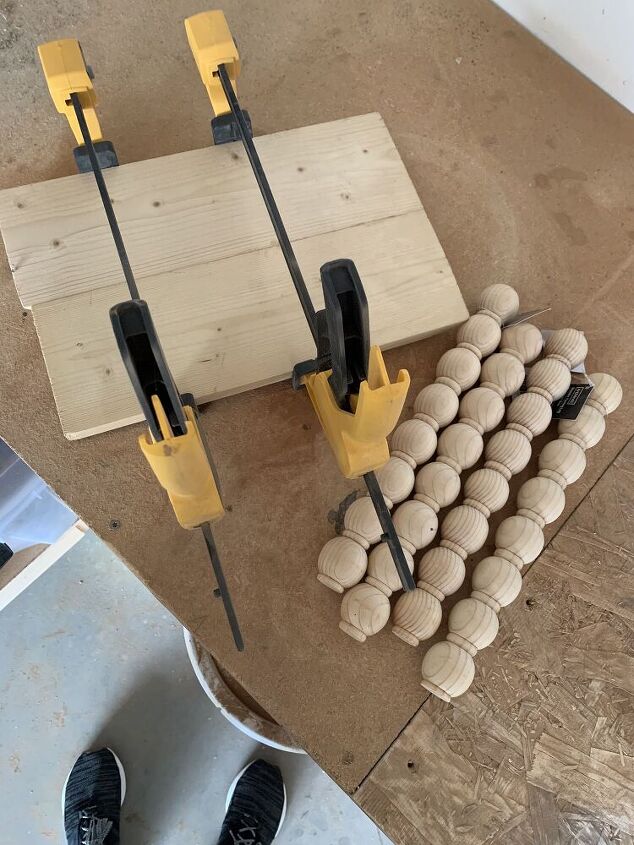
The point of creating this plant stand was to share something with you that was like three supplies and 10 minutes. The great thing is, if you purchase precut wooden plaque for the top like this, or this, or these, and then get the pre-made turned legs I used from Michaels, you only need glue and some clamps and done!
If you purchase a pre-made top you can skip this step!
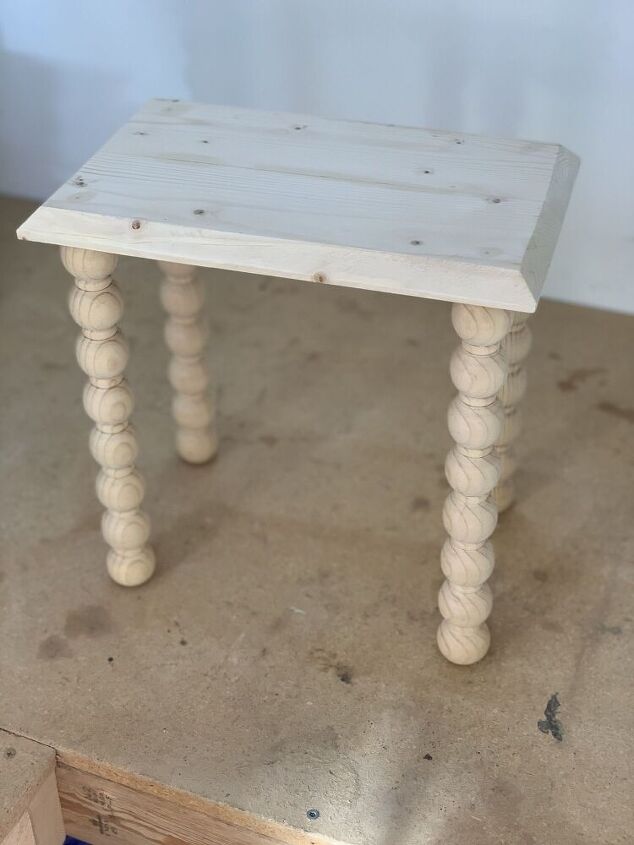
Per usual I like to make it a touch more complicated so instead of buying a precut top I made one using some 1x4 scrap wood, which I glued together.
Next I used my miter saw to bevel all of the top edges to create a more unique design.
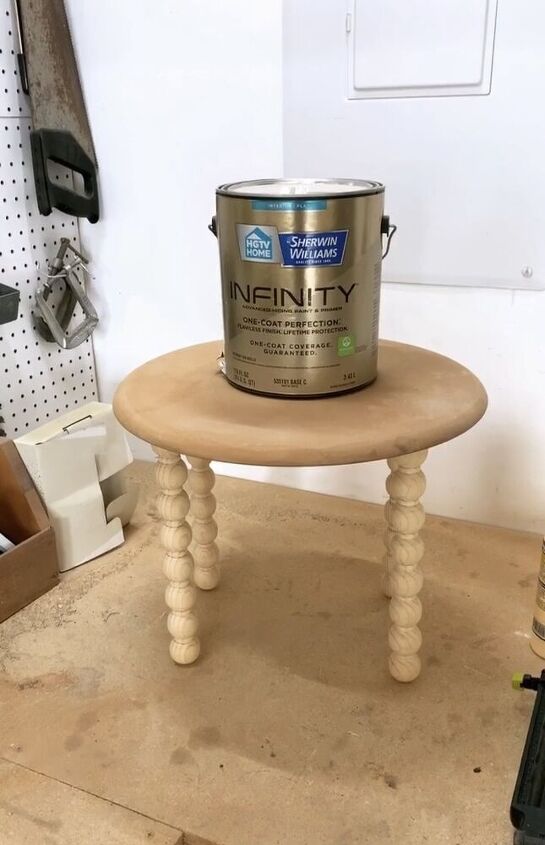
Then I sanded the top to prep for stain. I was using pine wood which can have a yellowish tint to it. Sanding does wonders to remove the yellow and give you a night clean natural wood tone to start with.

The next step is to assemble your stand by gluing your legs and clamping. I didn't have long enough clamps so I ended up gluing and then using my nail gun to shoot a 1 1/4" nail from the top into each leg to hold it steady enough to apply some weight to help the glue bond while it dried. I used this Gorilla Glue, but Tightbond wood glue would work just fine too!
If you wanted to create a wooden tray for your kitchen or bathroom you could easily cut these legs down to your desired length.
After the glue dried it was ready for stain!
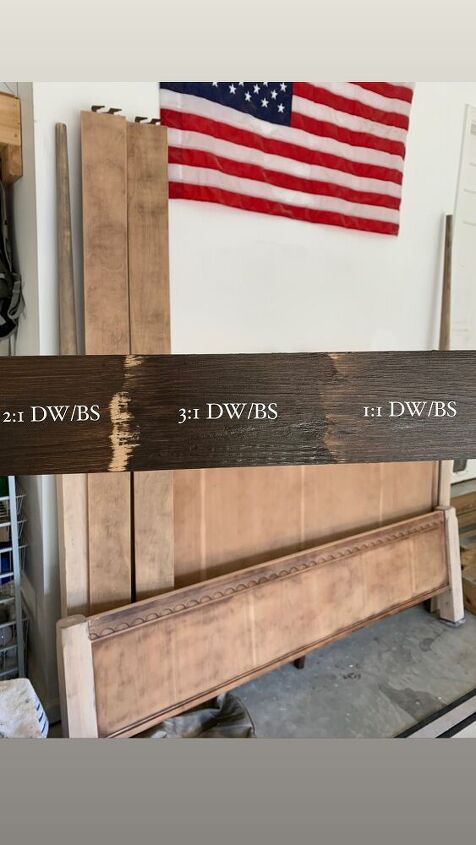
I was using this plant stand to test stain colors for the bed I am refinishing (in he background of the picture below). A while back I used a combination of Dark Walnut and Briarsmoke stains to create a sort of smokey brown color for my daughter's refinished dresser and I wanted to try that color here.
I used a newer to me staining technique that involves mixing your stain into Polycrylic. I love how this technique helps to create an even, uniform finish. It's great when you have blotchy wood, or you are applying it to a piece that has multiple kinds of woods that vary in color. The mixed stain floats the color on top of the piece rather than allowing the stain to soak in. It's buildable and it seals as you stain so it helps to cut down the finishing process time.
I used this technique on my DIY Upholstered Storage Bench and liked the ratio of 2:1 Polycrylic to stain. The Briarsmoke has heavy grey tones and it almost works like a solid color stain so I had to play around to see how much to add to get the rich brown I wanted, with smokey tones. The 2:1 dark walnut to briarsmoke ended up being the perfect combo.
When you apply mixed stain like this you have to work quickly because it dries much faster than stain alone does. Once it's dried it functions more like paint in that it can scratch off or will need to be sanded to remove distinct brush strokes or variations of thickness of the stain.
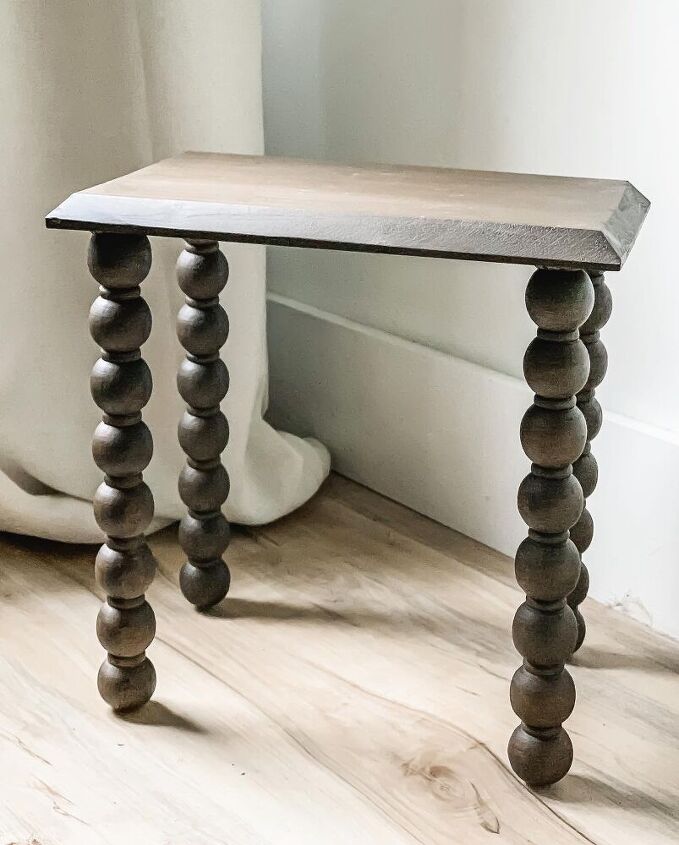
I LOVE the final color and design! It's a beautiful rich, smokey brown. It has dressed up our bedroom corner so nicely, and the turned legs go so well with the vintage feel I am going for.


For play-by-play steps on this project and more follow me at The Lauren Jamison Collective on Instagram, and see my blog for more home DIY and lifestyle ideas!


Frequently asked questions
Have a question about this project?