


How to Build a Built-In Storage Bench
Hometalk Recommends!
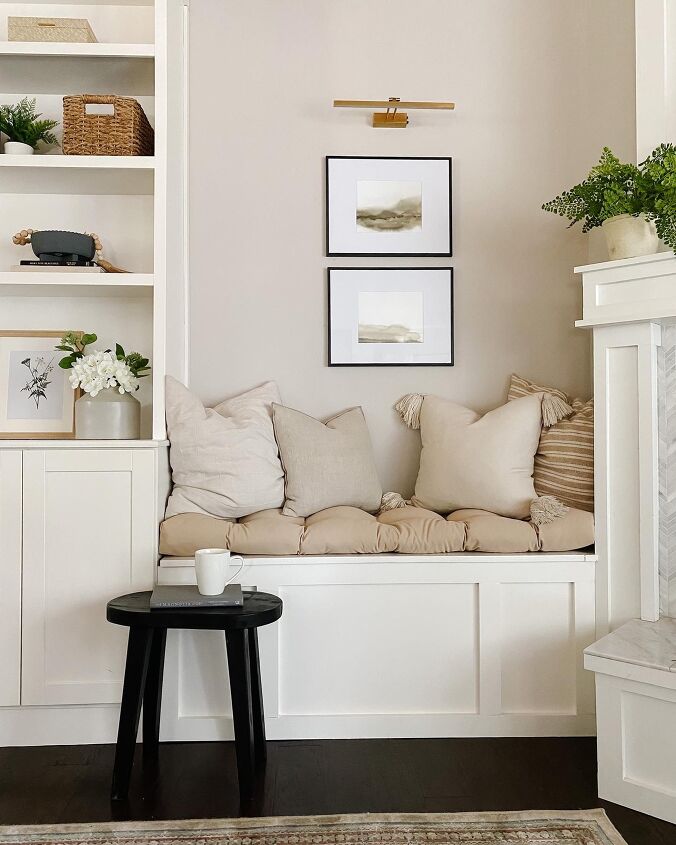
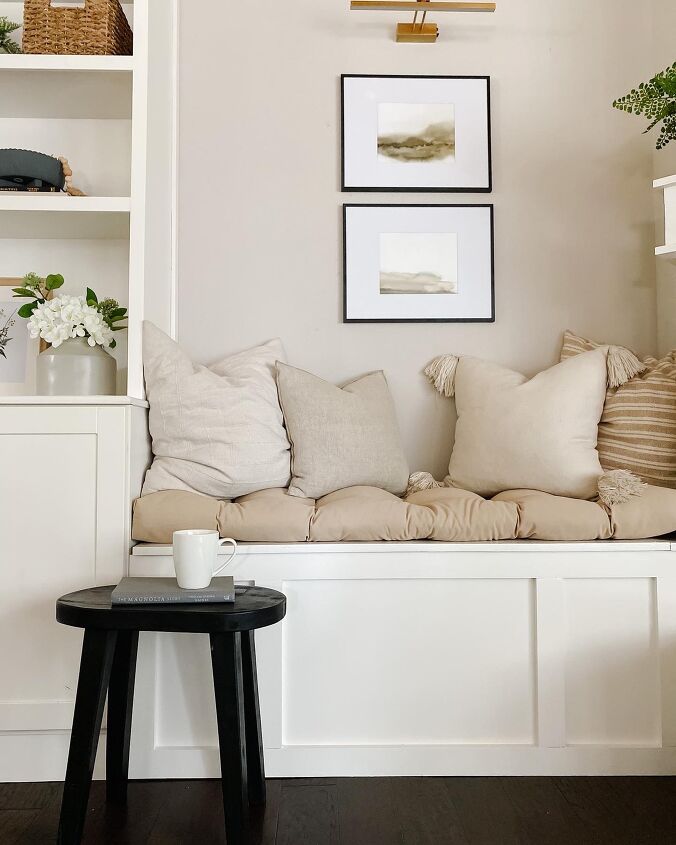
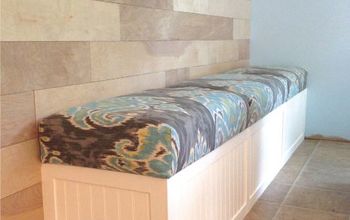
Ever since I was a little girl, I always knew that I wanted a window seat or a charming bench in my home one day. I finally found the perfect space in our home, and we created this custom storage bench. If adding a bench to your home is also on your bucket list, then you are in the right place! I am going to walk you through exactly how to create one for yourself!
Built-in Bench Materials Needed:
- 2x4s (2-3 depending on size of seat)
- 3/4″ sheet plywood or MDF (We used plywood because we had some leftover from another project)
- 2″ wood screws
- 3″ trim pieces
- 1 1/2″ brad nails for nail gun
- Hinges (I love National Hardware for all my hardware needs)
- Caulking and spackle
- Primer and Paint (We used a paint match to our entertainment center white semi-gloss)
DIY Storage Bench Tutorial
Step 1: Plan out your bench and decide on the size and design. Some things to think about is what type of items you will be storing in the bench, what the space will be used for, and will you have a cushion top or not? If you have a specific area such as a niche the size will be decided for you, however I recommend deciding on your bench cushion before moving forward with deciding on the final size. Bench cushions come in limited sizes and custom sizes can get expensive, so I would keep this in mind before just diving in and selecting a random length and width. I have linked some great inexpensive bench cushion options below. If you are dealing with a limited area, you could always DIY a custom cushion as well, however it may involve some sewing skills.
Things to keep in mind when deciding on the size of your window seat. The standard height of a bench is around 18″ and you will want to factor in if you will be adding a cushion and how thick it will be. Sometimes there will be additional factors that you would want to look at, such as will the height work with the window. We had to adjust our height slightly, due to an outlet being on the wall, and 18″ would have put the bench directly in the middle of the outlet. If you are creating a bench that will have a table in front of it, make sure that there will be proper leg room.
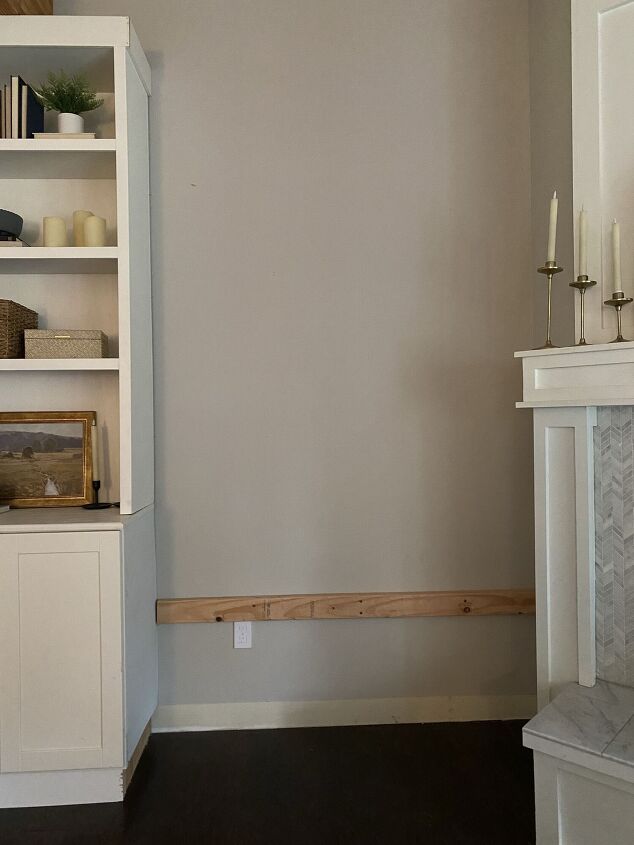
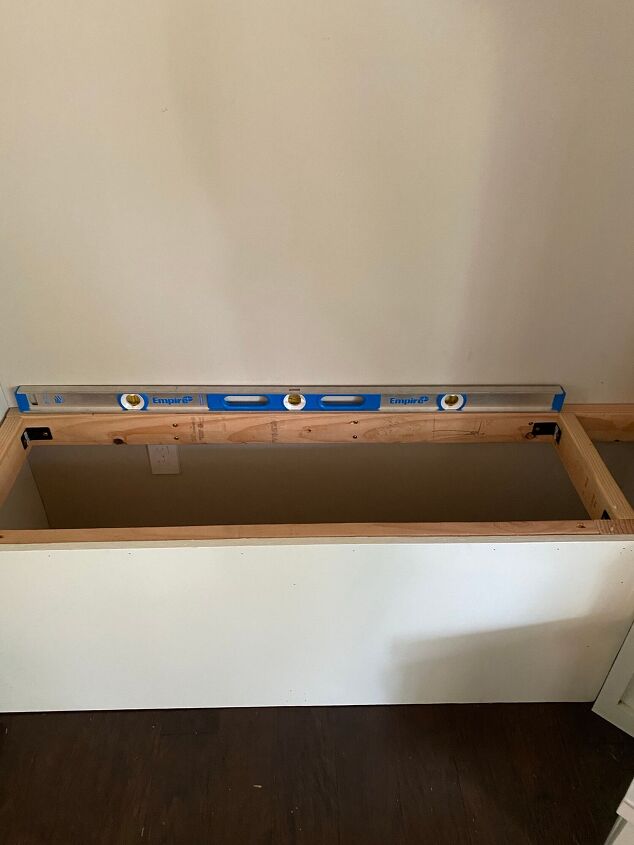
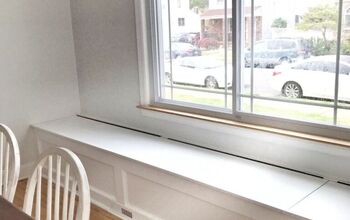
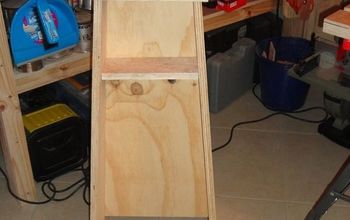
Step 2: Build the frame. When you are ready to get started, you will start to build out the frame which will be the support of the bench. You are essentially building a bench out of 2×4’s which will then be finished and covered with your plywood. Find the studs in the wall and attach your back 2×4 to the wall with wood screws. Make sure the 2×4 is level and this will be the start of your frame. For the legs of the frame, you can choose to screw the 2×4’s down into the subfloor for support or add another horizontal bar on the bottom for extra support. The specifics of your frame will vary depending on your space and size.
Step 3: Add the skin or decorative front. Now that you have your frame, it is now time to “skin it” with the plywood or MDF. Our bench was surrounded on either side so we only needed to add a plywood front, but yours may need sides as well. You will cut these pieces to size and attached them to your frame with a nail gun.
Step 4: Add the trim. Depending on the style of bench you are wanting the next step would be to add trim to the bench. This is what really makes the bench stand out and look like a custom piece. We added 3″ trim pieces in a board and batten style pattern to the front of ours. Feel free to experiment here to see what you really like. For example, we tried spacing the panels in 3 equal parts and decided we liked the asymmetrical pattern better. You will just attach this trim with a nail gun as well.
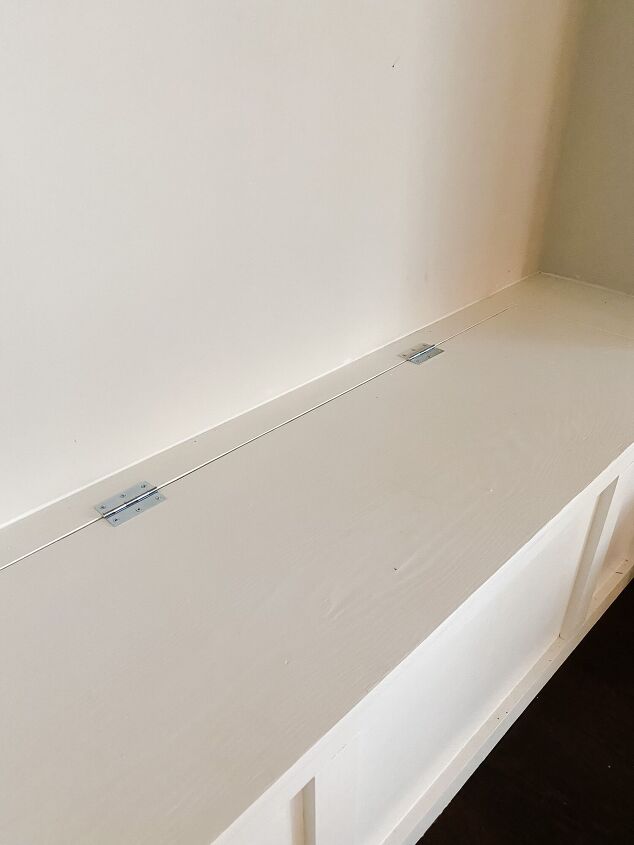
Step 5: Attaching the bench top. After the trim is added you can now measure the actual size of the seat top. Cut one piece of plywood that is about 2″ thick for the very back of the bench to attach the hinges to, which will allow the lid to open properly. We used two standard hinges from National Hardware, but you could use a piano hinge as well. Please note that the hinge will be shown. We were ok with this because we knew that our cushion would cover them. You could also paint over the hinges to disguise them as well.
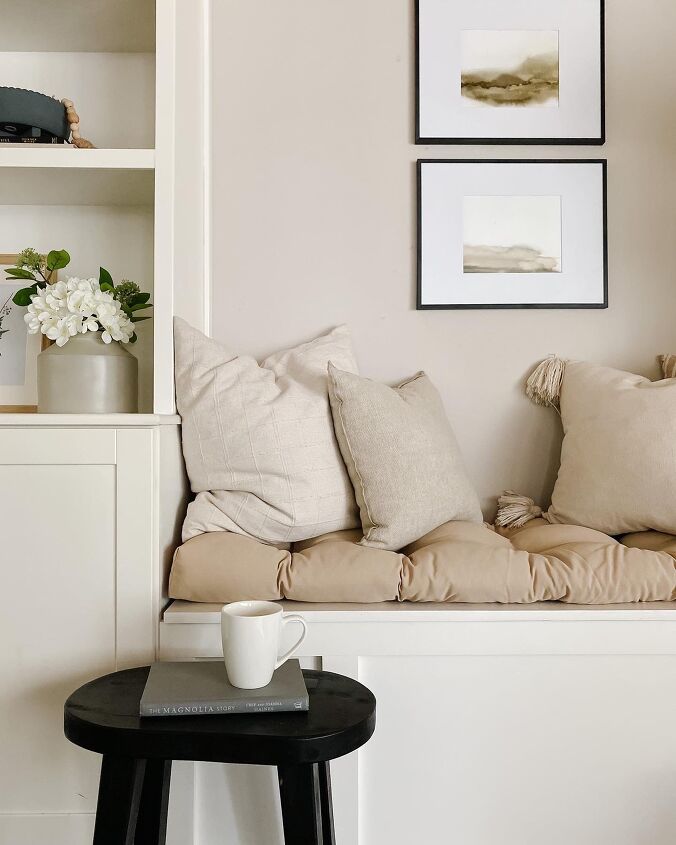
Step 6: Paint. Last step is to prep and paint the bench. You will want to fill in all the little nail holes, caulk the seams, sand, and finally prime and paint. We used a color matched white paint that matched our entertainment center. The finish should be a semi-gloss, just like trim, so that it is easily cleanable. The last step is to add your cushion and now you have a custom bench!
Below is a roundup of some great pre-made bench cushion options. These are the ones I considered before building our bench.
Shop Bench Cushions
Resources for this project:
See all materials


Comments
Join the conversation
-
Looks great!
-
Could you send me this room, please ? Guess I have to move to get something so pretty


Frequently asked questions
Have a question about this project?
Hi, I get the top and bottom 2x4’s but did you screw supports vertical on each corner from the top 2x4 to the bottom 2x4’s? Is that the stability you were talking about? And you screwed the 2x4 pieces on all 3 sides to the studs top and bottom. Correct?
btw This is just what I’ve been looking to do to my 52 “ window with shelves on either side!! I’m so excited to do this!