DIY Make Your Painted Staircase Look Like Real Wood Again

by
Victoria Larsen Stencils
(IC: professional)
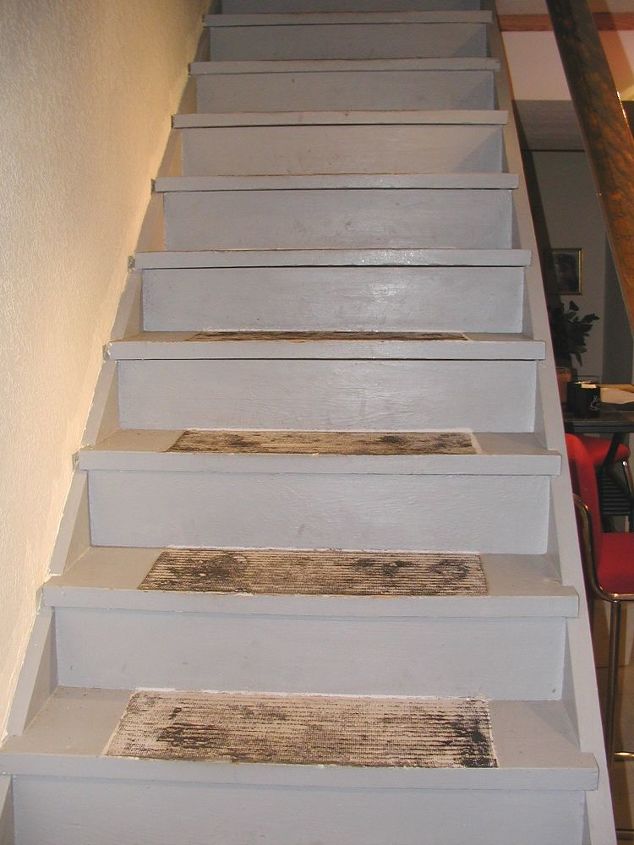
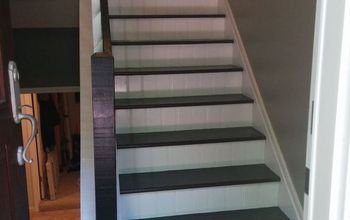
If your staircase looks anything like this one, let me show you just how easy it is to give it a real wood look and bring it back to it's former glory.
This stair case led down to my husbands music studio. What that meant was that clients would have to travel these stairs and it just didn't do a thing to make customers feel that this was the high end studio that it was really meant to be..Ick!
I thought of stenciling the risers (since I'm a stencil designer) but I opted to paint the risers the same cream color of the walls.
Adding wood grain was actually pretty fun.
I even created the look of a knot hole with the smaller brush.
When the grain was done on each stair, I used a dry brush to very lightly "blur" the grain lines. I did only one stair at a time, completing all of the steps. Starting at the top and working my way down made it easier (since I had a lower floor door to exit that floor).
3 coats of Varithane's floor varnish protected the finish and the stairs were done. It was a great make over that I was proud of and certainly made entering the music studio a much more pleasant experience!
Simply tape the wood grain stencil on to the surface. Mix darker brown paint with a little translucent wall glaze (again, to make it workable longer) and simply a, standard paint brush with the glaze over the stencil openings.
Remove the stencil to reveal the grain lines, then again, use a dry brush to slightly blur the lines. Varnish to protect.
Enjoyed the project?
Published November 6th, 2015 10:58 AM
Comments
Join the conversation
3 of 23 comments
-
 Colleen Baugus
on May 28, 2017
THANK YOU SO MUCH FOR SHARING, I AM ALWAYS HAPPY TO LEARN NEW WAYS OF PAINTIN G
-
Glad you learned something!
 Victoria Larsen Stencils
on May 29, 2017
-
-
-
 Hac58009539
on Feb 01, 2022
Yes, I am going to try this!
-











Frequently asked questions
Have a question about this project?