


How to Build Easy Breakfast Nook Benches

Take the included materials list with dimensions and quantities to your local hardware store, and discover a trick on how to build easy breakfast nook benches with this DIY tutorial.
For more DIY ideas and family fun visit Hammers N Hugs!

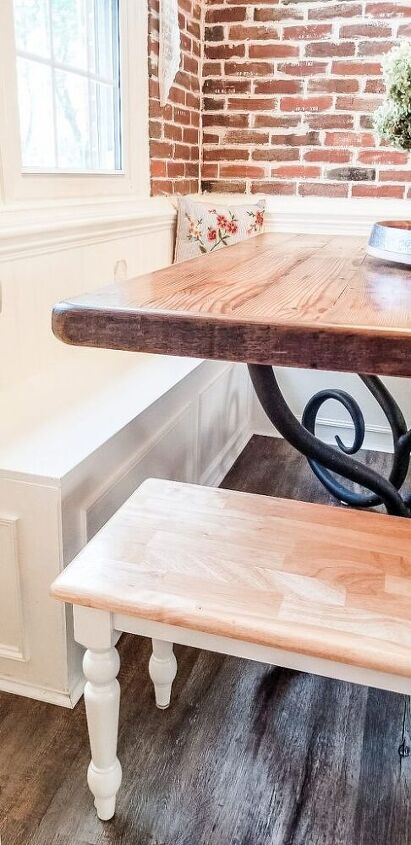
I love breakfast nooks.
I like how built in benches automatically add space to the rest of the kitchen by pulling the table closer to the wall.
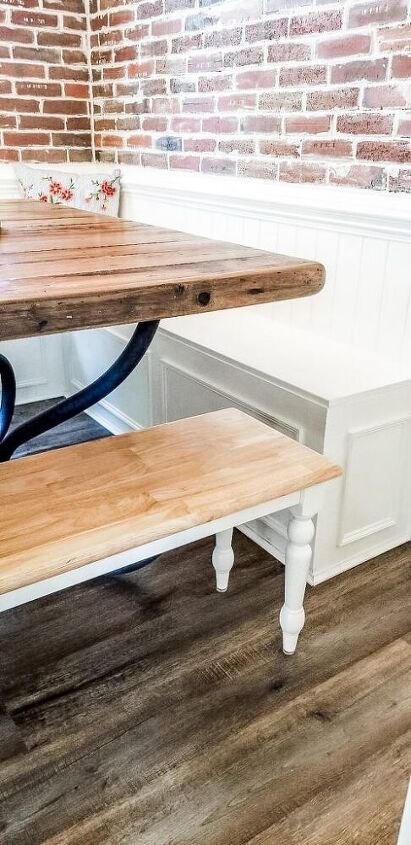
We added a breakfast nook in our second fixer upper as well, and we loved it so much that we replicated the same dimensions again in our current house.
I had a custom 60" x 60" fir table made in California, so our nook dimensions are tailored to this table.
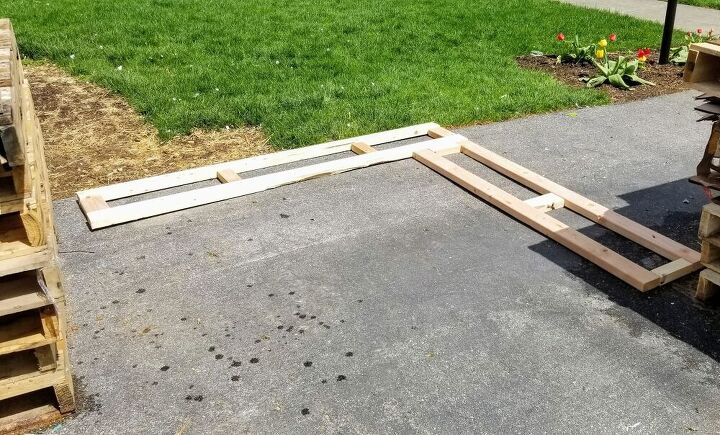
Ok here is the tip to making easy breakfast nook benches. *Build the two benches prior to installing*
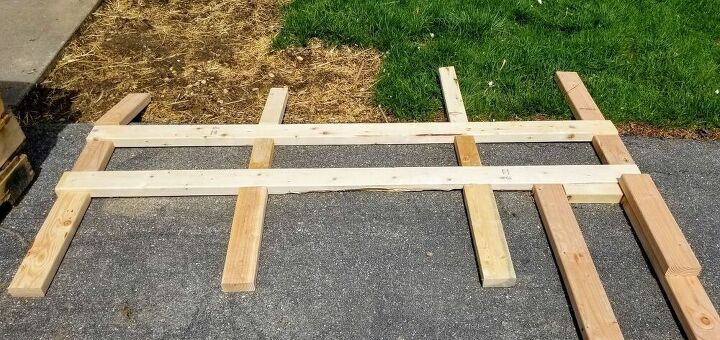
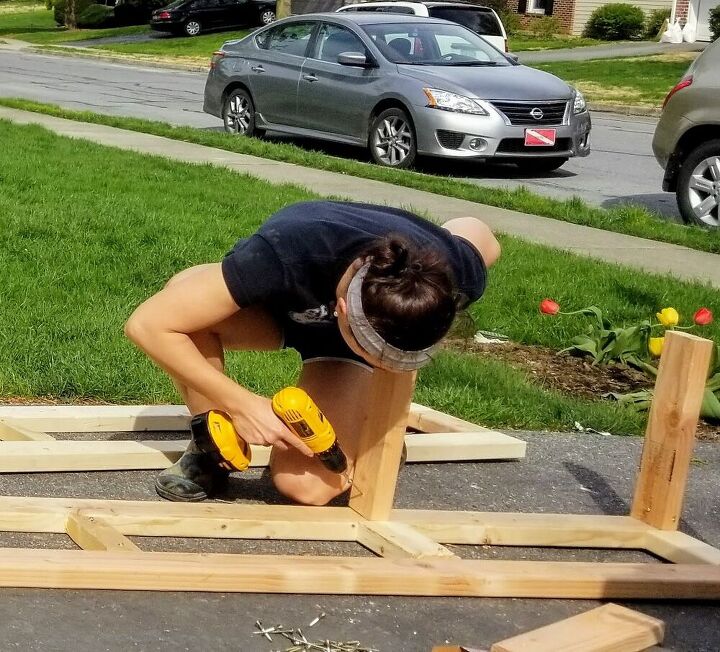
First lay out your bench on the driveway or even in the nook itself.
You will build the two benches separately prior to installing them. There are lots of 2x4 pieces that go into the benches and the key is to lay them all out to keep them in order!
Here is the base for the two benches which includes (2) 76" 2x4s on the left with (4) of the 9" 2x4s bracing them. On the right are (2) 60" 2x4s with (3) 9" 2x4s.
Fasten the long pieces to the perpendicular short pieces with screws. Do not attach the two bench bases together though! They are laid out to give the visual, but do not fasten them together.
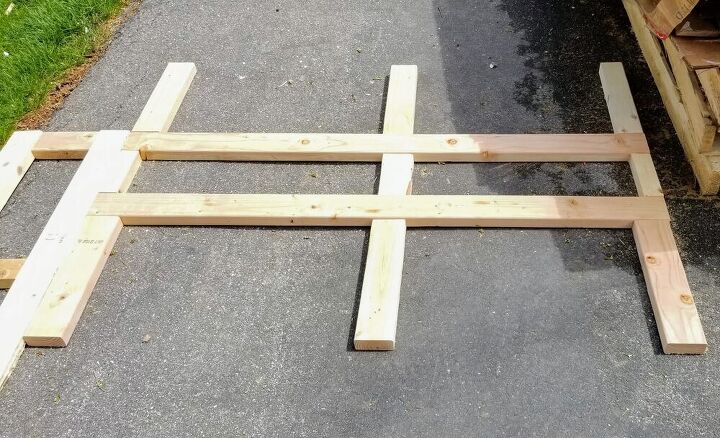
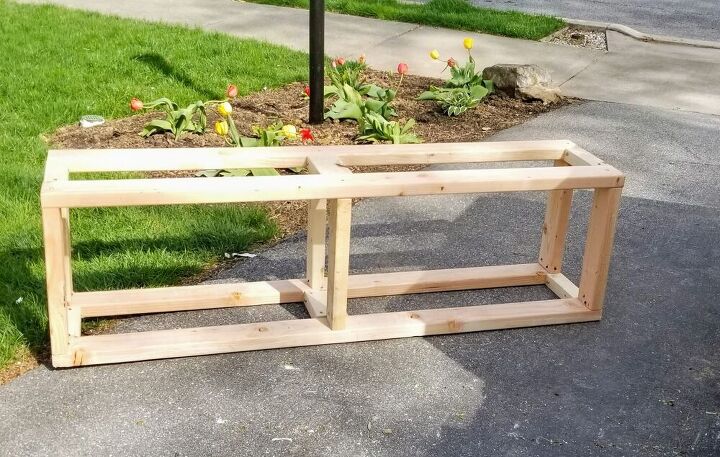
Next lay out all of the 15" vertical supports on either side of the short 9" braces.
Now we are going to lay out the rest of your 2x4s, so the pieces do not seem as overwhelming. All of these supports laying flat will ultimately stand upright to support the bench top.

Like this. Make sense?
Here are all the vertical 2x4s laid out along the left bench. In the picture below I stacked each vertical piece together to simplify my piles.
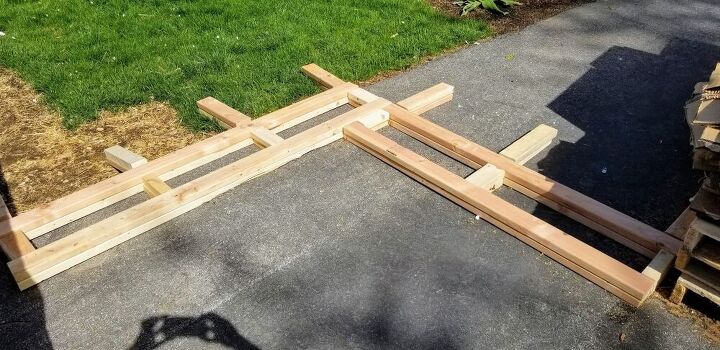
Here every piece that I need for the benches is stacked on top of each other to simplify your process. Can you see that basically the foundation is repeated on top of the vertical pieces?
the vertical supports.
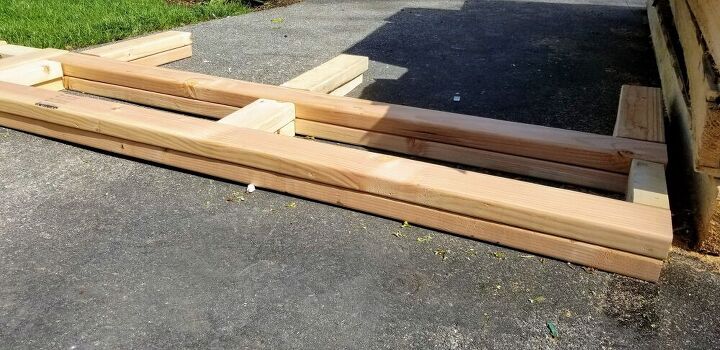
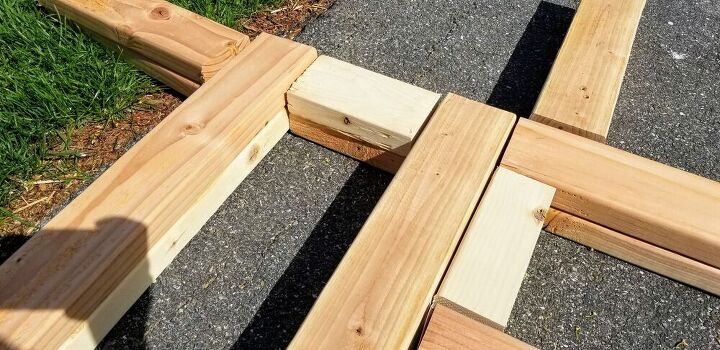
Add all of the vertical supports perpendicular to the cross sections of the bench foundation.

Add all of the vertical supports perpendicular to the cross sections of the bench foundation.

the bench top.
Built the bench top next. It is literally a repeat of the base.
Then secure it to the vertical supports.
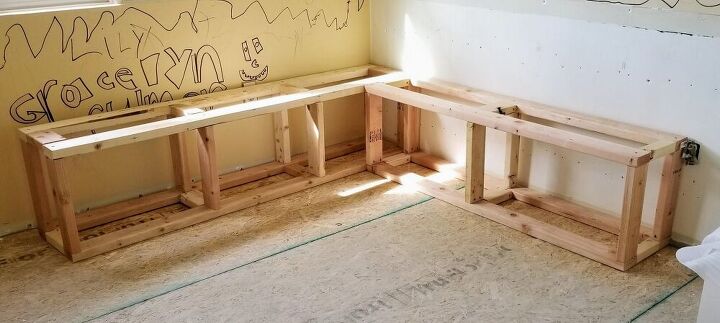
to walls and floor.
At this point, set up the bench frames in your kitchen or wherever they will go. I did this same bench (different dimensions) in our foyer as well. These benches can be put anywhere in a home.
Secure to the floor and the walls with screws. Keep as tight as possible.
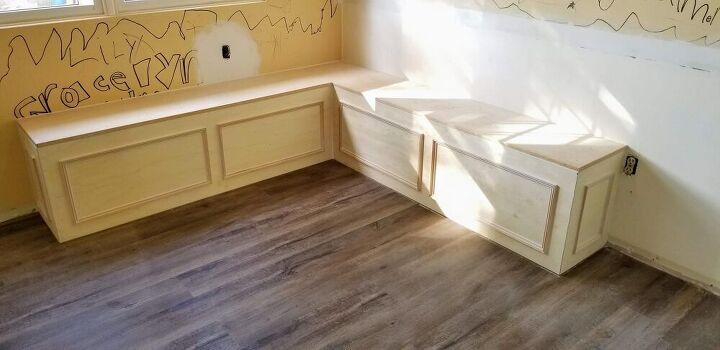
the plywood and decorative trim.
Add the 1/2" sanded plywood to the face and then the 3/4" sanded plywood to the top.
Add the shoe molding trim around the bottom, and then whatever decorative trim on the face of the benches.
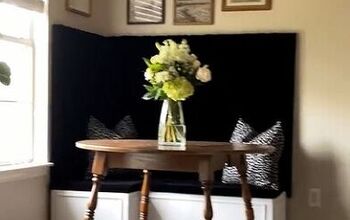
This picture window trim is less farmhouse style and a little more classic appearing which is what I wanted as this is our formal and casual dining space all in one at this house!
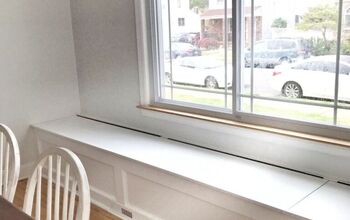
Caulk, paint, and voila!!
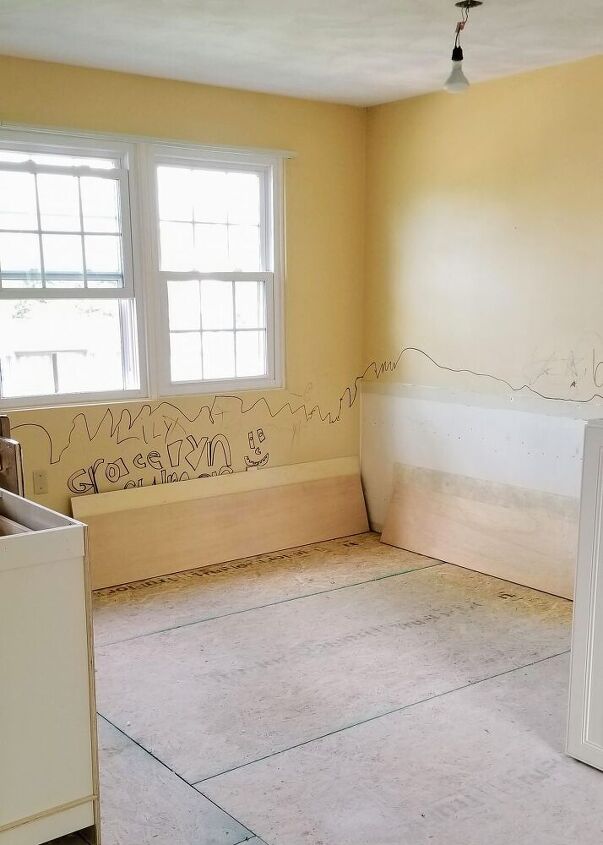
BEFORE
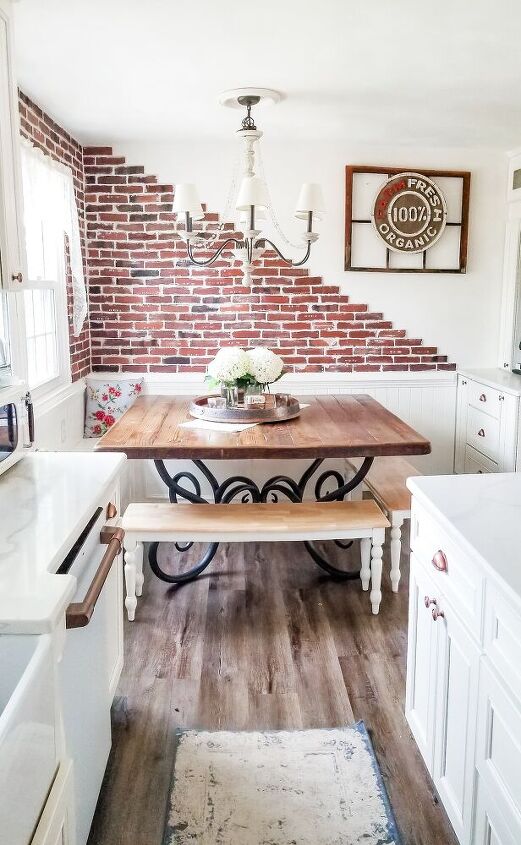
AFTER
One of my favorite views in our home!
Resources for this project:
See all materials


Comments
Join the conversation
-
Lovely, just lovely
-
Love, but would make the benches into storage with hinged seats.


Frequently asked questions
Have a question about this project?
Why not attach the tops with hinges on the back and also make the inside of the benches storage?
Very Cute & Cozy! Love the brick and the flooring...veneer and laminate?
While I love the primary project, was just wondering if that is original ( real ) brick? I want to find inexpensive faux brick for wall but not flat wall paper. Appreciate any ideas!!