


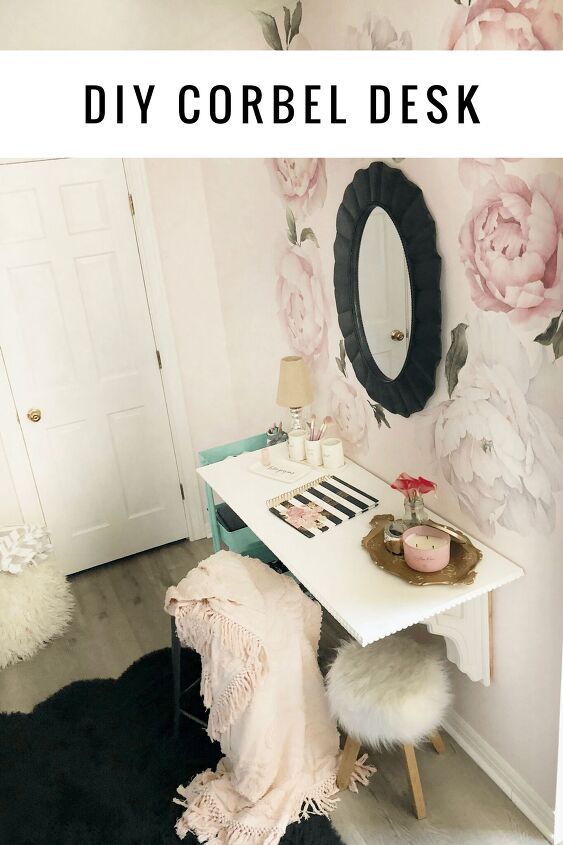
How to Make a DIY Corbel Desk for Small Spaces - CuterTudor

How to Make a space saving DIY Corbel Desk.
My daughter and I are in the process of updating her bedroom into a place fit for a queen; I mean a teen. Consequently, Callie definitely has her preferences, and I have tried to let her take the lead from furniture arrangements and paint color, to the smallest details like candle scents and wall decals. As hard as it is to let go, it is amazing to see her make her own design choices. While this room may not match the rest of our home, it fits my soon to be teenager well. I will certainly admit that it has been fun to decorate with PINK!
In the process of updating her room, Callie wanted to remove extra furniture to get the most out of her space. For that reason, she still needed a writing desk for homework and a vanity to get ready, so the DIY corbel desk evolved. When I shared the idea with my toughest client yet, she loved it! I originally saw this idea shared by Amie and Jolie of the Junk Gypsy Co in Roundtop, Texas.
So, how easy it is?Y’all, this built in DIY corbel desk would be perfect as a kids desk, vanity, entry table or bar in a game room or kitchen nook. Seems like, it is great for small spaces and I built this by myself! This is an easy project that you can put on your ‘do it yourself’ list. I am so proud that I used a brad nailer and a miter saw without having to take a trip to the emergency room. However, I did drop our biggest tape measure on my toe. Let’s just say ‘if a tool falls on a toe in a workshop and no-one else is around, will it make a sound?’ Yes, the answer is definitely a yes! Besides that, with a few tools and supplies like corbels, wood trim and a sheet of wood, you CAN do this, too!
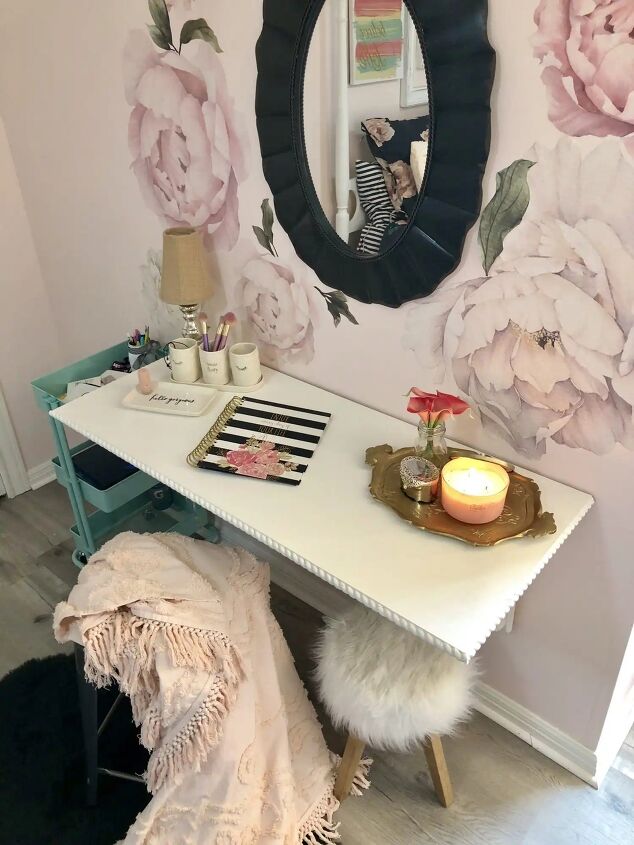
DIY corbel vanity and writing desk in one.
DIY Corbel Desk Instructions
Get measurements.
First, determine the height, width and depth for the DIY corbel desk. The standard desk height is 28-30″ tall. I made sure the cart could slide under if needed, so we settled on 30 inches tall. Decide how wide and deep that you want the table top to be, as well. This one measured about 50 inches long, enough room for the cart and a chair to slide under. Depth of the desk needs to hang over the top of the corbels, but how much is up to you. Make your marks for height and width on the wall in pencil.
Build the base.
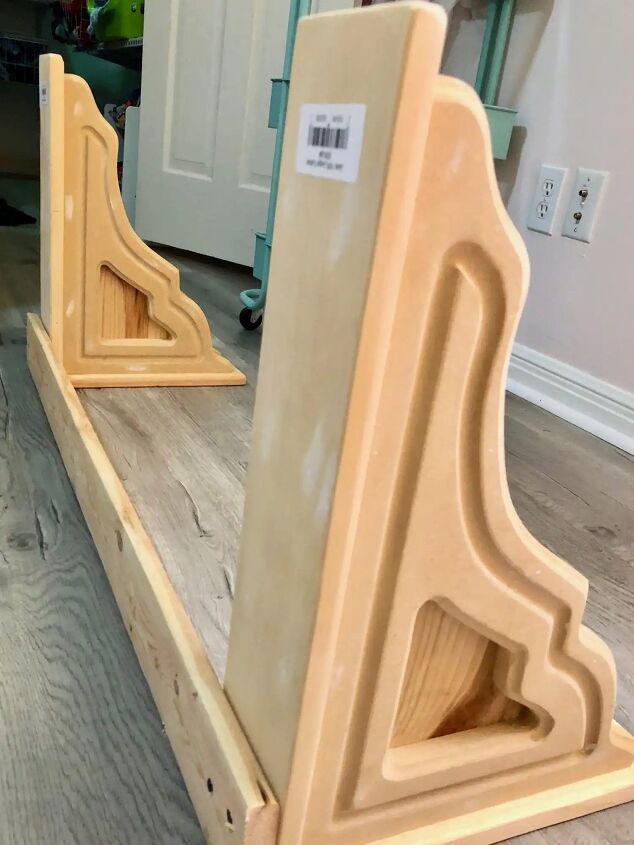
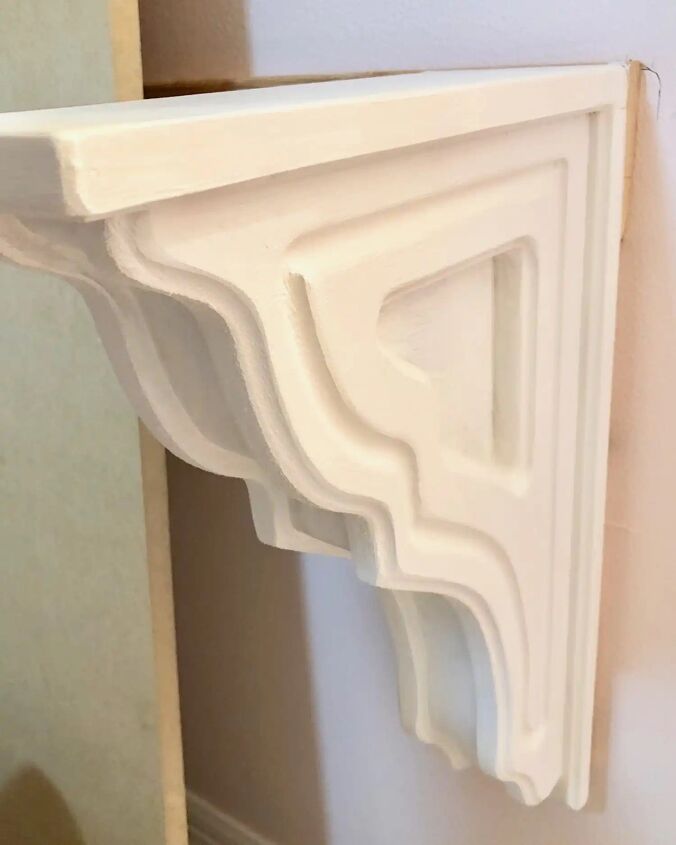
Once you have your measurements, you need to build a brace to attach the corbels to the wall. We used 1×4 inch boards, but the width you use may be determined by the width of your corbels. If you have 3 inch wide corbels, use 1×3 boards. Cut the board according to the measurement you need and size of your corbels. We cut one 1×4 inch board 50 inches long (width of desk including corbels placed on the inside).Turn the corbels upside down where the table top side is on the floor. Place the long board between the corbels as shown in picture below. Use a drill and screws to secure the long board to the back of the corbels.
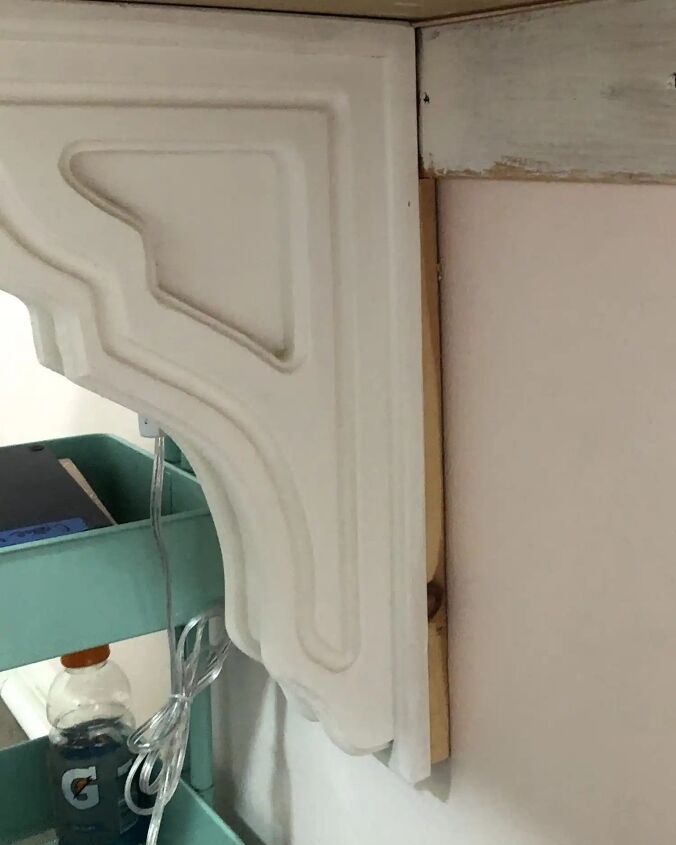
Measure the length for 2 more boards to be placed above the long board on the back of each corbel. You will measure from the end of the corbel to the bottom of the long board. Drill these pieces to the back of the corbels. This allows you to secure the boards to the studs in the wall.Secure the base.
Attach to wall.
Next, find the studs in the wall. Obviously, the corbels are turned back around at this point. Lastly, drill the long board directly to the studs in the wall in numerous places.
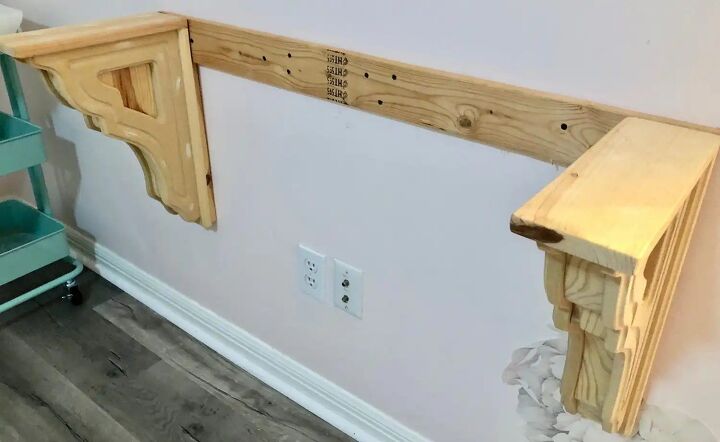
The 1×4 boards will allow you to secure the corbels to the studs in the wall.
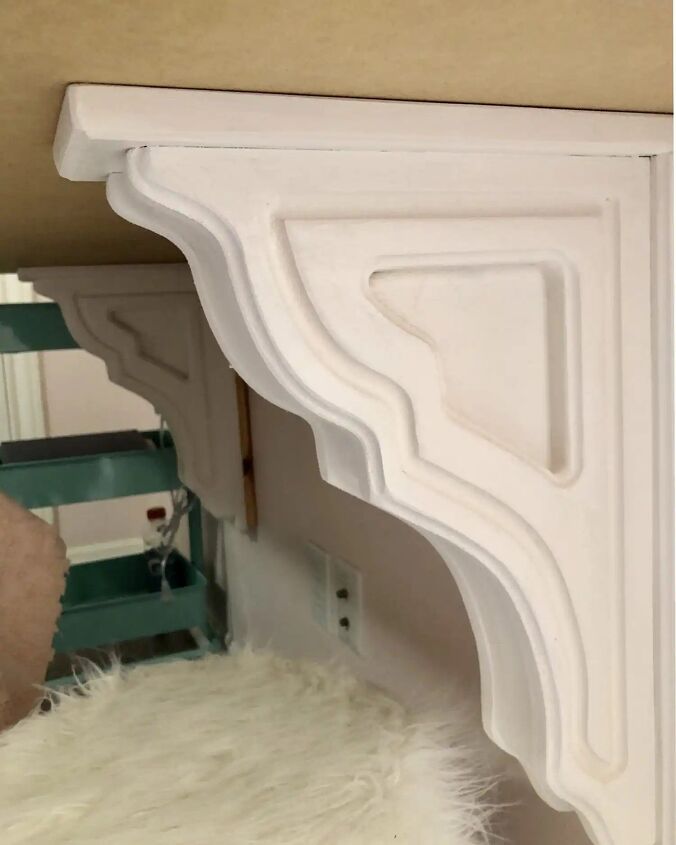
Here’s how the DIY corbel desk looked assembled… Now to add the details and paint it!
I found these unpainted corbels at The Findery; in Waco, Texas. They are available in two sizes; these are the larger corbels.
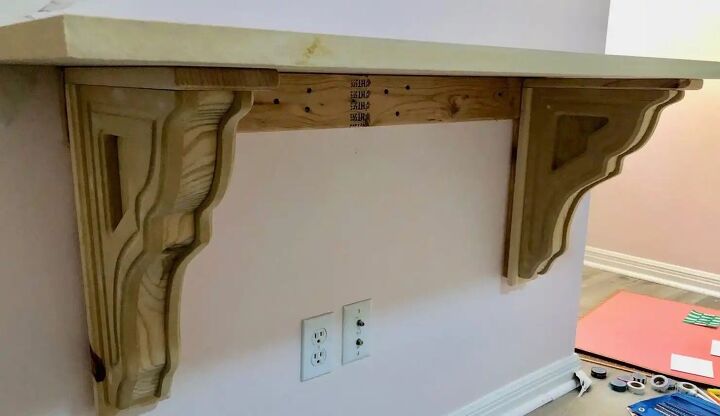
Build the top.
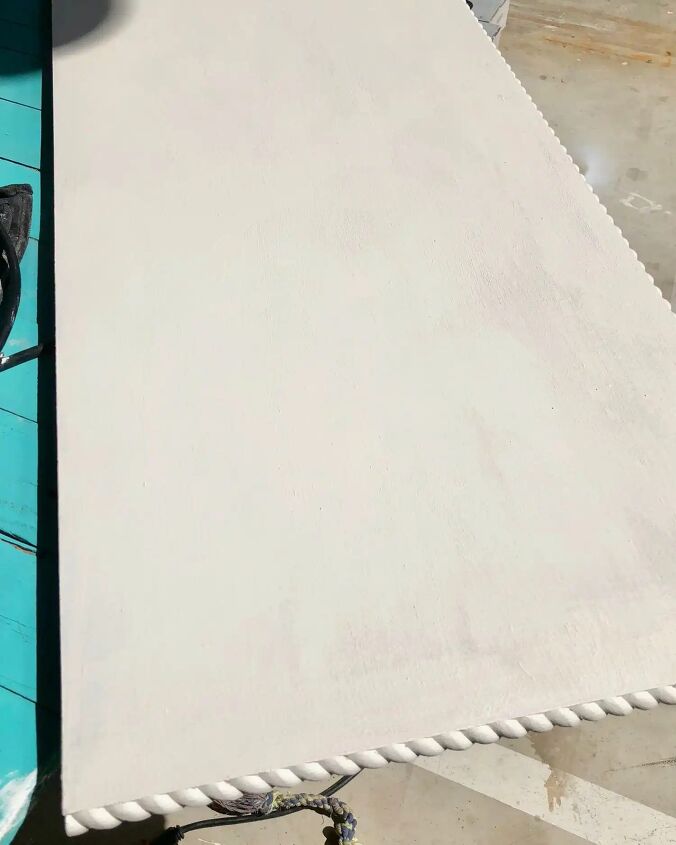
I used a sheet of MDF cut to the desired size of the table top for this vanity. I allowed the table top to hang over both sides 4 inches and about 6 inches off the front. Use a table saw to cut or have Home Depot or Lowe’s cut it for you.
For the trim, a 1 inch wood trim from Home Depot to cover the length of the desk on the front and two sides worked great. For that reason, I did not put it on the back so that it would sit flush against the wall. Use a miter saw to cut the wood trim. Be sure to overhang the wood on the front of the panel to cover the side piece of the trim, like in the photo on the left.
Ryobi has an awesome cordless brad nailer that I can use with confidence. Adhere the trim with the brad nailer. I aimed the nail gun near the bottom half of the trim to hide the nail heads. *You can use a nicer sheet of wood, like birch plywood if you prefer to stain the wood.
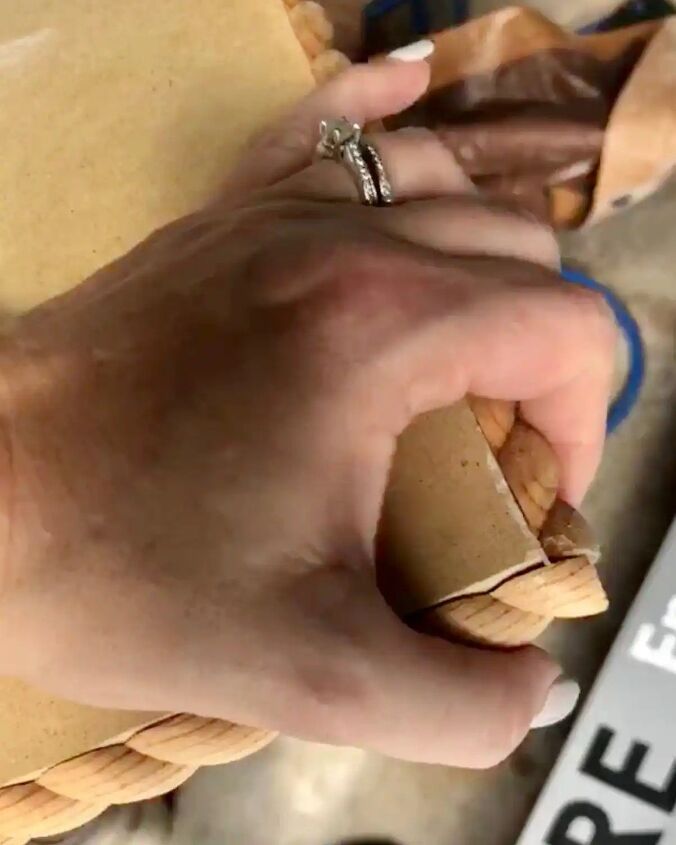
Overlap the wood trim to cover the end pieces on the side of the wood panel.
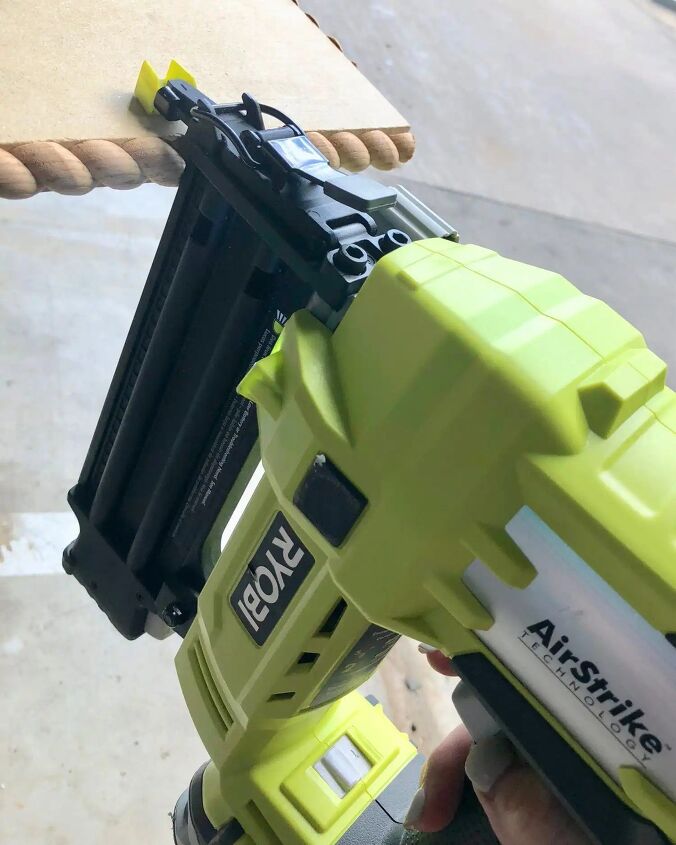
Use a brad nailer to adhere.
Paint it.
Paint the corbels, wood panel and trim. I used a latex interior paint in the color called ‘marshmallow.’ I used Miss Mustard Seed’s white wax to seal the top. You can distress the corbels with a sander, but my daughter doesn’t like the vintage look. I know y’all, but I can’t disown her. Paint the 1×3’s before they are installed, as well. Have fun and paint your DIY corbel desk to fit your own style!
Style it up.
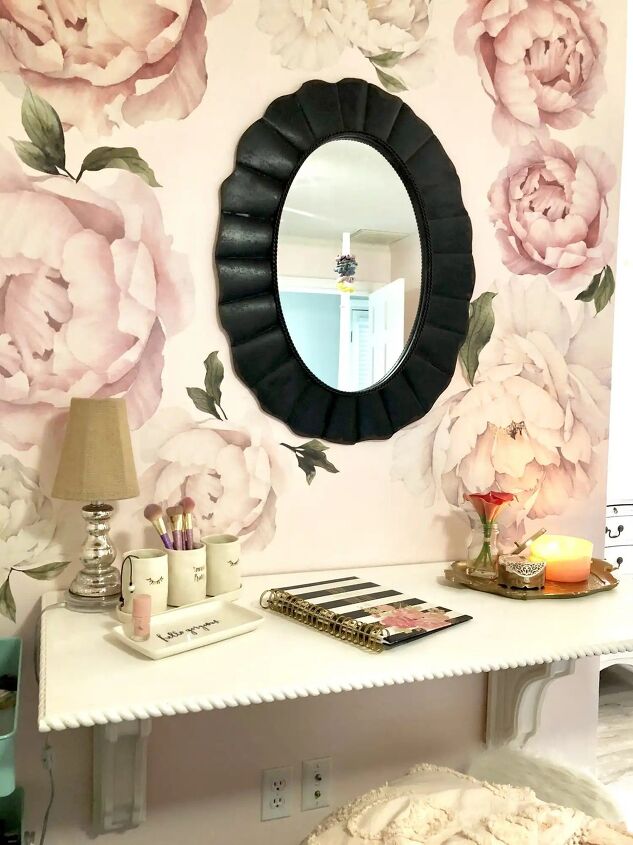
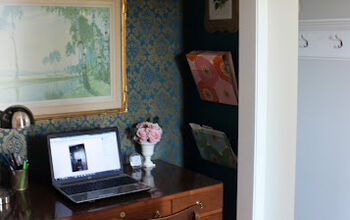
I wanted a mirror above the desk so that it could be used as a vanity for my daughter, too. I found the perfect black metal, ruffled edge mirror from Antique Farmhouse. My daughter chose these peony flower wall stickers from Rocky Mountain Decals. I have removed these two times since I received them in May and haven’t had any problems repositioning them or getting them to stick.
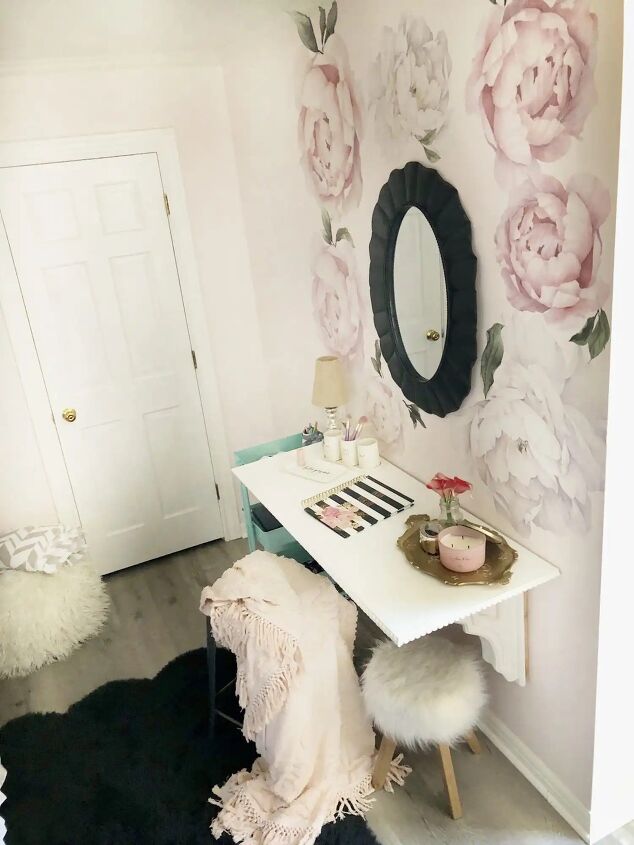
Create a backdrop for the desk with wall decals and a mirror.
Finally, Accessorize.
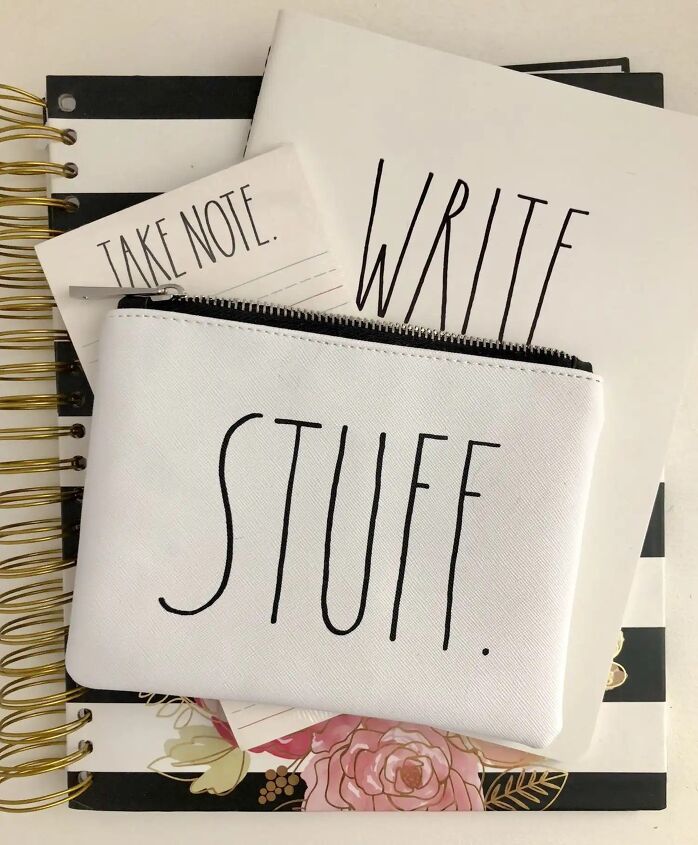
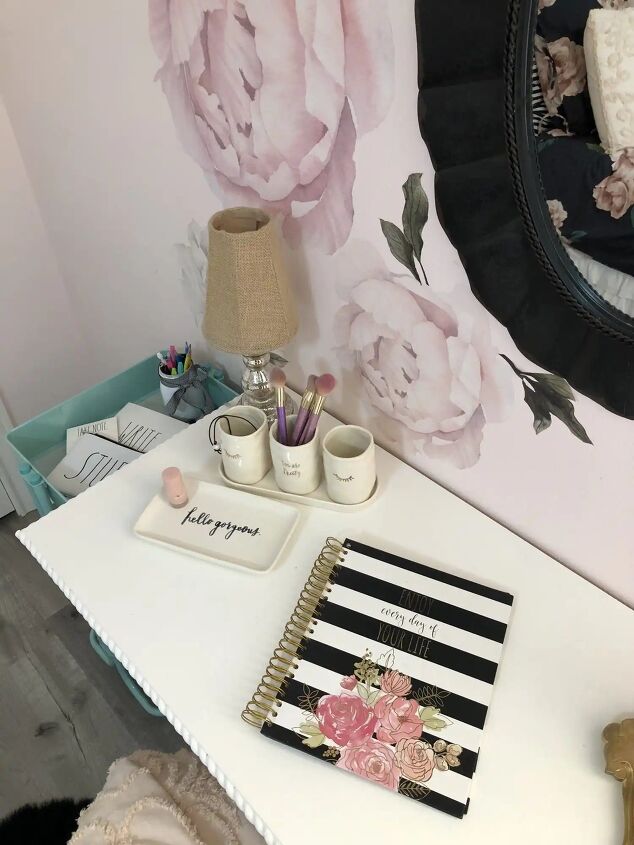
Isn’t the fun part when you decorate with all your favorite finds? Accessorizing seems like the point that the room really comes together. Because there are so many cute organizational tools, you don’t have to pick function over form anymore. I found these Rae Dunn goodies during a recent trip to Homegoods! I bought the makeup brush holder and tray , plus some cute notebooks and pencil pouches. My daughter and I found the striped notebook with pink roses at Marshall’s. It was the perfect color and pattern for her room.


Having a place for everything helps kids keep their room organized. More truthfully, it helps moms know where to put stuff, lol. I do think it helps though! Because my daughter is getting older, we are really working on being responsible and keeping organized. So, I hope this space inspires her to do that. On the other side of the vanity, I styled a jewelry box, vase of faux flowers and a yummy cactus pear scented candle.
I hope you have been inspired to build your own DIY corbel desk for a small space in your home. Maybe I will share the rest of the room update with y’all before she actually turns 13! Don’t forget to follow me on Instagram at @cutertudor and most importantly, pin this for later!
Pin this to your DIY Pinterest Board
deskDIYdo it yourselffurniturehow tokidsteen roomtutorialvanity


Comments
Join the conversation
-
Oh...my....gawsh! Seriously, your vanity area is OH, SO GORGEOUS, LOVELY, AND FEMININE! Bet it makes you smile everytime you go in there.... just lovely!
-
Very creative, love it!!


Frequently asked questions
Have a question about this project?
Do you need to shim the Corbel in order to have a level top? Looking at the instal it looks like the mount would pitch the top as the top of the corbel is connected to the wood strip and the bottom is not.
How do cords reach the electrical outlet? I don’t see a hole to access them?
Ok I have to ask. Can’t believe no one else has. Where did you find the wall covering with the huge beautiful flowers in it? I’m in love with it. Beautiful. Love the desk.