


Easy Outdoor Planter Idea for Sun
Do you want to plant a gorgeous container garden to brighten up an outdoor living space but aren’t sure where to start? Learn how to design this outdoor planter that attracts hummingbirds.
I love to design container gardens.
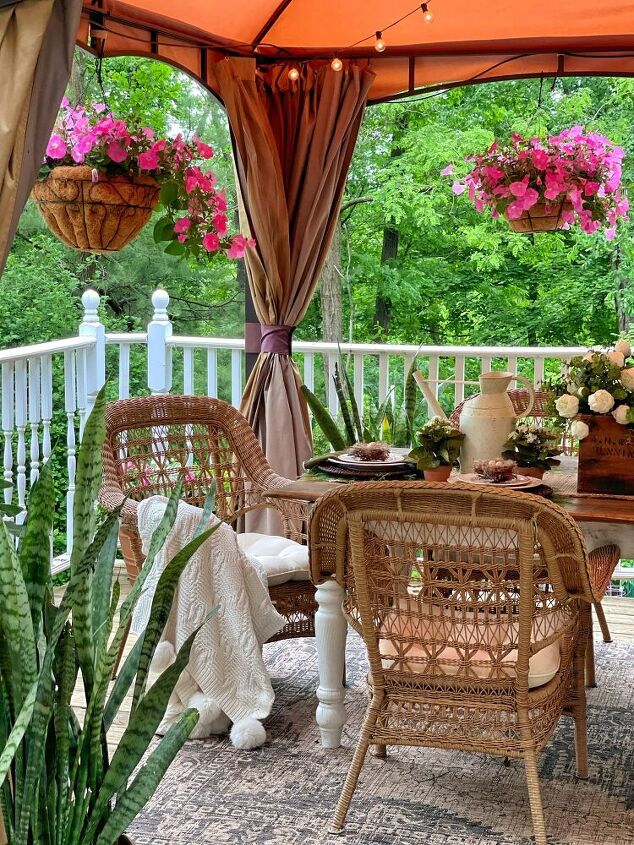
In spring, my favorite thing to do is plant outdoor planters for my deck and patio areas to enjoy all season long.
They add a lot of color and personality to outdoor living spaces.
Container gardens help soften the hard lines and lend to a relaxing atmosphere.
I’ve got a great container garden recipe for sun today that you can try.
And a little tip to keep those planters light so you can move them around easier.
The Elements of Container Garden Design
When designing an outdoor planter or any container, keep in mind the thriller, filler, and spiller method of design.
What does that mean?
It means you want a plant that will add height and drama (the thriller).
Plants that will fill in the container (the filler).
And plants that will trail over the outside of the container to soften the lines (the spiller).
There are lots of ways to achieve the look.
Here is one of the outdoor planter recipes that I designed for the season.
Hometalk Recommends!
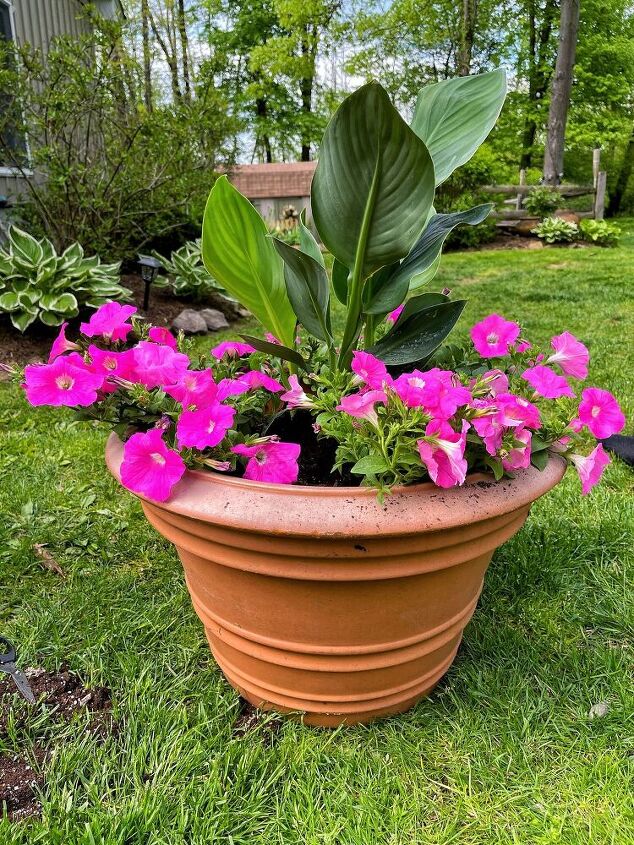
Outdoor Planter Idea for Sun That Attracts Hummingbirds
I love to watch the pollinators enjoy the gardens.
Do you?
We always get a kick out of the hummingbirds that zip by to grab some nectar while we are hanging out on the deck.
Because I use plants to attract them to my gardens, I design container gardens to draw them in.
There are lots of plants and methods to attract pollinators to the garden.
HERE are tips to attract hummingbirds.
HERE are tips to attract butterflies.
And HERE is a great list of plants that will attract butterflies.
Supplies Needed For This Container Garden Idea
For this outdoor planter idea, you will need:
- Potting Soil
- Canna Lilly
- Superwave Petunia
- Euphorbia
- Sweet Potato Vine
- Fertilizer
- Garden Gloves
When selecting a garden container, I strongly suggest going larger than smaller.
Smaller containers tend to dry out quicker and you can plant more in a larger outdoor planter.
Choosing Plants for a Container Garden
When choosing plants at the nursery, envision the size of the container you plan to use or grab one at the nursery to test out how many plants you’ll need.
This is also a great way to create your design before you actually plant. I love playing around with different colors and textures while at the nursery.
Know what your light conditions are and read the plant tags to make sure the plants you are choosing align with one another in terms of care.

How to Plant a Container Garden for Sun
Whenever I start planting a container, I like to start with the thriller plant, and then fill in around it.
Grab a pair of garden gloves like these before starting.
Sometimes I get a little lazy and don’t bother, but I usually wind up regretting the dirt under my fingernails when I’m done.
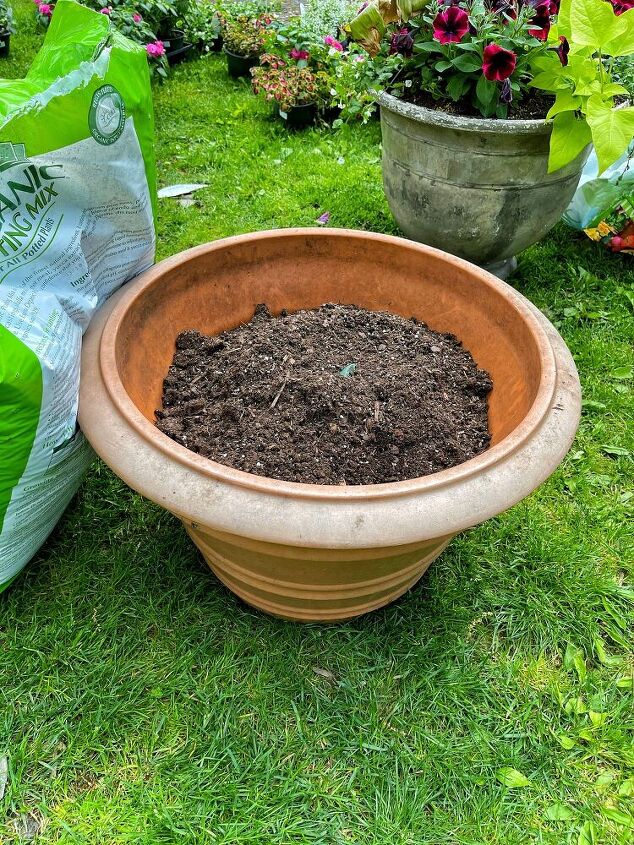
Step 1 - Fill container halfway with potting soil.
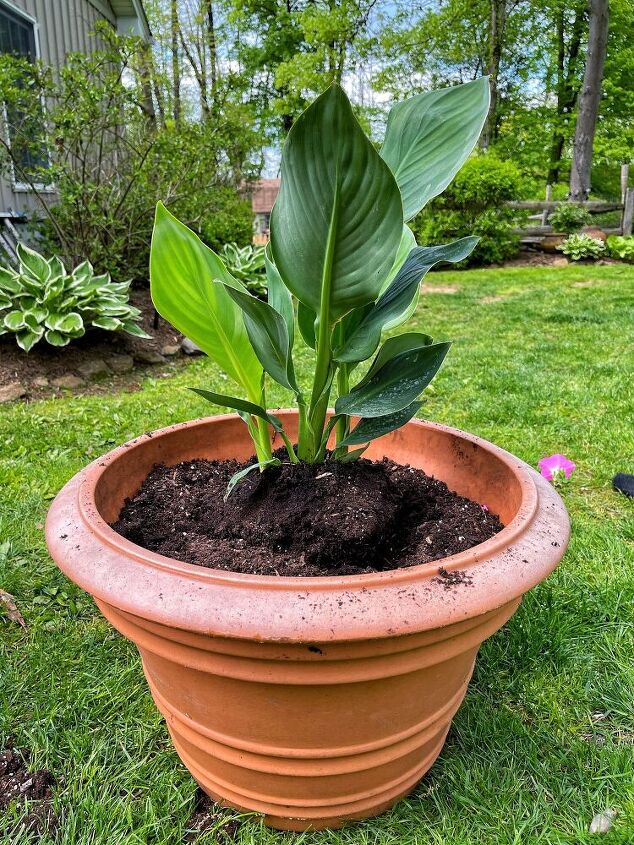
Step 2 - Add the Thriller Plant
For the height in this outdoor planter, I am using this gorgeous canna lily.
There are lots of varieties to choose from, but I love the large leaves and height it adds to garden containers.
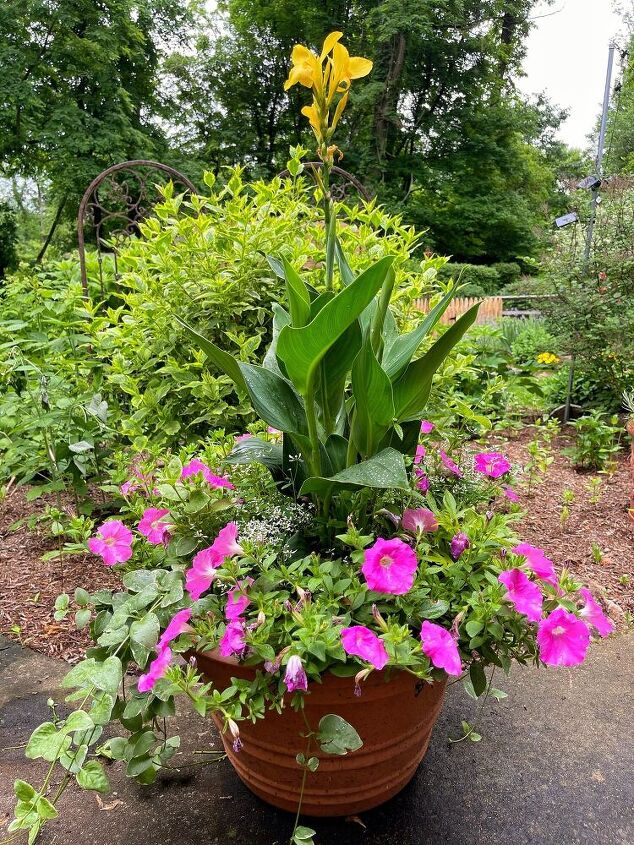
This canna lilly will flower yellow as the temps warm-up and produce blooms all season long.
Where I live, Zone 6a, canna lilies are not hardy, but can be dug up and stored for the winter to replant the following spring after all danger of frost has passed.
So, if you are willing to do a little extra work in the fall to preserve them, you can replant them in the spring.
From my experience, they overwinter well.
Step 3 - Add Filler Plants
After planting the thriller plant, I like to fill in the container.
And when I say to fill the container, I mean FILL IT.
Depending on the size of the container, I plant them in odd numbers.
And typically work in 1’s, 3’s, or 5’s.
Design Tip: Stuff those containers with plants. The growing season is short – don’t leave gaps. They’ll look lush and beautiful from day one.
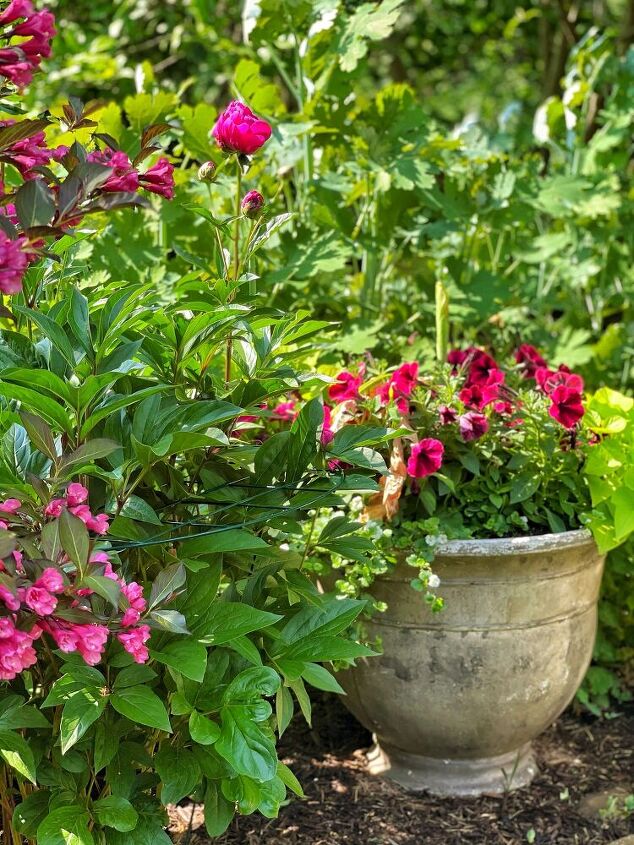
For filler plants, I planted these gorgeous wave petunias and euphorbia.
Now the wave petunias also count as spiller plants because they will spill over the sides.
But I love them as filler too because they weave in and fill in the gaps as the garden grows.
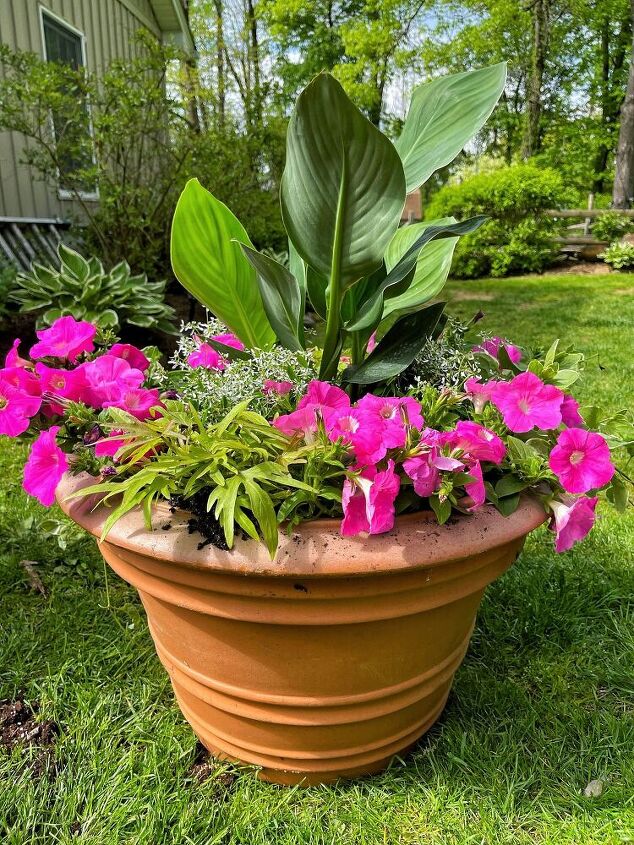
If you’ve never planted euphorbia before, I love this annual.
It’s light, airy, and adds a little brightness to container gardens and borders.
Step 4 - Add Spiller Plants
And finally, I tucked in some sweet potato vine to add some dimension and texture with foliage.
There are lots of sweet potato vine varieties out there, choose one that speaks to you and the container you design.
I love trying new things that I haven’t worked with before,
It’s part of the fun with gardening.
Step 5 - Backfill with Potting Soil
Backfill the planter with potting soil and ensure there are no air pockets.
Step 6 - Fertilize
Annuals need to be fertilized, particularly when they are in containers.
Every time the plants are watered the nutrients wash out, so it's important to feed these plants.
I love to use a slow-release fertilizer as a set-and-forget approach, but you can use whatever you like.
Step 7 - Water Well
Now that it's planted, give the container a good watering and set it where it will receive the appropriate light conditions.
How to Keep Large Outdoor Planter Lightweight and Easy to Move Around
If you are planting a larger container, that container will be pretty heavy to move around when filled with soil and plants.
In general, I like to work with lightweight containers like this so I can leave them outdoors in the cold NJ winters without worrying about damage to them.
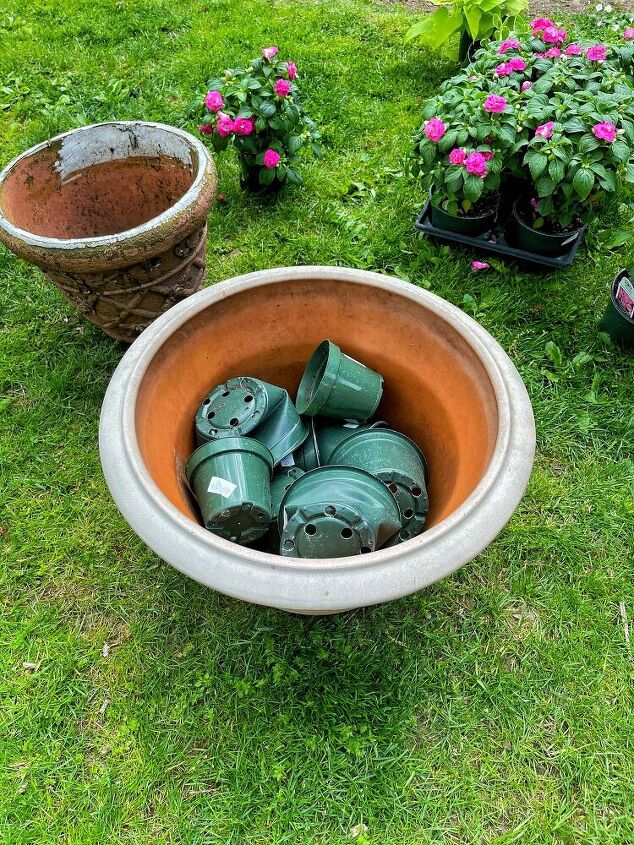
There are a few ways to lighten planters, but this method is my favorite.
The benefits of this method include recycling containers, reducing the amount of potting soil needed AND lightening the weight of the pot.
While working with your plants, remove each one from their containers and fill the bottom half of the outdoor planter with the plastic pots.
Place them so they fill the space.
Back fill with potting soil and leave enough planting depth for the plants you’ll be using.
And that’s it!
I do this all the time and it works so well.
Containers are significantly lighter.
I’m saving money on potting soil.
And I’m recycling nursery pots.
So it’s a win-win.
For more gardening tips and tricks, CLICK HERE.
Subscribe to the Blog. Gain access to information not available to the general public.
Thanks for stopping by the blog today!
Enjoy your day! xoxo

Resources for this project:
See all materials


Comments
Join the conversation
-
Soda bottles and cans work for this as well. You wouldn't get you deposit back of course. But you are repurposing.
You can also use cheap disposable diapers in your flower pots, they will hold moisture so you don't have to water as often.
-
One good gardening hint--to keep your nails intact and clean, try this:
- dig your nails into a bar of soap
- pull on a pair of latex or nitrile gloves (dollar store variety)
- pull on regular gardening gloves
When you re finished for the day remove the gloves and you'll find your nails are a bit soapy but clean.


Frequently asked questions
Have a question about this project?
Would empty paper towel and toilet paper rolls work? I realize they would break down over time, but I thought they might be more natural for the soil and better for the plants?? Either way thanks for the idea.