


DIY Raised Garden Box

Growing your own food is exciting and fun. Having the right spot to do it in can help too! Read below to see how YOU can build your very own DIY raised garden box. In just a few hours YOU can have a spot that is perfect for growing your own food – right outside your back door!
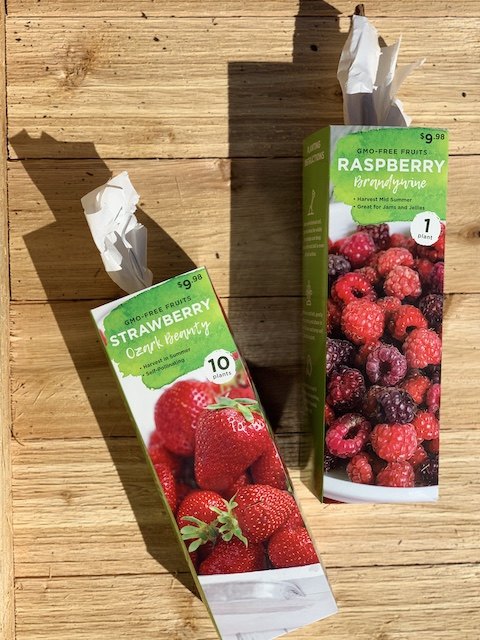
Last week, on a recent trip to our local builder’s supply store, the kids ran into some raspberry and strawberry plants. They were so excited to see the fruit plants – especially after the long winter – and asked if we could take some home. Our family has always wanted to add a garden of some sort in our backyard and we decided right then and there that this would be the year to do it.
Without having a garden ‘plan’ in place, we bought these two little fruit plants and then we came home and began mapping out our first little garden. We decided to build a raised garden to start with. We felt that starting off small and going with a DIY raised garden box would help us ease into the process of gardening! Also, we felt having a raised garden bed allows us to help keep the plants away from the insects and animals that like to eat berries. The size and portability of the raised bed also allows us the flexibility and opportunity to move our garden around as needed.
Building this DIY raised garden box was a quick project and it only took a couple of hours to complete. We found cedar boards at our local Home Depot to create a sturdy and safe structure for our plants. We choose to use cedar because it is naturally insect resistant and it doesn’t rot as quickly as some other wood.
- 10 – 2”x4”x8’ cedar boards
- 1 – cedar fence picket
- 1 Box – 2 ½” screws
- 1 Box – 2” screws
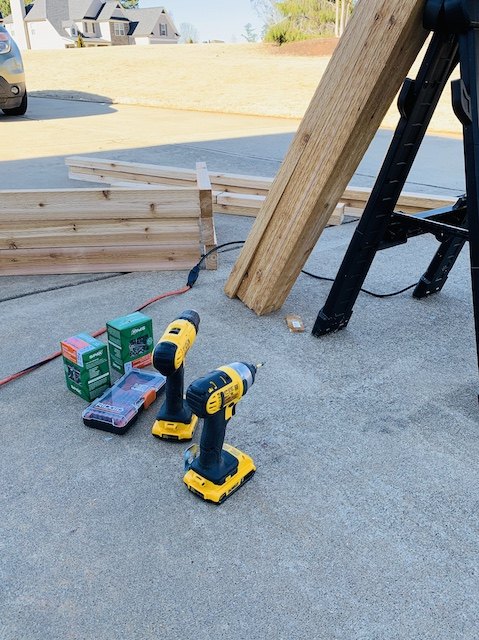
- Miter Saw
- Drill
- Drill bits
- Circular saw
Upon first glance, this may seem like a difficult project to build. But, I promise you that it isn’t. While there are several steps and a lot of cuts, each one is easy to do. We are breaking down all of the steps below to make this DIY raised garden box as easy as possible to recreate!
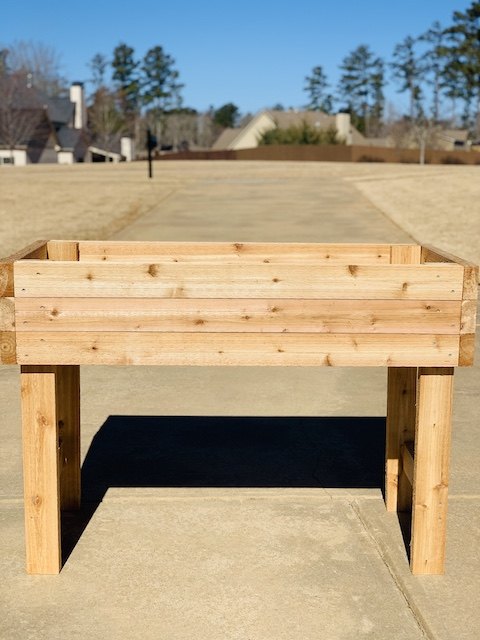
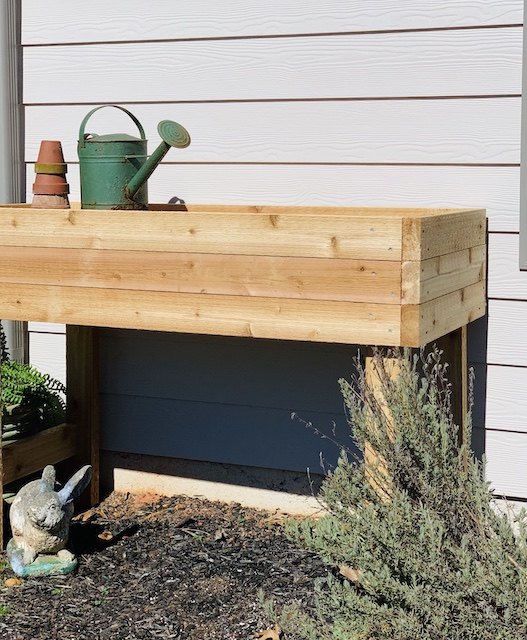
Since I envisioned the elevated bed going along the back of our house, I liked the idea of a rectangular shape. With that in mind, I used a fairly simple measurement of 4’ width by 2’ depth. The height of the bed is subjective, but I settled on 3’ to allow for easy harvesting when the time comes. To prepare for assembly simply cut your pieces as such:
- Cut 3 of the 2” x 4” x 8’ boards to into 3 pieces, each measuring 2’, 2’ and 4’
- Cut 2 of the 2” x 4” x 8’ boards to into 2 pieces, each measuring 4’
- Cut 2 of the 2” x 4” x 8’ boards to into 2 pieces, each measuring 3’
At this point, you should have 6 boards that are 4’ long for the front and back width pieces. You should have 6 boards that are 2’ long for each of the sides. Finally, you should have 4 boards that are 3’ long for the legs. Be sure to keep the remaining pieces as we’ll being doing additional cuts after assembly begins. I found that cutting the remaining pieces after you start assembly is easier – variations in the wood could cause some inconsistencies in measurements.
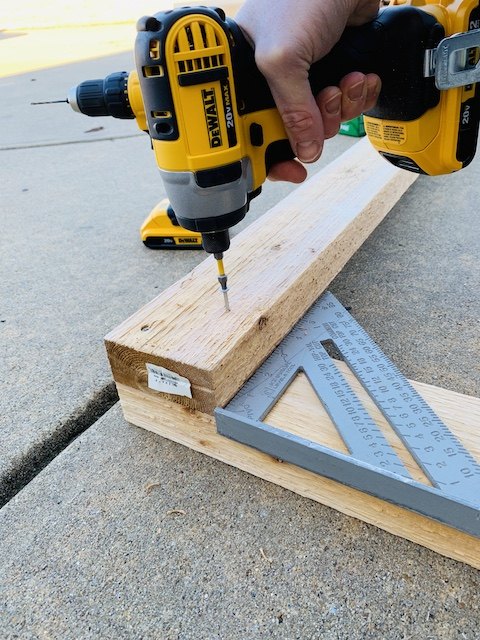
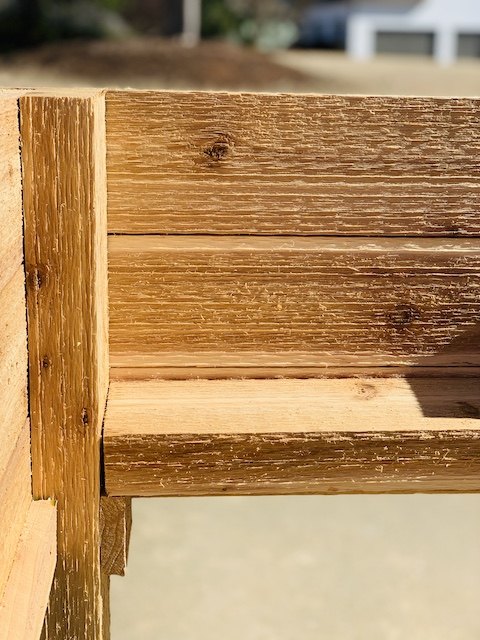
Quick NOTE: Since we used cedar, it is important to note that predrilling the holes for your screws is strongly encouraged. Cedar is a dry wood and can easily split.
I started by attaching the 4’ long board to the top of 2 of the 3’ legs using the 2-1/2-inches screws. Repeat this step so you have the front and back of the elevated bed frame completed. I used two screws each time I attached a board.
Next, stand the assembled pieces up, so the 4’ board is on the ground (i.e. the planter is upside-down). Use the 2’ boards to connect the front and back of the elevated bed frame.
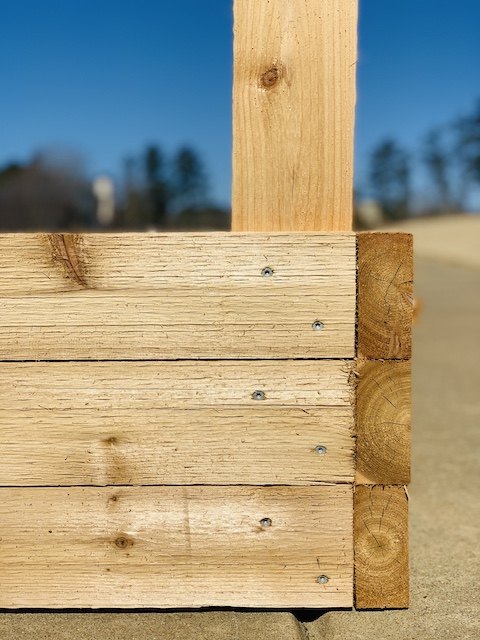
Now start adding the remaining 4’ and 2’ boards. Each side will have 3 boards on each of the sides.
Cutting The Wood – Part 2
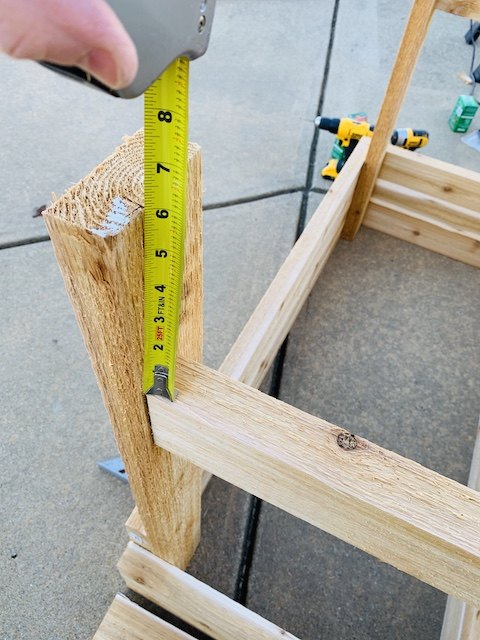
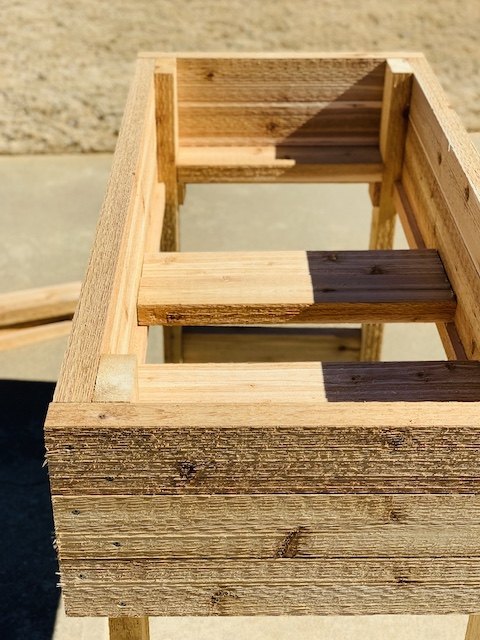
Once you finish adding the boards, it’s time to make some additional cuts. Since the legs are 3 feet long and will hold the weight of the wood, dirt and plants, I felt it was important to add a support piece to keep them from warping. This will be added near the bottom of the legs.
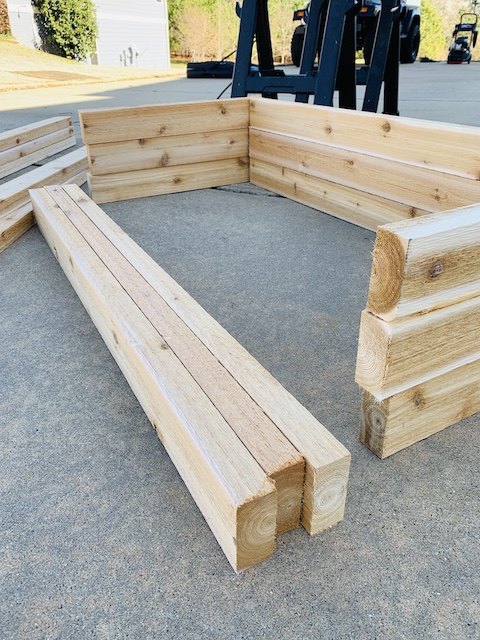
The boards for the bottom of the bed may need to be cut individually based on variations in the wood. If you cut them all at once and the same length, you may find that you have to make additional cuts or you run the risk of cutting it too short. Using the remaining 2” x 4” x 8’ boards:
- Cut 4 boards to fit between the legs, my boards measured roughly 17.5”
- Cut 11 pieces for the bottom of the bed. My cuts varied from 20.5” – 20.75” for most of the boards
The next thing to cut is the piece that will support the bottom of the elevated bed. I could not find a 1” x 2” cedar board at our local Home Depot which is why I decided to use a picket. The picket serves the purpose but does require some additional cutting with a circular saw. Using the picket:
- Cut 2 strips that are 1.5” wide by 40” long
- Cut 4 additional pieces from the picket that are 1.5” x 3”
Add 2 of the short boards you just cut between the legs, measuring 6” from the top (which is really the bottom since the garden bed is upside-down!!).
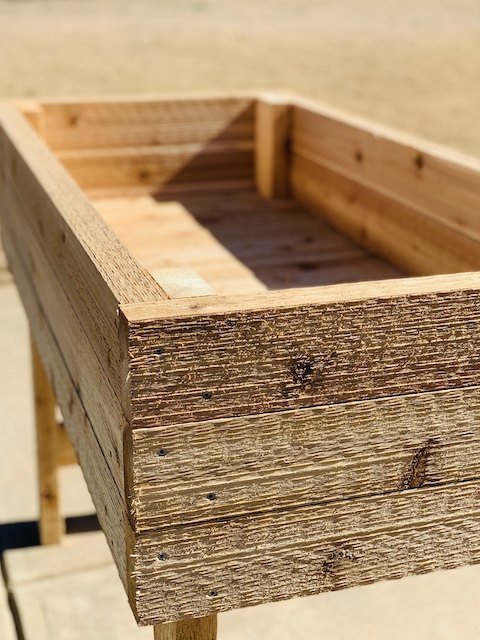
At this point you can turn the bed upright to continue the assembly. Using the 2-inch screws, add the strips you cut from the picket to the bottom board on the long sides of the bed.
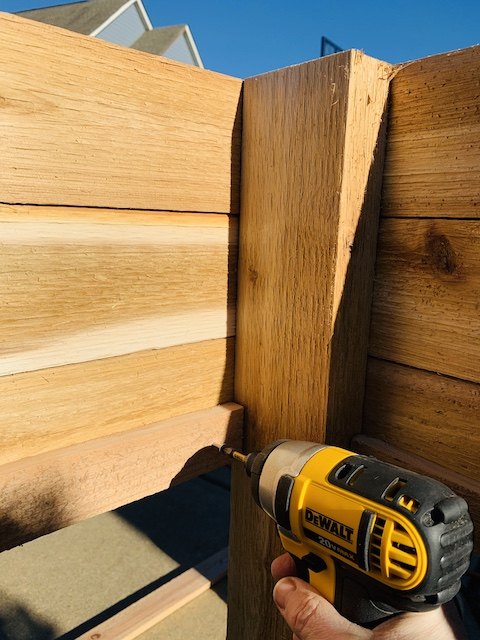
Then add the 3” pieces onto the legs. Double check that the small picket pieces are at the same level as the long strips.
Lastly, place the bottom pieces of the elevated bed on top of the supports. With a little persuasion, I was able to fit the boards without making any further cuts.
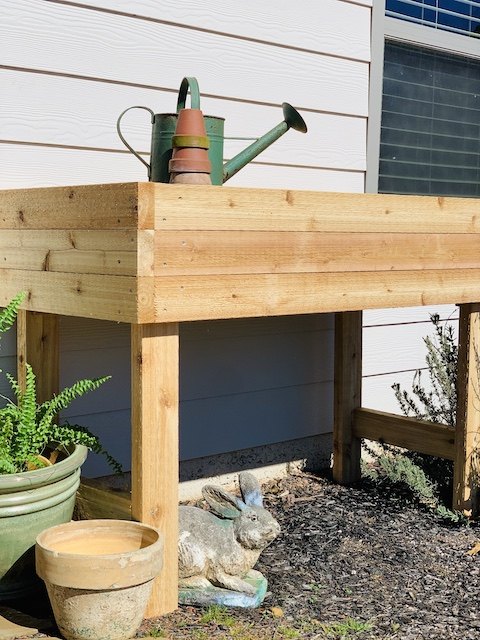
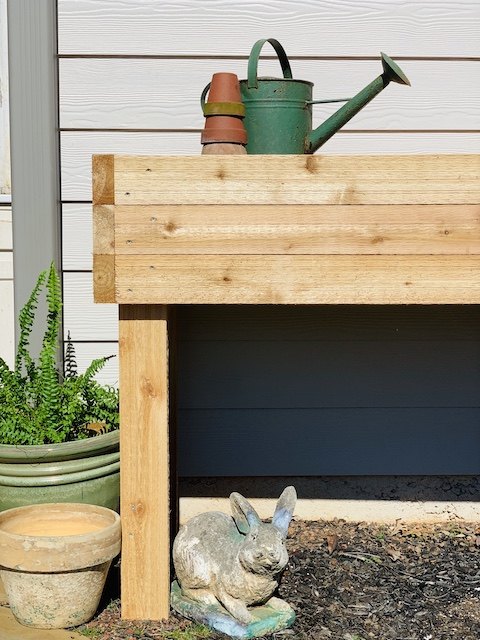
Done
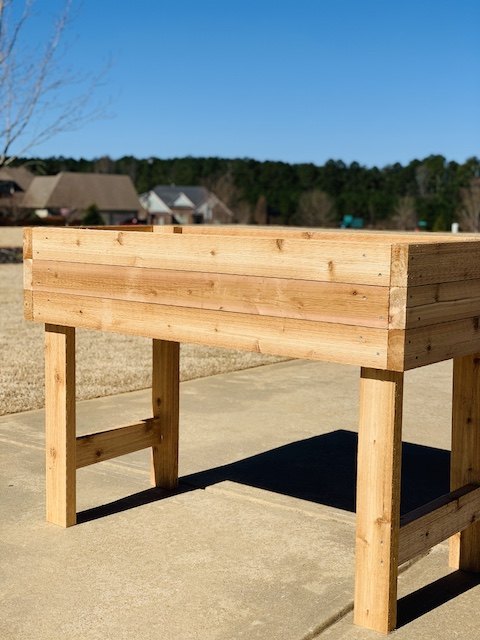
Once the planter is complete it will be very sturdy yet light enough to easily to move around! Plus – the smell of the cedar is amazing!
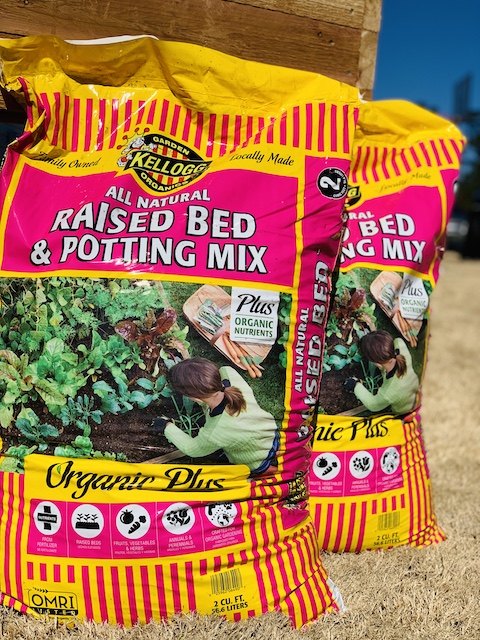
We plan to cover the bottom of the raised bed with some gardening fabric like this and then we will fill it with this organic raised bed and potting mix from Kellogg! We are holding off on actually planting these fruit plants until the final freeze happens. But, once it does, we will be ready!
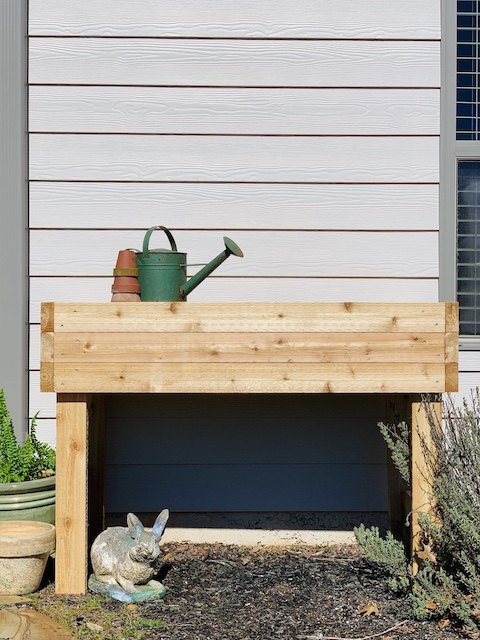
This elevated bed was an easy build that we anticipate doing again. The size turned out perfectly for what we wanted both in terms of holding the plants and where we plan to place it. The strawberries and raspberries will have plenty of room to expand and it fits just outside our backdoor. Our family is excited to now begin our gardening adventure! I hope that this DIY raised garden box will help you to begin thinking about your garden as spring approaches and the weather begins to get warmer! Happy gardening my friends!
*If you liked this project then you may want to check out how my husband built this birdhouse and this tray!
*this post included affiliate links
Comments
Join the conversation
-
Great post! I've been wanting to build a raised bed for my herbs. This would work perfectly!
-
1. Notice u want raspberries. Cannot tell ur variety, but some of these get scary tall. Last yr, my 1 variety reached top of garage height then curled backward. Be prepared.
2. I tried the raised garden bed soil this yr as well. I am less than impressed. Next yr I will return to my standard method for veggies. To me, it just doesn't seem to be fortifying the plants enough, even with a shot or 2 of amendments. Guess u will have to experiment like the rest of us.
Good job; good luck.


Frequently asked questions
Have a question about this project?