


Raised Garden Bed

This was so easy, we should’ve done this a long time ago!
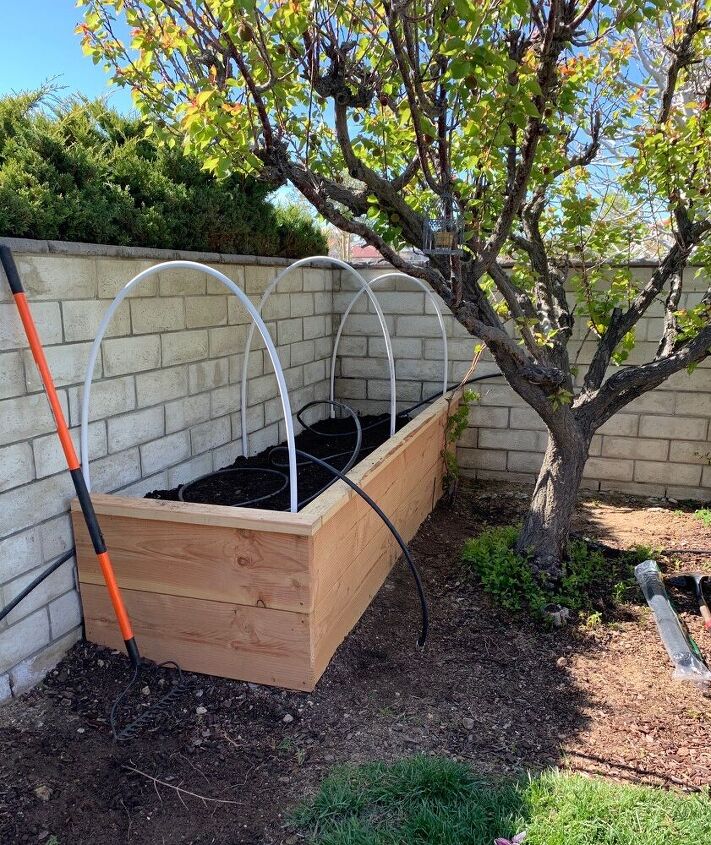
This is the completed project and I’m not certain if it’s the correct way to build one but it serves its purpose and it’s keeping critters out too.
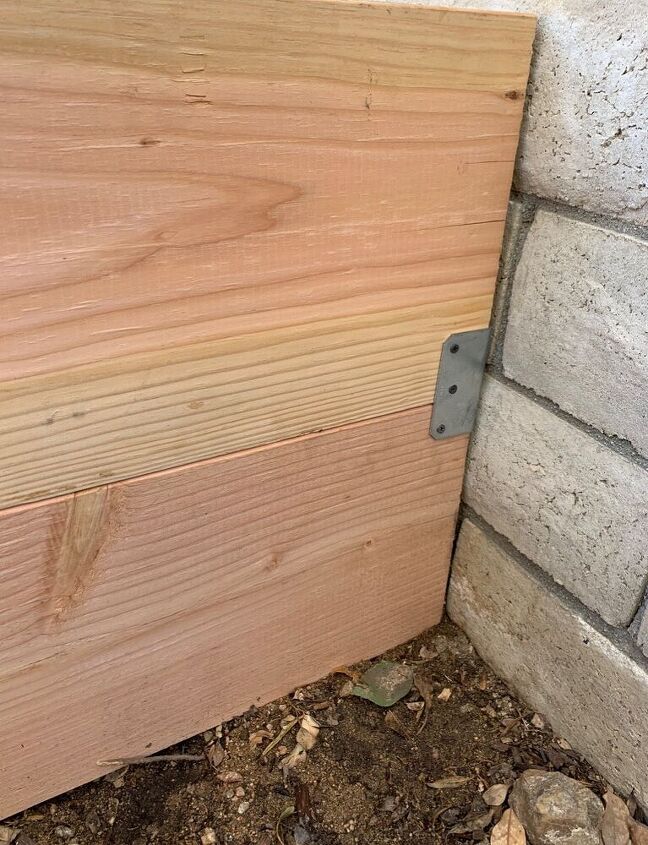
The bed is 3 x 9 ft. For the 9ft side, we used 2 planks that measured 1 ft X 9 ft and stacked them on top of one another then attached them metal brackets. We used flat brackets for the center of the boards and L shaped like the one in the photo for the ends. For the shorter side, we also used the same however, the shorter side was only 3 ft. Hence, a completed bed which measured 3 X 9. Tip, we purchased two 1 ft X 12 ft planks, cut them so we had two 3ft planks and two 9 ft planks, which made the height of our bed 2 ft tall.
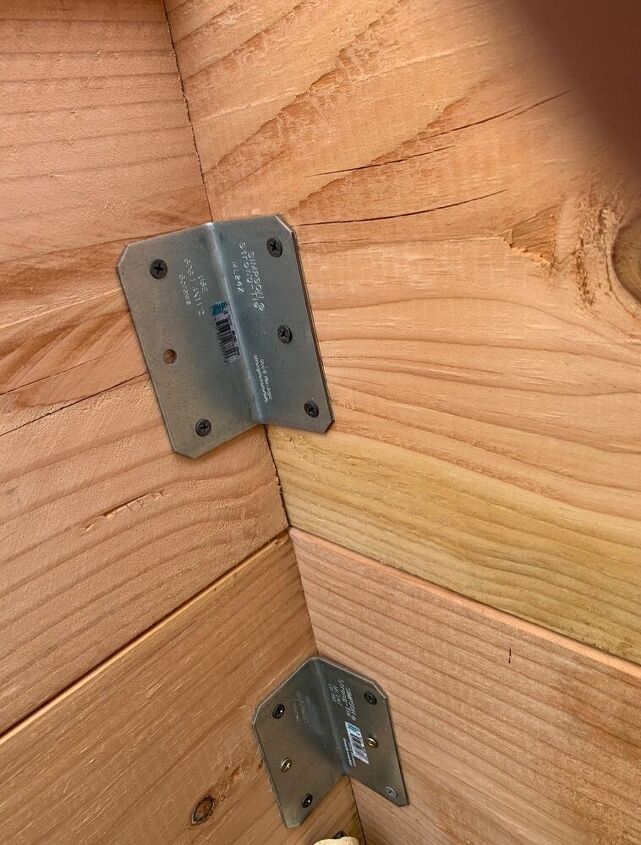
These are the metal brackets we used to attach the boards together, the 3 ft to the 9 ft. We used 2, one towards the top of the planks and the second towards the bottom just to ensure they were secured.
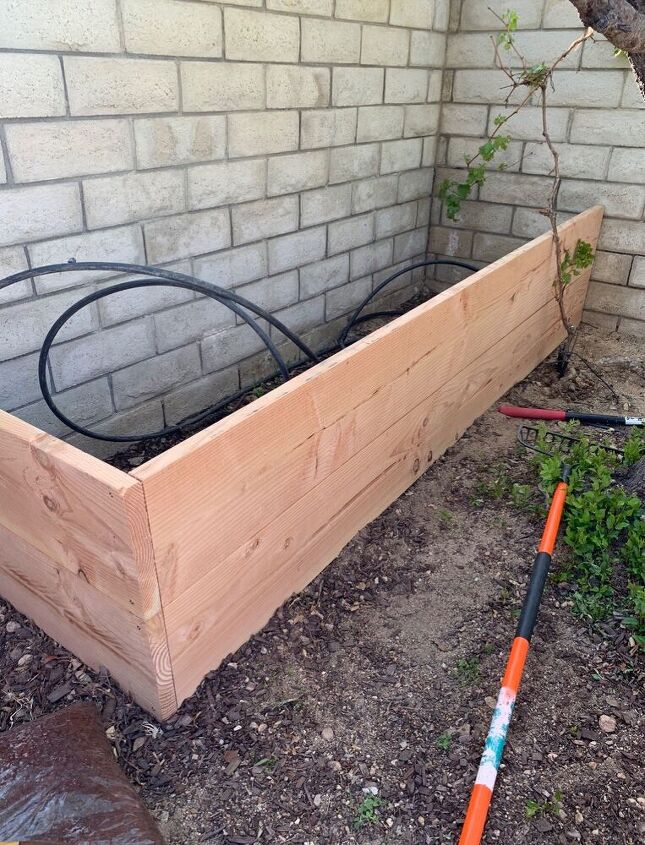
We opted to use the wall to our advantage and instead of using wood, we used the block wall as our 3rd & 4Th wall of the bed. So, we built an L shape base instead of a full rectangular bed made of only wood. I hope that made sense 🤦🏻♀️ The completed size it 3x9 ft. FYI, make sure the ground is leveled.
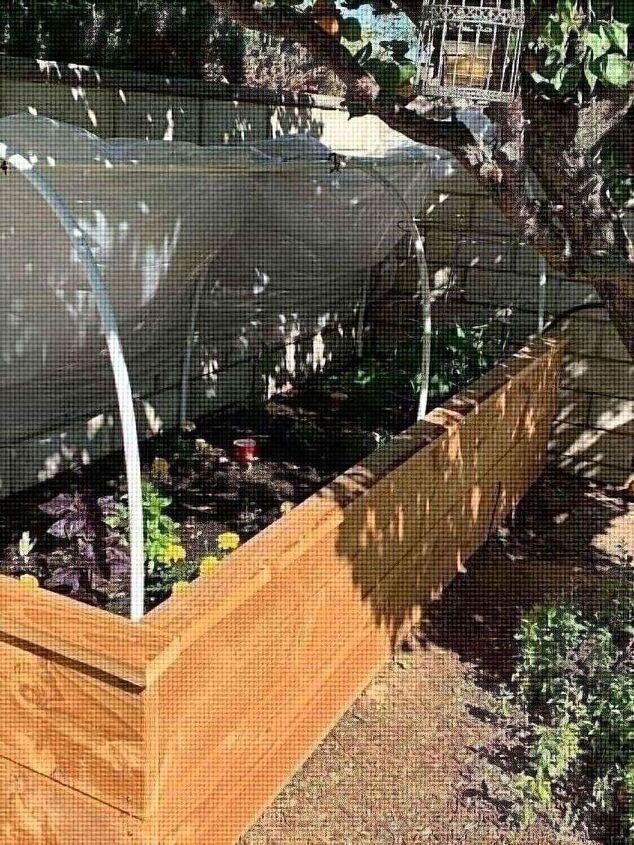
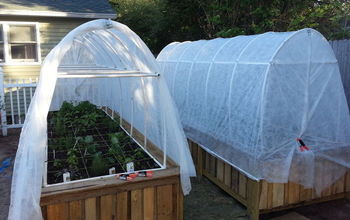
I wanted to make a cover for the bed to prevent critters from indulging in the fruits of my labor and to protect them from harsh weather. This was very easy and inexpensive too. First, decide on the length that you will need and cut them to size. I will show you how we attached them in the next photos.
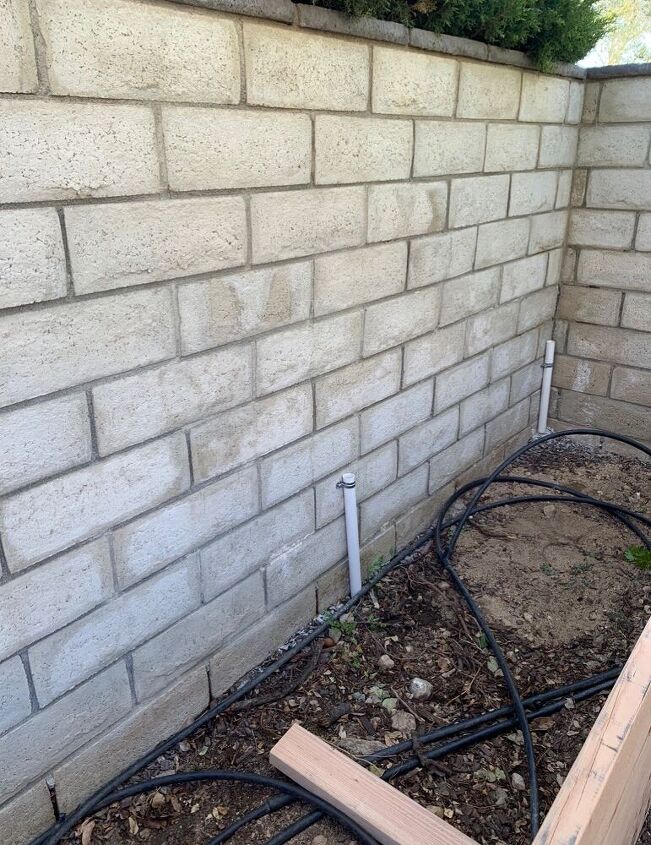
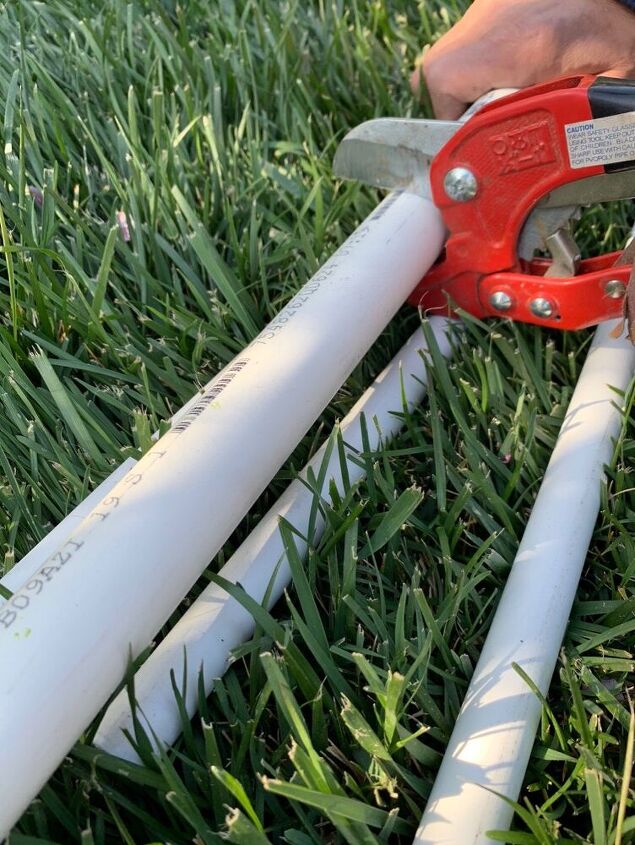
We used 1 inch PVC pipes, cut them about 1 ft each, and secured them to the walls with brackets. My husband drilled the holes first on the wall to make it easier to drill in the concrete screws. We used regular screws to attach them to the wood. We secured 6 total in order to get our hoop cover shape. I will explain later where they were all placed but 3 of them were secured to the brick walls. One at each end of the bed and the 3rd in the center.
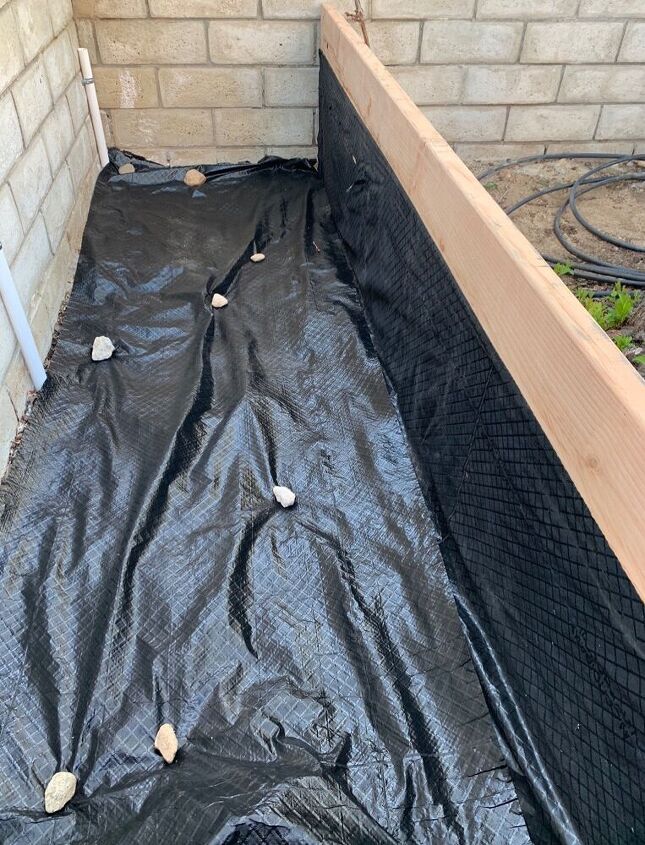
After we attached the PVC pipes to the block wall, we laid the plastic weed blocker to the entire surface of the bottom of the bed. We also brought it up against the wood walls. You don’t have to do this, you can just lay it on the bottom.
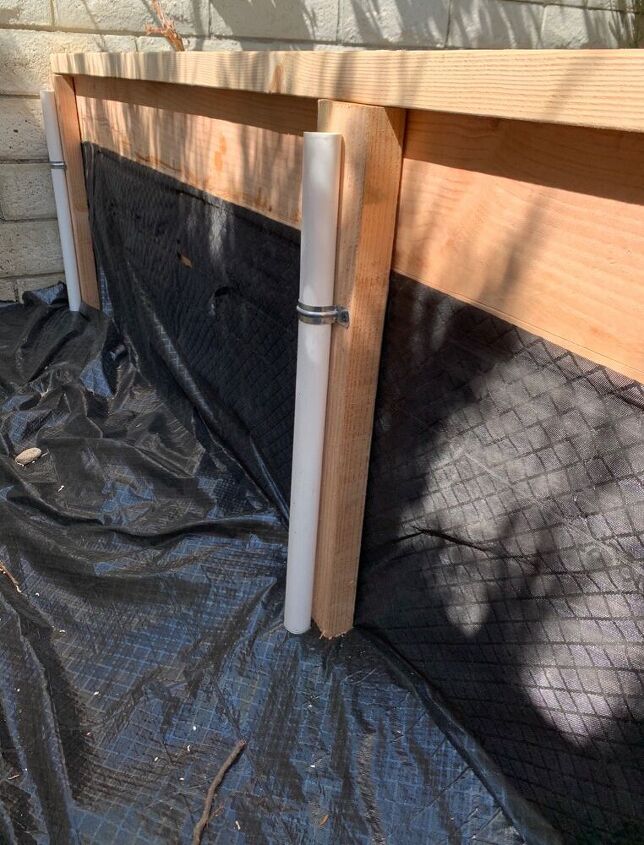
As I previously mentioned, we attached 3 of the 1 inch pipes against the brick walls. The other 3 were secured directly across from the ones against the walls, 1 at each end of the bed and the 3rd in the center. Once this was completed, the base was ready to insert and hold in place the 1/2 inch PVC pipes and construct the hoop cover. I will show you what I mean in the next photo.
Here you can see what I meant, once the 1 inch pipes are attached, the 1/2 inch pipes are inserted into the 1 inch pipes to make the hoops for the cover. Garden plastic is than applied over the hoops. At this point, we also filled the bed with soil and compost.
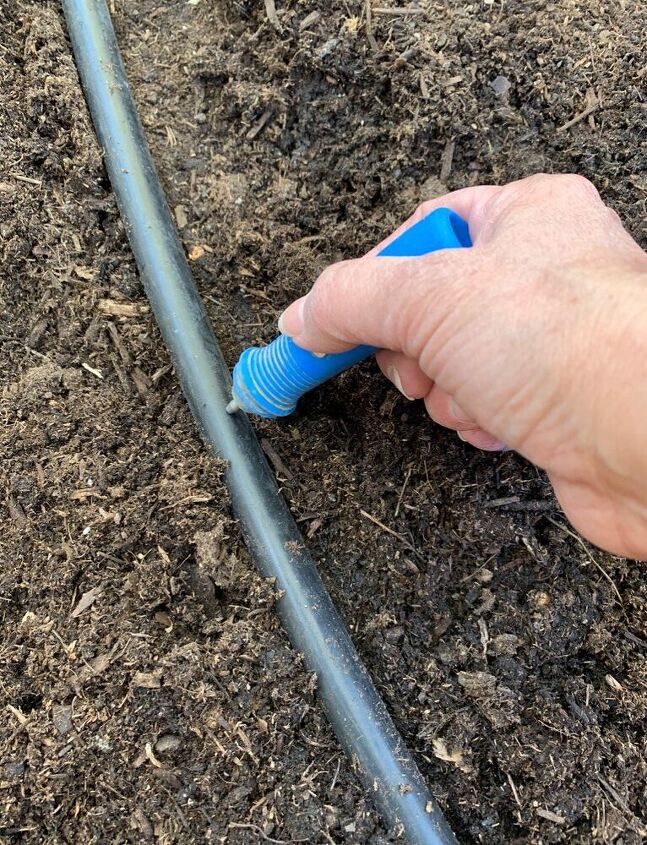
Our irrigation drip tubing lays on top of the soil. We first decided where we wanted it to lay, cut it to size, made the holes using the hole punch that came with the irrigation drip system. If you purchase a kit, it comes with everything you need. We purchased ours from Lowes. I will show you the final product in the next few photos.
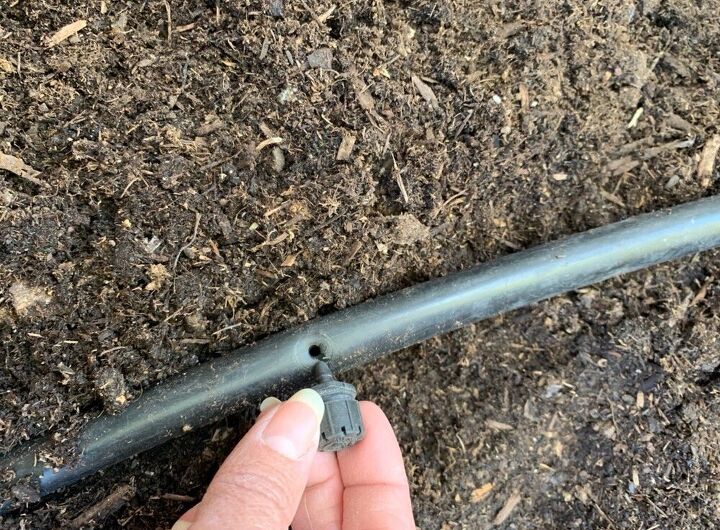
Once the holes were made, the drip system connectors were inserted into the holes, it’s that simple.
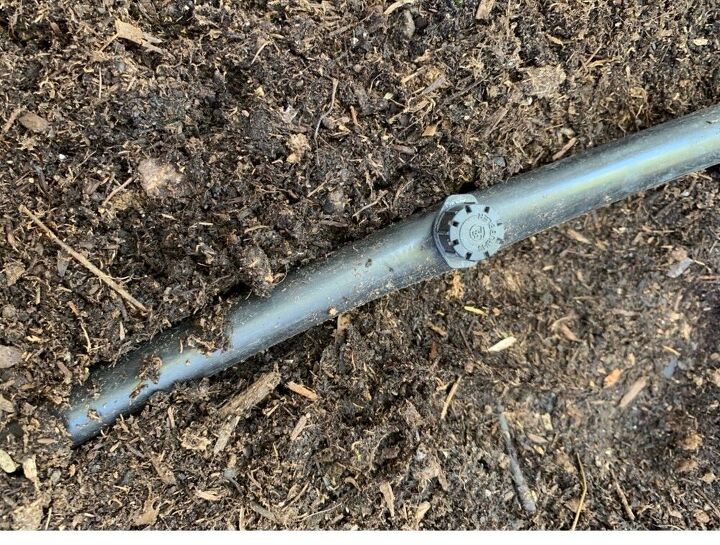
This is what the connectors look like after they’re inserted into the holes.
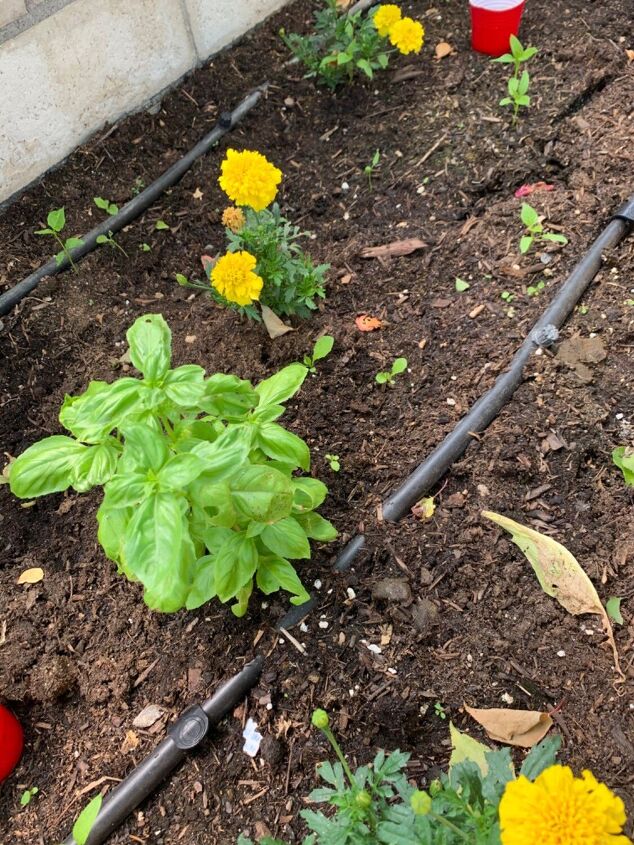
This is a photo of our completed irrigation drip system which we placed on top of the soil.
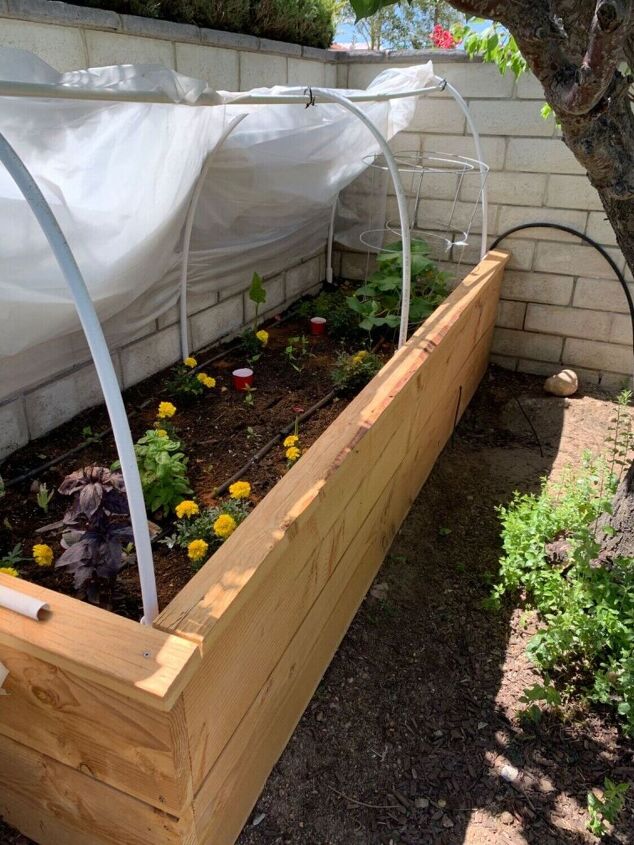
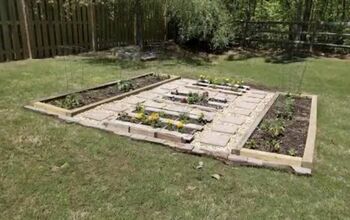
A photo or our completed raised garden bed. I’m looking forward to growing veggies. So far, we are happy with it. If you notice from this photo, we built a small shelf like border over the top of the bed, not necessary but I thought it gave it a more complete look. The wood panels are approximately 4 inches wide and the length is the same as the base of the bed. The longer one is 9 ft and the smaller is 3 ft. 🌿 Happy DIYing and if you want to see more of what I do, please come visit me on Instagram at https://www.instagram.com/mycreativekneads/
Resources for this project:
See all materials


Comments
Join the conversation
-
Irma I loved your idea! Looks great. Maureens critisism wasnt necessary, we have common sense. I have been wanting to do this, I can use your idea for my plan! Thank you.🤩
-
I hope the black weed barrier allows water drainage


Frequently asked questions
Have a question about this project?
Thank you for this idea. I would like to do this myself, but I do not know how to bend the PVC pipes. Do they need to be heated to make them pliable? How did you do that? Did you buy them shaped into a hoop?
Hi Irma, Thank you for such a clear step-by-step description! Somehow I've missed how the screening gets attached to the pipes, and maybe also to the garden walls? Thanks!
Hi, your raised bed looks wonderful and your directions are clear and helpful too. Maybe I missed it but what are the red things in your bed that look like party drink cups? Just curios...