


Build A Storage Shelf To Hide And Protect Pipes In Your Garage

The water access pipes located in my garage were becoming a problem. Besides being ugly, we were constantly tapping them with our cars and that wasn’t good. One day, while staring at a pile of leftover wood, I decided to build myself a storage shelf to cover those ugly pipes. It wasn’t a complicated DIY and with a few tools and some scrap wood, you too can protect your pipes and add some storage. Here’s how I did it.
Supplies:
- Wood - both 2x2s and plywood
- Measuring Tape
- Table Saw
- Jigsaw
- Hammer
- Nails
- Nail Gun
- Wheels
- Drill
- Screws
- Googles
- Gloves
- Optional- Router, Wood Planer, Mitre Box
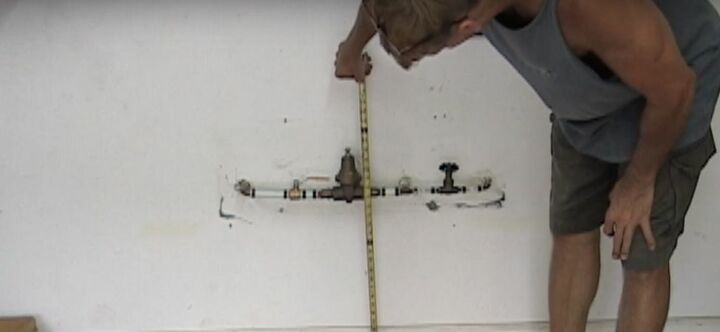
Step 1: Measure
I started by mapping out a rough plan for my shelf. I measured the length of the pipes and their height from the ground. I also noted the area around them so I could determine the space available for the entire shelf. There’d be more measurements along the way, but this was a good start.
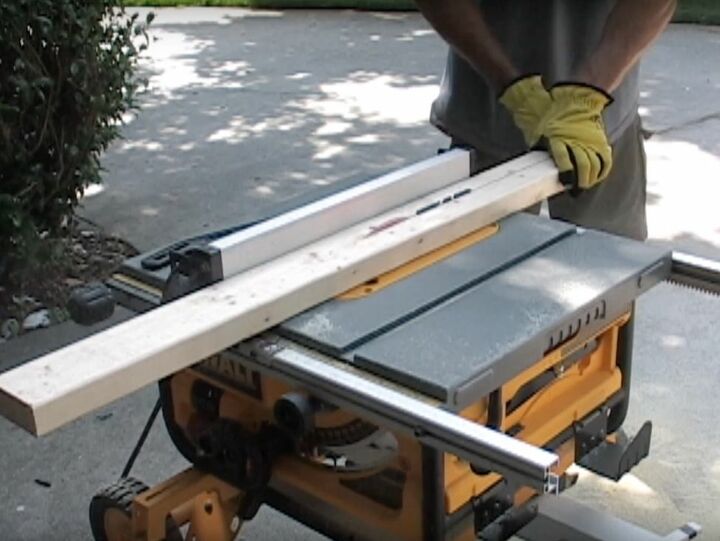
Step 2: Cut the Frame and Base
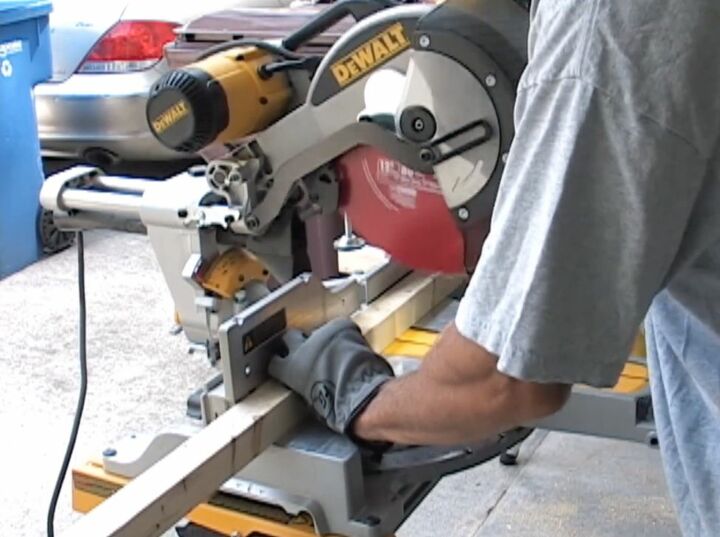
I started by cutting my wood, using pieces I found in the trash. I planned them first, but if your wood is new, you won’t need to do this. I cut my wood into 2x2 strips for the supports. Then I cut a base out of the plywood, which would become the bottom of my shelf. Remember to wear protective gear when working with power tools.
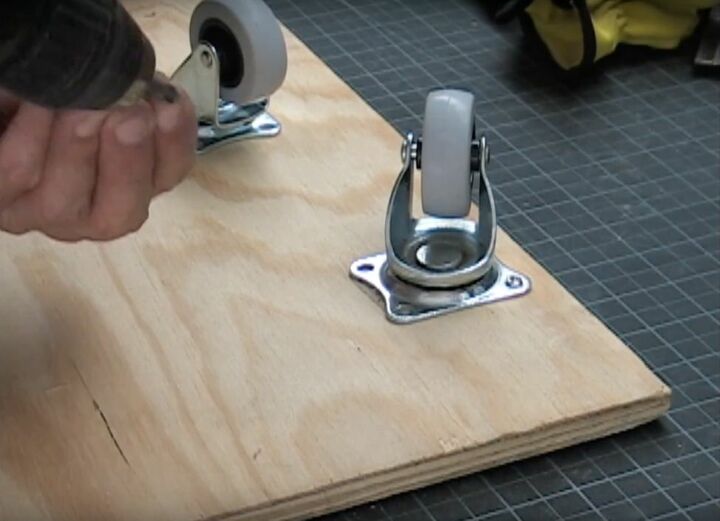
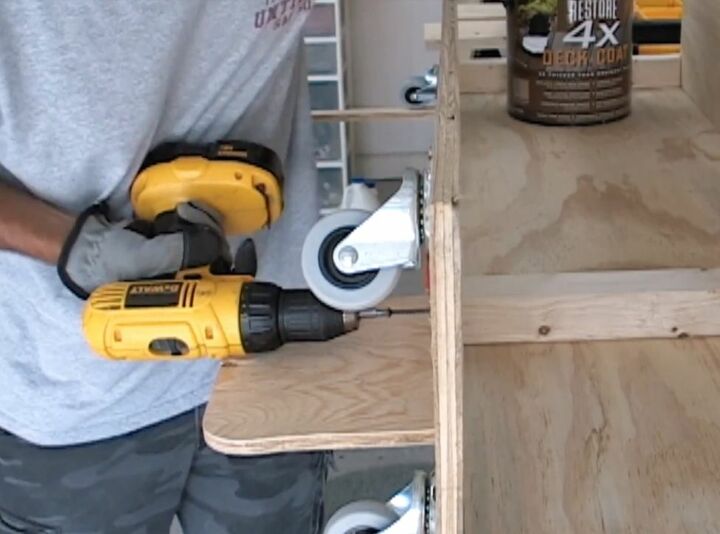
Step 3: Add Wheels
I had some wheels in my toolbox, so I decided to add them to my base to make it more mobile. This way I could move it around if necessary. It would also allow me to easily access the water pipes if needed. I found screws that wouldn't pop through the other side and screwed them into the board.
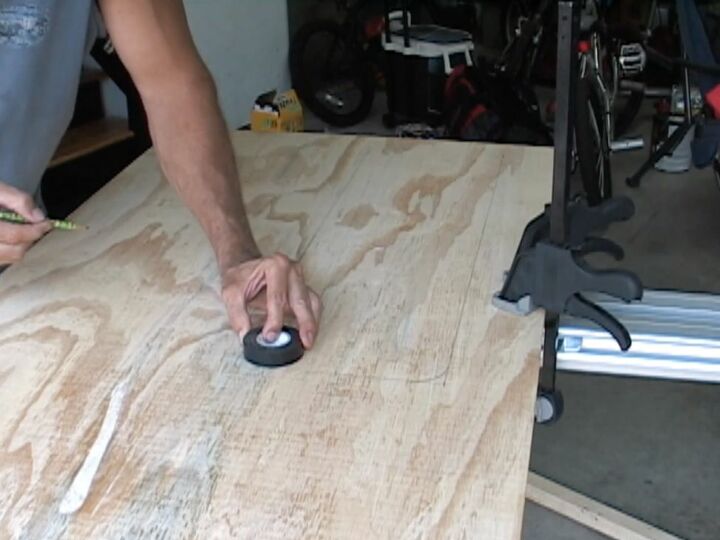
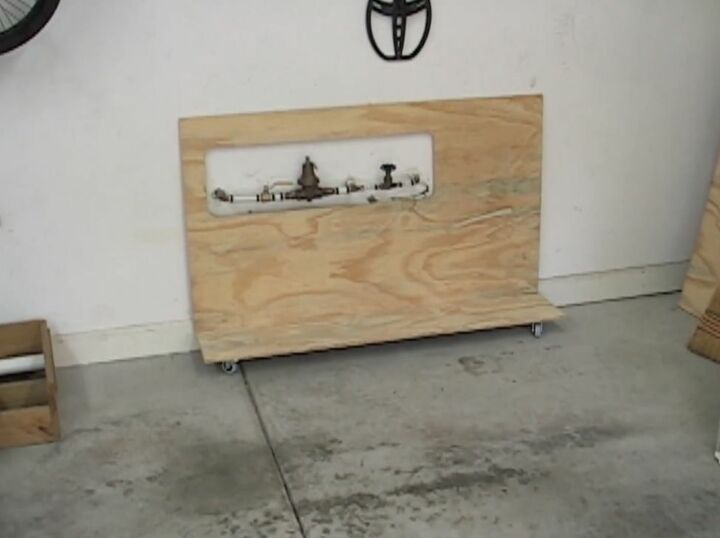
Step 4: Construct A Backplate
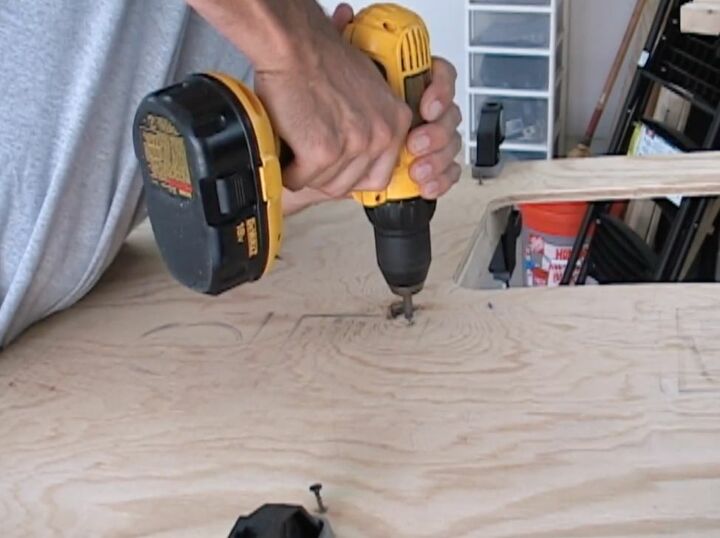
I decided to create a backplate for my shelf to keep it looking neat. This step is optional, but if you’re going to make one, you’ll need to cut out a space for the pipes. Using the measurements I took earlier, I marked the space where I needed to cut. I used a roll of tape as my template for the rounded corners and then drilled a few small holes on the lines I drew, so I could start cutting in the center with my jigsaw. When I was done, I held it up on the base, to make sure it fit properly.
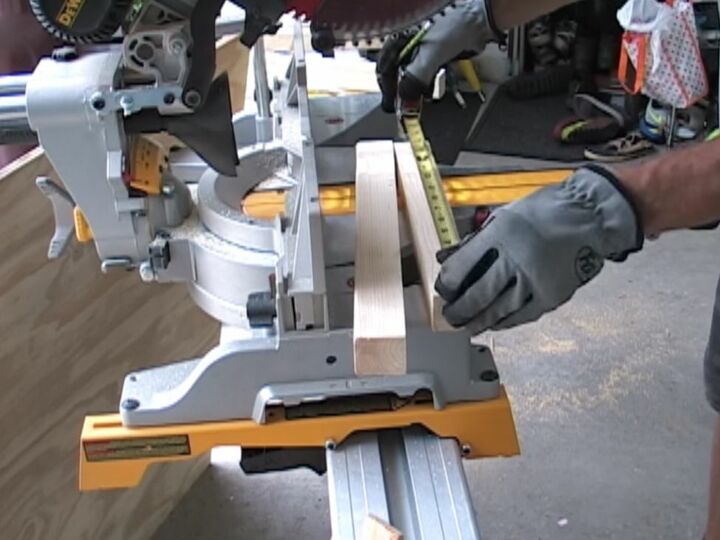
Step 5: Cut Wood for Shelf Supports
Now, I had to measure again, to decide where I wanted my shelves to be mounted. I was careful to consider where the pipe opening would be, so I didn’t block it. The frame pieces would be mounted vertically and the horizontal shelves would slide into notches I made on those frame pieces. I measured from the base to the top of the base plate to determine the height necessary and cut the 2x2’s to fit.
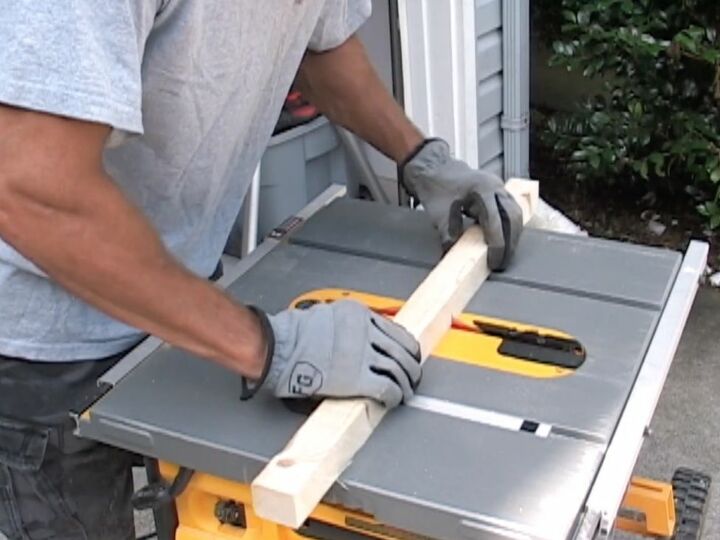
Step 6: Create Notches
Then I ran the wood through the table saw several times in the same place, with the blade raised to ½ inch, to create notches wide enough to slip the plywood shelves inside them. When I was finished, I checked my plywood to make sure it fit in the notches.
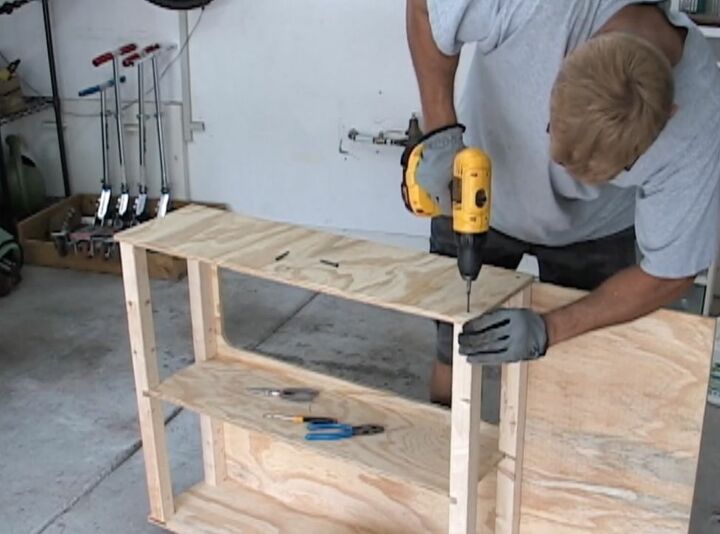
Step 7: Attach Supports to The Base
Now it was time to put it all together. I used a piece of plywood to set the distance from the edge and clamped my support to the backplate so it wouldn’t move, while I flipped it over and screwed it in place. I repeated the process on the other side with the second support. I decided that I was only going to have the shelves cover ¾ of the area and leave a space for a wood bin. If they were going to go all the way across, I would’ve used the plywood to set the distance from the edge on the other side, as well.
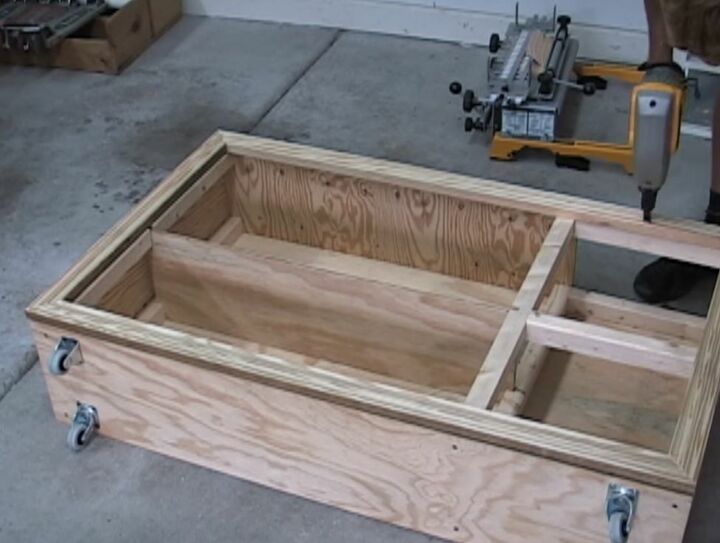
Step 8: Cut Out the Center Shelf And Add Front Supports
I used plywood to create my center shelf. I measured the distance between the notches, marked my wood and cut it. Then I slipped it into the notches. Next, I screwed the base with wheels, into the bottom of the notched supports. Finally, I attached the front support legs, by placing the shelf in the notch and screwing them into the base.
Step 9: Create the Top Shelf and Side Panel
Up next, I needed to make the top shelf. I measured the width and length of the area. I wanted to keep the front and back of the shelf flush with the frame. However, I wanted to have it overhang the sides, the same distance that I had inset the supports, so a plywood side panel would fit flush inside. Once it was cut to size, I screwed it into the legs. Then I measured for the side panel and screwed it into the space I had left for it.
Step 10: Frame the Bin
To create the side bin, I cut my 2x2’s to make supports and my plywood to make another side panel. I screwed them together and then screwed them to the outer edge of the shelf. I then, cut a few cross pieces for support and screwed them into place.
Step 11: Add A Detailed Frame
Lastly, I had some wood leftover and since I knew my wife would be looking at it, I wanted it to be attractive. I cut the wood to the necessary sizes to frame out any exposed front facing areas and mitred the corners. Then I used a router to add some detail to the wood strips and I tacked them in place. Keep in mind you could purchase decorative moulding instead, if you wish, or leave this step out entirely.
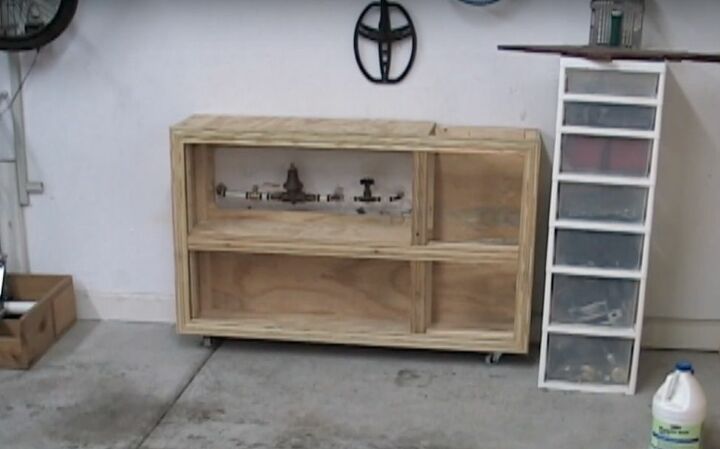
There you have it, my ugly garage water pipes are covered and protected from accidental damage, plus now I have a handy storage shelf. It only took me about two hours to complete and was totally free. If your pipes are in danger and you’re tired of looking at them, or perhaps you just need a little extra storage in the garage or carport, why not give this DIY project a try?
Let me know what you think of my shelf and if it’s on your own list of DIYs!


Frequently asked questions
Have a question about this project?