


Home Decor Guide: DIY Floating Shelves for All Budgets

Why have store-bought decor, when DIY shelves are so simple to make? There are a few stages and tools to the process, but creating shelving is one of the easiest home improvements you can do for yourself. This guide is here to help with a step-by-step rundown of everything you need to know to decorate your house with stylish new shelves, without breaking the bank - or a finger! Even though you will need some funds for this project, the expense should be manageable, if you choose affordable but quality materials. Let’s start with a shopping list.

Tools and Materials
- Wooden planks
- Electric or table saw
- Electric or manual planer
- Electric sander and sanding paper
- Hand drill
- Clamps
- Measuring tape
- Industrial glue
- Wood stain
- Wood paint
- Brush
- Hammer
- Screwdriver
- Level
- Screws and anchors
- Pencil
- Cloth
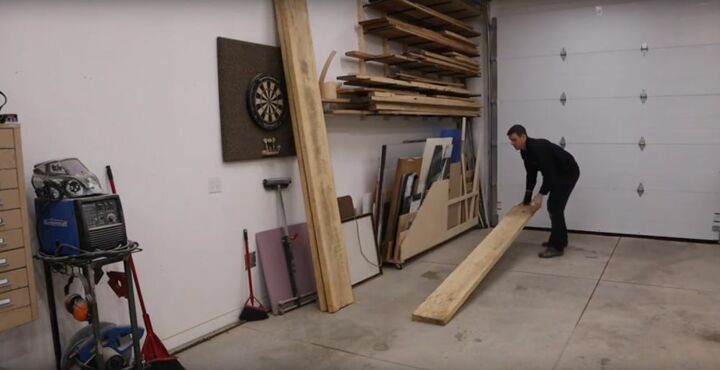
The key resource you need for your DIY floating shelves are planks of wood. I used one to make two shelves. If you want more for your home, invest in two or three. This way you’ll have plenty to work with. This isn’t a cheap material, however, so make sure you explore the market, specifically types of timber and their prices.
Also keep in mind that, if you’re new to woodworking, mistakes are more likely to happen. To keep this from ruining your project, familiarize yourself with exactly what you’re doing and maybe supply yourself with an extra plank. Being prepared in all aspects of the project, from tools to worktops, will lead to quicker and better results.
Before starting the project, it’s a good idea to measure the wall where the DIY shelves will go. Also think about how you’re going to position each one. These kinds of details will help you buy and cut the right lengths of wood. It’s also important that you protect your hands and face while working, so a good pair of gloves, ear defenders, and a dust mask would also be a wise investment.
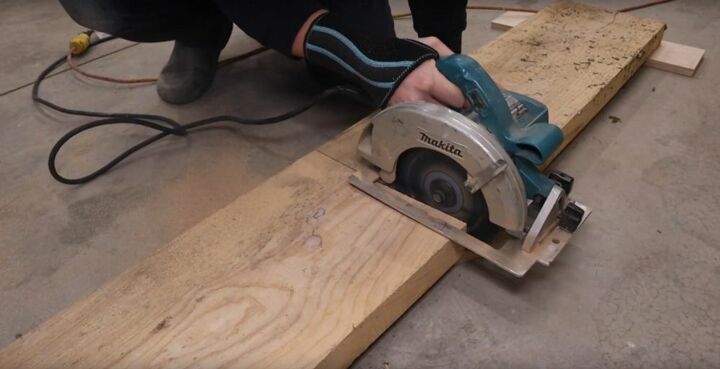
Get your initial calculations of the shelves you want, as well as a measuring tape. With a pencil, mark out the desired lengths on a plank. I used an electric saw to cut the wood, but you can depend on a table saw for this and more.
Keep in mind that you don’t have to go for high-end woodworking machinery. There are loads of smaller and cheaper tools you can find in local or online stores. So, when it comes to planing your wood, you can use a tool or table that fits your budget. That said, the latter option will save you a lot of time and effort.
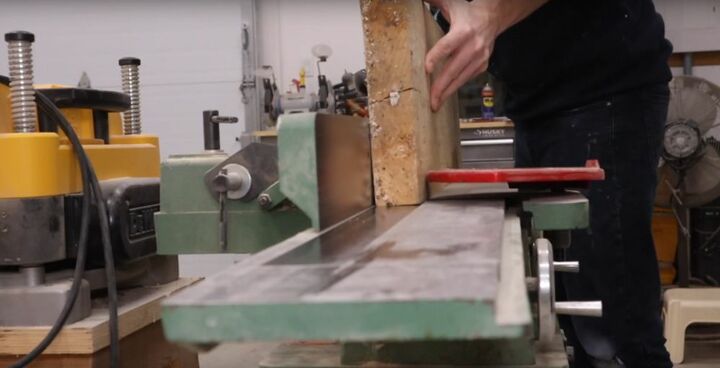
At this point you need to smooth out the wood so you can work with it better. You'll repeat this step throughout the project as you progress towards the final shape of your DIY floating shelves.
Once you have the different lengths of wood you need to construct the shelves, use a saw to make grooves in the slabs. These are to help cut them further and as precisely as possible. Having flat and even parts ensures everything will fit together perfectly.
Once again, what saw you use is up to you, but a table makes all these delicate stages much easier. The risk of injury is still there, though, especially if you’re not experienced in this kind of equipment. So wear protective gear and be careful when handling all woodworking tools.

This step is a bit repetitive as you have to keep cutting and smoothing out the slabs of wood. If you start losing focus, take a break and come back with fresh eyes. Gradually, you’ll be able to see the final form and thickness of the DIY shelves. When you reach the exact dimensions for each necessary part, you can move onto the next stages.
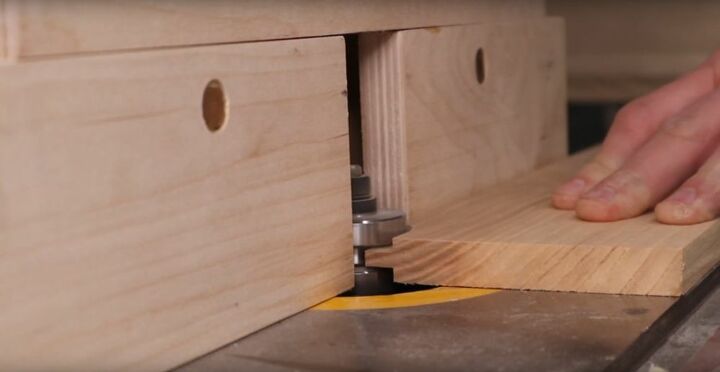
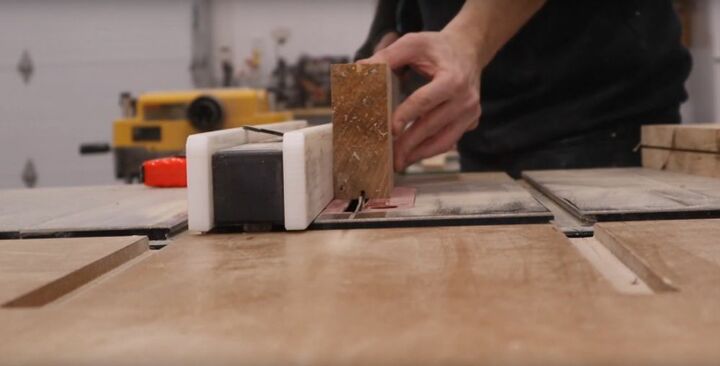
The most effective way to join different bits of wood is through a tongue and groove effect. There’s a specialized cutter for this exact job, but you could reach the same result with a saw or other creative ways. It depends how much you’re willing to spend on your DIY floating shelves project and how straightforward you want it to be.
I prefer to use the tools of the trade to make my work easier and more precise. This tongue and groove cutter, for example, uses set dimensions to grind the edge of the wood into the desired shape. This will then slide into the groove of another slab for a snug and secure hold.
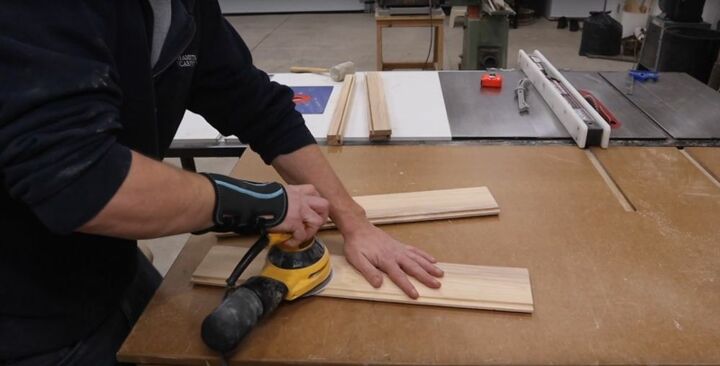
Before you can put the shelves together, though, you need to sand down all the slabs. You want a sleek feel and look, getting rid of any splinters and obstructions. The electric route is faster and more efficient, but with enough time and effort, sanding paper will do the trick too. Your budget is the best judge of what tools you should get for the project.
If you do decide to go down the high-tech route, hold the wood down and stable as you go over it with the electric sander. You could use a vice instead of your hands for an extra-strong grip that allows you to focus on handling the machinery.
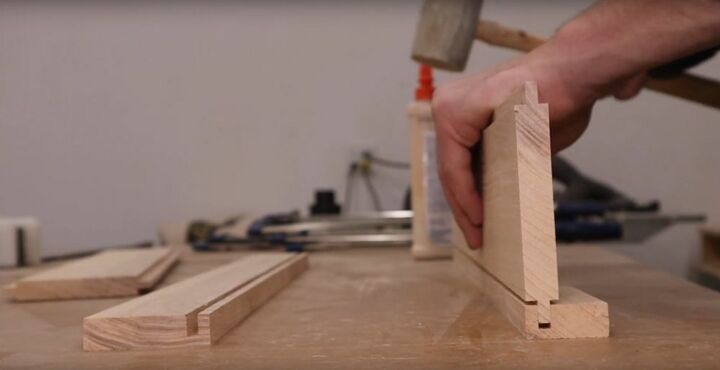
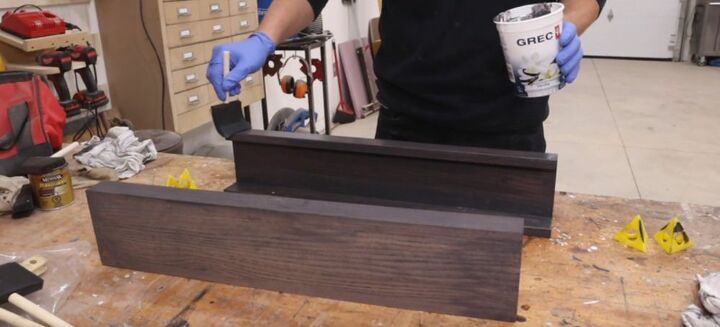
This is the moment you’ve been waiting for. The slabs should now be nicely shaped planks that fit into each other without a hitch. Since this stage involves glue and a hammer, check that this is the case before you start constructing your DIY shelves. Otherwise you may end up having to make messier changes than necessary.
If you’re happy with the overall structure and look, get the glue and squeeze some into a plank’s groove. Push a tongued piece of wood into it and use the hammer to set it firmly into place. Wipe away any leaked glue – too much of it can result in an unattractive effect when it dries. Join all the planks together into complete shelves.
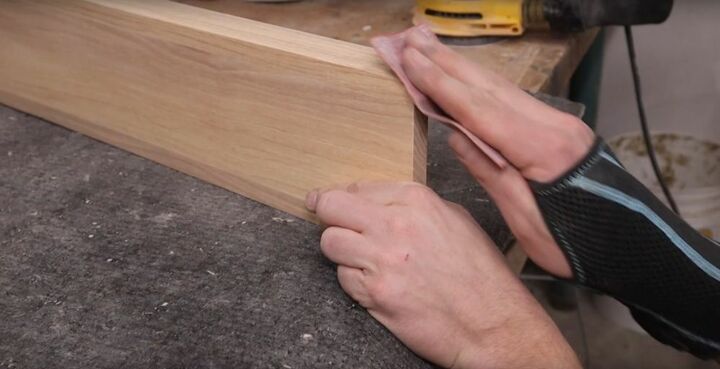
This is a bit more delicate work, so sandpaper is the best choice. Smooth down each shelf, especially the corners. As a great opportunity to closely inspect the construction, look for any imperfections you might be able to fix before applying the finishing touches.
While uneven dimensions are complicated, things like cracks in the wood or a wobbly joint have their clever solutions. There are few more steps to go in the project, but fixing issues as you work speeds up the process and stops you forgetting about them.
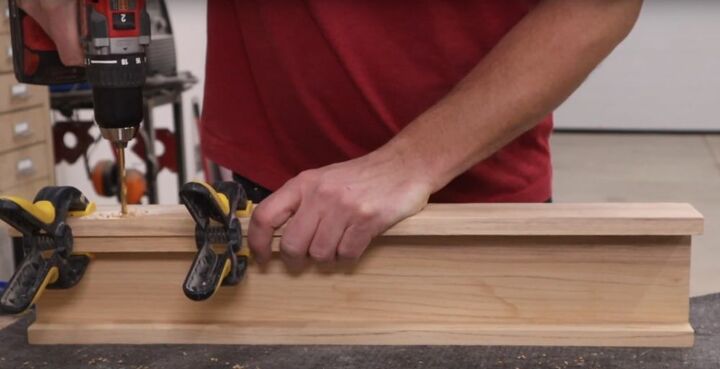
The holes are important as they provide the mechanism for hanging your shelves. First, measure out and mark where each hole will go. Precision is important to make sure the shelves are hung up straight. Get the clamps and fix one shelf’s side against an extra bit of wood for stability. Then drill through the marked spot and use the sanding paper to smooth down its surface. Repeat these steps for each hole. When done, you’re ready for the final decorating stages.
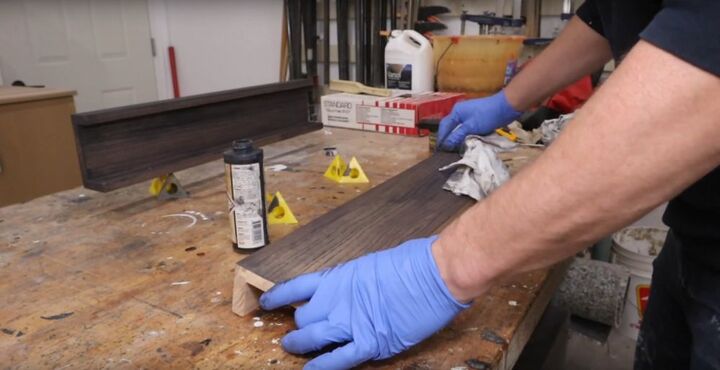
You can get wood stain in a range of colors, whether natural or more striking. With the structure of your DIY shelves ready, all you need to do now is pour some of the stain on the wood and spread it out with a cloth. You’re aiming for a thin and uniform layer of color across the shelf’s surface. This smooths out the timber even more and protects it from dust, wear, and tear.
On top of the wood stain, you’re going to apply the paint you chose. Both products I went for are dark in color but feel free to decorate your shelves as you see fit. You can blend them with the walls’ hue or let them stand out with a bolder design. Why not be extra creative and paint on some vines or patterns? The only thing to look out for is making sure you cover the whole shelves.
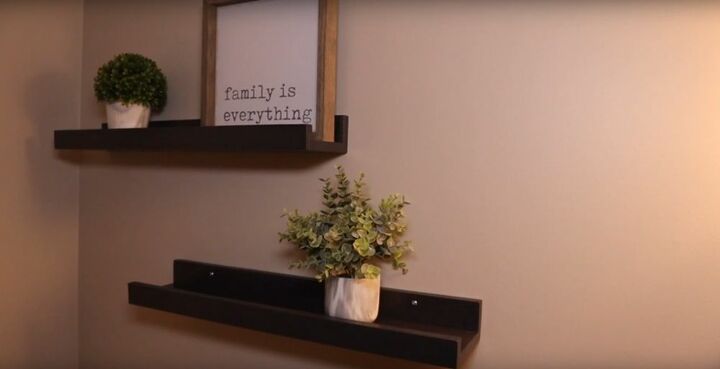
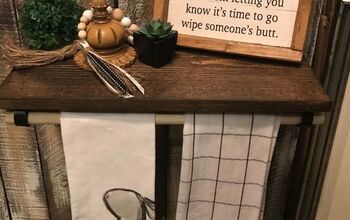
At this point, your DIY floating shelves are built and ready to be attached to the wall. For this part, you’ll need the screwdriver, level, screws, and anchors. Electric tools are also fine to use for a faster installation. First, hold each shelf up and mark out where the nails are going to go. Then make the necessary holes in the walls and fit the anchors. Finally, screw the shelves onto the wall through the holes you made earlier. Check that they’re straight and stable one last time before adding decorations.
And your DIY floating shelves are ready~ Despite the significant technical elements involved, this is a project you can really enjoy and feel proud of when done. You can use the same woodworking skills for more intricate shelving designs or completely new home decor ideas. However, if you do decide to make full use of your potential, always remember to do it safely. With care, patience, and an affordable budget, you can enhance every room in your house with better and better wooden features.
Completed any great DIY shelving projects of your own? Share your ideas and tips to help other homeowners upgrade their homes in low-cost style.


Frequently asked questions
Have a question about this project?