


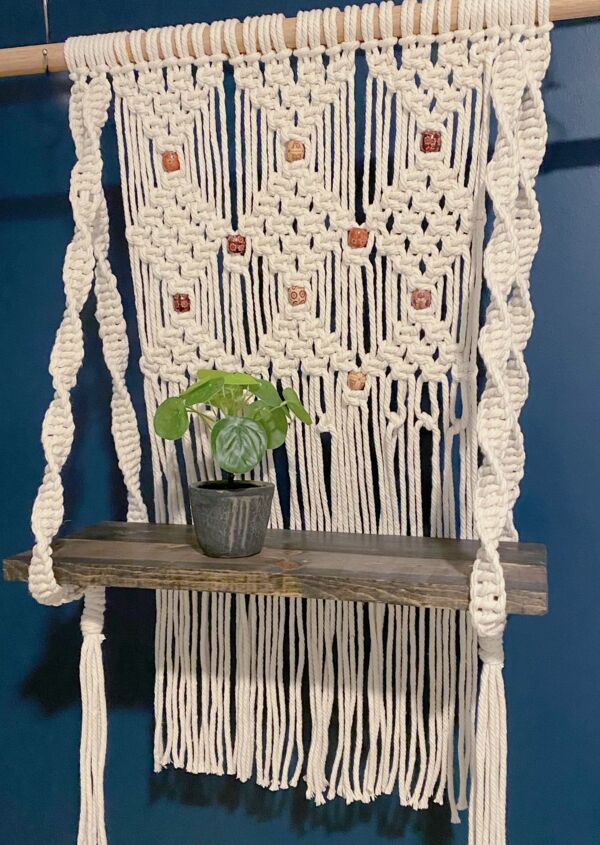
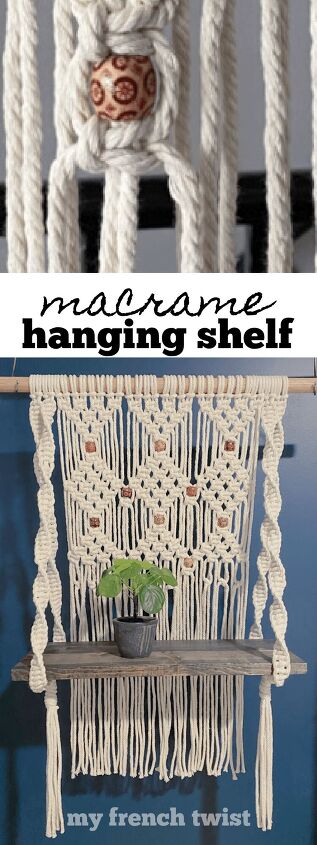
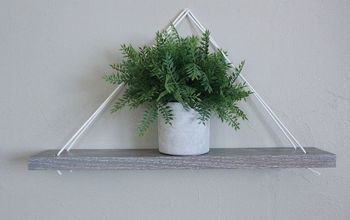
Macramé Hanging Shelf
For the Fall 2021 One Room Challenge, I’m helping my daughter-in-law Lilly transform her small office into a cozy boho retreat. This is week 5, so we are busy adding unique accessories to this super sweet room. And what conveys a modern bohemian vibe better than a macramé hanging shelf?
(This post may contain affiliate links; as an Amazon associate I earn from qualifying purchases. See disclosure here.)
supplies needed:
- wooden dowel – 26″ long
- 5mm cotton rope – 178 yards (534 feet)
- 17mm wood spacer beads
- wooden shelf
- scissors & masking tape
preparation
Cut 32 pieces of macramé rope, each measuring 200 inches. Tape all rope ends with masking tape to prevent fraying during the knotting process.
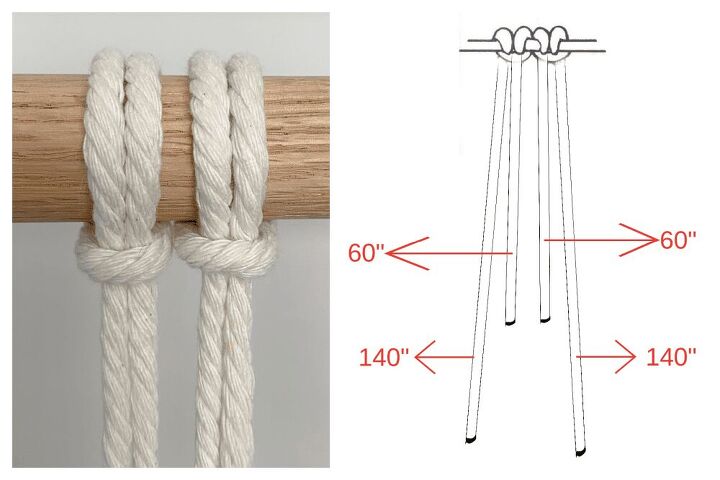
step 1 – end straps
To prepare the end straps of the wall hanging, using Lark’s Head Knots, tie two pieces of rope (each 200″ long) onto the dowel as shown below. It is important to have the outside cords 140″ long and the inner cords 60″ long.
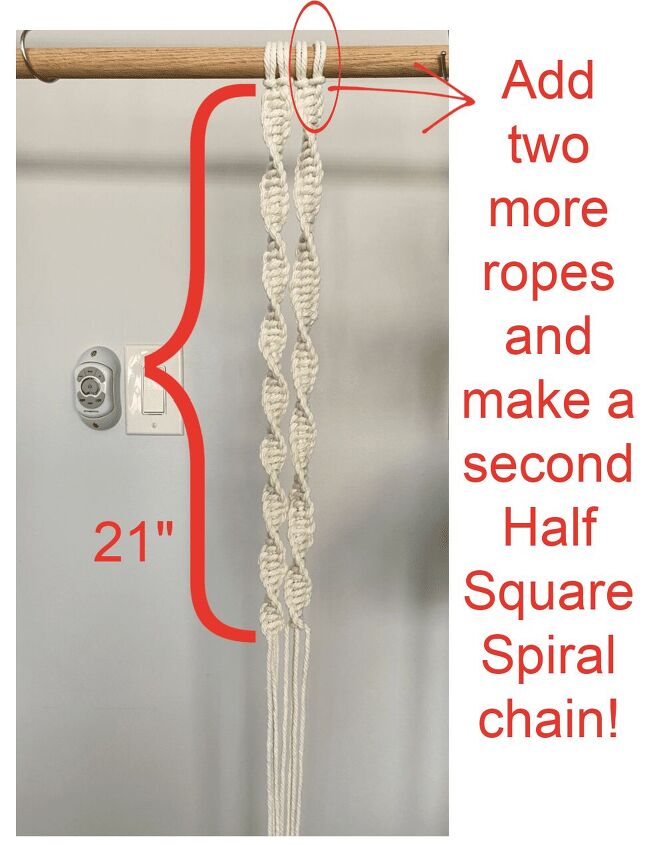
Next, create a Half Square Spiral vertical chain. Keep adding Half Square Knots to the chain until it reaches 21″ in length. After the chain is completed, add two more ropes and make a second Spiral chain, as shown below.
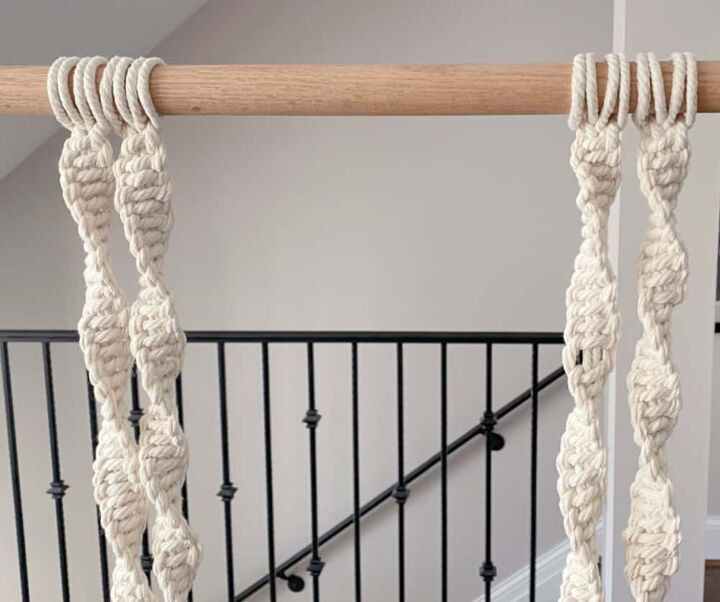
With four more pieces of rope (each measuring 200″) create two more identical Half Square Spiral chains. You now have four chains or end straps (two for each end) that will be attached to the wooden shelf.
step 2 – body
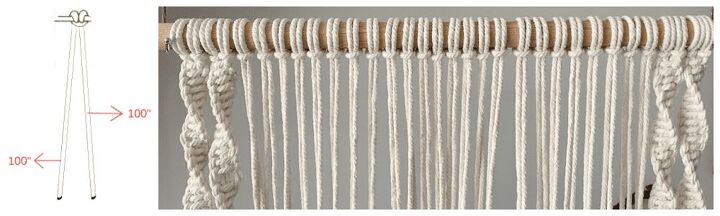
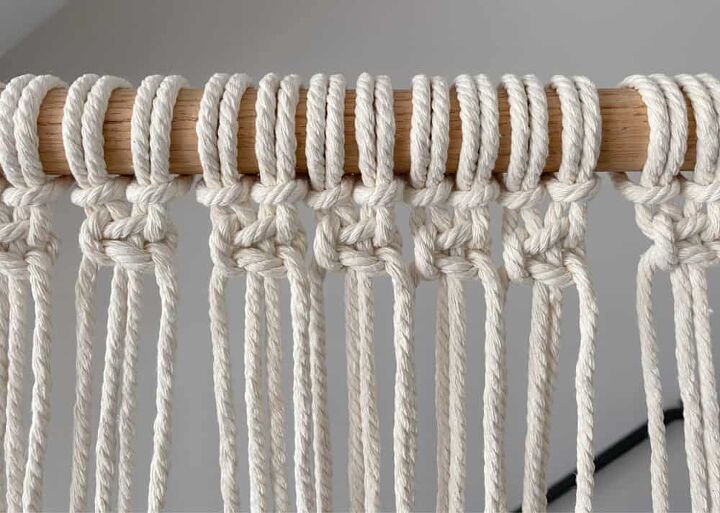
To prepare the body of the wall hanging, tie 24 pieces of rope (each measuring 200″) onto the center of the dowel with Lark’s Head Knots. These ropes will hang evenly, with both sides of the rope measuring 100″.
Next, just beneath the 24 Lark’s Head Knots, create a horizontal row of 12 Square Knots, as shown below. Remember, we are just working with the 24 pieces of rope (48 individual cords) in the middle; leave the end straps alone for now.
step 3 – left section of body
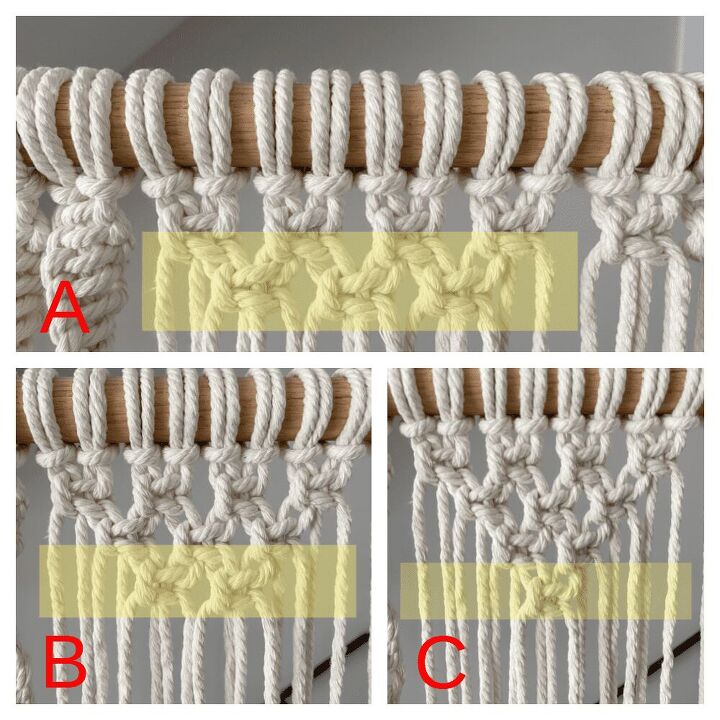
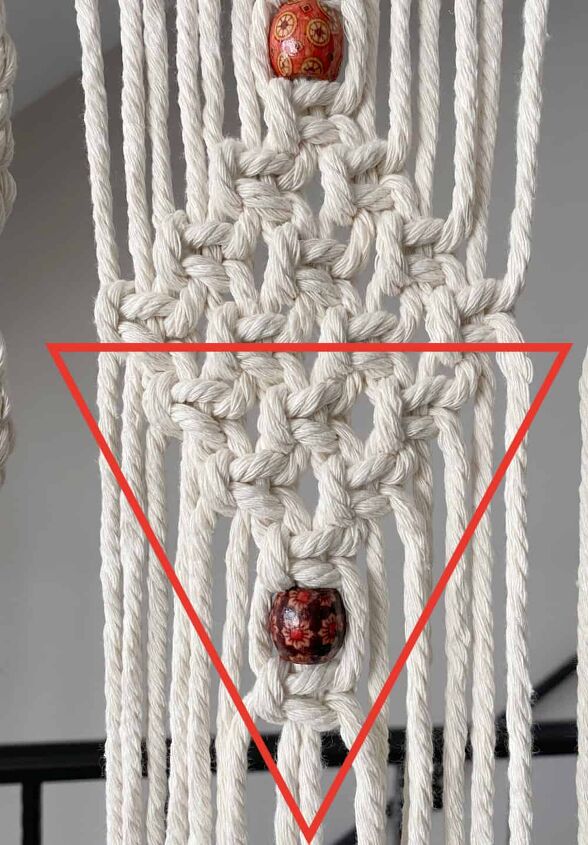
Now that a row of 12 Square Knots has been created, let’s treat the body as three sections – left, middle and right. Working with the left section only, create three Alternating Square Knots below the first four Square Knots (photo A below). Moving down another row, create two Alternating Square Knots (photo B). And beneath those, create a final Alternating Square Knot (photo C). This forms a triangular shape.
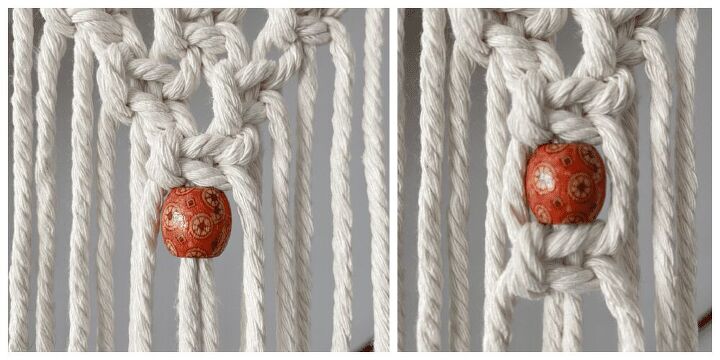
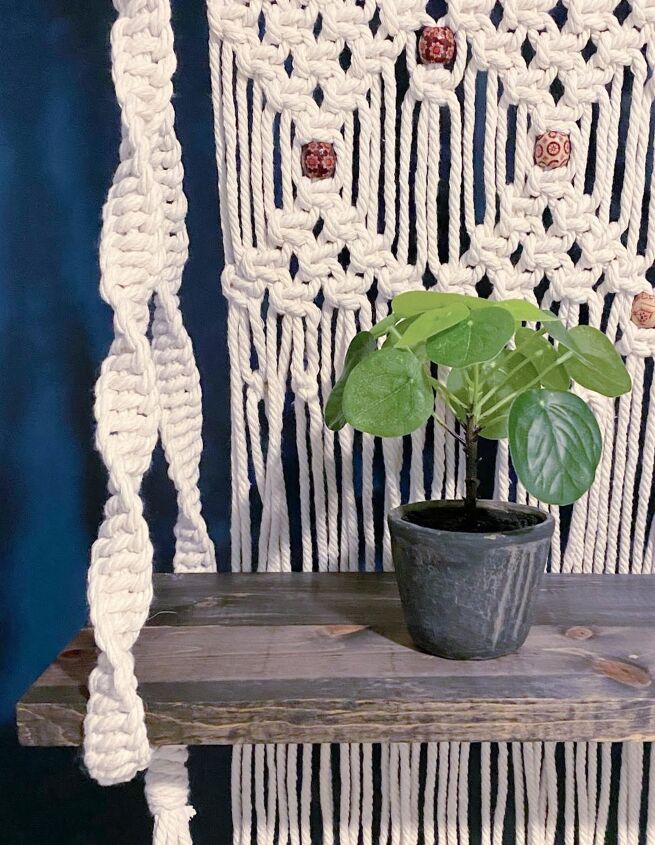
At the bottom tip of the triangle, slide a spacer bead onto the center two individual cords (directly below the last Square Knot you tied). Now tie another Square Knot just below the bead to keep it in place.
Beneath the last Square Knot, now create three more rows of Alternating Square Knots to form another triangle shape, as shown in photo below.
Continue in this fashion creating more rows to form a diamond shape (shown below). At the tip of the diamond, add a spacer bead. Tie a final Square Knot beneath the bead to keep it in place.
step 4 – middle & right sections
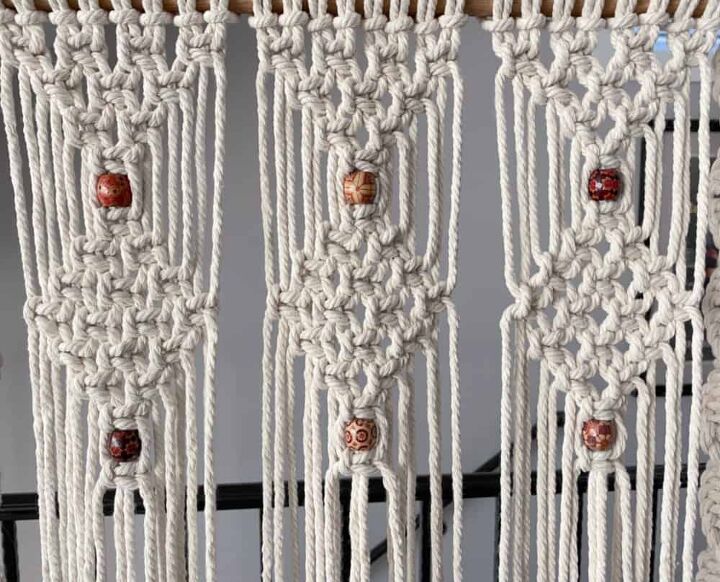
Before going any further with the left section, duplicate step 3 for both the middle and right sections. The body should look like the photo below.
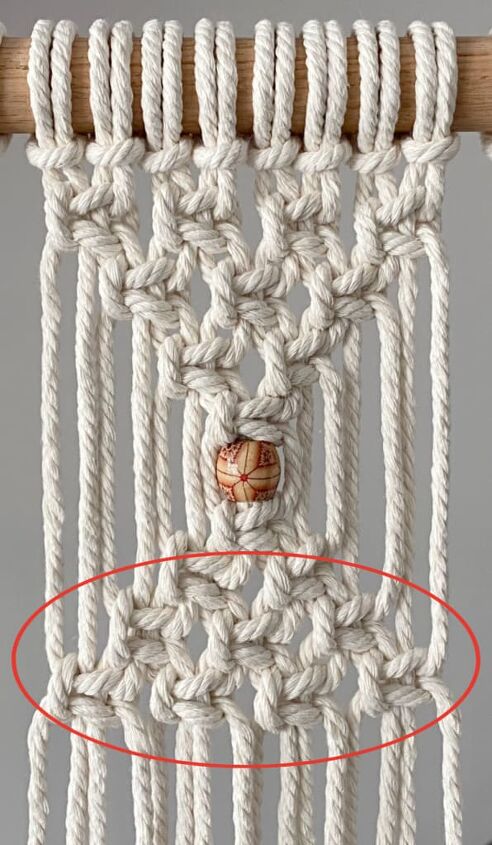
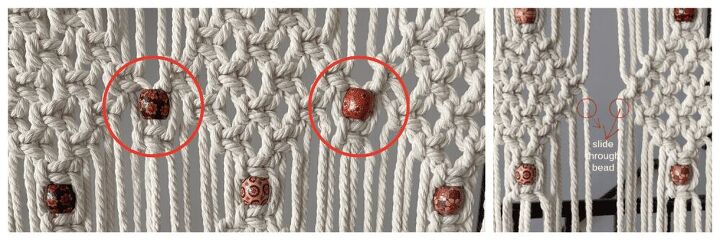
Now join the three sections together by adding two more beads, as shown below. Run the two inside cords on the sides of the diamonds through a spacer bead. Tie a Square Knot beneath each bead.
Under the bottom three beads, create three more small triangles using Square Knots and the same process used earlier for creating triangles. Join the three sections together once again with two final beads.
step 5 – finishing touches
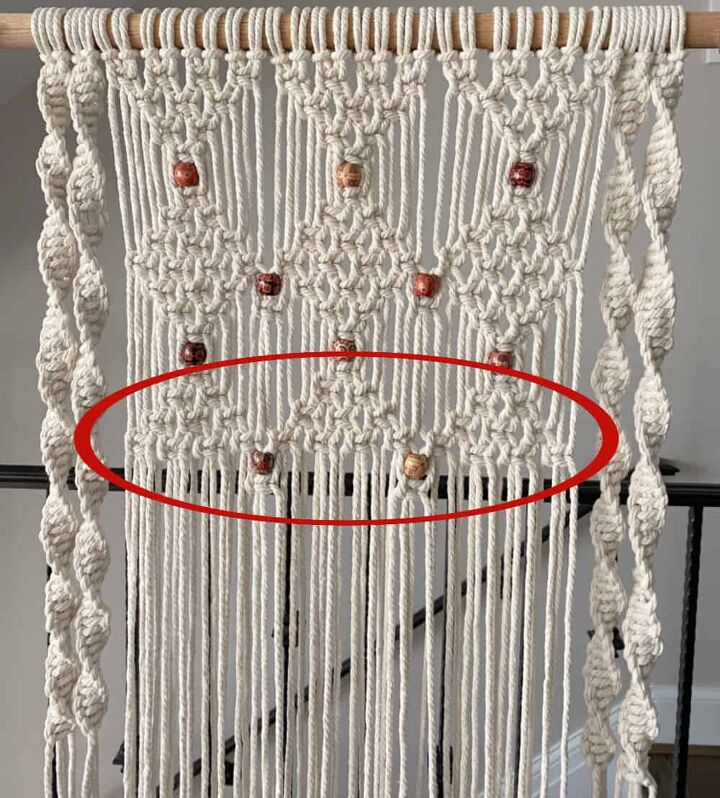
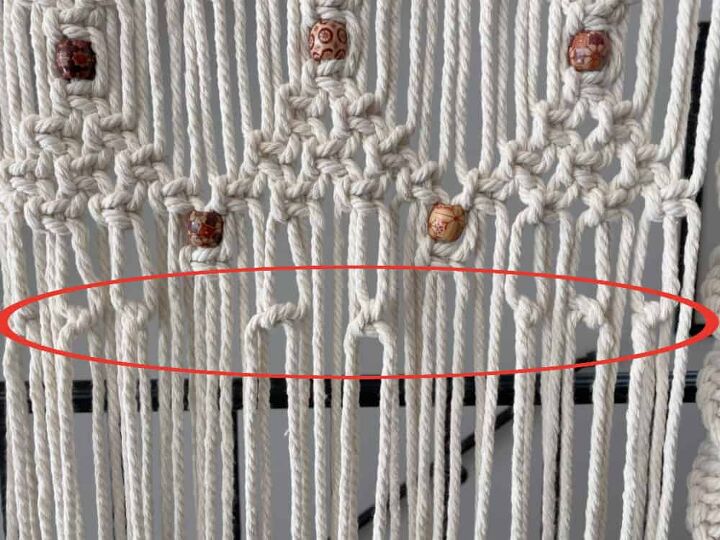
About 1″ below the last two beads, create a final horizontal row of 8 basic knots spaced evenly apart, as shown below.
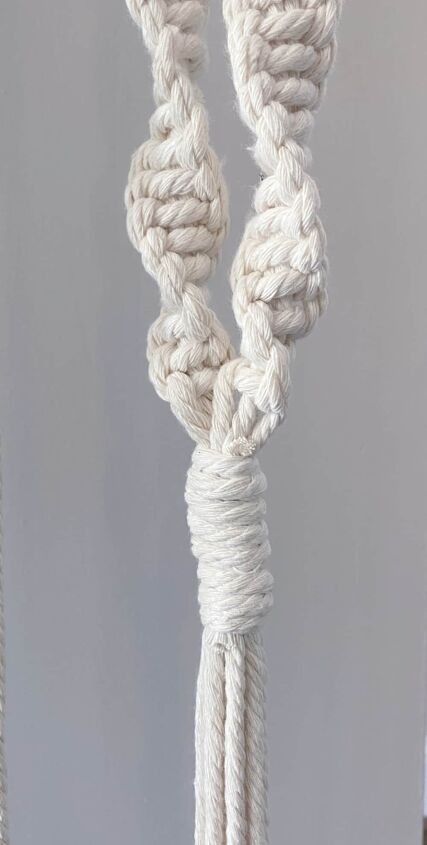
With the two end straps on the left end, make a Wrapped Knot just below the spiral chains. Repeat this process for the two end straps on the right.
step 6 – wooden shelf
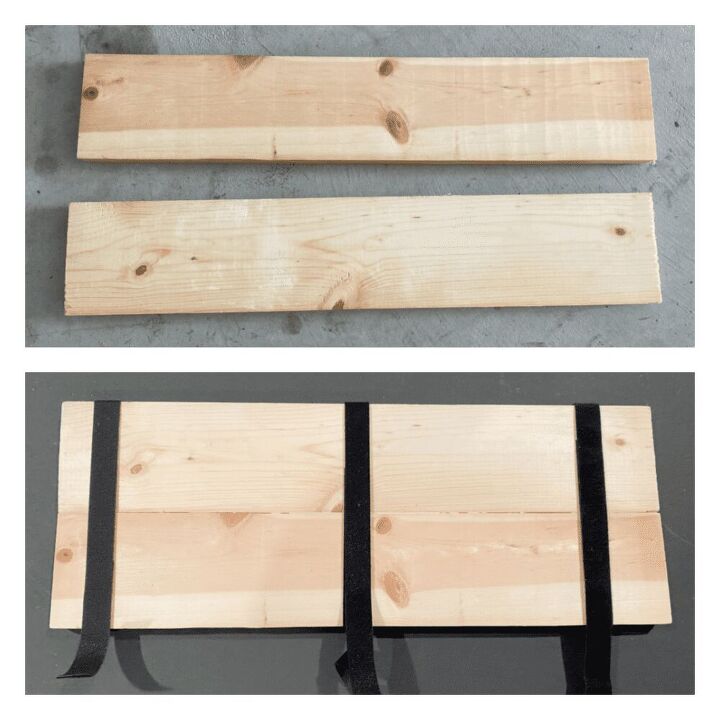
Ideally, a piece of wood measuring approximately 7″ x 18″ is needed for the shelf. However, I happened to find two pieces of scrap wood, each measuring 3.5″ x 18″ in my garage that will work. First, I sanded all the rough edges. Next I pieced them together with Liquid Nails. Then I held them tightly in place with velcro strips to dry.
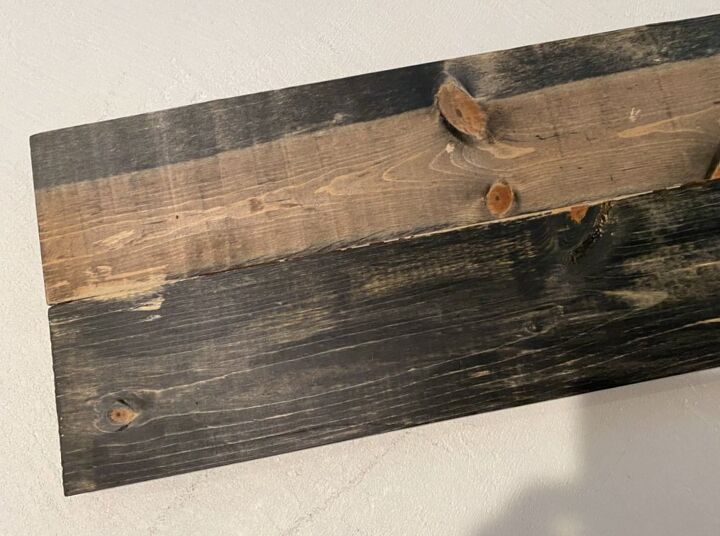
Next, I stained the shelves with a dark stain.
Once dry, place the shelf through the end straps of the macramé wall hanging. Trim all cords to your desired length. Now fill your macramé hanging shelf with plants and wait for the compliments to roll in! You’re finished! In my post next week, I’ll show you just how sweet this hanging shelf looks in Lilly’s new boho study.
The biggest compliment is a little share – pin the photo below!
Missed my posts from previous weeks? Check them out!
- Week 1 – the power of millennials
- Week 2 – moody blues
- Week 3 – diy mudcloth curtains
- Week 4 – styling a bookshelf


Check out the other guest participants as well as the featured designers!

Resources for this project:
See all materials


Comments
Join the conversation
-
LOVE macrame! Teaching my granddaughters ages eight and 12 how to macramé so they can make cool stuff! Making great memories❤️
-
I am inspired and I will definitely make this, it is so pretty And I love the shelf idea. Thank you


Frequently asked questions
Have a question about this project?