


DIY Faux Ceiling Beams

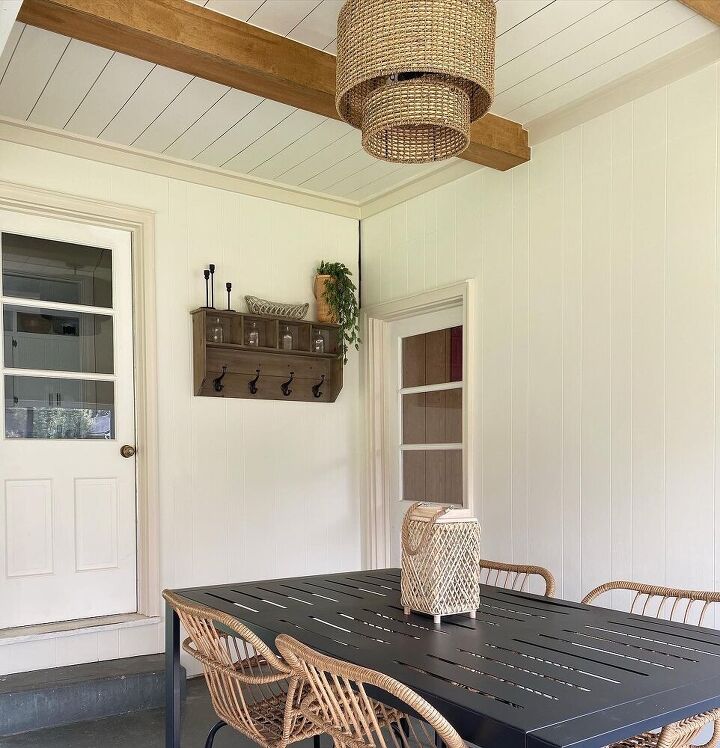
As I started my sunroom renovation I had so many different ideas for the ceiling! I contemplated between a black planked ceiling and a white planked ceiling with faux beams. Black ultimately just didn’t seem right for a sunroom in my opinion. I started by planking my ceiling using 1/4in plywood and painting it white! Then I tackled some DIY faux ceiling beams and I am so happy with how they turned out!!
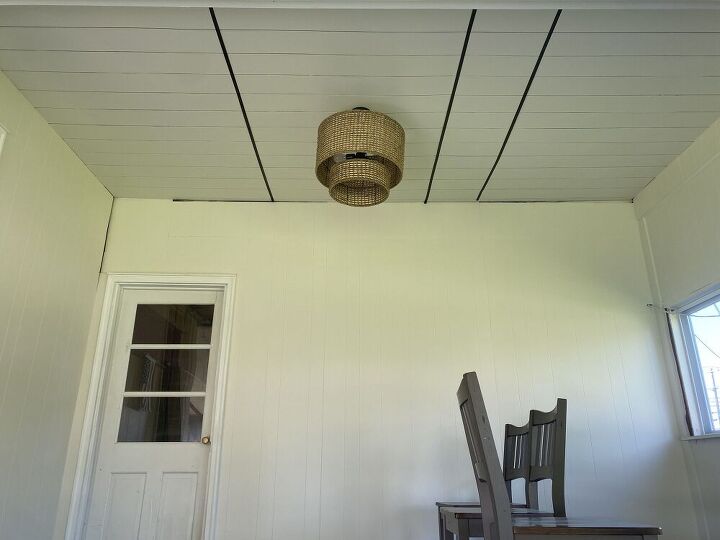
Here is the before! Using my stud finder, I marked my joists with electrical tape to help visualize what I was working with. During this step, unfortunately I realized that my light is not centered in the room and the joists are not symmetrical in the room. I wanted the beams evenly spaced from the light, making the light the main focus in the room. Having off centered beams just wouldn't look good ya know? After doing some measuring, I figured out a plan. I planned to hang/secure the beams off the side of each joist in order to make them equal on each side of the light. I then got right to it, and started making the beams!
What you'll need...
- 3 - 6in strips of 1/2in plywood per beam ( I used 6 because I made 2 beams!)
- Nail gun with 2in and 0.5 in brad nails
- Liquid Nails
- Saw (I used my Miter Saw but a chop or table saw would also work)
- Wood Conditioner and Stain ( I used Early American)
- Drill
- 3in construction screws
- Tape measurer
- Pencil
- Chalk Line
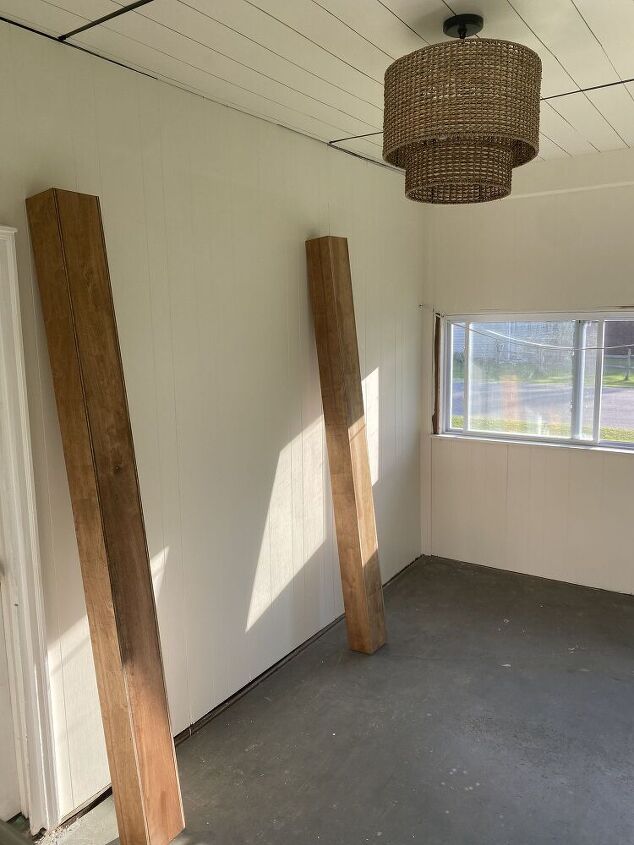
Start by cutting your 6in plywood strips to the length of your ceiling. Then attach the three strips of plywood in a U shape to create the beam. Secure the plywood by applying a small amount of liquid nails then using 0.5in brad nails and your nail gun to secure the plywood together. They really were so simple to make! They will be hollow and light, also making them easy to install.

Then choose you stain color. I started by testing out stains on a scrap piece of plywood. I ultimately decided to use oil based Early American. I used wood conditioner prior to applying my stain. Here is how they turned out!
Now you're ready to put your beams up. I used a chalk line on the ceiling joist to help guide where my beam will go. I cut about 5 scrap pieces (per beam) of 2x4s to the width of the inside of my beam. I pre drilled 2 holes in them then secured them into the ceiling joist about every 20in with 3in construction screws, drilling into the joists of the ceiling. After these are secured in a straight line, guided by your chalk line you are ready to place your beams up.
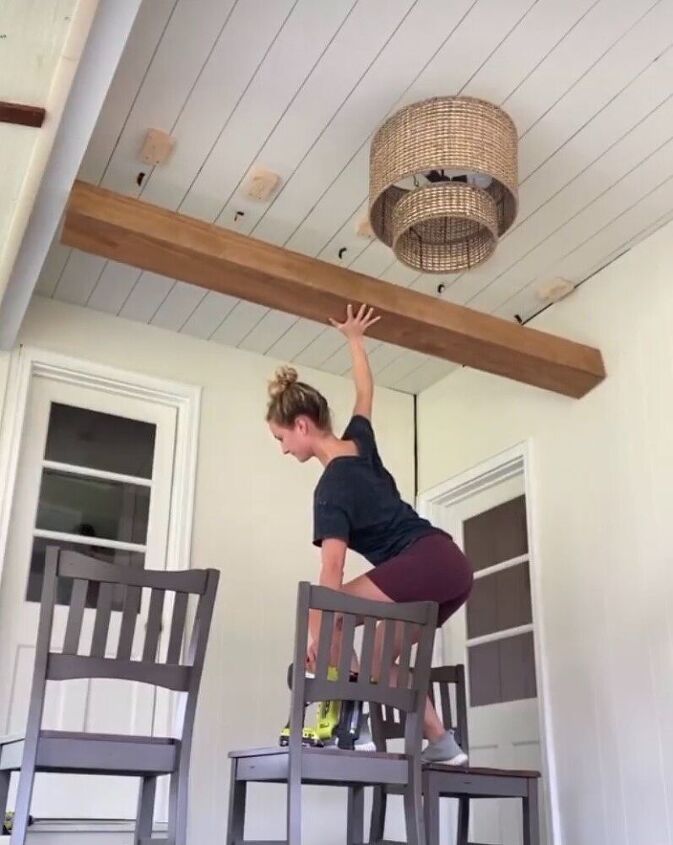
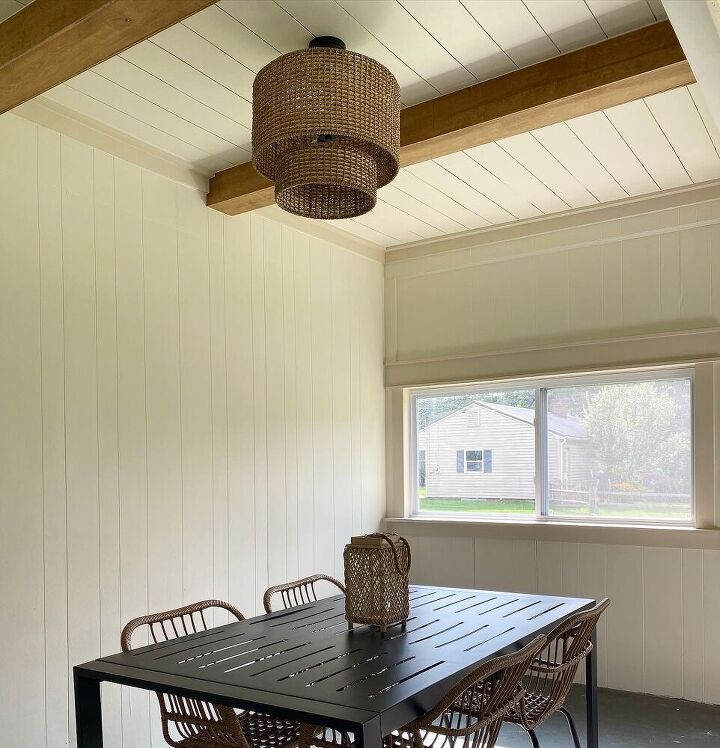
Fit your beams over the scrap 2x4s and push flush to the ceiling. Then simply use your nail gun with 2in brad nails to secure the beam to each 2x4! Here is a picture above of me with some wild balancing techniques getting the beam up and secured! Once you’ve nailed the beam in you're done!
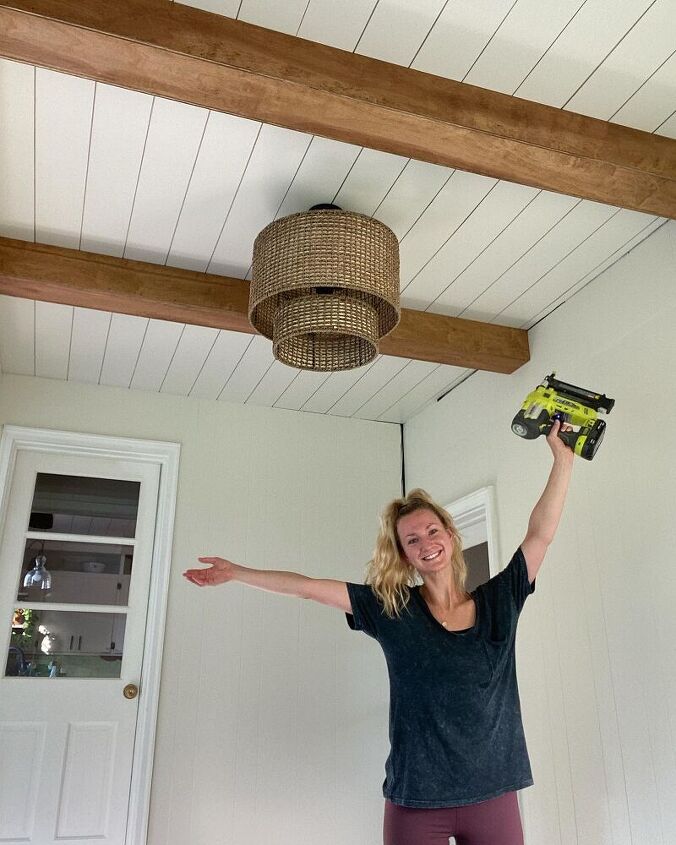
Here is me super excited (and sweaty) with my cute new beams! I later put up DIY crown moulding, caulked and finished this room up! Here is the finished room!
Thanks so much reading! I hope you love these beams as much as I do! You can find more details on these beams and other DIYs on my Instagram @abbbclark_homeee ! I have also linked a lot of the decor and furniture from this room for you to shop here! If you have any questions please feel free to ask! Thanks for reading!
Resources for this project:
See all materials


Comments
Join the conversation
-
LOVE
-
Anything about beams & I just love to check it out! I’m not ready yet & I would be having the fake “join you to the one real beam which I would first need to have it “combed” & paint/stained in the cor being used for the faux beams! It’s an idea I’ve had on the back burner & it will happen hopefully in a few years! Meantime I can dream each tutorial brings me closer!! ♥️👍️


Frequently asked questions
Have a question about this project?
Do you think using 1/4” plywood would work too?
Where do you purchase faux beams?
Where did you get your light fixture?