1.6K Views
Restoration of a Vintage Baby Carriage

by
Back to Life Restoration & Home Decor
(IC: professional)
My friend Jillian is a photographer and she got this vintage baby carriage that she wanted to have restored to use for her baby photo shoots!
She asked if we could restore it for her- of course we jumped at this opportunity since it was something way out of our normal realm of work but I love any chance we get to push ourselves artistically!
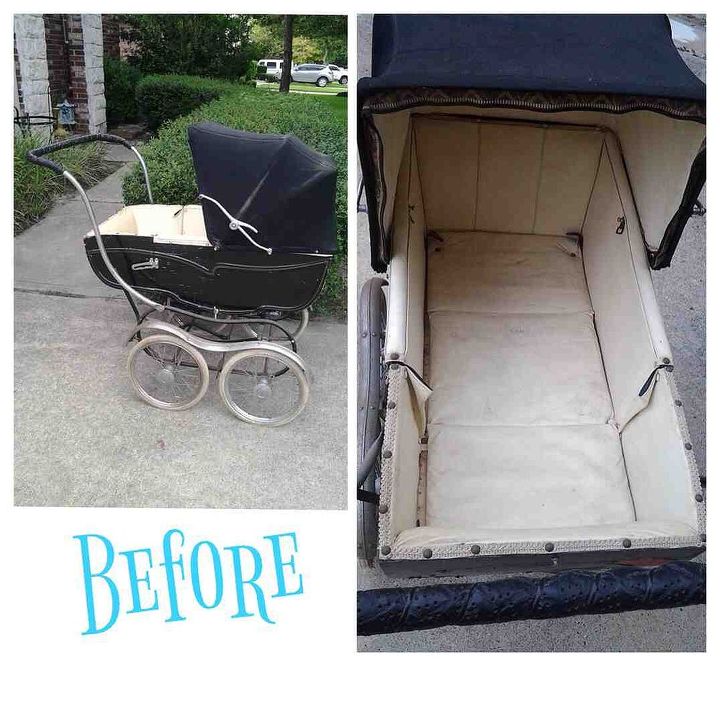
The veneer was starting to bubble and the paint was cracking. The leather inside was really dirty and smelled, the chrome was rusting and dull.
So we disassembled it by taking off the canopy from the carriage and then removing the carriage from the frame. We scraped any loose paint off the carriage and then sanded it down, painted it black and accented the decorative molding with an antique white paint. Once it dried we finished it with a poly to protect it. We also cleaned up the frame, re-painted it black, polished up the chrome and took off the nasty black steering wheel grip and replaced it with the same beautiful trim that we used as trim around the carriage (pictured below).
Once all the paint was dry, we assembled it all back together, cleaned it all up and added new trim and upholstery nails! It came out so darn cute and our friend loved what we did with it!! Jillian from BMG Photography posted some pictures on our Facebook Page of her recent photo shoot that she used the carriage in!
If you would like to see more pictures of our baby carriage restoration, go to: https://m.facebook.com/backtoliferestor
Thank you for looking and be sure to look for the photo shoot pictures on our page. Feel free to leave your comments and likes!
A few Before pictures
Some more Before pictures
After- simply gorgeous!!
Another After picture
The new decorative trim and black upholstery nails for the final details.
Closer look of the handle- this is the same trim that we used to line the carriage base.
Enjoyed the project?
Published September 16th, 2014 10:57 PM
Comments
Join the conversation
2 of 4 comments
-
Thank you!
 Back to Life Restoration & Home Decor
on Sep 17, 2014
-
-
Beautiful job
 Unique Creations By Anita
on Oct 03, 2016
-








Frequently asked questions
Have a question about this project?
I purchased a similar carriage at the Goodwill but it’s missing 2 of the springs that connect it to the wheel base. Do you have any idea where I could get new springs? I don’t even know what the proper name of the part is, just that they’re coiled springs that fasten w/ a metal cap on one end & hook w/ the other