


The Simplest Way to Update Old Door Knobs & Vents!
Sometimes air vents and door knobs are just plain outdated. They need updating but the thought of buying all new doorknobs and vents makes you see "$$$$$$$$$$$." Well, you're in luck. Here's a step-by-step tutorial on how to update your old door knobs and vents for only a few dollars! Seriously. It's amazing. Read all the steps below and head over to my blog for more details and pictures.
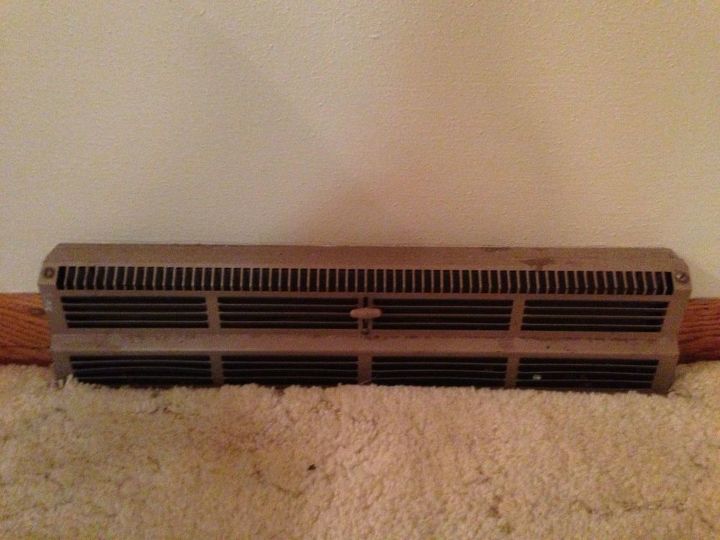
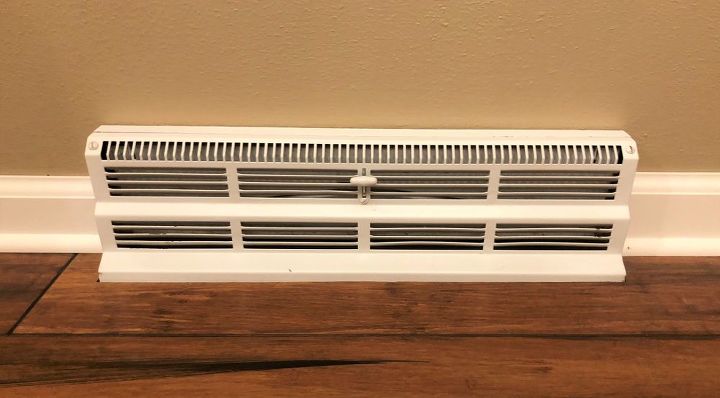
Look at this disgusting vent. It's not only an outdated color but it's also rusty in many spots. Unfortunately, we had a lot of these in our house.

Here is the "After" photo. How much better does this vent look? A million times better! Here's the step-by-step of how to do this.
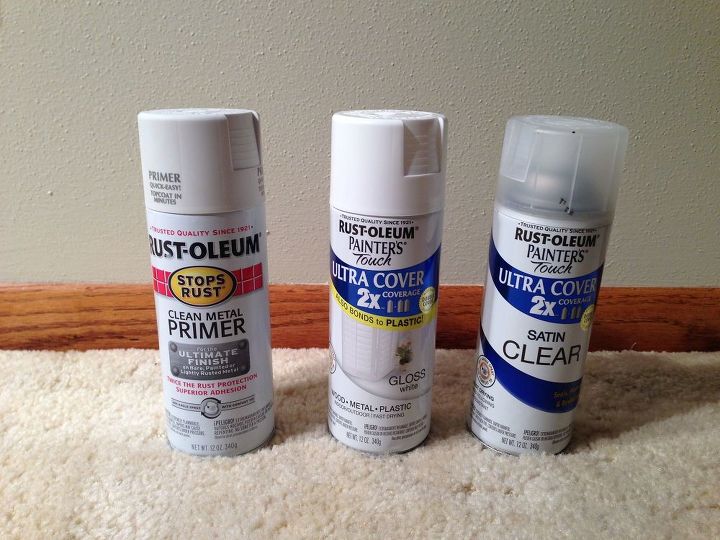
1) Gather your supplies: This is pretty simple. Buy three cans of Rust-Oleum Spray Paint: an Ultra Cover 2x Primer, an Ultra Cover 2x Spray Paint (in the color of your choice) and an Ultra Cover 2x Clear Coat.
2) Remove all vents and door knobs: This is pretty simple. Just unscrew all the screws and take them off.
3) Clean them all with soap and water: You could use something stronger but soap and water worked fine for me. I used a hose to spray off the vents since they were pretty dusty and it was tedious trying to get the dust out of every tiny vent area. Allow them to dry on their own or dry them off well.
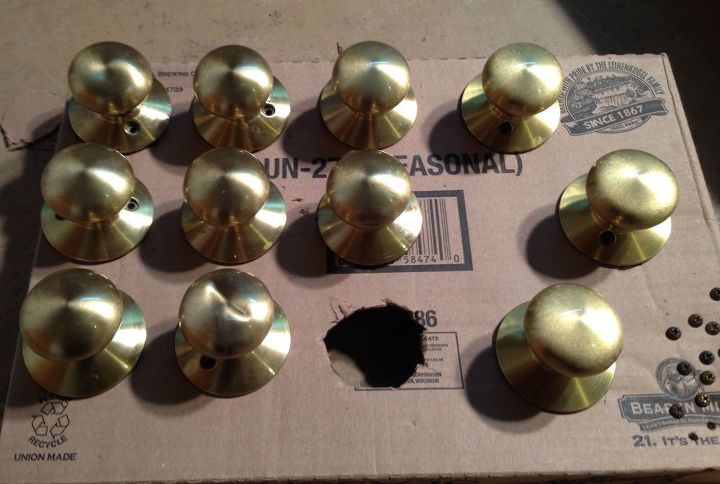
4) Create a cardboard holder for your knobs: Knobs are tricky to spray paint because they are going to roll around and not sit nicely like vents will. Therefore, I created this handy knob holder out of an old cardboard box. To make it, you use a sharp knife to cut out circles just big enough to fit the back of the knobs. Then place them all in the holes so you in the end you have them all sitting there nicely, ready to be spray painted on all sides at once. I even put the screws through the cardboard since you’ll want to spray the heads of those too!
5) Prime all knobs and vents: Now that you have all the knobs in place and all the vents laying there too, you’re ready to start spray painting! First, primer. Use a Rust-Oleum Ultra Cover 2x Primer. I followed the directions for application and dry time. I did just one coat, trying to get an even spray on all items.
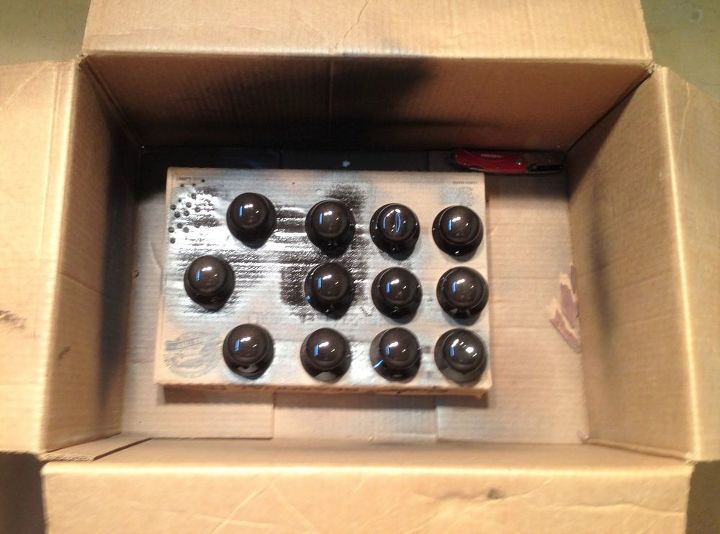
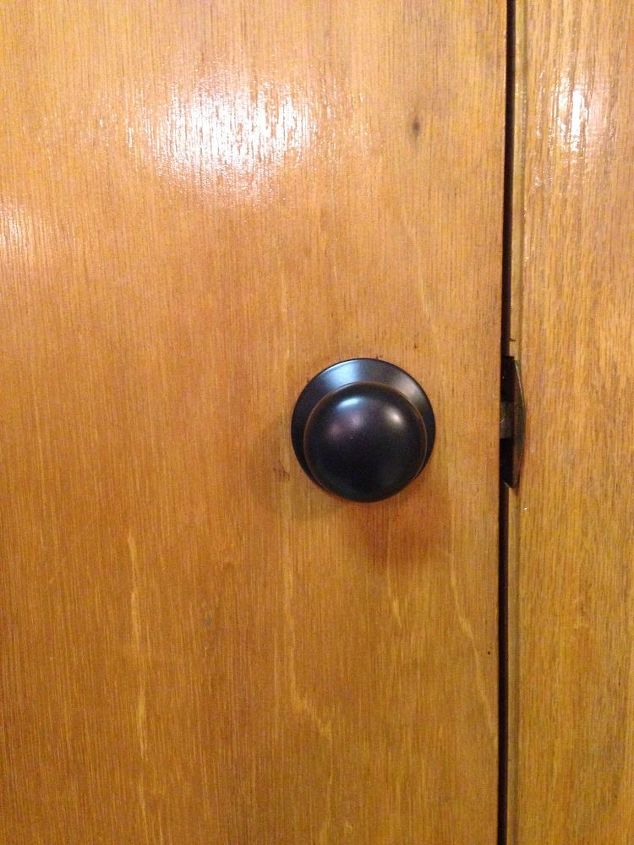
6) Paint all knobs and vents: Now you’re ready to move on to spray painting them the color you want them. I spray painted the vents white and the door knobs oil rubbed bronze. I used this product for the vents: Rust-Oleum Ultra Cover 2x Spray Paint – Gloss White and this product for the door knobs: Rust-Oleum Ultra Cover 2x Spray Paint – Metallic Oil Rubbed Bronze. I recommend wearing gloves when you do this.
7) Spray a top coat on them all: To ensure the best durability, spray a top coat on at the end. I used yet another Rust-Oleum product: Rust-Oleum Multi Purpose Spray Paint – Satin Clear. Follow the directions on the can and spray on just one coat to finish off all your items.
8) Reattach all door knobs and vents
Your vents and door knobs will now look brand new! Plus, they are extremely durable. I painted some of these about 5 years ago and they still look exactly how they did the day I painted them! This project is an inexpensive, easy and impressive update for your home. Happy Spray Painting!
Resources for this project:
See all materials


Comments
Join the conversation
-
Lots if great tips. Amazing what a little paint can do. They look amazing.
-
Thanks so much for this tutorial! I adapted it for a recent project - painting hvac outlet covers, switchplates & outlet covers. I labeled the backs with location & finish (silver, brass, or copper "rustproof" spray paint from the dollar store), and cleaned by spraying with vinegar water & wiping down with a terrycloth rag. Amazingly the filth on those 40-plus-year-old fixtures vanished and everything was squeaky clean for painting.
Your post inspired me to use cardboard shipping boxes, which kept everything organized. I even pressed all those teeny mounting screws into the bottom (taped) seam of a box, and painted them as well.
Thank you!!


Frequently asked questions
Have a question about this project?