


Inspired by Indigo: Stencil a Sumptuous Table Setting

For some reason, I'm drawn to the colors blue and white. I LOVE them together. I find this color combination crisp and clean but also very elegant. It may be my love for the ocean that attracts me to blue but I especially LOVE the shade of indigo. The color of my favorite worn pair of jeans, Bristol Blue glass (I fell in love with during my years studying abroad), English pottery and nautical motifs. I knew I wanted to create indigo placemats for my home for spring.
Are you a blue person too? If so, you're in luck! I will show you how I made these pretty indigo stenciled placemats to complete my spring tablescape theme-AND it didn't take me very long at all!
Stencil Supplies for this Project:
Royal Design Studio Stencils: Bombay Paisley Motif Stencil, Sari Border Series Stencils
Chalk Paint by Annie Sloan: Pure White
Royal Stencil Creme Paint: Antique Gold
" Stencil Brush
Painter's Tape, Tape Measure

Stencils and Stencil Creme Paint by Royal Design Studio www.royaldesignstudio.com

Step 1: Lay your placemats out with the stencils to decide how you want to position them. The great thing about the Sari Border Series stencils is that there are so many options for different stencil ideas. There are five designs in all. I chose one with flowers that had some swirl element similar to the Bombay Paisley stencil so that they would coordinate well.
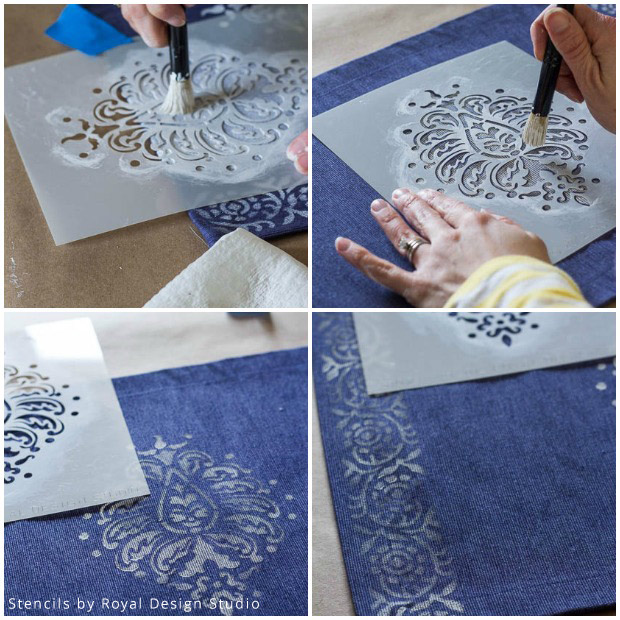
Step 2-Basic stencil technique: Tape the stencil in place to make sure it doesn't move. Dab just the tips of the stencil brush into the Pure White Chalk Paint and pounce or swirl the brush on a paper towel to remove the excess paint. Stencil the fabric using a circular motion with the brush.

I thought my wooden napkin rings needed a little sparkle to pair with the gorgeous blue and white placemats. Royal Design Studio has a metallic stencil crme paint that is not only ideal for stenciling, it can also be used as a high covering metallic paint over furniture and accessories.
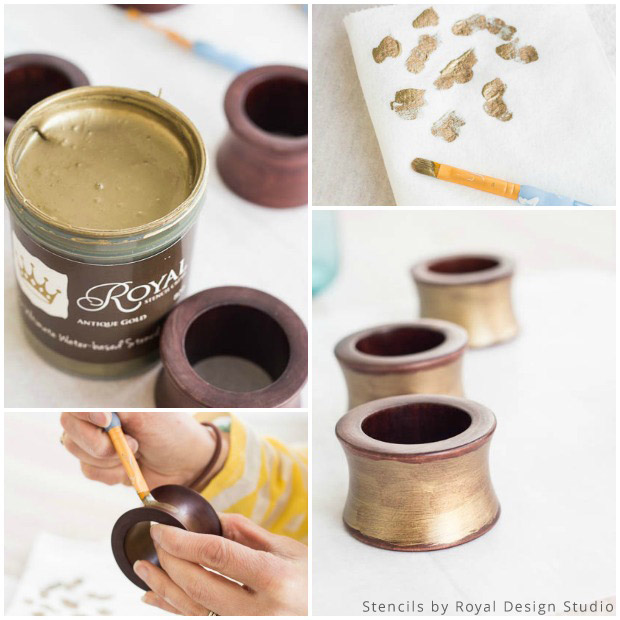
I used a small paint brush blot some Antique Gold Royal Stencil Creme to the wooden rings. You don't have to use very much. A little goes a long way!
Removing the excess paint from your stencil brush prevents bleed from seeping under the stencil. It is good to have many good quality paper towels on hand.
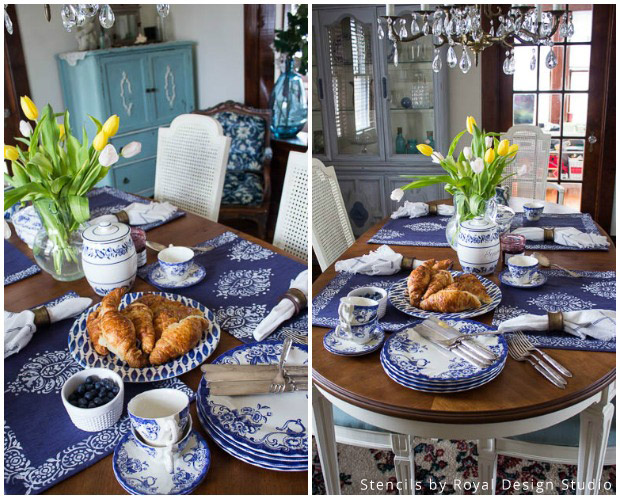
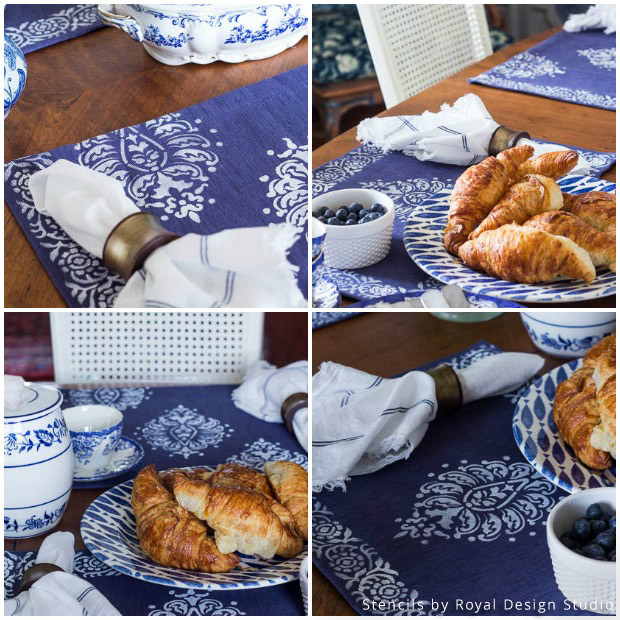
I so enjoyed using these new stenciled indigo placemats in getting my dining room ready for a blue and white brunch!
Comments
Join the conversation
2 of 3 comments
-
I am in love with..um the placemats, plates, cups...shall I go on...lol i love it all just beautiful!!!!!!!! I would love to know where you got your dishes? They are gorgeous!
-
This is absolutely stunning! I have a set of china that would go perfectly with this inspiration ~ now I need to make these for my home.


Frequently asked questions
Have a question about this project?