


4 of The Sweetest Valentines Tiered Tray Decor DIY's EVER!
Tiered Tray Decor is a growing decor statement in homes around the world and why pay for your tiered tray decor when you can make it yourself?
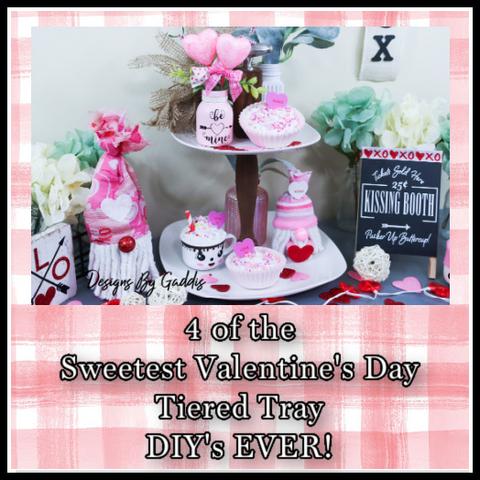
This tutorial has 4 of the Sweetest Tiered Tray Decor DIYs! I will show you how I created all these tiered tray decor pieces using items from Dollar Tree.
Project Steps
Tiered Tray Mug
- Step 1 - Paint and Dry a kid's tea set cup. I got this tea set at Family Dollar because I couldn't find one at my local Dollar Tree. I used white spray paint to paint the cup after I scratched it up with sandpaper.
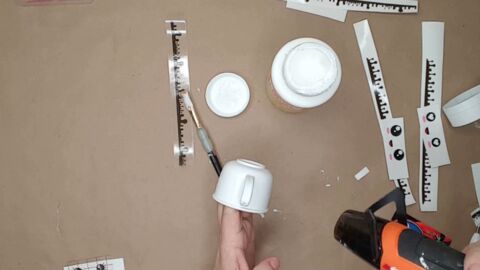
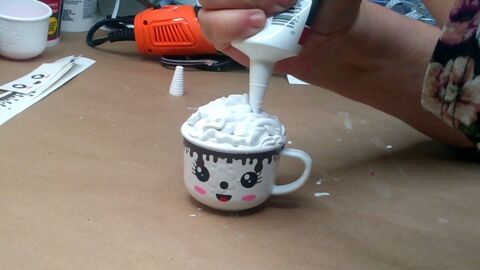
- Step 2 - After the paint has dried apply the chocolate dripping vinyl to the mug. I used this Chocolate Dripping from Design Bundles. Visit my blog for the link to the file used.
- Step 3 - Apply vinyl face to the mug. I used a file from Design Bundles. This file is also listed below.
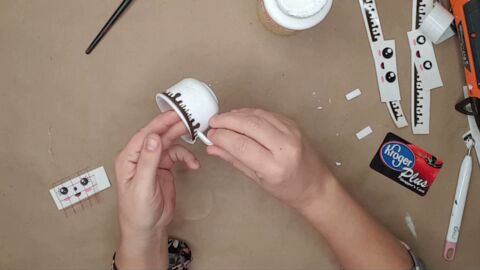
- Step 4 - Cut a small round foam ball in half and place in the bottom of the mug. This will help when you start with the "whipped cream".
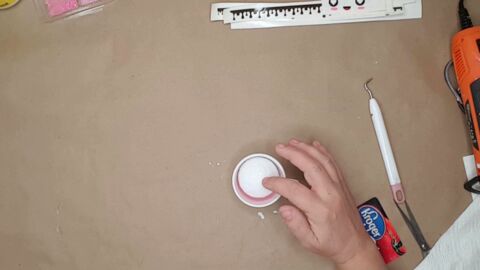
- Step 5 - Apply caulk to the inside of the mug so that it looks like whipped cream.
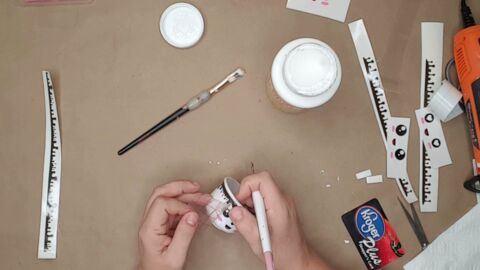
- Step 6 - Apply decorations to the "whipped cream". I small foam beads from Dollar Tree in various colors. They reminded me of sprinkles.
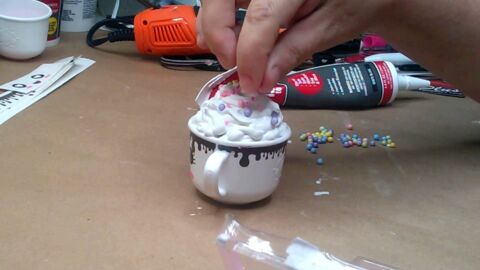
Just look at how cute this little mug turned out. Perfect for your Valentine's Day tiered tray. I also added a cut off red paper straw and a foam Love U sticker from Dollar Tree to finish the look off.

Tiered Tray Cupcakes
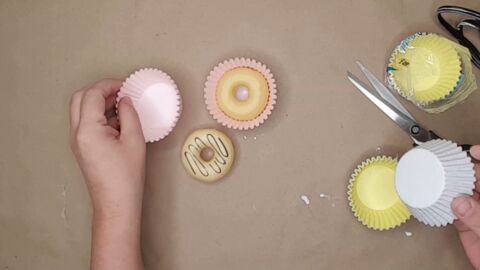
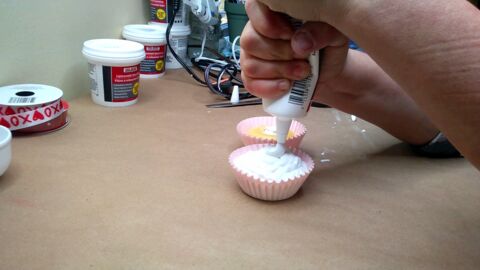
- Step 1 - I picked up a bag of donuts and ice cream cones in the toys section of Dollar Tree. I used the donuts as the base of my cupcake and simply put them inside of paper cupcake holders.
- Step 2 - I filled the center of each donut with caulk and then applied the caulk to each cupcake like it was icing for a real cupcake.
- Step 3 - I decorated both cupcakes with pink foam bead and pink and purple plastic jewelry beads from Dollar Tree.
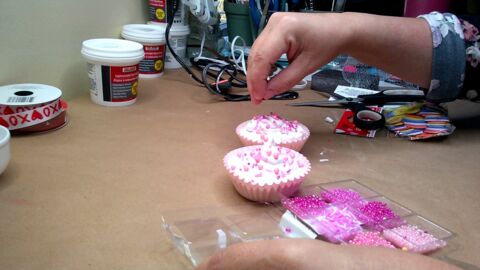
- TIP - I noticed that while the cupcakes were drying they started drooping due to the weight of the caulk. I had picked up some of the red plastic bowls from Dollar Tree and the cupcake fit perfectly and it kept it from drooping while it dried.
Just look at how good these cupcakes turned out. They look good enough to eat.
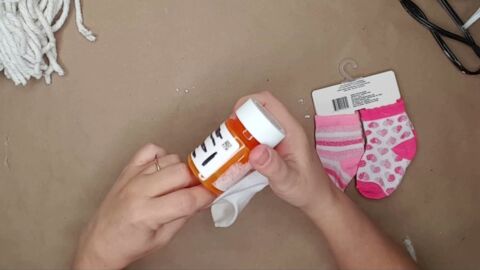
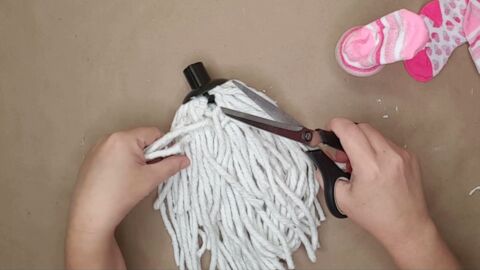
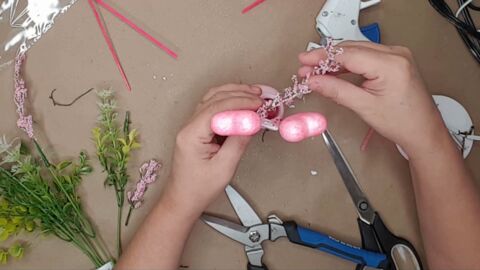
Pill Bottle Gnome
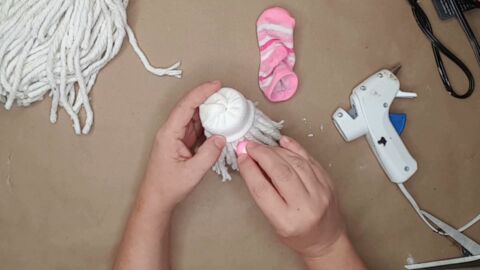
- Step 1 - You can use any empty pill bottle for this gnome. I placed the pill bottle into a kid's white sock I got from Dollar Tree.
- Step 2 - Cut the strings off of a Dollar Tree mop head for the beard of the gnome.
- Step 3 - Glue to mop head strings to a piece of card stock cut down to the size you want the beard to be on the gnome. I always use 2 layers of string. One goes directly onto the card stock, the other goes on top of the first layer. This gives the beard a fuller look.
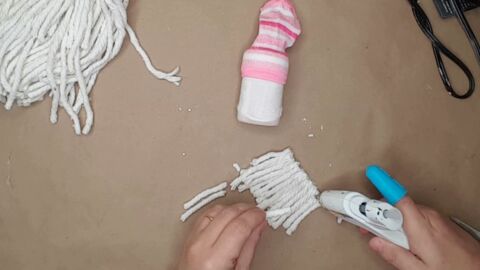
- Step 4 - Hot glue the card stock beard to the pill bottle.
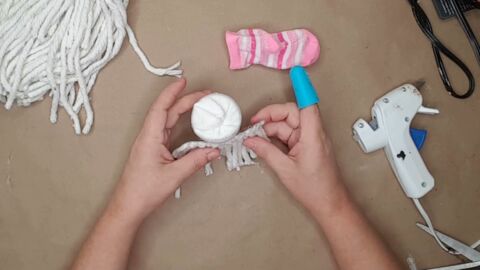
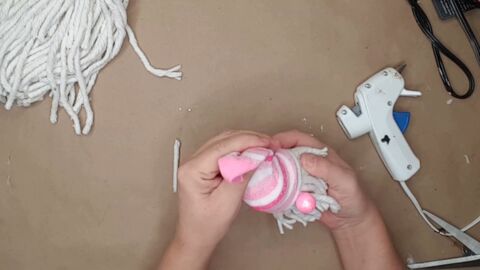
- Step 5 - Hot glue a nose onto the gnome. I used a pink foam ball from Dollar Tree on this Valentine's Day gnome.
- Step 6 - Add the gnome's hat. I used another kid's sock from Dollar Tree for the gnome's hat.
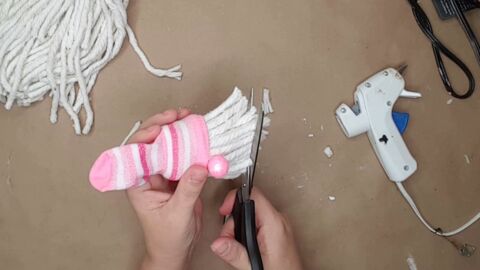
- Step 7 - Trim the beard.
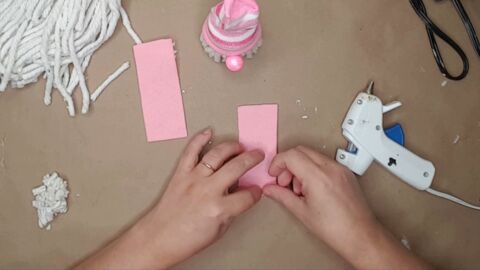
- Step 8 - Make the arms. I used some pink felt and cut it down for the arms. I hot glued it and rolled it until it was the size I wanted. I then cut the arm in half because it was actually too long.
- Step 9 - Attach the arms to the gnome.
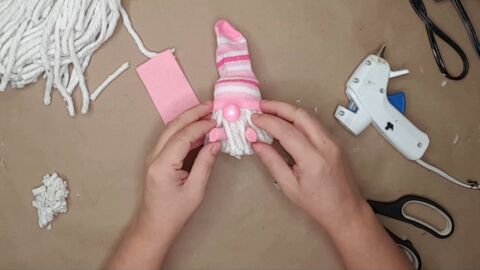
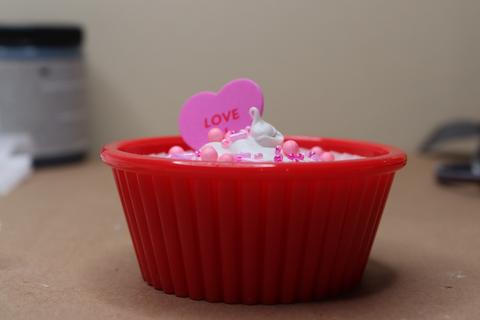
- Step 10 - Add any other accessories. I used this red foam heart sticker from Dollar Tree for the gnome to hold.
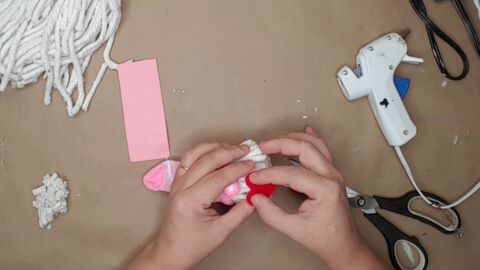
OMG! Look at how stinking cute this gnome turned out. I love it!
What do you think?

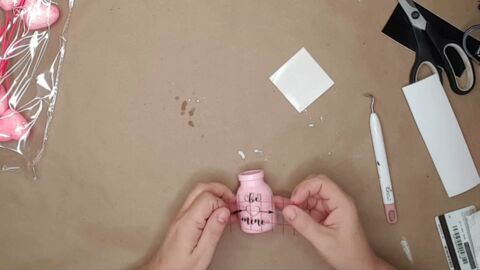
Be Mine Bottle
- Step 1 - I paint a little bottle from Dollar Tree with pink spray paint. The bottle came with little seashells which I poured into another bottle to be used in a project later. The cut file I used was from Design Bundles and you can find the link below.
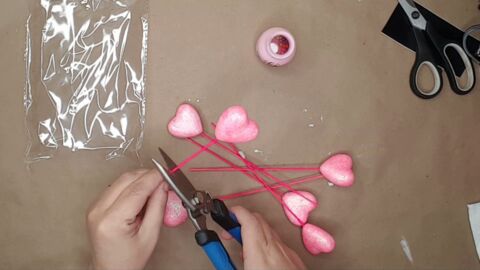
- Step 2 - I used these pink heart picks and 2 of them down to fit the bottle and the tiered tray.
- Step 3 - I made little bows out of ribbon from Dollar Tree that I found in the baby shower section. My Dollar Tree has NO Valentine's Day ribbon. Make it with what you can find, right?
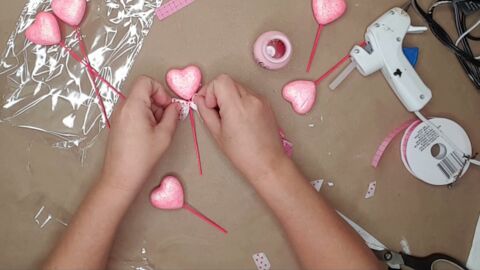
- Step 4 - I added some floral picks and greenery I also got from Dollar Tree. I cut everything down to fit and placed them inside the bottle and arranged it.
Look at how cute this little tiered tray Valentine's Day bottle is. It goes perfectly with all the other sweet Valentine's Day tiered tray decor.

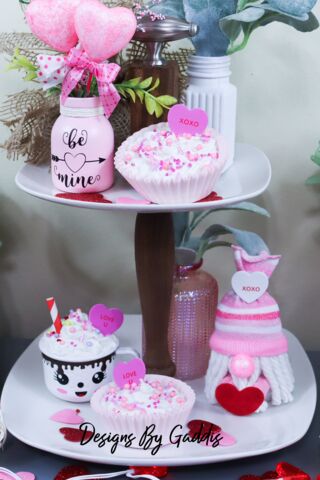
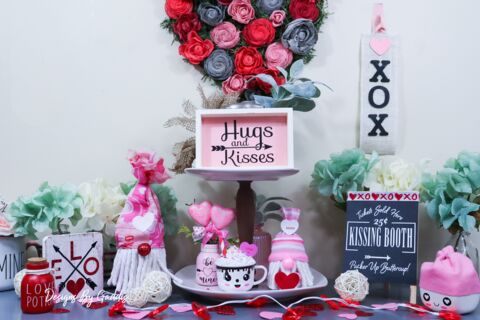
This tutorial has some of my favorite Valentine's Day tiered tray decor. I love everything about this tiered tray!
Products I Recommend and Use:
- Sola Wood Flowers
- Monvict Hot Glue Gun
- Tacklight Hot Air Gun
- Design Bundles Cut Files & Bundles
*As an Affiliate, we may earn a small commission when you purchase thru our link at no extra cost to you.*
_______________________________________________________________
to get FREE Printables and Special Deals only for my subscribers.
_______________________________________________________________
My Disclaimer: All of the video footage, photos, and designs are created by me and are owned by Designs By Gaddis. You may only use the video footage, photos, and designs with my permission. My content is mine and it is protected. I am not sponsored or paid by any of the product companies or tools shown in these videos unless otherwise mentioned. I have full rights and control of the content.
Copyright @ Designs By Gaddis 2020. Any reproduction or illegal distribution of the content in any form will result in immediate action against the person concerned.


Frequently asked questions
Have a question about this project?