


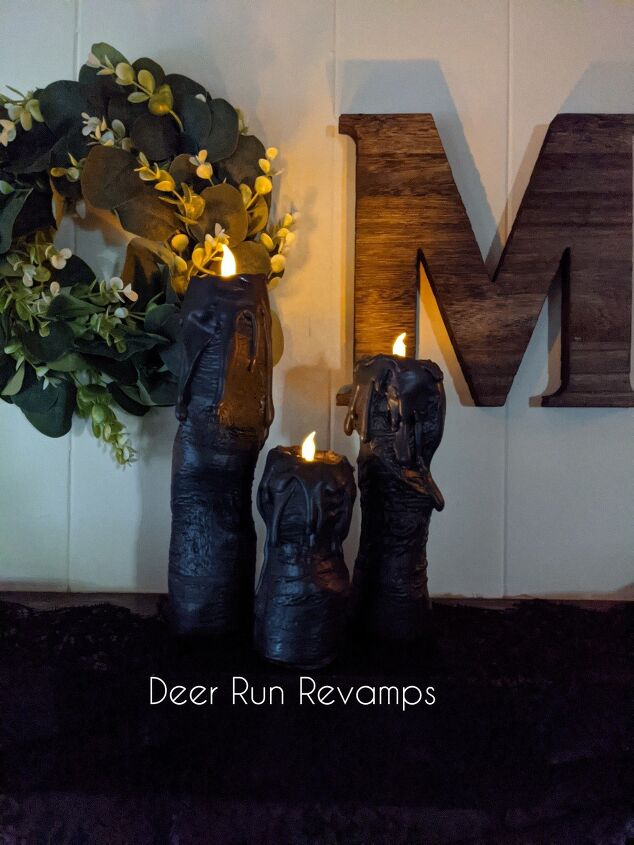
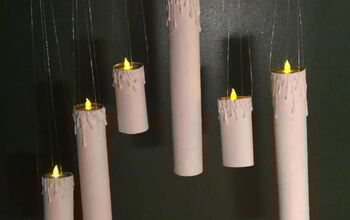
Fun Spooky Halloween LED Candles

I really wanted black LED candles but wasn't thrilled about the pricetag. So, I decided to make some 😁
You'll need one pool noodle, electrical tape, hot glue gun and glue sticks, black paint, and 3 flameless tealight candles
Chances are, you have most of these items already in your home making this an inexpensive project, which is my favorite kind of project 😊
DIY Pool Noodle Halloween Decor
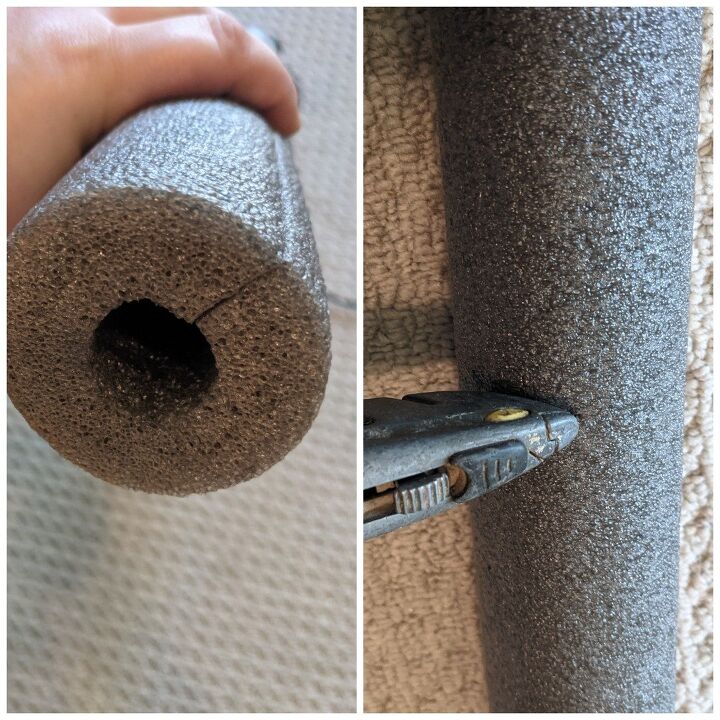
First, cut your pool noodle into three different sizes. This is completely up to you and the size that you want. I used a box cutter to do this and cut it into 4", 6", and 8" pieces
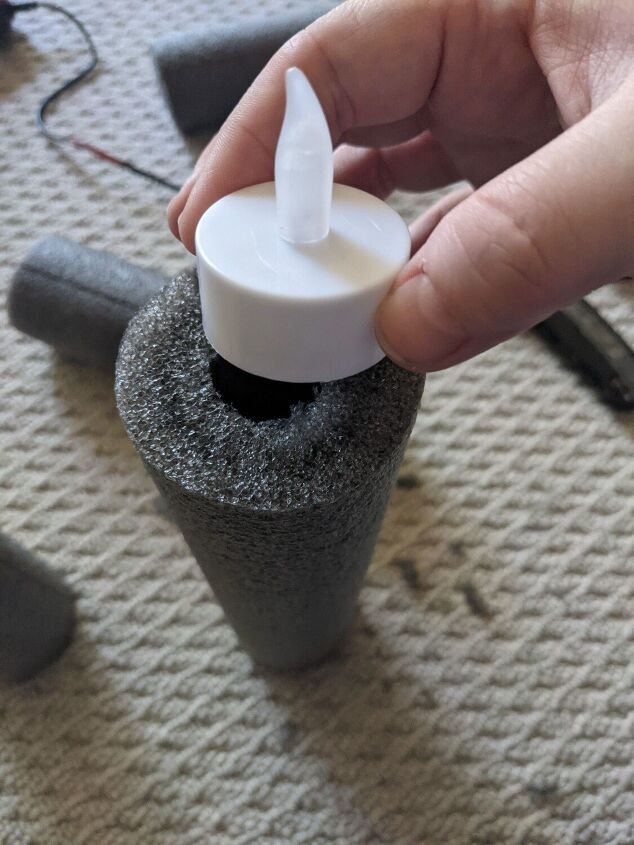
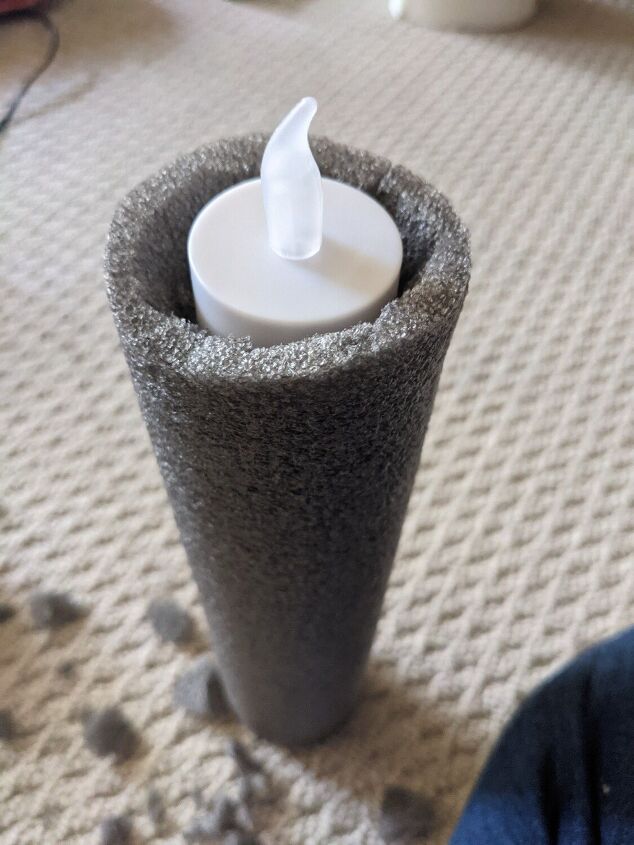
Since the battery operated tealights are too large for the hole in the noodle, I simply cut out a larger hole with the box cutter.
Allow a little extra room for the tealight so that it's easy to take it out to turn it on/off (unless you have remote controlled candles)

Now, grab your electrical tape
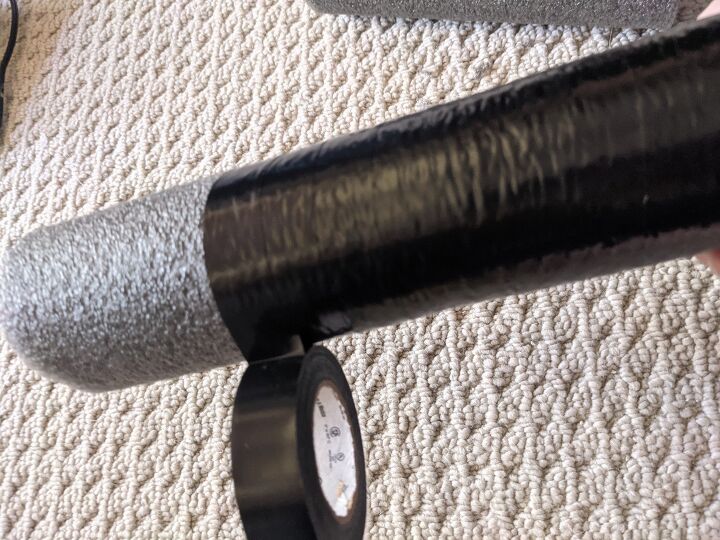
Wrap it around each pool noodle piece.
I wrapped the last row of tape around the top edge and into the middle where the candle will go.
This protects the foam noodle from the next step
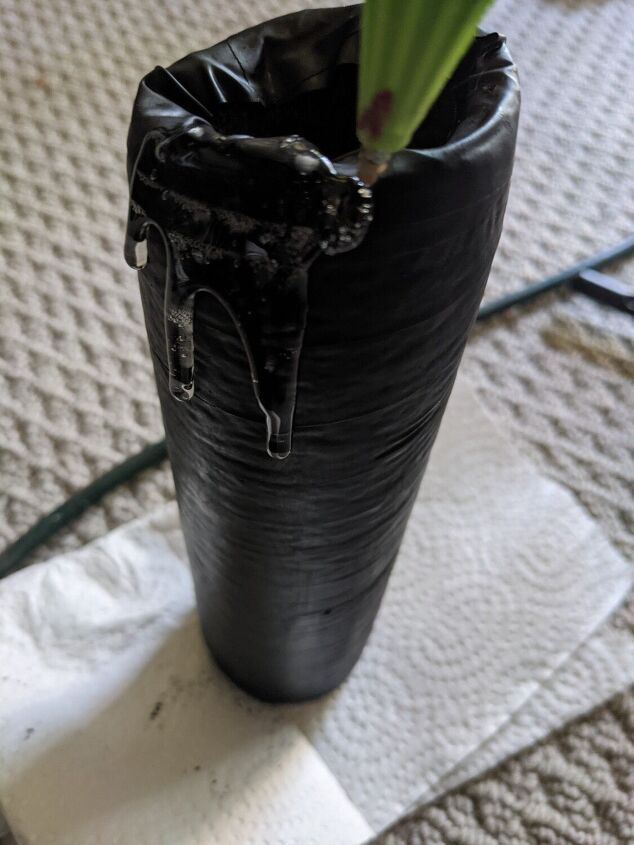
Apply lots of hot glue all along the top and allow it to drip down the outside of the candle. When you apply more hot glue in one spot, it will give you longer drips
This step is optional -
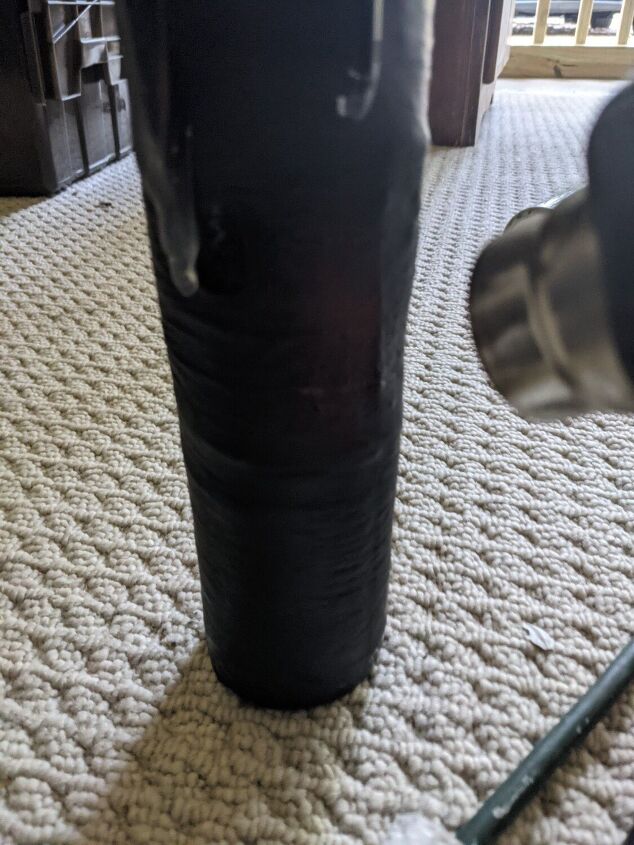
I took my heat gun and applied some heat in random areas to give the foam a deformed look.
Just hold the heat gun about 6 inches from the pool noodle for about 5-10 seconds. Don't hold it in one spot for too long because it will burn a hole through the pool noodle. Hold it just long enough for the noodle to start to look deformed
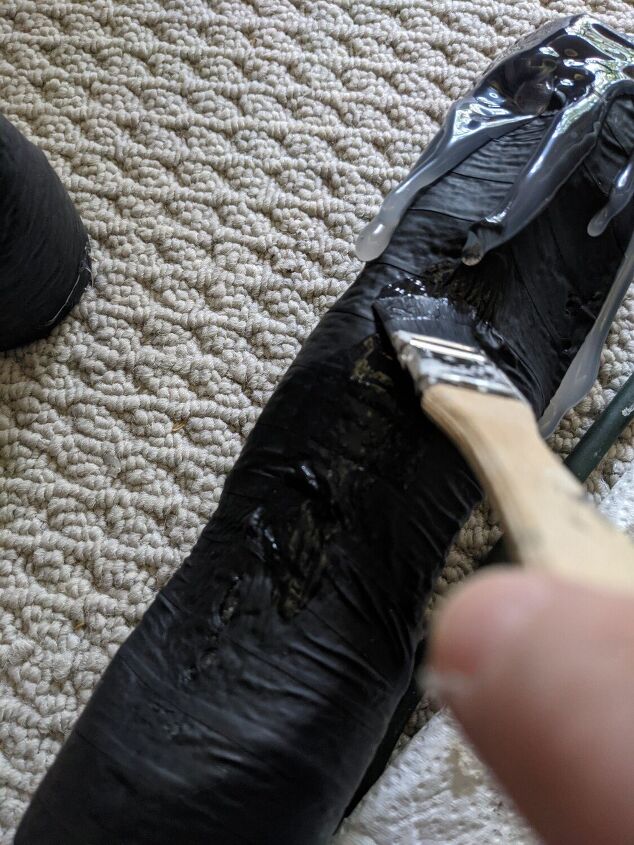
I wanted a matte black look, so once the hot glue was set, I used a black chalk paint and painted the "candles"
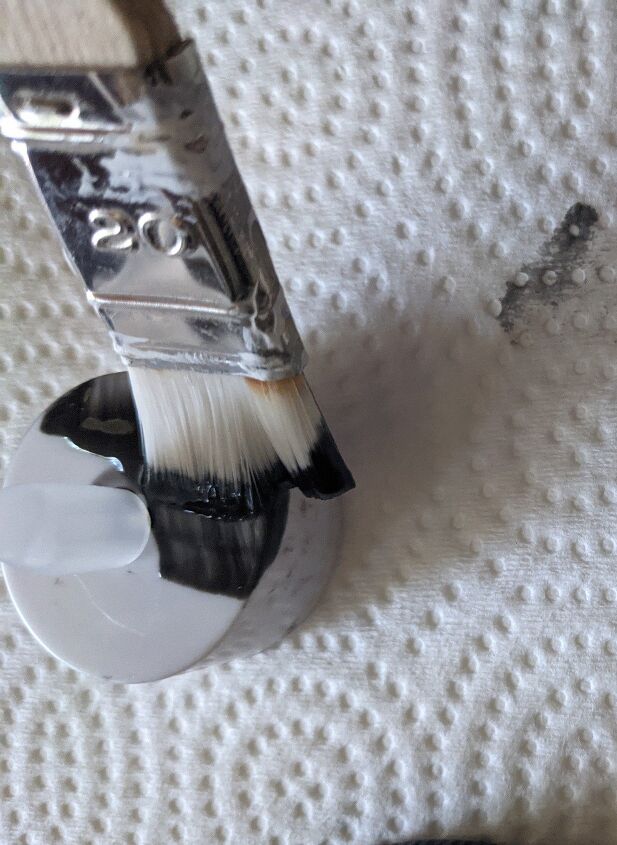
Paint the tops of the tealights (not the flame) and allow to dry, then turn them on and put them in your new candles
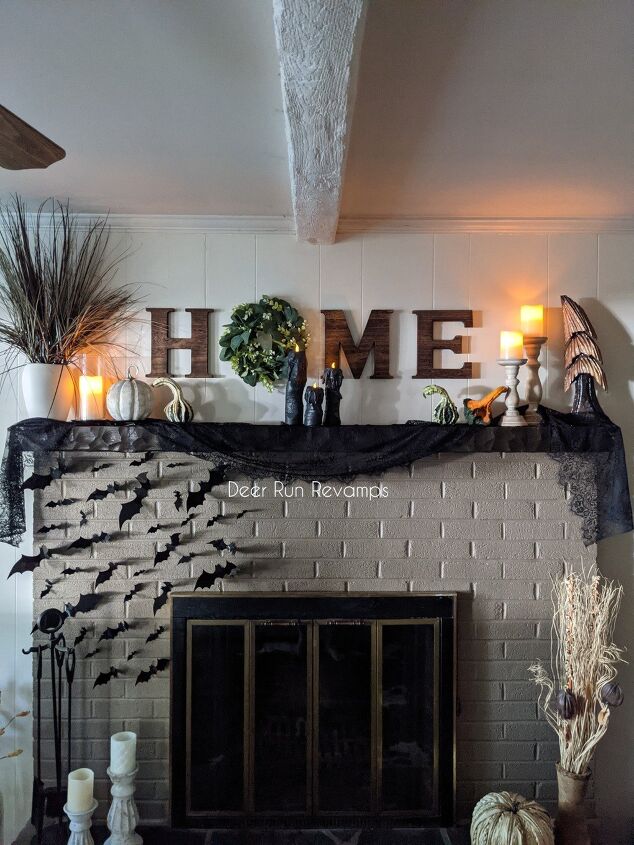
Decorate, and enjoy 👻🎃🕯️
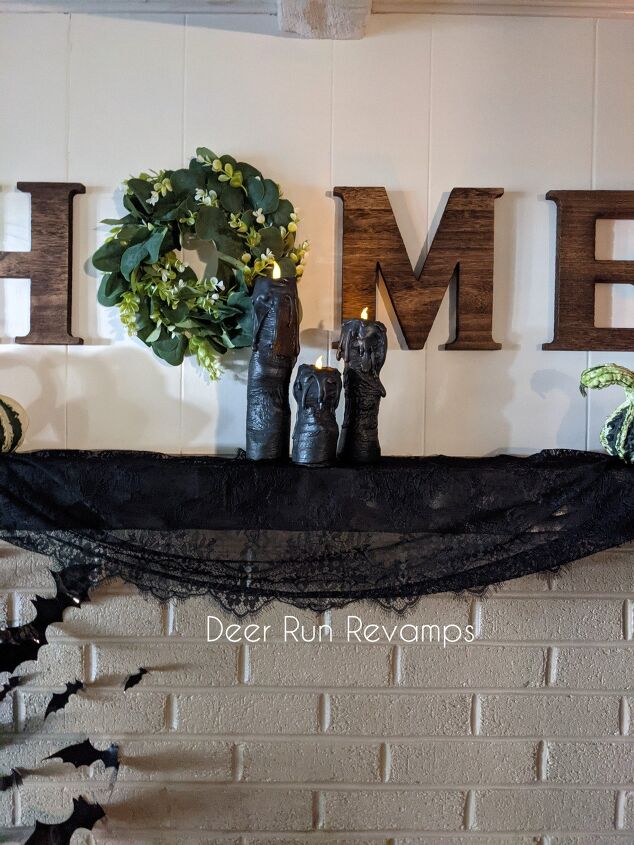
I really love the way they came out, and they look great on my mantle
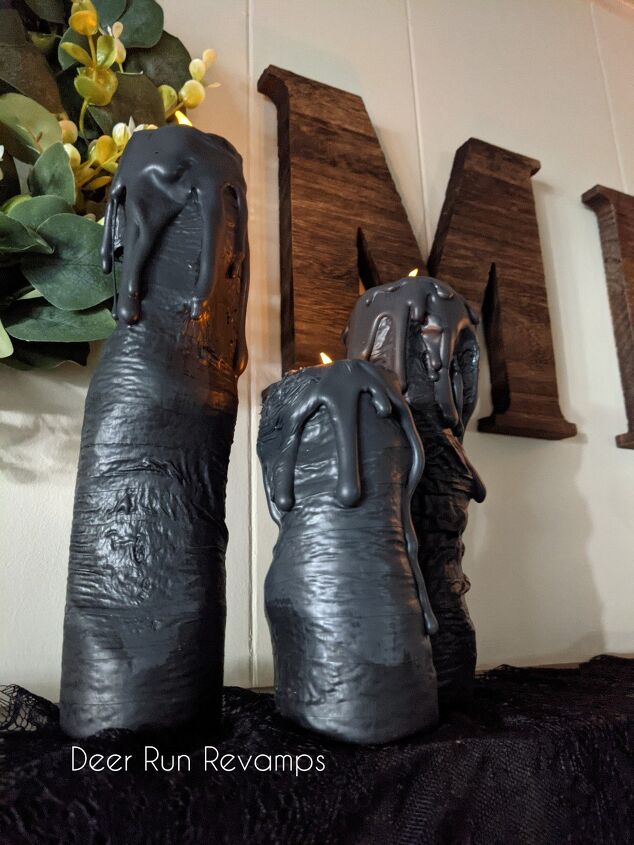
You could even paint the hot glue drips red for a super spooky twist 💀👻

If you'd like to see more of our home decor and refinished furniture, visit us on Facebook

Check out our Etsy shop for unique home decor, furniture, and hundreds of craft products

I really hope you've enjoyed reading this tutorial and are inspired to get creative! ♥️
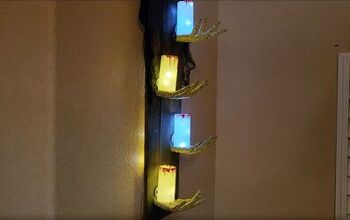
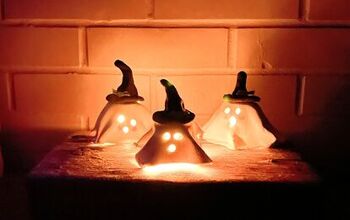
Looking for more Halloween candle inspiration?
Resources for this project:
See all materials


Comments
Join the conversation
-
I would use some red paint to, too make it look bloody}}
-
Awesome need to check that out, Thanks..


Frequently asked questions
Have a question about this project?
how do you turn off the candle when not in used? if it is glued down and oainted over?
What a great idea but how do you get them to stand without falling over?
Maybe Im seeing things… picture #3 of completed candles, it’s the one with a close up. The candle under the “M” looks like a face! The wax on top looks like hair and it appears to have some kind of bat or rat in the hair! How were you able to mold that out of the noodle and tape???
its amazing!